Page is loading ...

INSTRUCTION FOR CALIFORNIA MODEL AWNING
CAUTION: Sheet metal parts may have sharp edges or burrs. Use care and wear appropriate protective
clothing and gloves when handling parts. Failure to follow this caution could result in personal injury.
WARNING
Recommend at least 2 people work together to install the awning. The hardware supplied is intended for concrete
OR brick wall installation. If you intend to attach the awning to other materials (e.g. wood), other fasteners are
required accordingly. Please make sure the fasteners for other materials installation must have the same or above
strength comparing with the provided expansion bolts for concrete surface installation.
1 Never use the awning during heavy rain, storms or frosty conditions. Please do not extend the awning when wind
is above Beaufort Scale 5 or 30MPH.
2 Keep the flammable objects away from the awning.
3 Do not put any heavy object on the awning while the awning is extending.
4 Check the awning once every month to make sure all bolts and nuts are not loosened. Should you find any loose
bolts, tighten up immediately. Do not use until any repair or replacement is finished, if find any damage parts.
5 Do not extend or retract the awning when maintenance, such as window or wall cleaning, is being carried out in
the vicinity.
6 The arms have high tension cables inside the chambers. Do not try to repair or adjust the arms.
7 This awning should be installed at the height 8’ off the deck/ground.
8. The awning has 1 year limited warranty for any manufacturing defects.
9. The installation should be carried out by at least two adults.
10.
Make sure there is enough space for awning extension before installation.
CARE AND MAINTENANCE
FRAME
Cleaning:
use a mild detergent and warm water on the frames; do not use abrasive materials, cleansers, chemicals,
bleach or solvents on frames. Rinse with clean water. Dry thoroughly.
Maintenance:
Frame finishes may be maintained by applying a quality auto wax after each cleaning. For best
results, always cover awning when not in use. We recommend plastic cover or you can purchase a winter cover
by contacting us directly. Always clean and dry the frame thoroughly before placing it in the storage cover.
FABRIC
Cleaning:
Wipe up minor spots with a mild soap and a damp cloth. It is sufficient to brush off the dirt on the curtain
in most cases.
Maintenance:
Dry the fabric in the extended position when it is wet as soon as possible.
PACKAGE
This awing is packed in double corrugated carton box with inner poly bag. The spare parts are packed in separate
inner box or poly bag inside the master carton. If carton is broken or damaged, identify all parts against the parts list.
Do not attempt assembly if any parts are missing or damaged.
STORAGE
This awning should be kept away from fire and inflammable objects and should be stored in a dry place. Dry the
curtain in the extended position when it is wet.

Parts List
For awnings up to a size of 10’ wide, 2 brackets are included. For 12’ wide, there are three brackets.
1. Wall brackets
2. Rocker Arm
3. Instruction Manual
The installation should be carried out by professional!
Warning! Incomplete fasteners will weaken the product strength and cause potential danger.
APPLICATION A
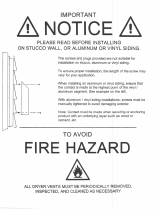
INSTALLING WALL MOUNTING BRACKETS TO FLAT SIDING, STUCCO, CEMENT OR CULTURED STONE (OF ANY TYPE):
• Place a safe ladder on a flat, dry, stable surface at both ends of where the awning will be installed
• Using a chalk-line and a string level (or a laser level) mark a horizontal line at your
chosen height above the patio.
• Using a stud finder, mark the center of all the studs along the line where the awning will be installed. Failure to center bolts in
structural studs will cause premature failure and result in awning collapse and possible injury.
• Mark both ends of where the awning will be installed on that line.
There should be one bracket each next to the lateral arms (between the roller/end bracket and the pitch bracket). ALWAYS INSTALL
THE WALL BRACKETS ON THE OPPOSITE SIDE OF THE PITCH BRACKETS where the arms fold in. The arm should be on the one side
and the bracket will be on the other side of the pitch bracket. Choose the appropriate studs or rafters to install your brackets onto.
Hint: short studs above windows and doors are structural and may be used to secure bracket as well as full length studs.
• Cultured stone surfaces may require a grinder to flatten off the area where the brackets are to be installed
• Using the bracket as a template (the top of the bracket has a ridge on it), mark the holes. Place the bottom of the bracket on the
chalk line. BRACKETS WILL BE THE LOWEST POINT OF THE AWNING.
• For stucco or cultured stone: Use a 5/16” masonry bit to get through the surface. Drill a pilot hole into the stud beyond it with a
3/16” wood/metal bit. For wood, cement or hardboard surfaces drill a pilot hole into the stud with a 3/16” wood/metal bit. Using
a ratchet, install (2) 5/16”x3” lag screws and (2) 5/16” washers to secure the bracket to the wall.
• For concrete surfaces: Use a 5/16” masonry bit to drill 3” deep holes into the surface. Insert two 5/16”X3” wedge anchors into the
hole. Install a washer on each anchor. Place the bracket so the anchors come through the mounting holes. Install another washer
and fully tighten the nuts.
• For flat siding: The easiest way is to mount a 1" x 5”- 6" treated/painted timber beam (the same length as your awning width)
through the siding into the studs using (2) 5/16”x3” lag screws and (2) 5/16” washers. Then you mount the awning to the studs
through the timber beam. Or mount a 2" x 5”- 6" treated/painted timber beam (the same length as your awning width) through
the siding into the studs.
• Repeat the process for the remaining brackets.
• Seal around each bracket with a clear paint-able silicone caulking.
WALL
BRACKET
WALL
STUD

APPLICATION B
INSTALLING WALL MOUNTING BRACKETS TO ALUMINUM, VINYL, HARDBOARD OR LAP SIDING
• Place a safe ladder on a flat, dry, stable surface at both ends of where the awning will be installed
• Using a chalk-
line and a string level (or a laser level) mark a horizontal line at your chosen height above the patio.
• Using a stud finder, mark the center of all the studs along the line where the awning will be installed.
• Failure to center bolts in structural studs will cause premature failure and result in awning collapse and possible injury.
• Mark both ends of where the awning will be installed on that line.
• There should be one bracket each next to the lateral arms (between the roller/end bracket and the pitch bracket). ALWAYS
INSTALL THE WALL BRACKETS ON THE OPPOSITE SIDE OF THE PITCH BRACKETS where the arms fold in. The arm should be
on the one side and the bracket will be on the other side of the pitch bracket. Choose the appropriate studs or rafters to
install your brackets onto. Hint: short studs above windows and doors are structural and may be used to secure bracket as
well as full length studs.
• Using the bracket as a template, mark the holes. Place the bottom of the bracket on the chalk line
• For aluminum or vinyl: Mark a 5-1/2”x5-1/2” square (centered on the stud left to right and on the bracket vertically) where the
bracket will be placed. Cut the siding with a sharp utility knife.
• For all other siding: Mark a 5-1/2”x5-1/2” square (centered on the stud left to right and on the bracket vertically) where the
bracket will be placed. Cut the siding with a circular saw set at the depth of the siding. Corners may need trimmed with a
hammer and a sharp chisel.
• Make the appropriate number of 5-1/2”x5-1/2” wood blocks made from a piece of 2x6 lumber.
• Using the brackets as a template (the top of the bracket has a ridge on it), drill (2) 5/16” holes in the blocks. Sand the corners
and paint the blocks to match your exterior paint color.
• Drill a pilot hole into the stud with a 3/16” wood/metal bit.
• Using a ratchet, install (2) 5/16”x4-1/2” lag screws (9/16” socket) and (2) 5/16” washers to secure the bracket to the stud
behind the block.
• Seal around each block with clear paint-able silicone caulking.
• Repeat the process for the remaining brackets.
BRACKET
BLOCK

I
I
I
N
N
N
S
S
S
T
T
T
A
A
A
L
L
L
L
L
L
I
I
I
N
N
N
G
G
G
T
T
T
H
H
H
E
E
E
A
A
A
W
W
W
N
N
N
I
I
I
N
N
N
G
G
G
O
O
O
N
N
N
T
T
T
O
O
O
T
T
T
H
H
H
E
E
E
B
B
B
R
R
R
A
A
A
C
C
C
K
K
K
E
E
E
T
T
T
S
S
S
• Place safe ladders on a flat, dry, stable surface at both ends (and in the middle if wider than 12’) of where the awning will be
installed
• Assure that the awning is in the closed position and the arms are tied closed. This will prevent the unit from inadvertently
opening while being lifted into the brackets.
• With the help of a capable assistant (or two-if your awning is more than 12’ long), lift the awning to the brackets and slip the
torsion bar (back bar) into the brackets. Make sure the torsion bar slides all the way to the back of the bracket. Then slide
the retaining bolts into the brackets. Center the unit as needed then tighten the nuts on the retaining bolts.
• If the torsion bar does not easily slip into the brackets, make sure the torsion bar is held in place and lift or lower the front bar
slightly till it is horizontal with the torsion bar. You may need to loosen the brackets slightly to accomplish this fit.
• Once fully secure, retighten the nuts on the brackets and carefully cut the zip ties off the arms.

OPERATION
Turn the hand hook to retract or extend the awning as your requirement.
Warning: Stop retracting the awning with excessive forces if already fully retracted.
Pitch adjustment:
A
A
A
D
D
D
J
J
J
U
U
U
S
S
S
T
T
T
I
I
I
N
N
N
G
G
G
T
T
T
H
H
H
E
E
E
P
P
P
I
I
I
T
T
T
C
C
C
H
H
H
O
O
O
F
F
F
T
T
T
H
H
H
E
E
E
A
A
A
W
W
W
N
N
N
I
I
I
N
N
N
G
G
G
CAUTION: DO NOT ATTEMPT TO ADJUST THE PITCH IN THE RETRACTED POSITION
IF YOU ORDERED AN ADJUSTABLE PITCH CRANK.. DO NOT STOP..GO DIRECTLY TO NEXT STEP
• Extend the awning completely.
• First identify the pitch adjustment brackets (K). (see diagram below)
• Loosen the top bolt (P) and bottom bolt (R) (do not remove the
m, just allow them to be moved) on the bracket at both ends.
This operation requires a 6mm and 8mm Allen wrench.
• Have your helper(s) hold the front end of the awning.
• Turn Allen bolt (Q) counter-clock-wise to lower the pitch and clock-wise to raise the pitch on both ends.
• Once you adjust the pitch to your desired level, tighten up the top bolt (P) and bottom bolt (R).
• If the front bar is lower on one side, simply loosen (P) on the opposite side bracket and make the appropriate adjustment to
(Q).
After you are happy with the results retighten (P).
•
The pitch adjustment range is 0 degrees to 15 degrees.
1
1
1
Y
Y
Y
E
E
E
A
A
A
R
R
R
L
L
L
I
I
I
M
M
M
I
I
I
T
T
T
E
E
E
D
D
D
W
W
W
A
A
A
R
R
R
R
R
R
A
A
A
N
N
N
T
T
T
Y
Y
Y
A. WHO GIVES THIS WARRANTY? Awntech Corporation
B. WHO IS ENTITLED TO THIS WARRANTY? This Warranty applies only to the original purchaser who paid for the product and may not be assigned or
transferred to subsequent owners. This Warranty applies only to products purchased and installed in the US.
C. WHAT ARE THE RESPONSIBILITIES OF AWNTECH CORPORATION UNDER THIS WARRANTY? Subject to the terms and conditions set forth herein,
Awntech Corporation will furnish replacements for parts found by Awntech Corporation to be defective in design, manufacture or assembly, under each
specific component or product warranty as set forth below.
D. WHAT ARE THE RESPONSIBILITIES OF THE ORIGINAL PURCHASER UNDER THE WARRANTY?
1. Before any claims may be made under this Warranty, the original purchaser must have paid in full for the product covered under the Warranty,
according to the terms and conditions of the pay-plan defined in the original order. IF THE PURCHASER HAS FAILED TO MAKE FULL PAYMENT, THIS
WARRANTY SHALL BE NULLIFIED AND AWNTECH CORPORATION SHALL BE RELIEVED FROM ANY RESPONSIBILITY OR LIABILITY UNDER THIS
WARRANTY. The purchaser agrees and acknowledges that this Warranty agreement constitutes an executor contract.
2. The purchaser must use care in installation, maintenance, operation, use, and storage of the product in accordance with the instructions contained in
the owner’s manual. ANY FAILURE TO INSTALL, MAINTAIN, OPERATE, USE AND STORE THE PRODUCT IN ACCORDANCE WITH THE INSTRUCTIONS
CONTAINED IN THE OWNER’S MANUAL WILL NULLIFY THIS WARRANTY AND RELIEVE AWNTECH CORPORATION FROM ANY RESPONSIBILITY OR
LIABILITY UNDER THIS WARRANTY.
3. Promptly notify Awntech Corporation of any claims.
4. The purchaser may be required to provide a photograph of any defective parts. The purchaser may also be required to pay a deposit until the
defective parts are returned to Awntech Corporation for inspection. The purchaser must obtain a return authorization form from Awntech
Corporation’s customer service department prior to the return of any merchandise and after having received such authorization, return the part or
product, freight prepaid, to Awntech Corporation.
E. WHAT IS COVERED UNDER THIS WARRANTY?
1. The following components of Awntech Beauty-Mark® models and their accessories (defined as accessories attached to the awning) are covered
under this Warranty, subject to the limitations set forth below. These components have a one (1) year limited (prorated) warranty, against

manufacturer’s defects as outlined below:
(a) Should the purchaser promptly notify Awntech Corporation of such defects within one year (12 months) from the date of the original purchase, the
defective component will be replaced at no charge. Awntech reserves the right to ask for the defective part to be returned and/or photos of the
defective part.
COVERED COMPONENTS: for Retractable Awnings
STRUCTURAL SUPPORTS, all supporting components (excluding Lateral Arms and their fittings) are warranted not to fail for five (1) year provided that the
components are not subjected to excessive winds or water pooling on the fabric.
FRONT ROLLER BAR is warranted against any and all damage including cracking and permanent bowing that would affect the performance of the awning
provided that the awning is not subjected to excessive winds or water pooling on the fabric.
ACRYLIC and ACRYLIC FABRIC is warranted for one (1) year against:
(a) Excessive fading under normal conditions if maintained, operated, used, and stored in accordance with the instructions contained in the owner’s
manual.
(b) Mildew on acrylic fabric. Mildew will not form on the fabric itself, but may form on dirt and dust that have not been removed from it. Please see
maintenance instructions for proper cleaning—outlined in owner’s manual.
(c) Excessive cracking or peeling under normal conditions if maintained, operated, used, and stored in accordance with the instructions contained in the
owner’s manual, and provided that the awning is not subjected to excessive winds or water pooling on the fabric.
DRIVE UNIT (Gear, Square and Round Toe) is warranted for one (1) year not to fail under normal conditions if maintained, operated, used, and stored in
accordance with the instructions contained in the owner’s manual.
AWNING ACCESSORIES (defined as accessories attached to the awning) are warranted for one (1) year not to fail under normal conditions if maintained
operated, used, and stored in accordance with the instructions contained in the owner’s manual.
R
R
R
E
E
E
T
T
T
U
U
U
R
R
R
N
N
N
S
S
S
,
,
,
D
D
D
A
A
A
M
M
M
A
A
A
G
G
G
E
E
E
S
S
S
RETURN QUALIFICATION: You can only return a product if it is defective upon arrival. If you simply do not like it for any other reason, you will be
given merchandise credit only.
DAMAGED MATERIAL: Damage occasionally occurs during shipping. Scrapes, dents, and rips in the outer packaging that could indicate possible
damage should be described to the carrier at the time of delivery. If damage to the product seems apparent, the shipment should be refused.
FABRIC DYE-LOT AND LIGHTING VARIATION: Fabric dyes may vary slightly from run to run. This is a normal and unavoidable. Different lighting types
and lighting direction may cause the fabric you chose on the website to appear slightly different than the actual fabric does in full sunlight.
TRIPLE CHECK YOUR MEASUREMENTS: To avoid disappointment and frustration, please triple check all measurements to assure that your awning will
fit properly in the location you intend. Please make sure that you have at least 1’-2’ extra wide area available to install the awning and also make
sure that you have enough open space for the projection.
HAZARDOUS MATERIAL QUALIFICATIONS: None
RETURNS/ORDER EXCEPTION CONTACT:
Customer Service: Phone 817-354-9600, Fax 817-354-9612, email customers@awntech.com
TO ACQUIRE A RETURN OR REPAIR AUTHORIZATION NUMBER, YOU MUST GO THROUGH OUR WARRANTY PROCESS BELOW:
1. Email or mail a photo of the damaged parts to:
EMAIL: [email protected]
MAIL: Customer Support, Awntech Corporation, 10950 S. Pipeline Rd., Bldg. 1, Euless, TX 76040
Authorized returns should be shipped to:
Awntech Corporation
10950 S. Pipeline Road, Buildings 1-2
Euless, TX 76040 (817-354-9600)
/