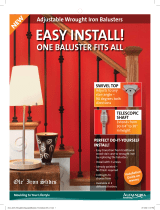
HOUSE OF FORGINGS HFSTB16.2.3 Installation guide
- Type
- Installation guide

WO O D T O I R ON
BALUSTER INSTALLATION

Drop cloth
Reciprocating Saw
Pliers
Drill & Paddle Bit
Tape Measure
Portaband Saw
Wood Filler
(optional)
Wood Stain
(optional)
Paint
(optional)
EpoxyEpoxy Injector
16684 Air Center Blvd.
Houston, Texas 77032
Toll Free 866.443.4848 Fax 281.443.1133
ww w. houseofforgin gs .n et
Please contact us for more detailed information
or for a listing of distributors near you.

1. Choose your balusters
3. Choose your pattern
2. Choose your nish or patina
www.houseofforgings.net

Before-Standard Wood Balusters

1
2
3
Before
Standard Paint Grade Primed White Wood
Balusters common in many homes
Cover all work areas, furniture and decor to
protect from the sawdust that will be created
when cutting the wood balusters.
Cut the wood balusters in the middle using a
reciprocating or jig saw.
www.houseofforgings.net

4
5
6
Once cut, remove the balusters by slowly
pushing them back and forth until the nails are
worked loose.
Remove the existing nails from the rail and base
using pliers and apply wood ller to the nail
holes if necessary.
Now is a good time to layout your new iron
balusters against the rail to make sure your
pattern and spacing are correct.
Once proper spacing (refer to your local building code)
has been established, mark your rail and cap with a
pencil where you will drill your holes according to the
diameter of your baluster. Drill 1/4 inch deep into the
cap and 1-1/2 inch deep into your handrail. This will
allow you to slide the baluster up into the
handrail and drop down into the cap.
www.houseofforgings.net

7
8
9
Measure and cut your balusters 1 inch
longer than the distance between the bottom
of the handrail and the top of the base cap.
It is best to use a portaband saw to cut the
balusters.
If you are using shoes/collars or knuckles on
your balusters put them on now(do not tighten)
before continuing to step 9.
Inject epoxy into the holes in the
handrail and cap.
Allow 24 hours to dry fully.
Height
Cut line
Cut line
Baluster length will
vary on an open rake
www.houseofforgings.net

10
11
12
Slide the baluster up into the handrail and
drop down into the cap. Make sure that all
balusters are right side up and that your
pattern is correct.
Whether your cap or treads are painted or
stained they may need wood ller for nail
holes and touching up with paint or stain.
Note: The Previous step can be avoided using
our remodel shoes(HF16.3.44-47). The 1-1/2”
oversized sq. base will cover the footprint left
by most wood balusters.
If you are using shoes/collars or knuckles on
your balusters tighten the set screw or use ep-
oxy to secure them now.
Aer
Your beautiful new staircase with wrought iron
balusters from House of Forgings.
www.houseofforgings.net

www.houseofforgings.net
-
 1
1
-
 2
2
-
 3
3
-
 4
4
-
 5
5
-
 6
6
-
 7
7
-
 8
8
-
 9
9
HOUSE OF FORGINGS HFSTB16.2.3 Installation guide
- Type
- Installation guide
Ask a question and I''ll find the answer in the document
Finding information in a document is now easier with AI
Related papers
Other documents
-
WM Coffman 802428 Installation guide
-
 EZ Handrail EZ8CDT Specification
-
 Ole Iron Slides SP121-WR038CSB Installation guide
-
 EZ Handrail EZF7254W Installation guide
-
Deckorators 346942 User manual
-
Arke BB0210 Operating instructions
-
 Crown Heritage BC419601016 Installation guide
-
Unbranded 5443305 Installation guide
-
 Trex 5457185 Installation guide
-
 Trex 5457472 Operating instructions


