Page is loading ...

ASSEMBLY INSTRUCTIONS
WARNINGS AND CAUTIONS
• Make sure POWER is COMPLETELY OFF at the fuse box
• Have your fixture installed by a qualified licensed electrician
• Prepare everything in a clear area
• Wear gloves at all times during this installation
• Read instructions carefully before you start assembly
• Keep this installation sheet for future reference
CH332421 TECHNICAL SUPPORT
1.855.855.8926
technicalsupport@aloralighting.com
NOTICE
• The important safeguards and instructions outlined in this sheet cannot cover
all possible conditions and situations that may occur. It must be understood
that caution and certain care factors must be followed. These instructions are
provided for your safety and we highly recommend that a licensed, trained
electrician install this unit.
• This fixture is designed to be mounted on a correctly installed standard round
or octagon box OR through a wiring box with a plaster frame. The box must be
securely mounted to the structure of the building. The crossbar and hardware
supplied should be used, directly mounting the fixture to the outlet box may
make it impossible to correctly align the fixture.
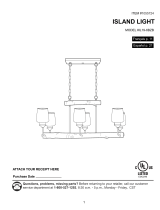
Chandelier
CANADA :
USA : 3035 E. Lone Mountain Rd - Las Vegas, NV, 89081
www.aloralighting.com
20230619
P:
1.855.855.8926
19054 28th Avenue Surrey - BC V3Z 6M3
1a.
1b.
1c.
1e.
2b.
2a.
2d.
3a.
4a.
ASSEMBLY INSTRUCTIONS
Please Note:
• 120V input
Step 1
Remove fixture from its original package.
Step 2
Separate mounting plate (1c) from canopy (2a) by removing canopy screws
(2b).
Step 3
Attach mounting plate (1c) to electrical junction box (1a) using junction box
screws provided (1e) in hardware package.
Step 4
Determine hanging height of fixture by securing rods (2d) to fixture (3a), and
hooking onto canopy (2a), after feeding fixtures wires through rods.
Step 5
Make proper electrical connections (black to hot “L”, white to neutral “N”,
ground to “GND”) with wire nuts (1b) provided in hardware package
Step 6
Install the recommended lamp (4a) (not provided) (referred on the socket
label for maximum wattage and type) to fixture socket.
Step 7
Attach canopy (2a) to mounting plate (1c) with canopy screws (2b).
You are now ready to enjoy your fixture.
/