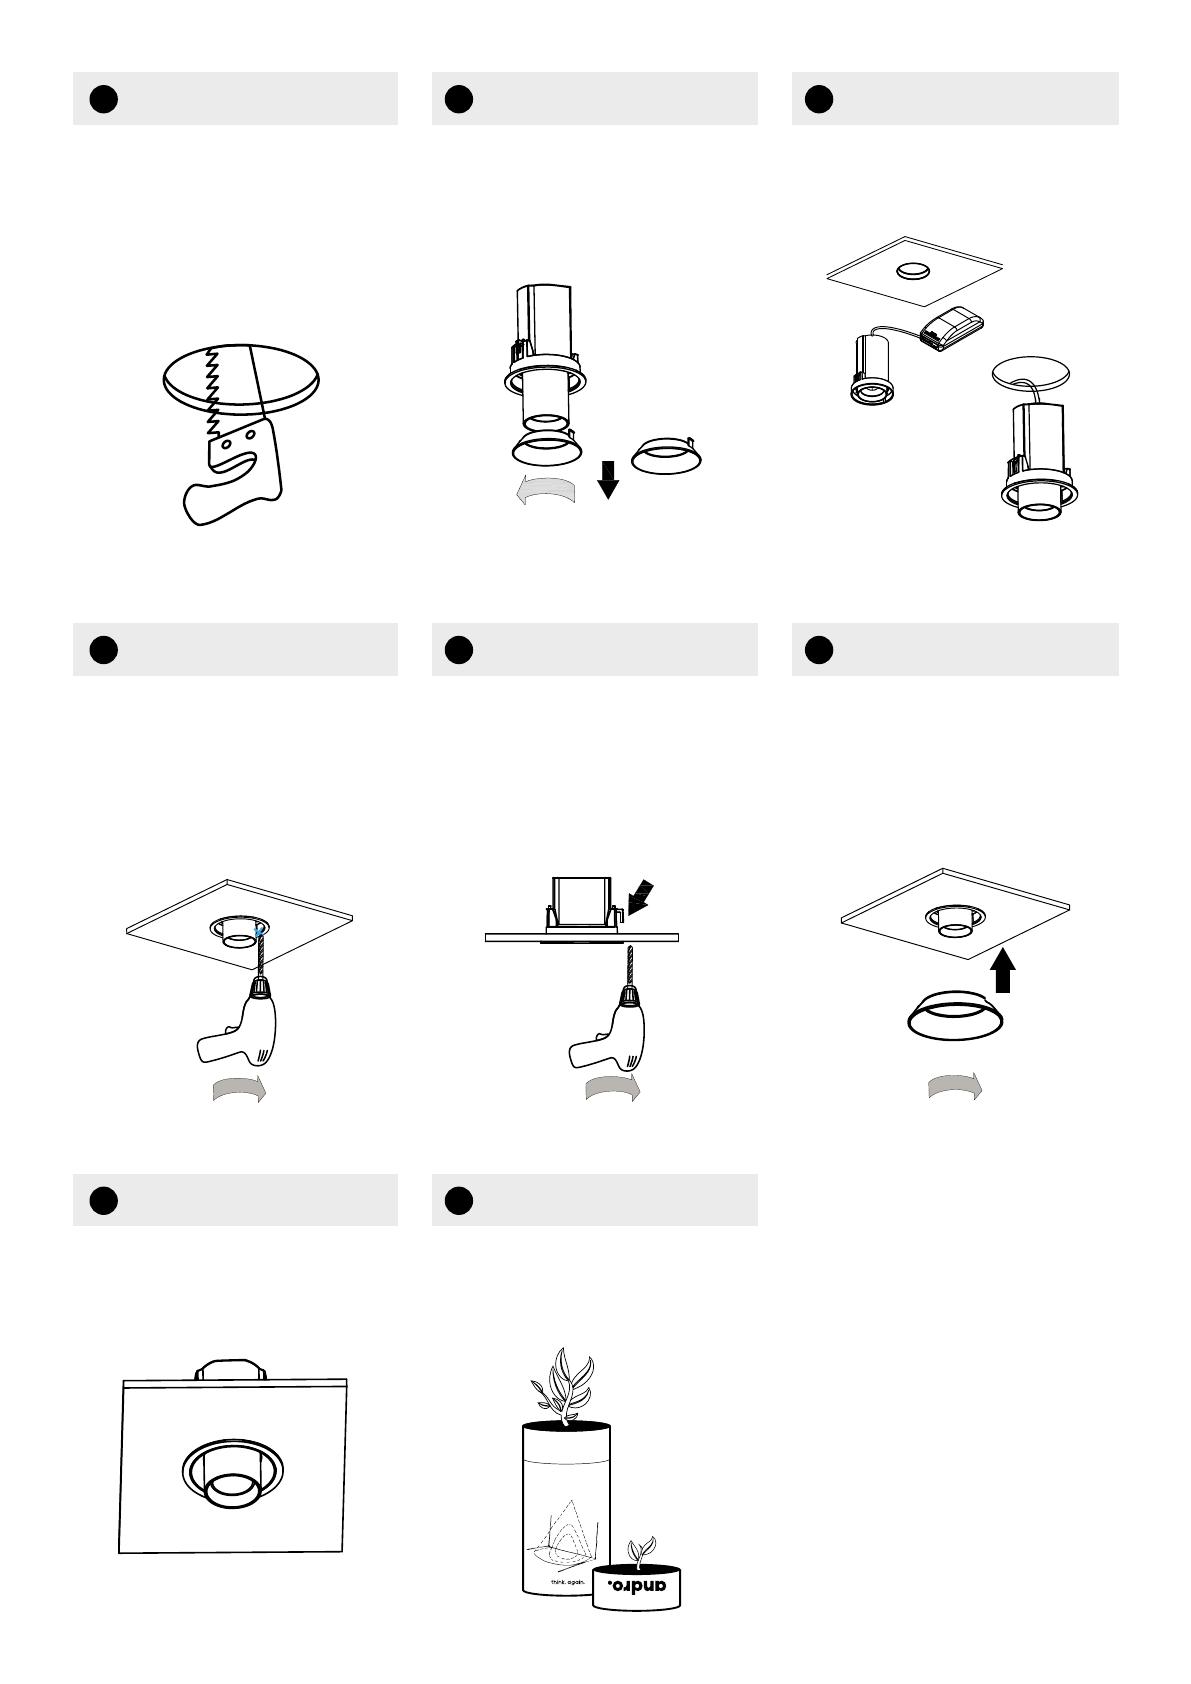
ambience Lighting Andro Trim Installation guide

Type
Installation guide
INSTALLATION GUIDE
Everything you wanted to know but were too afraid to ask
think. again.
+61 3 9486 3699
sales@ambiencelighting.com.au
ambiencelighting.com.au
ANDRO TRIM
WHOA, HOLD IT!
1 To avoid non-replaceable
damage of custom-
painted fittings, the
secondary ring must be
removed before adjusting
the inner tube.
The inner tube must be
adjusted at ground level
before ceiling installation.
2 Hit the o switch on any
power before install.
3 Install must only be
carried out by someone
suitably qualified.
4 Only use the product at
the specified voltage and
frequency.
5 It would be sweet if
you the packaging.
6 Read Step 1 again. Thx.
IP20
6 7
4A4B5
Turn ON power supply to
complete installation.
Now repurpose your andro
packaging to plant some
seedlings.
1 2 3
Fix the screws onto the ceiling
using a screw driver.
Cut a hole in the ceiling as per
the nominated cut-out sizes:
S Ø98mm
M Ø115mm
L Ø128mm
Tighten the screws until the
flanges on the housing are
retracted and the housing is
held tight in its position.
Remove the secondary ring by
rotating it anti-clockwise and
pulling it out.
Push the housing in the hole.
Fix the secondary ring back
onto the housing by rotating it
clockwise and pushing it in.
min: 2mm
max: 20mm
  • Page 1 1
  • Page 2 2

ambience Lighting Andro Trim Installation guide

Type
Installation guide

Ask a question and I''ll find the answer in the document

Finding information in a document is now easier with AI