Bernette 502060 14 88 User manual

Type
User manual
Piping Foot
1
Information
Purpose
For creating and sewing on piping.
For working with cords up to 5mm in diameter.
For your safety
Before using this accessory, please read this instruction manual as well
as the instruction manual of your machine carefully.
Application
Creating piping tape
> Fit the Piping Foot.
> Set the straight stitch with needle position to center.
> Set the optimal thread tension.
> Set the stitch length to 2–3mm.
> Fold the bias tape lengthwise. Place the cord between the folded
tape halves and pin it in place.
> Guide the cord under the right groove on the underside of the
presser foot. (Fig.1)
> Sew the piping tape together close to the cord. If necessary, adjust
the needle position by a maximum of 3 steps.
www.bernette.com
5600006.00A.04 | 2022-05 EN
2
3
4
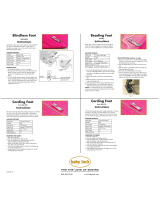
Sewing on the piping
> Fit the Piping Foot.
> Set the straight stitch with needle position to center.
> Set the stitch length to 2–3mm.
> Place the piping tape on the right side of the first layer of the fabric
so that the edges lie on top of each other. (Fig.2)
> Sew the piping tape in place, guiding the cord in the left groove.
> Place the second fabric layer right side on right side on the first layer
and pin it in place.
The piping tape lies between the fabric layers. (Fig.3)
> Position the sewing project under the presser foot so that the seam
that has already been sewn is on top. If necessary, move the needle
position to the right by a maximum of 3 steps so that the seam is
sewn close to the piping.
> Sew on the piping tape close to the piping, guiding the cord in the
left groove. (Fig.4)
www.bernette.com
5600006.00A.04 | 2022-05 EN
  • Page 1 1
  • Page 2 2

Bernette 502060 14 88 User manual

Type
User manual

Ask a question and I''ll find the answer in the document

Finding information in a document is now easier with AI