Brother MFC-8860DN Quick Setup Manual

Category
Copiers
Type
Quick Setup Manual

This manual is also suitable for

Before you can use the machine, you must set up the hardware and install the software.
Please read this “Quick Setup Guide” for the correct setup procedure and installation
instructions.
Keep this “Quick Setup Guide”, User’s Guide and supplied CD-ROM in a convenient place for
quick and easy reference at all times.
Step 1
Setting Up the machine
Step 2
Installing the Drivers & Software
Setup is Complete!
Installing the Drivers & Software
Setting Up
the machine
Windows
®
USB
Windows
®
Parallel
Windows
NT
®
4.0
Parallel
Macintosh
®
USB
Macintosh
®
Network
Windows
®
Network
Network
Administrators
MFC-8460N
MFC-8860DN
Quick Setup Guide
Version A
Warning Caution Improper Setup Note User’s Guide
Warnings tell you
what to do to prevent
possible personal
injury.
Cautions specify
procedures you
must follow or avoid
to prevent possible
damage to the
machine or other
objects.
Improper Setup
icons alert you to
devices and
operations that are
not compatible with
the machine.
Notes tell you how
you should respond
to a situation that
may arise or give
tips about how the
current operation
works with other
features.
Indicates reference
to the User’s Guide.
1
Carton components may differ from one country to another.
Save all packing materials and the carton.
Carton Components
Quick Setup Guide
CD-ROM
User’s Guide
Drum Unit Assembly
(including Toner Cartridge)
AC Power Cord Telephone Line Cord
To ensure safe operation the supplied plug must be inserted only into a standard power outlet that is
properly grounded through the standard electrical wiring. None grounded equipment may cause an
electrical shock hazard, and may cause excessive electrical noise radiation.
The interface cable is not a standard accessory. Please purchase the appropriate interface cable for
the interface you intend to use (Parallel, USB or Network).
Do NOT connect the interface cable at this time. Connecting the interface cable is done during the
software installation process.
USB interface cable
Please make sure you use a USB 2.0 interface cable that is no longer than 2.0 metres.
When you use a USB cable, make sure you connect it to the USB port of your computer and not to a
USB port on a keyboard or non-powered USB hub.
Parallel interface cable
Please make sure you use a Parallel interface cable that is no longer than 2.0 metres.
Use a shielded interface cable that is IEEE 1284-compliant.
Network cable
Use a straight-throgh Category 5 (or greater) twisted-pair cable for 10BASE-T or 100BASE-TX Fast
Ethernet Network.
1. Automatic Document Feeder (ADF)
2. Control Panel
3. Face-down Output Tray
Support Flap (Support Flap)
4. Front cover
5. Paper Tray
6. Power Switch
7. Document Cover
8. ADF Document Output Support Flap
1
6
2
3
4
5
8
7
Getting Started
2
MFC-8460N
MFC-8860DN
Control Panel
1 One Touch keys 2 Status LED 3 LCD (Liquid Crystal Display)
4 Menu keys 5 Dial Pad 6 Stop/Exit key
7 Start key 8 Copy keys 9 Mode keys
10 Fax and telephone keys 11 Print keys
For the details of the control panel, see “Control panel overview” in Chapter 1 of the User’s Guide.
When you move the machine, grasp the side handholds that are under the scanner. Do NOT carry the
machine by holding it at the bottom.
9 81011
12 345
6
7
9 81011
12 345
6
7
3
Table of Contents
Setting Up the machine
1. Install the Drum Unit Assembly .......................................................................4
2. Load Paper in the Paper Tray ..........................................................................5
3. Release the Scanner Lock ................................................................................6
4. Install the Power Cord and Phone Line ..........................................................6
5. Setting the Date and Time ................................................................................8
6. Setting your Station ID .....................................................................................9
7. Tone and Pulse dialling mode ....................................................................... 10
8. Selecting a Receive Mode ..............................................................................10
9. Setting the LCD Contrast ...............................................................................11
Installing the Drivers & Software
Supplied CD-ROM “MFL-Pro Suite” ..............................................................................12
For USB Interface Cable Users
(For Windows
®
98/98SE/Me/2000 Professional/XP/XP Professional x64 Edition) .... 14
For Parallel Interface Cable Users
(For Windows
®
98/98SE/Me/2000 Professional/XP/XP Professional x64 Edition) .... 16
For Windows NT
®
Workstation Version 4.0 Users ......................................................19
For Network Interface Cable Users
(For Windows
®
98/98SE/Me/NT/2000 Professional/XP/XP Professional x64 Edition) ... 21
For USB Interface Cable Users ......................................................................................24
For Mac OS
®
X 10.2.4 or greater ....................................................................... 24
For USB Interface Cable Users ......................................................................................26
For Mac OS
®
X 10.2.4 or greater ....................................................................... 27
For Network Users and Administrators
BRAdmin Professional configuration utility
(For Windows
®
users) ..................................................................................................30
BRAdmin Light configuration utility
(For Mac OS
®
X users) ..................................................................................................32
Options and Consumables
Options ............................................................................................................................33
Replacement Consumables ...........................................................................................33
Step 1
Step 2
4
Setting Up the machine
Do not connect the interface cable.
Connecting the interface cable is
done during the software
installation process.
1 Open the front cover by pressing the front
cover (1) release button.
2 Unpack the drum unit and toner cartridge
assembly.
3 Gently rock it from side to side several times
to distribute the toner evenly inside the
assembly.
4 Put the drum unit assembly into the
machine until it clicks into place.
5 Close the front cover of the machine.
1 Install the Drum Unit Assembly
(1)
Step 1
5
Setting Up
the machine
Windows
®
USB
Windows
®
Parallel
Windows
NT
®
4.0
Parallel
Macintosh
®
USB
Macintosh
®
Network
Windows
®
Network
Network
Administrators
1 Pull the paper tray completely out of the
machine.
2 While pressing the paper guide release
lever (1), slide the adjusters to fit the paper
size. Check that the guides are firmly in the
slots.
3 Fan the stack of paper well to avoid paper
jams and misfeeds.
4 Put paper in the paper tray.
Check that the paper is flat in the tray and
below the maximum paper mark (1).
5 Put the paper tray firmly back into the
machine and unfold the output tray support
flap (1) before you use the machine.
2 Load Paper in the Paper Tray
(1)
For details on supported paper
specifications, see “Acceptable paper and
other media” in Chapter 2 of the User’s
Guide.
(1)
(1)
6
1 Push the lever (1) up to unlock the scanner.
(The gray scanner lock lever is located at
the back left side, under the document cover
(2).)
Damage caused to your machine by
failure to lock the scanner before
packing and shipping may void your
warranty.
Do not connect the Parallel or USB
cable yet.
1 Make sure that the power switch is off.
Connect the AC power cord to the machine.
2 Plug the AC power cord into an AC outlet.
Turn the power switch on.
3 Connect one end of the telephone line cord
to the socket on the machine marked LINE
and the other end to a modular wall socket.
3
Release the Scanner
Lock
(2)
(1)
4
Install the Power Cord
and Phone Line
If Scanner Locked appears on the LCD,
immediately release the scanner lock and
press Stop/Exit.
Step 1
Setting Up the machine
7
Setting Up
the machine
Windows
®
USB
Windows
®
Parallel
Windows
NT
®
4.0
Parallel
Macintosh
®
USB
Macintosh
®
Network
Windows
®
Network
Network
Administrators
Warning
The machine must be fitted with an earthed plug.
Since the machine is grounded through the power
outlet, you can protect yourself from potentially
hazardous electrical conditions on the telephone
network by keeping the power cord connected to
your machine when you connect it to a telephone
line. Similarly, you can protect yourself when you
want to move your machine by disconnecting the
telephone line first and then the power cord.
If you are sharing one phone line with an
external telephone, connect it as shown
below.
If you are sharing one phone line with an
external telephone answering device,
connect it as shown below.
Please set the receive mode to External
TAD.
For more details, see “Connecting an
external TAD” in Chapter 7 of the User’s
Guide.
Extension
Telephone
External
Telephone
TAD
TAD
8
.
The machine displays the date and time, and prints it on every fax you send.
1 Press Menu.
2 Press 0.
3 Press 2.
4 Enter the last two digits of the year on the
dial pad, and then press OK.
(e.g. Enter 0, 6 for 2006.)
5 Enter the two digits for the month on the dial
pad, and then press OK.
(e.g. Enter 0, 3 for March.)
6 Enter the two digits for the day on the dial
pad, and then press OK.
(e.g. Enter 2, 5.)
7 Enter the time in 24-hour format on the dial
pad, and then press OK.
(e.g. Enter 1, 5, 2, 5 for 3:25 P.M.)
8 Press Stop/Exit.
5 Setting the Date and Time
02.Date/Time
Year:2006
Enter & OK Key
02.Date/Time
XX/XX/2006
Month:03
Enter & OK Key
02.Date/Time
XX/03/2006
Day:25
Enter & OK Key
02.Date/Time
25/03/2006
Time:15:25
Enter & OK Key
If you make a mistake, press Stop/Exit to
start from Step
1.
Step 1
Setting Up the machine
9
Setting Up
the machine
Windows
®
USB
Windows
®
Parallel
Windows
NT
®
4.0
Parallel
Macintosh
®
USB
Macintosh
®
Network
Windows
®
Network
Network
Administrators
You should store your name and fax number to be printed on all fax pages that you send.
1 Press Menu.
2 Press 0.
3 Press 3.
4 Enter your fax number (up to 20 digits) on
the dial pad, and then press OK. To enter a
“+” for international dialling codes, press .
For example, to enter the UK dialling code
“+44”, press , 4, 4, and then rest of your
number.
5 Enter your telephone number (up to 20
digits) on the dial pad, and then press OK.
(If your telephone number and fax number
are the same, enter the same number
again.)
6 Use the dial pad to enter your name (up to
20 characters), and then press OK.
7 Press Stop/Exit.
6 Setting your Station ID
03.Station ID
Fax:_
Enter & OK Key
03.Station ID
Fax:+44XXXXXXXX
Tel:_
Enter & OK Key
03.Station ID
Fax:+44XXXXXXXX
Tel:+44XXXXXXXX
Name:_
Enter & OK Key
Refer to the following chart for entering
your name.
If you need to enter a character that is on
the same key as the previous character,
press to move the cursor to the right.
If you entered a letter incorrectly and want
to change it, press to move the cursor
under the incorrect character, press
Clear/Back.
Press
key
One
time
Two
times
Three
times
Four
times
2 ABC2
3 DEF3
4 GH I 4
5 JKL5
6 MNO6
7 PQRS
8 TUV8
9 WX Y Z
For more details, see “Entering Text” in
Chapter D of the User’s Guide.
10
Your machine comes set for Tone dialing service. If
you have Pulse dialling service (rotary), you need to
change the dialling mode.
1 Press Menu.
2 Press 0.
3 Press 4.
4 Press or to select Pulse (or Tone).
Press OK.
5 Press Stop/Exit.
There are four possible receive modes; Fax Only,
Fax/Tel, Manual and External TAD.
Choose the Receive Mode which best suits your
needs.
7
Tone and Pulse dialling
mode
8
Selecting a Receive
Mode
Are you connecting an external telephone or external
telephone answering device to the machine?
Do you use a Distinctive
Ring subscriber service?
Go to
“Distinctive
Ring”
in the
Chapter 7 of the
User’s Guide
Are you using the voice
message function of your
external telephone answering
device?
Do you want the machine to answer fax and
telephone calls automatically?
Do you want to use the machine for Fax
only?
Fax Only
The machine
automatically answers
every call as a fax.
Fax/Tel
The machine controls
the line and
automatically answers
every call. If the call is
not a fax, the machine
will ring for you to pick up
the call.
Manual
You control the phone
line and must answer
every call yourself.
External TAD
Your external telephone
answering device (TAD)
automatically answers
every call. Voice
messages are stored on
the external TAD. Fax
messages are printed.
Yes
No
No
Yes
Yes
No
Yes
No
No
Yes
Step 1
Setting Up the machine
11
Setting Up
the machine
Windows
®
USB
Windows
®
Parallel
Windows
NT
®
4.0
Parallel
Macintosh
®
USB
Macintosh
®
Network
Windows
®
Network
Network
Administrators
1 Press Menu.
2 Press 0.
3 Press 1.
4 Press or to select the mode.
Press OK.
5 Press Stop/Exit.
You can change the contrast to help the LCD look
lighter or darker.
1 Press Menu.
2 Press 1.
3 Press 7.
4 Press to increase the contrast.
OR
Press to decrease the contrast.
Press OK.
5 Press Stop/Exit.
For more details, see “Receiving a fax” in
Chapter 6 of the User’s Guide.
9 Setting the LCD Contrast
Go to Next page to
install the drivers & software
12
Installing the Drivers & Software
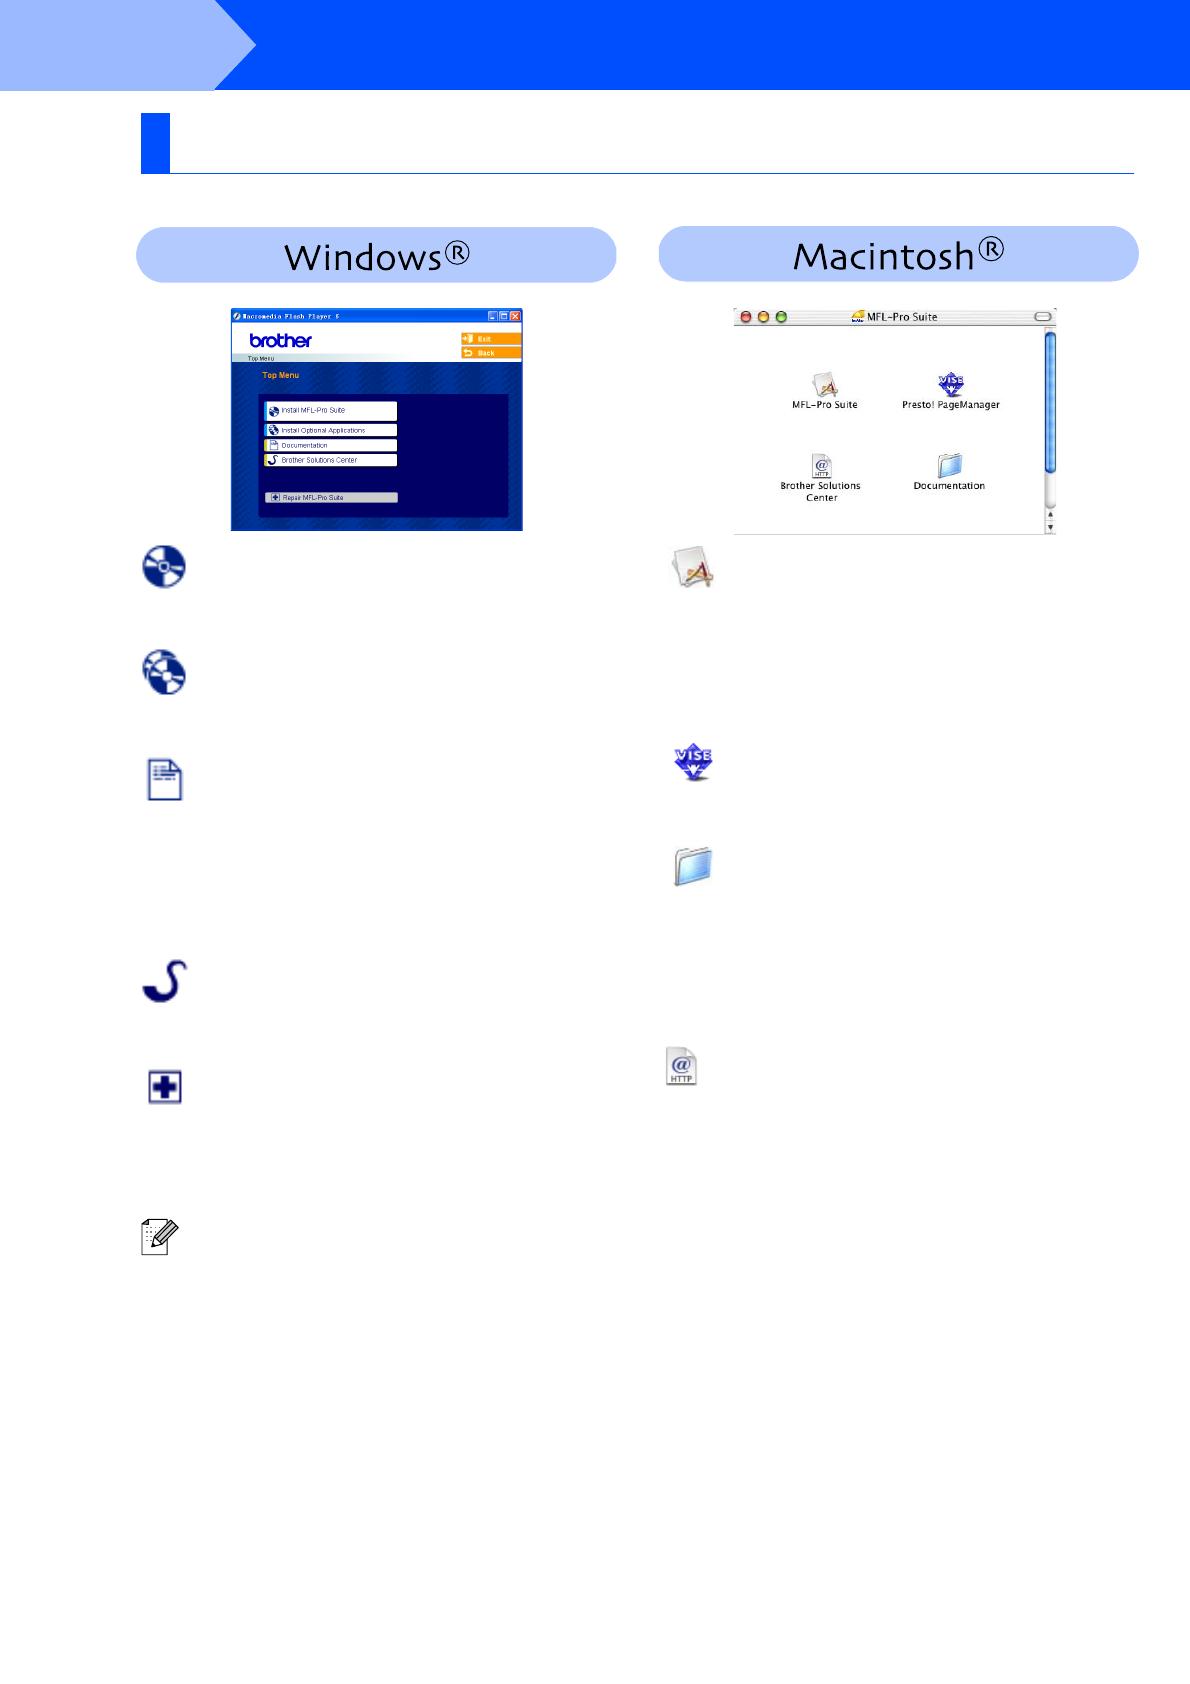
The CD-ROM includes the following items:
Install MFL-Pro Suite
You can install the MFL-Pro Suite and multifunction
drivers.
Install Optional Applications
You can install additional MFL-Pro Suite software
utilities.
Documentation
View the User’s Guide and other document in PDF
format (Viewer included). The User’s Guide on the
CD-ROM includes the Software and Network User’s
Guide for features available when connected to a
computer (e.g. Printing, Scanning and networking
details).
.
Brother Solutions Center
Brother contact information and web site links offering
the latest news and support information.
Repair MFL-Pro Suite
(For USB and Parallel cable users only)
If you experience errors while installing the MFL-Pro
Suite, you can use this function to automatically repair
and re-install the software.
MFL-Pro Suite
You can install the MFL-Pro Suite that includes the
printer driver, scanner driver and the Brother
ControlCenter2 for Mac OS
®
10.2.4 or greater. You
can also install Presto!
®
PageManager
®
to add OCR
capability to the Brother ControlCenter2 and easily
scan, share and organize photos and documents.
Presto!
®
PageManager
®
You can install Presto!® PageManager® to add OCR
capability to the Brother Control Center2.
Documentation
View the User’s Guide and other document in PDF
format (Viewer included). The User’s Guide on the
CD-ROM includes the Software and Network User’s
Guide for features available when connected to a
computer (e.g. Printing, Scanning and networking
details).
Brother Solutions Center
You can access the Brother Solutions Center, a Web
site offering information about your Brother product
including FAQs, User’s Guides, Driver updates and
Tips for using your machine.
Supplied CD-ROM “MFL-Pro Suite”
MFL-Pro Suite includes Printer Driver, Scanner
Driver, Brother ControlCenter2, and True Type
®
fonts.
Step 2
13
Setting Up
the machine
Windows
®
USB
Windows
®
Parallel
Windows
NT
®
4.0
Parallel
Macintosh
®
USB
Macintosh
®
Network
Windows
®
Network
Network
Administrators
Follow the instructions on this page for your operating system and interface cable.
For the latest drivers and to find the best solution for your problem or question, access the Brother Solutions
Center directly from the driver or go to http://solutions.brother.com
Step 2
USB Interface Cable Users .......................................... Go to page 14
(For Windows
®
98/98SE/Me/2000 Professional/XP/XP Professional x64 Edition)
Parallel Interface Cable Users ..................................... Go to page 16
(For Windows
®
98/98SE/Me/2000 Professional/XP/XP Professional x64 Edition)
Windows NT
®
Workstation Version 4.0 Users........... Go to page 19
(For Parallel Interface Cable Users)
Network Interface Cable Users
For Mac OS
®
X 10.2.4 or greater ............................. Go to page 27
Network Interface Cable Users.................................... Go to page 21
USB Interface Cable Users
For Mac OS
®
X 10.2.4 or greater ............................. Go to page 24
For Network Users and Administrators...................... Go to page 30
Installing the Drivers & Software
14
Make sure that you have finished the instructions from Step 1 “Setting Up
the machine” on pages 4 - 11.
1 Switch off the machine and disconnect the
machine from the power socket (and from
your computer, if you have already
connected an interface cable).
2 Turn on your computer.
(For Windows
®
2000 Professional/XP/
XP Professional x64 Edition, you must be
logged on with Administrator rights.)
3 Put the supplied CD-ROM for Windows
®
into your CD-ROM drive. If the model name
screen appears, choose your machine. If
the language screen appears, choose your
language.
4 The CD-ROM main menu will appear.
Click Install MFL-Pro Suite.
5 After reading and accepting the Presto!
®
PageManager
®
6 License Agreement, click
Yes.
6 When the Brother MFL-Pro Suite Software
License Agreement window appears, click
Yes if you agree to the Software License
Agreement.
7 Choose Local Connection, and then click
Next. The installation will continue.
For USB Interface Cable Users
(For Windows
®
98/98SE/Me/2000 Professional/XP/XP Professional x64 Edition)
Please close any applications running before
installing the MFL-Pro Suite.
If this window does not appear, use Windows
®
Explorer to run the setup.exe program from
the root folder of the Brother CD-ROM.
If you want to install the PS driver (BR-Script 3
printer driver), choose Custom Install and
then follow the on-screen instructions. When
the Select Components screen appears,
check PS Printer Driver, and then continue
following the on-screen instructions.
Step 2
Installing the Drivers & Software
15
8 When this screen appears, connect the
USB interface cable to your PC, and then
connect it to the machine.
(For Windows
®
XP)
(For Windows
®
98/98SE/Me/2000)
DO NOT connect the machine to a
USB port on a keyboard or a non-
powered USB hub. Brother
recommends that you connect the
machine directly to your computer.
9 Plug in the power cord and turn on the
machine.
It will take a few seconds for the installation
screens to appear.
The installation of the Brother drivers will
automatically start. The installation screens
appear one after another. Please wait, it will
take a few seconds for all the screens to
appear.
DO NOT try to cancel any of the
screens during this installation.
0 Click Finish to restart your computer.
(After restarting the computer, for
Windows
®
2000 Professional/XP/
XP Professional x64 Edition, you must be
logged on with Administrator rights.)
The MFL-Pro Suite (including, Printer
driver and Scanner driver) has been
installed and the installation is now
complete.
After restarting the computer, the Installation
Diagnostics will run automatically. If the
installation is unsuccessful, the installation
results window will be shown. If the
Installation Diagnostics shows a failure,
please follow the on-screen instruction or read
on-line help and FAQ’s in
Start/All Programs (Programs)/Brother/
MFL-Pro Suite MFC-XXXX (where XXXX is
your model name).
Installing the Drivers & Software
Setting Up
the machine
Windows
®
USB
Network
Administrators
16
Make sure that you have finished the instructions from Step 1 “Setting Up
the machine” on pages 4 - 11.
1 Switch off the machine and disconnect the
machine from the power socket (and from
your computer, if you have already
connected an interface cable).
2 Turn on your computer.
(For Windows
®
2000 Professional/XP/
XP Professional x64 Edition, you must be
logged on with Administrator rights.)
3 Put the supplied CD-ROM for Windows
®
into your CD-ROM drive. If the model name
screen appears, choose your machine. If
the language screen appears, choose your
language.
4 The CD-ROM main menu will appear.
Click Install MFL-Pro Suite.
5 After reading and accepting the Presto!
®
PageManager
®
6 License Agreement, click
Yes.
6 When the Brother MFL-Pro Suite Software
License Agreement window appears, click
Yes if you agree to the Software License
Agreement.
7 Choose Local Connection, and then click
Next. The installation will continue.
For Parallel Interface Cable Users
(For Windows
®
98/98SE/Me/2000 Professional/XP/XP Professional x64 Edition)
Please close any applications running before
installing the MFL-Pro Suite.
If this window does not appear, use Windows
®
Explorer to run the setup.exe program from
the root folder of the Brother CD-ROM.
If you want to install the PS driver (BR-Script 3
printer driver), choose Custom Install and
then follow the on-screen instructions. When
the Select Components screen appears,
check PS Printer Driver, and then continue
following the on-screen instructions.
Step 2
Installing the Drivers & Software
17
8 When this screen appears, connect the
parallel interface cable to your PC, and then
connect it to the machine.
(For Windows
®
XP)
(For Windows
®
98/98SE/Me/2000)
DO NOT plug in the power cord
before connecting the parallel
interface cable. It may cause
damage to your machine. Brother
recommends that you connect the
machine directly to your computer.
9 Plug in the power cord and turn on the
machine.
0 For Windows
®
98/98SE/Me/
2000 Professional users, click Next.
Windows
®
XP users should wait for a while;
installation of the Brother drivers will start
automatically. The installation screens
appear one after another.
DO NOT try to cancel any of the
screens during this installation.
Continued ...
Installing the Drivers & Software
Setting Up
the machine
Network
Administrators
Windows
®
Parallel
18
A When the following screen appears, click
Finish and wait as the PC restarts
Windows
®
and continues the installation.
B After the computer restarts, the installation
of the Brother drivers will automatically start.
Follow the instructions on the screen.
(For Windows
®
2000 Professional/XP/
XP Professional x64 Edition, you must be
logged on with Administrator rights.)
The MFL-Pro Suite (including, Printer
driver and Scanner driver) has been
installed and the installation is now
complete.
For Parallel Interface Cable Users
(For Windows
®
98/98SE/Me/2000 Professional/XP/XP Professional x64 Edition)
After restarting the computer, the Installation
Diagnostics will run automatically. If the
installation is unsuccessful, the installation
results window will be shown. If the
Installation Diagnostics shows a failure,
please follow the on-screen instruction or read
on-line help and FAQ’s in
Start/All Programs (Programs)/Brother/
MFL-Pro Suite MFC-XXXX (where XXXX is
your model name).
Step 2
Installing the Drivers & Software
  • Page 1 1
  • Page 2 2
  • Page 3 3
  • Page 4 4
  • Page 5 5
  • Page 6 6
  • Page 7 7
  • Page 8 8
  • Page 9 9
  • Page 10 10
  • Page 11 11
  • Page 12 12
  • Page 13 13
  • Page 14 14
  • Page 15 15
  • Page 16 16
  • Page 17 17
  • Page 18 18
  • Page 19 19
  • Page 20 20
  • Page 21 21
  • Page 22 22
  • Page 23 23
  • Page 24 24
  • Page 25 25
  • Page 26 26
  • Page 27 27
  • Page 28 28
  • Page 29 29
  • Page 30 30
  • Page 31 31
  • Page 32 32
  • Page 33 33
  • Page 34 34
  • Page 35 35
  • Page 36 36
  • Page 37 37

Brother MFC-8860DN Quick Setup Manual

Category
Copiers
Type
Quick Setup Manual
This manual is also suitable for

Ask a question and I''ll find the answer in the document

Finding information in a document is now easier with AI