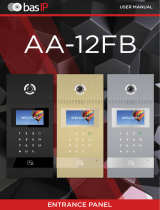
USER MANUAL
ENTRANCE PANEL
AA-14FB

AA-14FB Full User Manual
Device description
wiki.bas-ip.com
ENTRANCE PANEL
Main features
• Panel type: Multi-apartment.
• Display: 10’’ TFT, color with backlight and heated.
• Keyboard: Touch screen.
• Camera: 1/3”.
• Resolution: 2 Мp.
• Сamera angle: 110° (horizontal).
• Output video: Full HD (1920 × 1080), H.264 Main Profile.
• Night backlight: 6 LEDs.
• Light sensitivity: 0,01 LuX.
• Protection class: IP65.
• IK-Code: IK06.
• Working temperature: -40 — +65 °С.
• Power consumption: 6,5 W, in standby — 3,6 W.
• Power supply: +12 V DC.
• Body: Aluminum.
• Colors: Silver, Gold, Black.
• Dimensions for installation: 172 × 373 × 58 mm.
• Size of the panel: 185 × 400 × 45 mm.
• Installation: Flush, surface with BR-AA14 bracket.
Appearance
Multi-apartment entrance panel with 10 "TFT screen with backlight and
heated, with face recognition and support for mobile access BAS-IP UKEY.
The panel has a unique feature – face recognition. This identifying technology
is integrated into the BAS-IP panels and uses the camera of the outdoor panel
and infrared sensors for its operation.
10’’ Display.
Reader.
Microphone.
Backlight.
Camera.
Loudspeaker.
1
2
3
4
5
6
-
-
-
-
-
-
1
2
3
4
5
6

Completeness check of the product
Before installation of the outdoor panel, it is necessary to check that
it is complete and all components are available.
Outdoor panel kit includes:
Outdoor panel
Manual
Flush mount bracket
Set of wires with connectors for connection of power supply,
lock, and additional modules
Set of screws with a wrench
1 pc
1 pc
1 pc
1 pc
1 pc
After verifying the device's completeness, you can switch to the outdoor panel
connection.
For connection you will need:
Electrical connection
An Ethernet UTP CAT5 or higher cable connected to a PoE network switch
or regular switch/router.
Cable length recommendations
The maximum length of the UTP CAT5 cable segment should not exceed 100 meters,
according to the IEEE 802.3 standard.
Power supply at +12 V, 2 amps.
Connection scheme of electromagnetic lock using
uninterruptible power supply UPS-DP/S
123
+12V GND Lock
+-
Power
+12 V
Opening
lock time
adjustment
Exit
button
Less
More
N.C.
N.O.
GND
Contact
Fire alarm
input
Switching
contact type:
normally open
or normally closed
1. +12V
2. Ground
3. Lock
4. COM
5. N.C./N.O.
6. Unused
Output to connect
electromechanical lock
LAN
Power
Electromagnetic Lock
SH-45
Door Sensor
SH-42
(optional)
Exit Button
GND
+12V
123
NC COM
Relay outputs to lock
4 5
NC NO
Wiegand output
123
+5V D0
4
GND D1
RS485
123
+12V 485+
4
GND 485-
Exit Button/Door Sensor
123
Exit Din
4
GND DS
RS232 (Option)
Green
RX
Black White
GND TX
COM
EAN: 5060514912850 (BLACK)
EAN: 5060514912874 (GOLD)
EAN: 5060514912867 (SILVER)

123
+12V GND Lock
+-
Power
+12 V
Opening
lock time
adjustment
Exit
button
Less
More
N.C.
N.O.
GND
Contact
Fire alarm
input
Switching
contact type:
normally open
or normally closed
1. +12V
2. Ground
3. Lock
4. COM
5. N.C./N.O.
6. Unused
Output to connect
electromechanical lock
LAN
Power
SH-45 Door Sensor
SH-42
(optional)
Exit Button GND
+12V
123
NC COM
Relay outputs to lock
4 5
NC NO
Wiegand output
123
+5V D0
4
GND D1
RS485
123
+12V 485+
4
GND 485-
Exit Button/Door Sensor
123
Exit Din
4
GND DS
RS232 (Option)
Green
RX
Black White
GND TX
COM
123
+12V GND Lock
+-
Power
+12 V
Opening
lock time
adjustment
Exit
button
Less
More
N.C.
N.O.
GND
Contact
Fire alarm
input
Switching
contact type:
normally open
or normally closed
1. +12V
2. Ground
3. Lock
4. COM
5. N.C./N.O.
6. Unused
Output to connect
electromechanical lock
LAN
Power
SH-45 Door Sensor
SH-42
(optional)
Exit Button GND
+12V
123
NC COM
Relay outputs to lock
4 5
NC NO
Wiegand output
123
+5V D0
4
GND D1
RS485
123
+12V 485+
4
GND 485-
Exit Button/Door Sensor
123
Exit Din
4
GND DS
RS232 (Option)
Green
RX
Black White
GND TX
COM
Connection scheme of electromagnetic lock using
third-party power supply for the lock
Connection scheme of electromechanical lock using
uninterruptible power supply UPS-DP/S
Connection scheme of electromechanical lock using
third party power supply for the lock
+12V
DC
Electromagnetic Lock -+
Electromechanical lock
Electromechanical lock
+12V
DC
-+

EAN: 5060514912850 (BLACK)
EAN: 5060514912874 (GOLD)
EAN: 5060514912867 (SILVER)
Flush mounting using complete brachet
Check the availability of all components required for installation,
connection and fastening.
fastening
screws
x4
fastening
anchor
dowels
x4
flush
mount
bracket
x1
panel
fastening
bolts
x4
connection
cords
x5
185 mm
400 mm
45 mm 172 mm
373 mm
58 mm
1
Measure the bracket dimensions required for carving out a niche
for further bracket mounting.
2
On the wall, draw a rectangle
according to the dimensions
done in the previous step.
3Make a niche in the wall by
hollowing the wall or any other
appropriate way.
4
174 mm
375 mm
1090-1300 mm

Place flush mount bracket in the
niche and outline places for
anchor dowels mount opposite
the holes in the bracket.
6
Attention: the hole at the bottom is designed to drain the water.
Do not intentionally close it. Also it is necessary to make a drain for water
at the bottom of the niche which will serve to divert water out.
Remove the bracket and make
holes in the outlined places with
a perforator.
7Hammer the anchor dowels into
the resulting holes.
8
5

EAN: 5060514912850 (BLACK)
EAN: 5060514912874 (GOLD)
EAN: 5060514912867 (SILVER)
Place the flush mount bracket
in the hollowed-out niche and
fasten it with screws through
the mounting holes.
10
Wire all the necessary cables
for panel connection and
switching (for Ethernet, an exit
button, a lock, panel power,
a door sensor, a fire alarm,
RS485, and Wiegand interfaces)
into the niche.
9
Cut out a rectangle of 80x40 mm
from foamed polyurethane or
rubber and make holes opposite
the required outgoing connectors
on the back side of the panel.
11
80 mm
40 mm
Pass all the protruding from the
wall wires through the made
earlier holes in the insulating
rectangle.
12

Apply a thin layer of silicone
sealant along the perimeter
of the niche with the connectors
оn the panel rear side and place
the protective rectangle in a niche
(where all connectors are)
on the panel rear side.
15
Silicon
sealant
Apply a 3-4 mm layer of silicone
sealant around the niche with
the placed insulating rectangle,
so that the sealant falls precisely
on the joint of the rectangle
and the back plastic cover
of the panel.
16
Silicon
sealant
Switch and connect the
protruding from the wall
and passing through the
insulating rectangle wires to the
necessary connection cords from
the panel kit.
13Join all the resulting connectors
at the ends of the wires to their
corresponding response parts
on the panel rear side.
14
Tape

EAN: 5060514912850 (BLACK)
EAN: 5060514912874 (GOLD)
EAN: 5060514912867 (SILVER)
Put all connected to the panel
wires on the bottom of the flush
mount bracket.
All the protruding from the wall
and connected to the panel wires
must be carefully bent in
a semicircle in so that the upper
part of the wiring bundle is higher
than the hole for inserting cables
from the wall into the inside
of the bracket.
18
14
Apply a 3-4 mm layer of silicone
sealant around all wires coming
out of the slots in the insulating
rectangle.
The sealant must be applied
to the top of the joint between
the wire and the insulating
rectangle.
17
Silicon
sealant

Install the entrance panel inside
the flush mount bracket.
Important!
Hold the wiring bundle
on the bottom of the bracket
so that some wires do not fall
on the sharp edges and are not
pressed by the panel.
Fasten the entrance panel
to the bracket with the fastening
bolts from the kit.
19
20

Warranty
The warranty card number
Model name
Serial number
Seller name
With following stated terms of warranty is familiar, functional test was
performed in my presence:
Customer signature
Warranty conditions
The warranty period of the product — 36 (thirty-six) months from
the date of sale.
Transportation of product must be in its original packaging or supplied one
by the seller.
The product is accepted in warranty repair only with a properly filled warranty
card and the presence of intact stickers or labels.
The product is accepted for examination in accordance with the cases
provided by law, only in the original packaging, in a full complete set,
appearance corresponding to the new equipment and presence of all relevant
properly filled documents.
This warranty is in addition to the constitutional and other consumer rights
and in no way restrict them.
Terms of warranty
The warranty card must indicate the name of the model, serial number,
purchase date, name of the seller, seller company stamp and
the customer’s signature.
Delivery to the warranty repair is carried out by the buyer himself.
Warranty repairs carried out only during the warranty period specified
in the warranty card.
The service center is committed to do everything possible to carry out
the repair warranty products, up to 24 working days. The period spent
on the restoration of product functionality is added to the warranty period.
EAN: 5060514912850 (BLACK)
EAN: 5060514912874 (GOLD)
EAN: 5060514912867 (SILVER)

www.bas-ip.com
-
 1
1
-
 2
2
-
 3
3
-
 4
4
-
 5
5
-
 6
6
-
 7
7
-
 8
8
-
 9
9
-
 10
10
-
 11
11
-
 12
12
BAS-IP bas-IP AA-14FB Entrance Panel User manual
- Type
- User manual
- This manual is also suitable for
Ask a question and I''ll find the answer in the document
Finding information in a document is now easier with AI
Related papers
-
BAS-IP bas-IP BR-AA14 Surface Mount Bracket User manual
-
BAS-IP bas IP AV-01KD Entrance Panel User manual
-
BAS-IP bas-IP AV-03D ENTRANCE PANEL User manual
-
 BAS-IP AA-12FB Outdoor IP Entrance Panel User manual
-
BAS-IP AT-10 INDOOR VIDEO ENTRY PHONE User manual
-
BAS-IP AV-05FD User manual
-
BAS-IP bas-IP BI-02 Multi Button Entrance Panel User manual
-
BAS-IP AV-05SD SILVER Individual Entrance Panel User manual
-
BAS-IP BAS-IP AV-08FB GOLD: IP Intercom Call Panel User manual
-
 BAS-IP bas-IP AT-07L IP Indoor Video Entry Phone User manual


