Press the AUTO LIGHT option to activate this feature.
When the AUTO LIGHT is not activated, the interior display
light will only turn on when the door is opened.
NOTE: Leaving the light on for an extended period of time will
slightly increase the temperature of the beverage center.
3. Control Lock
A selectable feature that locks all controls except for Cool
On and Cool Off.
To activate Lock Mode, press and hold
LOCK for 3 seconds. After the countdown,
all other displays will turn off and become
unavailable except Cool On, Cool Off and
Lock.
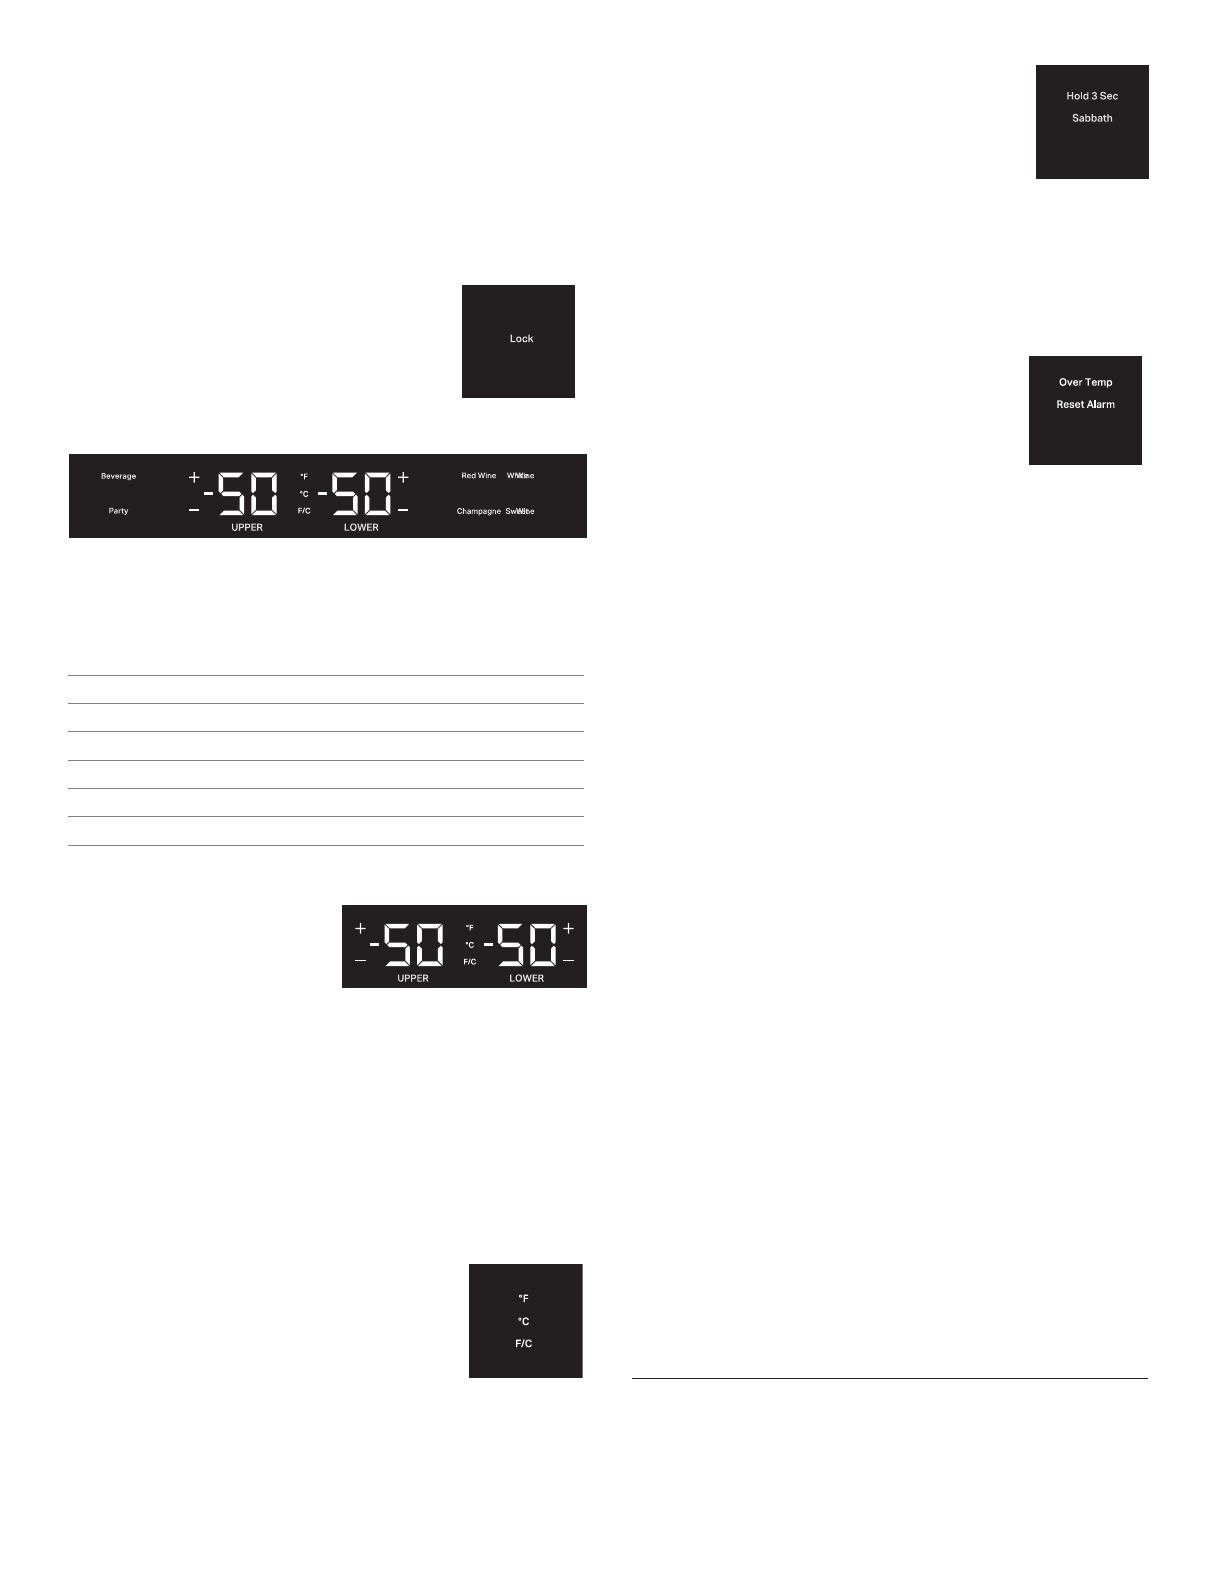
4. Using Presets
For your convenience, your beverage center also has
controls that are preset to recommended storage
temperature for specific beverages. Pressing any preset
option will set the temperature to the recommended
temperature for the specified beverage:
Beverage: 34 °F (1 °C)
Party: 37 °F (3 °C)
Red wine: 64 °F (17 °C)
White wine: 50 °F (10 °C)
Sweet wine: 42 °F (5 °C)
Champagne: 46 °F (7 °C)
5. Adjusting the Temperatures
To adjust set point
temperatures, press “+” (plus)
or “-” (minus) until the desired
temperature setting is
reached. The control is set correctly when the beverages
are as cold as you like it.
NOTES:
The set point for the beverage center is 37 °F (3 °C for the
upper compartment and 50 °F (10 °C) for the lower
compartment. The set point range for the upper
compartment is 33 °F to 40 °F (0 °C to 4 °C) and 42 °F to
64 °F (5 °C to 17 °C) for the lower compartment.
Wait at least 24 hours between adjustments for the product
to acclimate. Recheck the temperatures before making
further adjustments.
6. Viewing Celsius/Fahrenheit
Temperatures
Press the F/C touch pad to toggle between
displaying the temperature in degrees
Fahrenheit and degrees Celsius.
The corresponding indicator will illuminate.
7. Sabbath Mode
Allows the door of the beverage center to be opened or
closed during the Sabbath or other religious holidays
without directly turning on or off any lights, digital
readouts, solenoids, fans, valves, icons,
tones, alarms or the compressor. By
selecting this feature, the temperature set
points remain unchanged, but the control
panel lights, interior lights, and control audio
turn off. For most efficient beverage center
operation, it is recommended to exit the Sabbath Mode
when it is no longer required.
Press and hold SABBATH for 3 seconds to turn on the
feature. After the 3 second countdown, the feature will
activate and all other displays will turn Off.
Press and hold SABBATH for 3 seconds to turn off the
feature and turn on the display.
8. Over Temperature Alarm
The Over Temperature feature is designed
to let you know when the beverage
center temperature rises above 70 °F
(21 °C) for 4 hours or longer. The audio
alarm will shut off automatically when the temperature
returns to normal. To let you know an Over Temperature
condition occurred, the indicator light will continue to flash
until the Reset Alarm touch pad is pressed.
If the over temperature condition is still present when an
Over Temp reset is performed, the indicator light will
continue to reactivate every 4 hours until the beverage
center temperature is below 70 °F (21 °C).
NOTE: These features will not appear on your control
unless your beverage center is over temperature and the
alarm requires a reset.
9. Max Cool
Plummets internal temperatures to their lowest point for
24 hours.
Press “+” and “F/C” at the same time to turn on the
feature. The feature will activate.
Press “+” and “F/C” at the same time to turn off the
feature. The feature will activate.
If it is not turned off as indicated, after 24 hrs it will be
deactivated by itself.
10. Door Open Alarm
Helps avoid food and beverage spoilage by giving an
audio and visual alert if the door is left open for 5 minutes.
If the door is open longer than 5 minutes, an alarm will
sound every 2 minutes until the door is closed or any
control is pressed.
11. Showroom Mode
This mode is used only when the beverage center is on
display in a retail store. To activate Showroom Mode,
press and hold both Cool On and Sabbath for 3 seconds.
If you unintentionally turn on Showroom Mode, Cool Off
will light up on the display, and the controls will appear to
work. Exit Showroom Mode by pressing and holding
COOL ON and SABBATH at the same time for 3 seconds.
Normal Sounds
Your new beverage center may make sounds that your old
one didn’t make. Because the sounds are new to you, you
might be concerned about them. Most of the new sounds are
normal. Hard surfaces, such as the fl ooring and surrounding
8


