Ozito Ecomow ECO-320 User manual
- Category
- Lawnmowers
- Type
- User manual
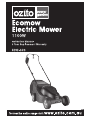
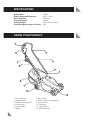
Ozito Ecomow ECO-320 is a powerful electric lawn mower designed for small to medium-sized lawns. With a cutting diameter of 320mm and adjustable cutting heights of 31mm, 47mm, and 63mm, it offers versatile mowing options. The IPX4 water resistance rating ensures durability in various weather conditions. The Ecomow ECO-320 features a 1100W motor, delivering efficient cutting performance. It is equipped with a grass catcher for convenient collection and disposal of grass clippings, promoting a neat and tidy lawn.
Ozito Ecomow ECO-320 is a powerful electric lawn mower designed for small to medium-sized lawns. With a cutting diameter of 320mm and adjustable cutting heights of 31mm, 47mm, and 63mm, it offers versatile mowing options. The IPX4 water resistance rating ensures durability in various weather conditions. The Ecomow ECO-320 features a 1100W motor, delivering efficient cutting performance. It is equipped with a grass catcher for convenient collection and disposal of grass clippings, promoting a neat and tidy lawn.


-
 1
1
-
 2
2
-
 3
3
-
 4
4
-
 5
5
-
 6
6
-
 7
7
-
 8
8
-
 9
9
-
 10
10
-
 11
11
-
 12
12
-
 13
13
-
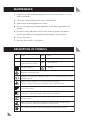 14
14
-
 15
15
-
 16
16


Ozito Ecomow ECO-320 User manual
- Category
- Lawnmowers
- Type
- User manual
Ozito Ecomow ECO-320 is a powerful electric lawn mower designed for small to medium-sized lawns. With a cutting diameter of 320mm and adjustable cutting heights of 31mm, 47mm, and 63mm, it offers versatile mowing options. The IPX4 water resistance rating ensures durability in various weather conditions. The Ecomow ECO-320 features a 1100W motor, delivering efficient cutting performance. It is equipped with a grass catcher for convenient collection and disposal of grass clippings, promoting a neat and tidy lawn.
Ask a question and I''ll find the answer in the document
Finding information in a document is now easier with AI
Related papers
-
Ozito ELM-1545 1500W 360mm Electric Lawn Mower User manual
-
-
Ozito PXBSDMK-4182 User manual
-
-
-
Ozito PXCLMK-018 User manual
-
-
-
-
Other documents
-
Ferm LMM1013 Lawn Mower User manual
-
Bushranger 46TK6M, User manual
-
Rover Domestic Domestic Rotary Mower User manual
-
MTD 181-222A002 User manual
-
Coopers 10679 Instructions For Use Manual
-
Worx WG718 User manual
-
Sun Joe MJ401E-BLK Owner's manual
-
Sun Joe MJ401E-RM Owner's manual
-
Weed Eater 96132006300 User manual
-
Homelite UT13118 User manual