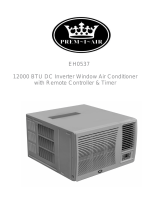
GREE GJC09AF-E6RNB3A User manual

Category
Toy parts
Type
User manual
WFD 009
UNITS
AWWR-WFD009-C11
AWWR-WFD012-C11
SM WFD GB AVRIL 2017
Version:1
Service Manual
Table of Contents
Table of Contents
Part :Technical Information .............................................................1
1.Summary ......................................................................................................1
2.Specications ...........................................................................................2
3.Outline Dimension Diagram ..............................................................4
4.Refrigerant System Diagram ............................................................5
5.Electrical Part ............................................................................................6
5.1 Wiring Diagram ...........................................................................................6
5.2 PCB Printed Diagram ..................................................................................7
6.Function and Control ............................................................................9
6.1 Introduction of Control Panel .......................................................................9
6.2 Introduction of Remote Controller .............................................................10
6.3 Function Introduction .................................................................................13
Part :Installation and Maintenance ............................................15
7.Notes for Installation and Maintenance ....................................15
8.Installation ................................................................................................18
8.1 Selection of Installation Location...............................................................18
8.2 Electric Connection Requirement ..............................................................18
8.3 Installation Procedure ...............................................................................19
8.4 Installation of Accessories .........................................................................19
8.5 Drain Water ............................................................................................... 19
9.Maintenance .............................................................................................20
9.1 Malfunction Analysis ..................................................................................20
9.2 Flashing LED of Indoor/Outdoor Unit and Primary Judgement .................25
10.Exploded View and Parts List ......................................................35
11.Removal Procedure ...........................................................................37
Appendix: ......................................................................................................42
Appendix 1: Reference Sheet of Celsius and Fahrenheit ............................... 42
Appendix 2: List of Resistance for Ambient Temperature Sensor ................... 43
Service Manual
Technical Information 1
1.Summary
Remote Controller:
Model:
Part :Technical Information
AWWR-WFD009-C11
YX1F
AUTO
COOL
DRY
FAN
HEAT
T-ON T-OFF
SWING
SLEEP
LOCK
SPEED
+
_
ON/OFF
FAN SWING
SLEEP TIMER
MODE
Service Manual
Technical Information
2
2.Specications
Model AWWR-WFD009-C11
Product Code 7WT010008
Power
Supply
Rated Voltage V~ 230
Rated Frequency Hz 50
Phases 1
Cooling Capacity W 2700
Heating Capacity kJ/h /
Cooling Power Input W 782
Heating Power Input W /
Cooling Current Input A 3.5
Heating Current Input A /
Rated Input W 1100
Rated Current A 5.5
Air Flow Volume(H/M/L) m3/h 400/350/310
Dehumidifying Volume L/h 1
EER W/W 3.45
COP W/W /
Application Area m212-18
Climate Type T1
Isolation I
Moisture Protection IP24
Design Pressure Hi. Side MPa 4.3
Design Pressure Low Side MPa 2.5
Dimension (WXHXD) mm 560/375/708
Dimension of Carton Box (LXWXH) mm 803/620/410
Dimension of Package (LXWXH) mm 806/623/425
Net Weight kg 43
Gross Weight kg 47
Refrigerant R32
Refrigerant Charge kg 0.51
Indoor Side
Fan Type Centrifugal
Fan Diameter Length(DXL) mm Φ193.1X80.9
Cooling Speed r/min 910/850/780
Heating Speed r/min /
Fan Motor Power Output W 60
Fan Motor RLA A 0.5
Fan Motor Capacitor μF 4
Electric Heating Power Input W /
Evaporator Form Aluminum Fin-copper Tube
Evaporator Pipe Diameter mm Φ7
Evaporator Row-n Gap mm 3-1.3
Evaporator Coil Length (LXDXW) mm 330X323.9X38.1
Swing Motor Model MP24VA
Swing Motor Power Output W 2.5
Fuse Current A 3.15
Sound Pressure Level (H/M/L) dB (A) 50/48/46
Sound Power Level (H/M/L) dB (A) 59/57/55
Service Manual
Technical Information 3
The above data is subject to change without notice; please refer to the nameplate of the unit.
Outdoor
Side
Compressor Manufacturer ZHUHAI LANDA COMPRESSOR CO.,LTD
Compressor Model QXF-A086zT190
Compressor Oil FW68DA or equivalent
Compressor Type Rotary
Compressor LRA. A /
Compressor RLA A 4.1
Compressor Power Input W 860
Compressor Overload Protector 1NT11L-6233/KSD115/HPC115/95U1
Throttling Method Capillary
Set Temperature Range oC 16~30
Cooling Operation Ambient Temperature
Range oC 16~43
Heating Operation Ambient Temperature
Range oC /
Condenser Form Aluminum Fin-copper Tube
Condenser Pipe Diameter mm Φ7
Condenser Rows-n Gap mm 2-1.4
Condenser Coil Length (LXDXW) mm 602.2X25.4X342.9
Fan Motor Speed (H/M/L) rpm 910/850/780
Fan Motor Power Output W 60
Fan Motor RLA A 0.5
Fan Motor Capacitor μF 4
Outdoor Unit Air Flow Volume CFM 800
Fan Type Axial-ow
Fan Diameter mm Φ353
Sound Pressure Level (H/M/L) dB (A) 56/54/52
Sound Power Level (H/M/L) dB (A) 65/63/61
Defrosting Method /
Service Manual
Technical Information
4
3.Outline Dimension Diagram
Unit:mm
Fence or
Likewise
Less than
220 mm
Over
150mm Over
150mm
Over
500mm
Note: There must be no barriers within 1m in front of it.
708
560
375
Service Manual
Technical Information 5
4.Refrigerant System Diagram
HOT DISCHARGED AI
R
OUTDOOR COILS
AXIAL FAN
COMPRESSOR
REFRIGERANT FLOW DIRECTION
CAPILLARY
CENTRIFUGAL
OR CROSS FAN
INDOOR COILS
COOLED AIR
Service Manual
Technical Information
6
5.Electrical Part
5.1 Wiring Diagram
Electric Diagram
Instruction
Symbol Symbol Color Symbol Symbol Color Symbol Name
WH White GN Green CAP. Capacitor
YE Yellow BN Brown COMP Compressor
RD Red BU Blue Grounding wire
YEGN Yellow-Green BK Black / /
;
)$1
3(
:
9
8
1
$&/
$3
%1
0
%8
<(*1
%8 <( 5'
&203
&203
)$102725
&1
:
9
8
&/$3%2$5'
<(*1
;7
29(5/2$'
5'
29&&203
6$7
5'
:$51,1*
. .
.
&1
57 57 57
:+ %.
7(036(1625
28778%(
2875220
7(036(1625
(;+$867
7(036(1625

&$3
/1
+
0
0$,1%2$5'
;
;
%.
<(
%8 :+
3527(&725
3(
7(50,1$/
%2$5'
έ
67(33,1*
02725
1
/
:+%8
*1<(*1
32:(5
%.%1
%1
5'
5220
78%( 6(1625
78%(7(03
6(1625
507(03
&1
$3
',63/$<
%2$5'
(/(&75,&%2;
3( 3(
<(*1 3(
3(
0
&210
Please don't touch any terminal
when the voltage of terminal
P(DC+) and N(DC-) at AP1 is
higher than 30V to prevent the risk
of electric shock !
These wiring diagrams are subject to change without notice; please refer to the one supplied with the unit.
Service Manual
Technical Information 7
5.2 PCB Printed Diagram
5.2.1 Silk screen on main board
Top view
Bottom view
1
2
34
5
67
1Interfaces for neutral wire, live wire and earthing
wire 5 U\V\W interface of compressor
2 Communication interface 6 Interface of AC fan
3 Interface of temperature sensor 7 Interface of 4-way valve (reserved)
4 Interface of overload protection of compressor
Service Manual
Technical Information
8
5.2.2 Silk screen on display board
Top view
Bottom view
1
23
4
5
67
8
9
1 Terminal of swing motor
2Terminals connected
with main board
3Interface of temperature
sensor
4 Buttons
5 LED indicator
6 Infrared receiver
7 Buzzer
8 dual-8 nixie tube display
9 Buttons
Service Manual
Technical Information 9
6.Function and Control
6.1 Introduction of Control Panel
After putting through the power, air conditioner will give out a sound and indicators on control panel will be on. After that, you operate the
air conditioner through remote controller or control panel.
Note:If wireless remote controller is lost, open the surface panel and operate manually.
1. POWER BUTTON
Operation starts when pressing this button, and stops when pressing this button again.
2.SWING BUTTON
Activate the automatic air swing function.
3.FAN SPEED BUTTON
Select the fan speed HIGH, MID, LOW and AUTO in sequence.
4.TEMP/TIMER BUTTON
Press the▲keypad to increase the set (operating) temperature of the unit.and Press the▼keypad to decrease the set (operating)
temperature of the unit.The temperature seting range is from 16~30℃.
Press the▲keypad also to increase the selected time in 0.5h(1h) hour increments,and Press the▼keypad to decrease the selected
time in 0.5h(1h) hour decrements,The time seting range is from 0~24 hours.
Note:When operating the unit with control panel:when the timer range is 0~10h, the timer scale is 0.5h; when the timer range is 10~24h,
the timer scale is 1h. When operating the unit with remote controller, the timer scale is 0.5h.
Under on status, timer function can let the complete unit operate at COOL mode for a while and then switch to fan mode. The fan
mode is AUTO fan speed.
5.SIGNAL RECEIVER
6.MODE BUTTON
Select the operation mode, AUTO, HEAT, COOL, FAN,DRY (for reverse cycle model) or COOL,FAN, DRY(for cooling only model).
7.FILTER BUTTON
This feature is a reminder to clean the Air Filter (See Care and Cleaning) for more efcient operation and cooling. The LED (light) will
illuminate after 250 hours of operation. To reset after cleaning the lter, press the"Check Filter" button and the light will go off.
Service Manual
Technical Information
10
6.2 Introduction of Remote Controller
AUTO
COOL
DRY
FAN
HEAT
T-ON T-OFF
SWING
SLEEP
LOCK
SPEED
+
_
ON/OFF
FANSWING
SLEEP TIMER
MODE
ON/OFF button
MODE button
+/- botton
FAN button
SWING button
SLEEP button
TIMER button
Icon Display on Remote
Controller
Operation introduction of remote controll
er
For auto operation
Timer on Timer off
Sending signal
For air swing
For sleeping
For locking
For setting fan speed
Set temperature Set time
For cooling
For drying
For fan only
For heating
AUTO
COOL
DRY
FAN
HEAT
T-ON T-OFF
SWING
SLEEP
LOCK
SPEED
Buttons on Remote Controller
Note:
When power is connected(stand by condition), you can operate the air conditioner through the remote controller.
When unit is on, each time you press the button on remote controller, the sending signal icon on the display of remote controller
will blink once. If the air conditioner gives out a beep sound, it means the signal has been sent.
When unit is off, set temperature will be displayed on the remote controller(If the light of indoor unit display is turned on, the
corresponding icon will be displayed); When unit is on, it will display the icon of the on-going function.
1. ON/OFF Butto
n
Press this button to turn unit on/o
ff.
2. MODE Button
Pressing this button once can select your required mode circularly as below(the corresponding icon
will be lit up after the mode is
selected):
AUTO COOLDRY FANHEAT(For cooling and heating model)
Service Manual
Technical Information 11
When selecting auto mode, air conditioner will operate automatically according to ex-factory setting. Set temperature can't be
adjusted and won't be displayed either
. Press FAN button to adjust fan speed.
When selecting cool mode, air conditioner will operate under cool mode. Then press + or -- button to adjust set temperature. Press
FA
N button to adjust fan speed.
When selecting dry mode, air conditioner will operate at low fan speed under dry mode. In dry mode, fan speed can't be adjusted.
When selecting fan mode, air conditioner will operate in fan mode only. Then press FAN button to adjust fan speed.
When selecting heat mode, air conditioner will operate under heat mode. Then press + or -- button to adjust set temperature. Press
FA
N button to adjust fan speed. (This function is not available in this air conditioner.)
3. +/- butto
n
Pressing + or - button once will increase or decrease set temperature by 1 °F(°C). Hold + or -- button for 2s, set temperature on
remote controller will change quickl
y. Release the button after your required set temperature is reached.
When setting Timer On, Timer Off or Clock, press + or -- button to adjust the time (See TIMER Button for setting details).
4. F
AN Button
Pressing this button can select fan speed circularly as:
AUTO, SPEED 1( ), SPEED 2( ), SPEED 3( ), SPEED 4( ) (unavailable
in this air conditioner
. Speed 4 is the same with speed 3).
Note
:
Under Auto mode, air conditioner will select proper fan speed automatically according to ex-factory setting.
Fan speed can't be adjusted under Dry mode.
5. SWING Butto
n
Press this button to turn on left & right air swing.
6. SLEEP
Button
Under Cool, Heat, Dry mode, press this button to turn on Sleep function. Press this button to cancel Sleep function. Under Fan
and
A
uto mode, this function is unavailable.
Simple operationfi
rst
1.After putting through power
” button on remote controller to turn on the air conditioner.
2.Press “
” button to select your required operation mode: AUTO, COOL, DRY, FAN.
3.Press “+” or “-” button to set your required temperature.(temperature can’t adjusted under
AUTO mode)
4.Press “
” button to select your required fan speed: auto, fi rst notch, second notch, third notch, fourth notch (fourthnotch is same
as third notch for this air conditioner
.)
SPEED 2 (equals to medium fan speed)SPEED 1 (equals to low fan speed)
SPEED 3 (equals to high fan speed)
AUTO
7. TIMER Button
When unit is on, press this button to set Timer Off. T-OFF and H icon will be blinking. Within 5s, press + or - button to adjust the
When unit is off, press this button to set Timer On. T-ON and H icon will be blinking. Within 5s, press + or - button to adjust the
time for Timer On. Pressing + or - button once will increase or decrease the time by 0.5h. Hold + or - button for 2s, time will change
quickly. Release the button after your required set time is reached. Then press TIMER button to confirm it. T-ON and H icon will stop
blinking.
Note:
Range of time setting is: 0.5~24h
The interval between two motions can't exceed 5s, otherwise the remote controller will exit setting status.
time for Timer Off. Pressing + or - button once will increase or decrease the time by 0.5h. Hold + or - button for 2s, time will change
quickly. Release the button after your required set time is reached. Then press TIMER button to confirm it. T-OFF and H icon will
stop blinking.
SPEED 4 (equals to high fan speed)
Service Manual
Technical Information
12
1. Press the back side of remote controller on the spot marked with
, and then
push out the cover of battery box along the arrow direction.
2. Replace two No.7 (AAA
1.5V) dry batteries and make sure the positions of + and --
polar are correct
.
3. Reinstall the cover of battery box.
Note:
During operation, point the signal sender of the remote controller at the receiving
window of the indoor unit;
The distance between signal sender and receiving window should be within 8m.
There should be no obstacle between them.
Signal may be interfered easily in the room where there is fl uorescent lamp
or wireless telephone; Remote controller should be close to indoor unit during
operation.
Replace new batteries of the same model when replacement is required.
If you don't use remote controller for a long time, please take out the batteries.
If the display on remote controller is fuzzy or if there's no display, please replace
batteries.
battery
cover of battery box
remove
reinstall
Replacement of Batteries in Remote Controller
Service Manual
Installation and Maintenance 13
6.3 Function Introduction
Basic functions:
一、Cooling mode
1. Working condition and process for cooling
a.When Tinner amb. ≥Tpreset, the unit operates under cooling mode. Meanwhile, the fan and the compressor operate, and the fan oper-
ates at set fan speed;
b. When Tinner amb. ≤Tpreset-2, the compressor stops operation, and the fan operates at set fan speed;
c. When Tpreset-2℃< Tinner amb. Tpreset, the unit keeps previous operation status.
d. When turning off the unit, the compressor stops operation. The fan will stop operation after operating at low fan speed for another 30s.
2. Under cooling mode, the temperature setting range is 16℃~ 30℃ . When compressor stops operation due to malfunction, the fan and
the swing fan operate at original status.
二、Drying mode
1Working condition and process for drying:
a. When Tinner amb. Tpreset, the unit operates at drying mode. Meanwhile, the fan and the compressor operate, and the fan is de-
faulted to operate at low fan speed;
b. When Tpreset-2≤Tinner amb.≤Tpreset, the unit keeps the original operation status;
c. When Tinner amb. Tpreset-2, compressor stops operation, and the fan is defaulted to operate at low fan speed.
d. When turning off the unit, the compressor stops operation. The fan will stop operation after operating at low fan speed for another 30s.
2 In this mode, the temperature setting range is 16℃~ 30.
三、Auto mode
Working condition and process for auto operation
a. When Tinner amb.≥26, the unit operates at cooling mode and Tpreset=25;
b. When T inner amb.≤ 22, the unit operate at fan mode and Tpreset=20℃ ;
c When 22℃< Tinner amb. 26, the unit keeps the original operation status;
四、Fan mode
Under the fan mode, compressor stops operation and the fan operates at set fan speed. Temperature can’t be set by buttons on the con-
trol panel, while it can be set by remote controller.
Buttons’ function
1. ON/OFF:
It used to turn on or turn off the unit.
2. Mode:
It used to switch among cooling mode, drying mode and fan mode.
3. Fan speed:
It used to set high, medium, low or auto fan speed. The corresponding LED indicator is on (under drying mode, this button can’t be ad-
justed. The fan speed is the low speed).
4.+/- button:
4.1 The temperature setting range is 0~24 hours. The timer can be set in 0.5 hour increments between 1 and 10 hours; or in 1 hour incre-
ments for 10 hours above.
4.2 Under temperature setting range, each push on +/- button will increase or decrease 1.
5. Swing:
Press this button to turn on swing function; press this button again to cancel swing function.
6. Timer function
6.1 Timer ON: Timer ON can be set under OFF status, and then Timer ON setting range is 0.5 24 hours. When the set time is
reached, the system will operate at the preset mode.
6.2 Timer OFF: Timer OFF can be set under ON status, and then Timer OFF setting range is 0.5 24 hours. When the set time is
reached, the system will stop operation.
7. The dual-8 nixie tube is defaulted to display . The displays can switch among and . Press “+”and“-”buttons simultaneously for
3s to switch them.
8. FILTER
When the fan has operated for 250hour in all, the lter indicator will be on to remind user to clean the lter. When the lter indicator is on,
press lter button to clear the accumulated operation time and the lter indicator will be off.
9. Sleeping mode
9.1 When the initial temperature is set at 16 23, after turning on the sleeping function, the temperature will increase by 1 every
two hours. When the temperature is increased by 3, the temperature will not change any more. When the unit has operated for 7
hours, the temperature will decreased by 1. After that, the unit will operate at this time all the time.
9.2 When the initial temperature is set at 24 27, after turning on the sleeping function, the temperature will increase by 1 every
two hours. When the temperature is increased by 2, the temperature will not change any more. When the unit has operated for 7
hours, the temperature will decreased by 1. After that, the unit will operate at this time all the time.
Service Manual
Installation and Maintenance
14
9.3 When the initial temperature is set at 28 29, after turning on the sleeping function, the temperature will increase by 1 every two
hours. When the temperature is increased by 1, the temperature will not change any more. When the unit has operated for 7 hours, the
temperature will decreased by 1. After that, the unit will operate at this time all the time.
9.4 When the initial temperature is set at 30, after turning on the sleeping function, the unit will operate at this temperature. When the unit
has operated for 7 hours, the temperature will decreased by 1. After that, the unit will operate at this time all the time.
10. Fan
The fan can operate at high, medium, low or auto fan speed. The auto fan speed will automatically adjust the current operation status of the
fan.
a.Auto fan speed under cooling mode:
Tinner amb.≥Tpreset+2 high fan speed
Tpreset T inner amb. Tpreset+2 medium fan speed
T inner amb.≤Tpreset low fan speed
b.The fan speed under fan mode is same as that for cooling mode.
c.The auto fan under auto mode is controlled by the auto fan under its actual mode;
d.Only low fan speed under drying mode. When adjusting the fan speed button, only the low fan indicator is ON and the buzzer will give out
a sound.
11. Power-off memory
The system will memorize the setting operation status (mode, set temperature, fan speed, timer) before power failure. Once power recov-
ered, the unit will automatically operate at the set status before power failure.
Service Manual
Installation and Maintenance 15
7.Notes for Installation and Maintenance
Safety Precautions:
Important!
Please read the safety precautions carefully before
installation and maintenance.
The following contents are very important for installation
and maintenance.
Please follow the instructions below.
●The installation or maintenance must accord with the
instructions.
●Comply with all national electrical codes and local
electrical codes.
●Pay attention to the warnings and cautions in this
manual.
●All electric work must be performed by a licensed
technician according to local regulations and the
instructions given in this manual.
●Be caution during installation and maintenance. Prohibit
incorrect operation to prevent electric shock, casualty and
other accidents.
1. Cut off the power supply of air conditioner before
checking and maintenance.
2. The air condition must apply specialized circuit and
prohibit share the same circuit with other appliances.
3. The air conditioner should be installed in suitable
location and ensure the power plug is touchable.
4. Make sure each wiring terminal is connected rmly
during installation and maintenance.
5. Have the unit adequately grounded. The grounding
wire can’t be used for other purposes.
6. Must apply protective accessories such as cable-
cross loop and wire clip.
7. The live wireneutral wire and grounding wire of pow-
er supply must be corresponding to the live wire, neutral
wire and grounding wire of the air conditioner.
8. If power cord is broken, please get the specialized
power cord from the manufacture or distributor.
9. If the power cord is not long enough, please get the
specialized power cord from the manufacture or distribu-
tor. Prohibit prolong the wire by yourself.
10. Make sure all wires and pipes are connected prop-
erly.
Warnings
Electrical Safety Precautions:
1. Avoid contact between refrigerant and re as it generates
poisonous gas; Prohibit prolong the connection pipe by
welding.
2. Apply specied refrigerant only. Never have it mixed with
any other refrigerant. Never have air remain in the refrigerant
line as it may lead to rupture or other hazards.
3. Make sure no refrigerant gas is leaking out when
installation is completed.
4. If there is refrigerant leakage, please take sufcient
measure to minimize the density of refrigerant.
5. Never touch the refrigerant piping or compressor without
wearing glove to avoid scald or frostbite.
Refrigerant Safety Precautions:
Improper installation may lead to re
hazard, explosion, electric shock or injury.
1. Select the installation location according to the require-
ment of this manual.(See the requirements in installation
part)
2. Handle unit transportation with care; the unit should not
be carried by only one person if it is more than 20kg.
3. When installing the unit, a suf-cient xing bolt must be
installed; make sure the installation support is rm.
4. Ware safety belt if the height of working is above 2m.
5. Use equipped components or appointed components dur-
ing installation.6. Make sure no foreign objects are left in the
unit after n-ishing installation.
Installation Safety Precautions:
Part :Installation and Maintenance
11. Check if there is electric leakage on the unit body. If
yes, please eliminate the electric leakage.
12. Replace the fuse with a new one of the same speci-
cation if it is burnt down; don’t replace it with a cooper
wire or conducting wire.
13. If the unit is to be installed in a humid place, the cir-
cuit breaker must be installed.
Service Manual
Installation and Maintenance
16
Safety Precautions for Refrigerant
●To realize the function of the air conditioner unit, a special refrigerant circulates in the system. The used refrigerant is the
uoride R32,which is specially cleaned. The refrigerant is ammable and inodorous. Furthermore, it can leads to explosion
under certain conditions. But the ammability of the refrigerant is very low. It can be ignited only by re.
●Compared to common refrigerants, R32 is a nonpolluting refrigerant with no harm to the ozonosphere. The inuence upon
the greenhouse effect is also lower. R32 has got very good thermodynamic features which lead to a really high energy
efciency. The units therefore need a less lling.
WARNING:
●Do not use means to accelerate the defrosting process or to clean, other than those recommended by the manufacture.
Should repair be necessary,contact your nearest authorized Service Centre. Any repairs carried out by unqualied
personnel may be dangerous. The appliance shall be stored in a room without continuously operating ignition sources. (for
example:open ames , an operating gas appliance or an operating electric heater.)
●Do not pierce or burn.
●Appliance shall be installed, operated and stored in a room with a oor area larger than 4m (or 6m ).
●Appliance lled with ammable gas R32. For repairs, strictly follow manufacturers instructions only.Be aware that
refrigrants not contain odour.
●Read specialist’s manual.
Safety Operation of Flammable Refrigerant
Qualication requirement for installation and maintenance man
●All the work men who are engaging in the refrigeration system should bear the valid certication awarded by the
authoritative organization and the qualication for dealing with the refrigeration system recognized by this industry. If it needs
other technician to maintain and repair the appliance, they should be supervised by the person who bears the qualication for
using the ammable refrigerant.
●It can only be repaired by the method suggested by the equipment’s manufacturer.
Installation notes
●The air conditioner is not allowed to use in a room that has running re (such as re source,working coal gas ware,
operating heater).
●It is not allowed to drill hole or burn the connection pipe.
●The air conditioner must be installed in a room that is larger than the minimum room area.
The minimum room area is shown on the nameplate or following table a.
●Leak test is a must after installation. table a - Minimum room area(m2)
Maintenance notes
●Check whether the maintenance area or the room area meet the requirement of the nameplate.
— It’s only allowed to be operated in the rooms that meet the requirement of the nameplate.
●Check whether the maintenance area is well-ventilated.
— The continuous ventilation status should be kept during the operation process.
●Check whether there is re source or potential re source in the maintenance area.
— The naked ame is prohibited in the maintenance area; and the “no smoking” warning board should be hanged.
●Check whether the appliance mark is in good condition.
— Replace the vague or damaged warning mark.
Service Manual
Installation and Maintenance 17
Welding
●If you should cut or weld the refrigerant system pipes in the process of maintaining, please follow the steps as below:
a. Shut down the unit and cut power supply
b. Eliminate the refrigerant
c. Vacuuming
d. Clean it with N2 gas
e. Cutting or welding
f. Carry back to the service spot for welding
●Make sure that there isn’t any naked ame near the outlet of the vacuum pump and it’s well-ventilated.
●The refrigerant should be recycled into the specialized storage tank.
Filling the refrigerant
●Use the refrigerant lling appliances specialized for R32. Make sure that different kinds of refrigerant won’t contaminate with
each other.
●The refrigerant tank should be kept upright at the time of lling refrigerant.
●Stick the label on the system after lling is nished (or haven’t nished).
●Don’t overlling.
●After lling is nished, please do the leakage detection before test running; another time of leak detection should be done
when it’s removed.
Safety instructions for transportation and storage
●Please use the ammable gas detector to check before unload and open the container.
●No re source and smoking.
●According to the local rules and laws.
Service Manual
Installation and Maintenance
18
1.Basic requirement
Installing the unit in the following places may cause malfunction. If it is unavoidable, please consult the local dealer:
(1) The place with strong heat sources, vapors, ammable or explosive gas, or volatile objects spread in the air.
(2) The place with high-frequency devices (such as welding machine, medical equipment).
(3) The place near coast area.
(4) The place with oil or fumes in the air.
(5) The place with sulfureted gas.
(6) Other places with special circumstances.
2.Requirement of complete unit
(1) There should be no obstruction near air inlet and air outlet.
(2) Select a location where the condensation water can be dispersed easily and wont affect other people.
(3) The location should be able to withstand the weight of indoor unit and wont increase noise and vibration.
(4) Select a location where the noise and outow air emitted by the outdoor unit will not affect neighborhood.
(5) The location should be able to withstand the weight of unit.
(6) Select a location which is out of reach for children and far away from animals or plants.If it is unavoidable, please add fence for safety
purpose.
(7) Please try your best to keep far away from uorescent lamp.
1. Safety precaution
(1) Must follow the electric safety regulations when installing the unit.
(2) According to the local safety regulations, use qualied power supply circuit and air switch.
(3) Make sure the power supply matches with the requirement of air conditioner. Unstable power supply or incorrect wiring may result in
electric shock,re hazard or malfunction.
(4) For appliances with type Y attachment,the instructions shall contain the substance of the following.If the supply cord is damaged,it
must be replaced by the manufacturer,its service agent or similarly qualied persons in order to avoid a hazard.
(5) Properly connect the live wire, neutral wire and grounding wire of power socket.
(6) Be sure to cut off the power supply before proceeding any work related to electricity and safety.
(7) Do not put through the power before nishing installation.
2. Grounding requirement
(1) The air conditioner is rst class electric appliance. It must be properly grounding with specialized grounding device by a professional.
Please make sure it is always grounded effectively, otherwise it may cause electric shock.
(2) The yellow-green wire or green wire in air conditioner is grounding wire, which cant be used for other purposes.
(3) The grounding resistance should comply with national electric safety regulations.
8.Installation
8.1 Selection of Installation Location
8.2 Electric Connection Requirement
  • Page 1 1
  • Page 2 2
  • Page 3 3
  • Page 4 4
  • Page 5 5
  • Page 6 6
  • Page 7 7
  • Page 8 8
  • Page 9 9
  • Page 10 10
  • Page 11 11
  • Page 12 12
  • Page 13 13
  • Page 14 14
  • Page 15 15
  • Page 16 16
  • Page 17 17
  • Page 18 18
  • Page 19 19
  • Page 20 20
  • Page 21 21
  • Page 22 22
  • Page 23 23
  • Page 24 24
  • Page 25 25
  • Page 26 26
  • Page 27 27
  • Page 28 28
  • Page 29 29
  • Page 30 30
  • Page 31 31
  • Page 32 32
  • Page 33 33
  • Page 34 34
  • Page 35 35
  • Page 36 36
  • Page 37 37
  • Page 38 38
  • Page 39 39
  • Page 40 40
  • Page 41 41
  • Page 42 42
  • Page 43 43
  • Page 44 44
  • Page 45 45
  • Page 46 46
  • Page 47 47
  • Page 48 48

GREE GJC09AF-E6RNB3A User manual

Category
Toy parts
Type
User manual

Ask a question and I''ll find the answer in the document

Finding information in a document is now easier with AI