Page is loading ...

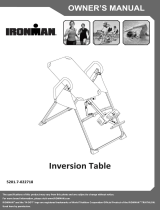
OWNER’S MANUAL
Traction Table
4510.3-110719


1
TABLE OF CONTENTS
SERVICE-------------------------------------------------------------------
2
IMPORTANT SAFETY GUIDELINES--------------------------------
3
LABEL PLACEMENT----------------------------------------------------
5
OVERVIEW DRAWING-------------------------------------------------
6
PARTS LIST---------------------------------------------------------------
7
ASSEMBLY----------------------------------------------------------------
8
HOW TO USE-------------------------------------------------------------
12
STORAGE-----------------------------------------------------------------
15
TRANSPORTING--------------------------------------------------------
LUBRICATION-----------------------------------------------------------
16
17
WARRANTY---------------------------------------------------------------
18
PARTS REQUEST FORM---------------------------------------------
19

2
SERVICE
IMPORTANT: FOR NORTH AMERICA ONLY
For damaged or defective product, questions, replacement parts or any other service
support, please contact our customer service department by the below methods:
For The Best Service, please Email:
service@paradigmhw.com
Response Time: 1-2 Business Days
Emailing us with the information above will be the best method to receive a response
during peak business hours
Website:
www.paradigmhw.com
Toll-Free:
1-844-641-7921
(8:00 AM - 5:00 PM Pacific Standard Time, Monday thru Friday)
Response time may vary via calling
Please have the following information ready when requesting for service:
Your name
Phone number
Model number
Serial number
Part number
Proof of Purchase
For damaged or defective product please contact our customer service before returning
to the store.
Paradigm Health & Wellness, Inc.
1189 Jellick Ave.
City of Industry, CA 91748, USA

3
IMPORTANT SAFETY GUIDELINES
Read all instructions before using the Traction Table. When using an Traction table, basic
precautions should always be followed, including the following:
WARNING - To reduce the risk of injury to persons:
1. Make sure your equipment is correctly assembled before you use it.
2. Be sure all screws, nuts, and bolts are tightened prior to use.
3. Only one person should use the equipment at a time.
4. Never operate this equipment if it is not working properly, has been dropped, or damaged. If a problem
is encountered, contact Customer Service before using the equipment again.
5. Always use this equipment on a clear and level surface.
6. For Household Use Only.
7. Do not use outdoors or near water.
8. Use the traction table only for its intended use as described in this manual. Do not use attachments
not recommended by the manufacturer.
9. Do not wear loose clothing when using the equipment.
10. Keep all hands and feet away from any moving parts.
11. Never drop or insert any object into any opening.
12. Always wear shoes when using the traction table.
13. Close supervision is necessary when the traction table is used near children, or by or near invalids or
disabled persons.
14. Listen to your body. It is recommended that you rotate up and down slowly. Dizziness might occur if
you come up too fast.
15. If at any time you feel faint, light-headed, or dizziness while operating the equipment, stop exercising
immediately. You should also stop exercising if you are experiencing pain or any discomfort.
16. This appliance is not intended for use by persons with reduced physical, sensory or mental capabilities, or lack
of experience and knowledge, unless they have been given supervision or instruction concerning use of the
appliance by a person responsible for their safety. Keep children under the age of 13 away from this machine.
17. Wait 2 hours after eating before using the traction table. If you start feeling nauseous, return to the
upright position slowly.
18. For any problems, contact Customer Service. Servicing should be performed by an authorized service
representative. Our contact number is on the service page.
19. WARNING: - Risk of Personal Injury - Consult with your personal physician to see if
traction equipment is appropriate for you. This is especially important for people with pre-existing
health problems. Do not use this equipment without your physician's approval.
20. WARNING: - Risk of Personal Injury – Do not allow children to use this machine.
21. WARNING:- Risk of Personal Injury - Keep children under the age of 13 away from the
machine while in use.
22. WARNING:- Risk of Personal Injury – Keep body parts, hair, loose clothing, and jewelry
clear of all moving parts.

4
IMPORTANT SAFETY GUIDELINES
23. WARNING:- Risk of Personal Injury - Tilt-back slowly when inverting. Failure to comply
could result in serious bodily injury.
24. WARNING:- Risk of Personal Injury - Do not attempt to service the unit yourself.
Discontinue use and contact customer service.
25. WARNING: - To Reduce The Risk Of Personal Injury - Read And Understand All The
Instructions Before Using The Traction Table.
Do not use this equipment if you have any of the following conditions or ailments:
Pregnancy
Extreme obesity
Middle ear infection
Hiatus hernia or Ventral hernia
Glaucoma, retinal detachment or conjunctivitis
Use of anticoagulants including Aspirin in high doses.
Spinal injury, Cerebral Sclerosis, or acutely swollen joints
Heart or circulatory disorders for which you are being treated
High blood pressure, Hypertension, Recent stroke or Transient Ischemic attack
Bone weaknesses including Osteoporosis, Unhealed fractures, Modular pins, or surgically
implanted orthopedic supports.
Do not exceed the maximum rated weight (load) and maximum
rated user height:
The Maximum Weight Capacity for this product is 300lbs / 136kg.
The Maximum Height Capacity for this product is 6 feet 6 inches / 198cm.
Retain this owner’s manual and keep the original purchase receipt
for future reference.
SAVE THESE GUIDELINES

5
LABEL PLACEMENTS
This drawing indicates the locations of the warning
labels found on your product. If a label is mi
ssing,
illegible or is removed, contact Customer Service to
request a complimentary replacement label.

6
OVERVIEW DRAWING

7
PARTS LIST
No.
No.
Description
Qty
No.
Description
Qty
1
Main Frame
1
26
End Cap
4
2
Adjustable Boom
1
27
End Cap
1
3
Heel Holder Boom
1
28
Foot Foam Rollers
4
4
Adjustable Heel Holder
1
29
End Cap
2
5
Swing Arm
2
30
Square End Cap
1
6
Adjustable Arm
2
31
Bushing
3
7
Transport Handle
1
32
Swing Arm Bushing
4
8
Fixed Bracket
1
33
Arm Pit Foam Rollers
2
9
Drive Screw
1
34
End Cap
2
10
Backrest
1
35
Flat Washer Φ20*Φ8.5*2.0
2
11
Lumbar Pad
1
36
Snap Buttons
3
12
Heel Holder Tube
1
37
Round Head Hex Bolt M4*9
3
13
Height Adjustment Pin
1
38
Round Head Hex Bolt M4*12
1
14
Metal Plate
4
39
Flat Washer Φ16*Φ8.5*1.5
13
15
Threaded Pin Joint
2
40
Nylon Nut M8
2
16
Left-Hand Axle Cover
1
41
Hex Bolt M8*20
2
17
Crank Wheel
1
42
Hex Bolt M8*10
4
18
Axle
1
43
Flat Washer Φ12*Φ6.5*1.5
7
19
Pop Pin
1
44
Nylon Nut M6
1
20
Bushing
3
45
Hex Screw M6*45
1
21
Foot Pad
4
46
Phillips Screw M6*15
2
22
Regulator Outer Bracket
2
47
Hex Screw M6*40
4
23
Regulator Inner Bracket
2
48
Hex Bolt M8*35
1
24
Alignment Wheel
1
49
Self-Tapping
Phillips Screw ST3.8*16
4
25
Wheel
2
50
Retaining Ring
6
Grease
1PC
Tool:
3mm Allen Wrench 1PC
6mm Allen Wrench 1PC
Hardware:

8
ASSEMBLY
Step 1
Hardware Removal
1A. Remove one Round Head Hex Bolt (37) from the Axle (18) by using 3mm Allen Wrench
provided. .
Installing the Crank Wheel
1B. Insert Crank Wheel (17) onto the Drive Screw (9) on the Main Frame (1) and tighten with
one Round Head Hex Bolt (37) by using 3mm Allen Wrench provided. NOTE* make sure the
Round Head Hex Bolt (37) fits into the flat spot on the Drive Screw (9). NOTE* tilt the
handle on the Crank Wheel (17) to use handle. To put it away pull the handle outward and
tilt it into the Crank Wheel (17).
Tool:
3mm Allen Wrench 1PC

9
ASSEMBLY
Step 2
Hardware Removal
2A. Remove four Hex Bolts (42) and four Flat Washers (39) from the Adjustable Boom (2)
by using 6mm Allen Wrench provided.
2B. Remove two Hex Bolts (37) from the Heel Holder Tube (12) by using 3mm Allen
Wrench provided.
Installing the Heel Holder & Foot Foam Rollers
2C. Insert the Heel Holder Boom (3) onto the Adjustable Boom (2), and tighten with four Hex
Bolts (42) and four Flat Washers (39) by using 6mm Allen Wrench provided.
2D. Insert the Heel Holder Tube (12) onto the hole on the rear of the Heel Holder Boom (3).
Align the hole and tighten with two Hex Bolts (37) by using 3mm Allen Wrench provided. Insert
two Foot Foam Rollers (28) and two End Caps (26) onto the Heel Holder Tube (12).
Tool:
3mm Allen Wrench 1PC
6mm Allen Wrench 1PC

10
ASSEMBLY
Step 3
Hardware Removal
3A. Remove one Hex Bolts (48) and one Flat Washer (39) from the Transportation Handle
(7).
Installing the Adjustable Heel Holder
3B. Depress the Snap Button (36), pull up the Pop Pin (19) and insert the Adjustable
Heel Holder (4) onto Heel Holder Boom (3). Attach the Transportation Handle (7) onto
the Adjustable Heel Holder (4) and tighten with one Hex Bolts (48) and one Flat
Washers (39) by using 6mm Allen Wrench provided.
Installing the Foam Roller
3C. Insert two Foam Rollers (28) onto the Adjustable Heel Holder (4) and attached two
End Caps (26) on to the both end of the Adjustable Heel Holder (4).
6mm Allen Wrench 1PC
Tool:

11
ASSEMBLY
5
Step 4
Installing the Adjustable Arm
4A. Install the Adjustable Arm (6) on to the Main Frame (1). Depress Snap Button (36)
and insert the Adjustable Arm (6) into the Swing Arm (5) Adjust the Adjustable Arm (6) to
the suitable position.
4B. Attach the Lumbar pad (11) on the Velcro strip on the Backrest (10). You can adjust the
position of vertically or horizontally along the Velcro strip.

12
HOW TO USE
Step 1
Adjusting table to load in
1A. Pull out the Height Adjustment Pin (13) and simultaneously push the Heel Holder
Boom (3) into the Main Frame (1) all the way in.
Step 2
Locking feet in Heel Holders
2A. Sit on the Main Frame (1), facing the Adjustable Heel Holder (4). Extend the Heel
Holder Boom (3) by hand to match the length of your leg.
2B. Pullout the Pop Pin (19), lift up the Adjustable Heel Holder (4) and slip your ankles
in between the Foot Foam Rollers (28). Pull the Pop Pin (19) and press down on the
Adjustable Heel Holder (4) until it is snug, release the Pop Pin (19) and make sure it is
Locked.

13
HOW TO USE
Step 3
Checking Arm Pit Foam Roller Adjustment
3A. With your feet locked in to place, lay on the Backrest (10). Lift your arms and wrap
them around the Arm Pit Foam Rollers (33). If they are to high or low get off the table
and adjust them at this time.
3B. Depress the Snap Button (36) on the Adjustable Arm (6) and insert it inward or
pull it outward on the Swing Arm (5) to your desired position using the 4 holes available.
Once adjusted check them again to make sure they are properly placed for your arm.

14
HOW TO USE
Step 4
Stretching your Back
4A. Keep your right arm wrapped around the Arm Pit Foam Roller (33), reach for the
Crank Wheel (17) and pull the handle out ward. Rotate the Crank Wheel (17)
CLOCK-WISE or towards your feet to extend the Heel Holder Boom (3) and stretching
your back. Continue to rotate the Crank Wheel (17) slowly until you reach a comfortable
stretch. DO NOT excessively stretch your back. Over time you can gradually increase the
amount of stretching.
4B. To dismount the table turn the Crank Wheel (17) COUNTER CLOCK-WISE or
towards your head to return the Heel Holder Boom (3) OR you can lift your arms out of
the Arm Pit Foam Rollers (33) then lay there for a few minutes.
4C. After the 5 minute period you can undo your feet and rise. You may have to rollover
off the side of the table to stand up.

15
HOW TO USE
To put Traction Table into storage mode:
1. Pull Pop Pin (13) out and hold while simultaneously pushing the Heel Holder Boom
(3) into the Main Frame (1).
2. Depress Snap Button (36) on the Adjustable Heel Holder (4) and pull it out of the
Heel Holder Boom (3).
3.Take the Adjustable Heel Holder (4) and insert it into the Adjustable Boom (2)
underneath the top side of the Backrest (10) with the Transport Handle (7) pointing
upward. Make sure the Snap button (36) locks into place.
4. Pull the handle out from the Crank Wheel (17) and fold it
away.
5. You can now store the table underneath a high bed or propped in a closet
STORAGE
4
36
2
4
3
6
1
1
3
19

16
Lift up the Main Frame (1) until the Wheels (25) on the Heel Holder Boom (3) make contact
with the ground, then move the bench to your desired location.
TRANSPORTING

17
Applying grease to the Drive Screw
1. Begin by turning the Crank Wheel (17) Counter Clock-wise until it stops.
Take grease from container with finger, work the grease into the threads of the
Drive Screw (9).
2. Repeat this process for both left and right sides of the Threaded Pin Joints
(15).
3. Rotate the Crank Wheel (17) Clock-Wise until it stops. Take grease from
container with finger, work the grease into the threads of the Drive Screw (9). This
will ensure proper lubrication of the entire Drive Screw (9). You can proceed with
normal operation of the table.
Grease
1PC
LUBRICATION

18
WARRANTY
MANUFACTURER’S LIMITED WARRANTY
Paradigm Health & Wellness warrants to the original purchaser that this product is free
from defects in material and workmanship when used for the purpose intended, under the
conditions that it has been installed and operated in accordance with Paradigm’s Owner’s
Manual. Paradigm’s obligation under this warranty applies to the following:
COMPONENT LENGTH OF WARRANTY
Structural Frame 1 year For Home Use Only
All Other Components 90 days For Home Use Only
Exclusions from Warranty Coverage:
Paradigm does not warrant against and is not responsible for, and no implied warranty shall be
deemed to cover, any product failure, product malfunction, or damages attributable to:
1. Improper installation and/or failure to abide by Paradigm’s installation guidelines;
2. Use of this product beyond normal home use, or in an application for which it was not
designed;
3. Cosmetic items such as scratches, dents or discolorations;
4. Damage caused by normal wear and tear, vandalism, accidental or by animals;
5. Any act of Nature (such as fire, flooding, snow, ice, hurricane, earthquake, lightning or other
natural disaster), environmental condition (such as air pollution, mold, mildew, etc.), or
staining from foreign substances (such as dirt, grease, oil, etc.);
6. Normal weathering due to exposure to sunlight, weather, and atmosphere which can cause
colored surfaces to, among other things, flake, chalk, accumulate dirt or stains.
7. Improper operation, alteration, handling, storage, abuse or neglect of the products.
Paradigm, using its sole discretion, will either repair or replace free of charge any part(s)
proven to be defective under normal home use. Any repair or replacement shall provide
no new warranty coverage, but shall retain only the remaining portion of the original
product’s warranty. This warranty is offered only to the original purchaser and is not
transferable. Proof of original purchase is required.
Ordering Replacement Parts
Replacement parts can be ordered by calling or emailing our customer service department:
Monday thru Friday, 8:00 AM - 5:00 PM (PST).
service@paradigmhw.com
When ordering replacement parts have the following information ready:
1. Owner’s Manual
2. Model Number
3. Description of Parts
4. Part Number
5. Date of Purchase
/