Wooster 0H21410020 User manual

Type
User manual
ALL ABOUT APPLICATORS
with global materials
MADE IN USA
More saving. More doing.
As a painter, you know the kind of performance you like from an applicator and what
level of results you’re looking for on the job. This manual is designed to provide
information you need to choose the right applicator. You’ll learn about the parts of a
brush and roller cover, various filament and bristle formulations, different fabric
types, and methods of fabric construction.
All About Applicators
This manual also includes tips from painters like you, as well as advice on loading an
applicator and what to look for in a quality miniroller system, roller frame, or
extension pole. With advanced knowledge
about paint applicators and accessories, you
can come closer to achieving the ultimate
performance and results every time.
Table of Contents
Brushes…………1–8
Rollers…………9–12
Frames..………13–14
Poles…….………..15
Minirollers.………..16
Table of Contents
Epoxy
Type of cement or adhesive
that locks filaments or
bristles in place.
Spacer
Small wood, plastic or
cardboard strip that creates
a reservoir to carry paint.
Handle
Made of wood, plastic, or other
synthetic materials. Provides
comfort and good balance.
Ferrule
Metal band that holds the filament
and handle together. Attached by
nailing or crimping.
Filament
The working end of the
brush, made with synthetic
or natural bristle materials.
Paintbrushes made the history books in 1330
B.C.
during the times of the Phoenicians. They were
constructed using twine to bind wild boar hairs in the open end of an animal horn. While brushes
may have started out as entirely handmade, nowadays precision machine processes are often
used to supplement professional brushmaking. Machine production allows manufacturers to
utilize the latest technology and promotes consistent quality by reducing human error.
BRUSH COMPONENTS
Painter’s Tip from Georgia
Never use the same brush in both oil- and water-based paints, because it gums up.
Keep two sets of brushes—one for oils, the other for acrylics—to make cleaning faster
and increase the life of the brush.
MinirollersBrushes
1
Large, thick beavertail style
allows a good, firm grip and
balances a large brush head.
Wall
Long, thin handles in regular,
rat-tail, and pencil styles
provide extra control.
Sash
Medium, contoured “beavertail”
handles are designed for a
comfortable feel.
Varnish
Round, thin, pencil-style varnish
handles make the brush easy to
rotate and direct.
Dowel
Unique “diamond cut handle end
with a thicker shoulder just above
the ferrule. Traditional, distinguished
shape balances a
25
/
32
thick brush.
Shasta
®
pencil
regular
rat-tail
HANDLE STYLES
Brushes
2
Made with Shergrip
®
elastomeric material,
this compact handle (only from Wooster)
measures no longer than 4
1
/
4
”, for comfort
and control even in tight spaces.
Shortcut
®
Rust-resistant steel
Professional quality, anti-corrosion,
self-healing coating hides scratches, holds
filament very securely, matte finish.
Stainless steel
Professional quality, rust-resistant, very
durable to help avoid denting, brushed finish.
Copper-coated stainless steel
Professional quality, rust-resistant, bright
copper finish for cosmetic appeal.
Brass-plated steel
Mid-line quality, enamel coating,
durable, bright brass finish.
Thick, soft
flagged ends
The most important part of a paintbrush is
the working end. Performance is based on
the engineering of the filament, which you
can’t see with the naked eye. The filament
and how it is finished or tipped affects the
feel of the brush and the results you get.
Every company guards their proprietary
tipping methods, because they’re a big part
of what makes each brand different. Trial
and error will show which brushes perform
best in different paints.
Tipping
Tin-plated steel
Economy quality, bright finish.
Brushed steel
Semi-professional quality, alloy
coating, rust-resistant (but to a lesser
degree than those at left), satin finish.
FERRULES
Synthetic brush
Painter’s Tip from Pennsylvania
What do you do to make it easier to clean your brushes at the end of the job, especially where
the filament enters the ferrule? You take 2 inches of blue masking tape and wrap it around
the ferrule, with the tape reaching about 1/2 inch onto the filament. The paint still gets down
behind the tape, but because little air gets to it, the dry line is up the filament about 1/2 inch.
Brushes
3
Making the Grade: Filament Facts
Synthetic brushes made with nylon, polyester, and other filaments can be used with all types
of paint, and are especially recommended for water-based coatings (latex, acrylics,
water-based wood finishes). They perform well while painting smooth to rough surfaces in
any weather, even heat and humidity.
Painter’s Tip from New Jersey
Do you find it is getting harder and harder to clean your brushes? That’s because of the
changes in paint formulations over the years—the paint now has more acrylic and more
solids. Acrylic sticks to polyester, so any brush which has a decent amount of polyester
doesn’t clean as well. Try the Wooster Chinex or Wooster nylon, two brushes that contain no
polyester and clean up awesome.
Brushes
4
C
A-
Maintains stiffness for control, resists heat
and humidity.
Lasts 7 times longer than bristle.
Perfect balance of paint pickup and release.
Cleans completely and easily.
Very durable, resists wear on rough surfaces.
Lasts 5 times longer than bristle, 2 times longer
than polyester.
Tips very precisely for a smooth, professional finish.
Cleans completely and easily.
Softens in hot weather or prolonged use in latex.
A
A+
NYLON
DuPont
CHINEX
®
NYLON/POLYESTER
POLYESTER
Chemically tipped for excellent leveling and
smoothing ability.
Thin, soft filaments virtually eliminate brushmarks.
Does not carry or release a lot of paint, low production.
Takes some time to clean.
Combines positive qualities of nylon and polyester.
Polyester used in short lengths to add stiffness
and control.
Nylon used in long lengths for precise tipping,
smooth finish.
Depending on the polyester content,
takes some time to clean.
Does not absorb water, resists heat and softening.
Lasts 2
1
/
2
times longer than natural bristle.
Can’t be precisely tipped, tends to leave brushmarks.
Difficult to clean.
CT
POLYESTER
FILAMENT
CHARACTERISTICS
GRADE
B+
Bristle is not recommended for latex or
acrylic paints because it will absorb up to
40 percent of its own weight in water,
causing it to flare or become too soft to
paint effectively. Also, rough surfaces will
break the tips off natural bristle so it will no
longer provide that smooth, glass-like
finish. Nylon is five times more durable than
bristle, so it’s best to choose a synthetic
brush for painting rough surfaces—even
when using oil-based paints.
Did You Know…
Natural bristle is the best choice for oil-based paints, varnishes, shellac, alkyd enamels, oil
stains, and oil-based polyurethanes. The highest quality comes from mainland China. It has the
softest natural tipping and flexibility, providing the smoothest finish with virtually no brushmarks.
Making the Grade: Bristle Facts
Chinese bristle hog
Brushes
6
Many factors determine the type of brush that will provide the best results on a job—the paint
being used, the environment or conditions, and the surface itself. However, a painter’s preference
for a brush’s response and firmness level often overrides other considerations. Manufacturers
today are making brushes in various blends so painters can choose the “feel” they like the most.
BLEND
USES
Precise response with extra
flex and smoothness.
Great for fine-finish painting
and interiors.
Works best in low humidity
and cooler temperatures.
PAINTS
FIRM
Clears, stains, and
lightweight paints or primers.
Fast-drying coatings.
Firm touch with good flex and glide.
Designed for all-purpose painting,
indoors or out.
Just-right taper for even coverage.
Medium-weight coatings,
like acrylics and enamels.
Solid response and extra stiffness.
Durable for exterior use and
rough surfaces.
Sharp edge, performs well in
heat and humidity.
Thicker paints and primers.
Low VOCs and other
fast-drying coatings.
EXTRA-FIRM
SOFT
Untapered
Tapered
Test for Taper:
See It & Feel It
Tapered filament helps paint flow for better coverage. It “pumps the paint” out and down to the
surface. It also gives shape to the brush for precise cutting-in. Look at the brush edgewise. If it
comes to a point, it has taper and will provide more control. Untapered or level filament reduces
the price of the brush, but it also sacrifices capacity, coverage, and control. It won’t release paint
like tapered filament. If the thickness of a brush feels the same from base to tip, it is untapered.
It lacks the performance of a brush with tapered filaments.
Degrees of Stiffness
Brushes
5
Softer and more flexible than black bristle.
Thinner, feather-like flags on the tips.
Excellent for fine finishing or interior applications.
Slightly stiffer than white bristle.
Thicker flags on the tips than white bristle.
Excellent for high-productivity or exterior applications.
B
B
Cost-effective bristle for DIY and maintenance brushes.
Made from an unsorted mixture of black and white bristle.
Softer than black bristle, but stiffer than white alone.
C
Natural bristle material obtained from the ears of oxen.
Extremely thin, soft, and expensive.
Tips come to a natural point (no flag) for super-fine finishing.
Always blended with China bristle in standard paintbrushes.
Perfect for lacquer, enamels, marine paints, and varnishes.
A
BLACK BRISTLE
WHITE BRISTLE
OX HAIR
GRAY BRISTLE
BRISTLE
GRADE
CHARACTERISTICS
Choosing the right brush size is not difficult. Basically, you should select a comfortable size that
will “fit the surface nicely. Larger brushes hold more paint and help you finish faster (less
dipping to refill). The angled edge vs. flat/straight is basically a matter of user preference,
though an angle sash is particularly effective on vertical surfaces.
Match the Brush to the Project
1. Dip the brush only about halfway into the paint. To avoid
dripping and keep your fingers clean, do not sink the brush
up to its metal ferrule.
2. Let excess paint drip for a moment, then lightly tap both
sides of the brush against the interior wall of the can or
bucket. Scraping excess paint on the lip of the can is
messy and counterproductive because it removes the paint
you just loaded into the brush.
3. As you paint, make sure to keep a wet edge, and
continue to paint from that point forward. Use long, smooth
strokes and refill the brush whenever the paint starts to
break up without covering the surface properly.
How to Load a Brush
Painter’s Tip from Ohio
Never dip your brush more than halfway up the filament. It won’t get on the wall, it will
just gum up the brush.
1” to 1
1
/
2
angle or flat
Hobbies & crafts, window
mullions, tight corners,
very detailed areas
Window frames, casings, door
mouldings, cutting-in edges
of walls & ceilings
2” to 2
1
/
2
angle sash
Baseboards, cabinets,
mouldings, furniture, stairs,
railings, shutters, gutters
Exterior siding, decks,
fences, masonry, walls,
ceilings, doors
BRUSH
SIZE
SURFACE
2” to 2
1
/
2
3” to 4”
Brushes
7
Brushes
8
How to Clean Paintbrushes
Many of today’s coatings are designed to dry quickly, making them especially difficult to clean
out of paintbrushes. The resins bind to the brush filaments and set up within a very short period
of time. In fact, some primers are basically impossible to remove—that’s when you should pull
out an old brush, use it, and be prepared to toss it when you’re done. With rollers, it’s almost
always most efficient and cost-effective to simply throw them away after use.
Here are our recommendations to improve cleanup of brushes and lengthen the life expectancy
of these tools. The instructions below are for water-based paints only; refer to the paint
manufacturer’s guidelines for brushes used in oil-based coatings.
Step 1
Rinse the paint from the brush with warm water while combing out the heel of the
brush with both sides of our 1832 Painter’s Comb
. This will ensure that you have loosened all
partially dried paint from the inside of the brush.
Step 2
Add a liberal amount of hand cleaner with pumice to the brush and work into the brush
completely. There are many brands of hand cleaner that will work—some are liquid, while others
are more of a thick paste that are scooped out of the container. Again, use the Painter’s Comb to
work paint out of the interior of the brush.
Step 3
Rinse the brush once more until the water runs clear of all paint and hand cleaner. You
may need to add some regular hand soap during this final process for very hard-to-clean
primers, paints, and stains. After the final rinse, do one last comb-through to make sure the paint
is completely removed from the center of the brush.
This method does not keep the coating from drying in the brush, so if you are using a fast-drying
primer or paint, you will need to clean brushes before the end of the day. This is true for all
paintbrushes. You may have to change brushes every two to four hours, so keeping an extra set
of clean brushes will allow you to remain productive while the used brushes dry after cleanup.
Broadest category of paint roller fabrics.
Made with a single fiber type or a blend of fibers.
Common materials are polyester, nylon, rayon, and acrylic.
In general, can be used with water- or oil-based coatings.
Quality varies from professional to economy.
Wool that is still attached to its tanned skin, also called
lambskin or sheepskin.
The original paint roller fabric, naturally shed-resistant.
Exceptional capacity and release for excellent production.
Expensive, but preferred by some professionals.
Prolonged soaking can cause the cover to delaminate.
Silky, Angora goat hair, always woven together with
synthetic fibers.
Creates a smooth, glass-like finish and resists matting.
Expensive, but provides superior results on smooth surfaces.
High-performance blend of lambswool and polyester fibers.
Wool provides maximum capacity and a smooth finish.
Polyester helps fabric to resist matting.
Types of Roller Fabric
FABRIC
SYNTHETICS
SHEARLING
MOHAIR
50/50
Fabric
Synthetic or natural fibers attached
to a backing. Holds then releases
paint to the surface.
Core
Base of the roller cover, most
often made of plastic or
phenolic-treated cardboard.
Adhesive
Substance that
bonds the fabric
to the roller core.
ROLLER COVER PARTS
The first paint rollers were developed in England and were introduced in the late 1940s. Wooster
began making them in 1951. Sleeves, covers, rollers, refills…no matter what you call them,
rollers are a fast, effective, and simple method of applying paint to large areas. Today, many
painting contractors use spray equipment for big jobs. However, roller covers will always have
their place on the jobsite due to their affordability and the control they offer (no overspray issues).
Painter’s Tip from Nevada
For the best results, after you roll and get even coverage, finish with light, vertical, full-length
strokes—painting down only—over each section. It will give you the smoothest finish.
CHARACTERISTICS
Rollers
Rollers
10
9
The manufacture of roller covers includes multiple steps that “finish” the cover and get it ready
for painting. First, rollers are fluffed up and any longer fibers are trimmed off to improve
coverage. Then they are beveled at the ends to prevent fat edges on the paint stripe and give
painters added control when rolling next to adjacent surfaces. Finally, the cover is vacuumed to
remove loose fibers. Similar to brush tipping, every company uses proprietary methods to finish
roller covers and takes pride in the performance results.
Roller Finishing Processes
MICROFIBER
Yarn-like fabric that offers high capacity and durability.
Bulk and thickness of the twisted tufts make it great for
rough surfaces.
Often used for back rolling as well as painting.
Unique fabric which has a velvety texture.
Tiny fiber tips deliver a uniform finish, great for smooth
surface applications.
Very good finish quality, but pickup and release are not its forte.
POLYAMIDE
Fabric Facts: Knit vs. Woven
WOVEN
Woven fabrics have a backing with a tighter cross section. The pile yarns are made with
a twist that helps lock the fibers into the backing, and they are secured using two
pass-throughs. This “double lock” process results in a shed-resistant fabric that provides
the smoothest, virtually lint-free finish. Woven rollers can be used with confidence in
enamels, primers, and all paints: flat, eggshell, satin, semigloss, and gloss.
Q. How do I choose the right cover for the job?
A.
For brushes, it’s the type of paint that matters (latex or oil). For rollers, it’s the sheen (flat
to gloss), because the higher the sheen in the paint, the more the surface will show lint from
the roller. For semigloss or gloss paint, choose a shed-resistant woven cover. To apply flat,
eggshell, or satin paint, a high-capacity knitted cover can be used. For a super-fine finish, it’s
perfectly okay to use a shed-resistant roller with a flat or satin paint, too!
KNIT
Both the backing and the pile fibers are different in knit and woven fabrics. In simple
terms, knitted fabrics have a looped backing, and the pile fibers are secured to the
backing with a single pass-through. The resulting fabric is more “open” than a woven, so
it can pick up and release more paint for the fastest coverage. Knit rollers are
recommended for flat, eggshell, or satin paints and stains.
The vast majority of paint rollers are made one of two ways—knitting or weaving—as described
below. New to the industry are “shed-resistant knit” fabrics, which combine the strengths of
both. Made with the traditional knitting process and unique fiber technology, they provide high
production rates with less shed. However, a true woven fabric will still provide a finer finish than
a shed-resistant knit.
Rollers
11
Backing
Pile Fiber
Backing
Pile Fiber
Match the Roller to the Surface
The nap or pile height of a roller cover is the length of the fibers that extend from the backing
and carry the paint. Basically, for smooth surfaces you use a shorter pile for even application;
rough surfaces need a higher pile, so the long fibers can reach into the valleys of the texture.
Some painters prefer to “bump up” to a thicker nap for higher production (e.g. 1/2” instead of
3/8”); select the pile height that still provides the desired finish.
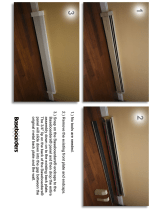
1. Many painters “break in” a roller cover by priming it
with water or thinner. In our lab we never prewet a
cover before painting. If you choose to, you must spin it
out with five or six strong pumps so it is only lightly
damp. Then take even more moisture out by blotting the
cover with a paper towel. Wooster recommends
conditioning only for water-based paints, using water.
2. Use a liner in the paint tray to save time during cleanup. Thoroughly mix the paint, then pour
some in the well of the tray. Don’t overfill—the well should be half empty. You need room to roll
excess paint onto the tray’s roll-off area.
3. With the roller cover on the frame, drag some paint with the edge of the cover from the tray
well back onto the roll-off area. Do not submerge the cover. Roll it on the grid toward the well
using several quick forward strokes, then drag more paint back with the cover. Continue until it
is completely saturated but not dripping.
4. Patience is very important when loading a cover. It takes time to work paint through the fabric
down to the core, especially with woven fabrics. Allow several minutes for the initial loading.
5. Do not “starve the cover” by attempting to paint too far without refilling—that can compress
the fibers and make it more difficult to reload, forcing you to spend more time in the tray.
How to Load a Roller Cover
Heavily textured plaster or stucco,
rough wood, brick, corrugated metal
Textured plaster or stucco, paneling,
decks, concrete block
3/16 or 1/4”
Most walls & ceilings, lightly textured
drywall or wood, acoustical tile
Untextured plaster, smooth wood,
wallboard, drywall, metal
3/8 or 1/2”
1
1
/
4
or 1
1
/
2
3/4 or 1”
ROLLER
NAP SIZE
SURFACE
Painter’s Tip from Virginia
Pre-wetting is a simple way to make any brush or roller perform better and clean more easily.
Wet it in whatever you plan to use to clean it.
Rollers
12
12
13
GT Insert
Black collar in the Sherlock frame grip and many
other Wooster professional tools. Has threads for
standard extension poles, plus eliminates
twisting when used with Sherlock GT
®
poles.
It’s the world’s best-selling professional frame, so you should know and understand the
features that have made it that way.
SHERLOCK
®
FRAME
Cage
Made of fiberglass-reinforced nylon, it’s very
durable and provides total support to maintain a
round cover. The cage has minimal side-to-side
movement for better control to paint a clean,
straight edge and get very close to corners.
Engineer’s Tip from Wooster
Occasionally the Sherlock frame can develop a “squeak” while rolling. It may be caused by
going from wet paint to dry conditions, or from storage in cold or dry climates. You can
eliminate the squeak by hydrating the bearings! Simply put the frame into a bucket of clean
water, making sure the entire cage is submerged. After a few minutes, shake the excess
water off of the frame, install the cover, and enjoy squeak-free professional performance.
Retaining Ring
Securely locks the roller on the cage,
so it won’t slip or fall off during
painting. When the job is done, it allows
the roller to release “hands free” with
a soft rap on the edge of a paint
bucket or trash can.
Bearings
Provide super-smooth
rolling action and
eliminate potential gray
streaking, by keeping
the moving cage off of
the chromed shank.
Shank “Sweet Spot”
To remove the roller cover, rap the frame in the 90° bend.
This part of the shank has been elongated to make it an
easier target to hit.
Frames
14
What to Look For in a Roller Frame
Cage
Traditionally, a wire and endcap
assembly that supports the
roller cover and spins smoothly.
Shank
Sturdy chrome-plated 5/16”
wire that connects the
functioning cage to the grip.
Threads
Allow the roller frame to be
attached to an extension
pole for ease of use.
Cage Wire
High-quality, conventional
frames have five or more
wires to help the roller
sleeve keep its shape.
Grip
Handle of the
roller frame,
usually made of
polypropylene.
Should be a
comfortable size
to fit the hand.
A roller frame that drags or sticks is a major frustration. No one should have to tolerate it.
To make the job go faster and the coverage better, spend a few dollars more for a frame
that spins smoothly.
Endcap
Made of nylon or plastic,
the endcaps hold the cage
wires and act as bearings
while rolling.
ROLLER FRAME COMPONENTS
11
Frames
13
Cage
Precision-engineered to roll
smoothly every time, even with
heavy materials. Works with
both 6
1
/
2
and 4
1
/
2
covers.
Shank
Sturdy, chrome-plated 1/4”
wire that connects the
functioning cage to the grip.
Grip
Full-size polypropylene handle,
threaded for extension pole use.
Sherlock GT
®
insert eliminates
twisting with those poles.
Roller
Made with the same fabrics as full-size
rollers for a uniform finish when
trimming or touching up. Open 3/4”
core makes cleaning easy.
Painter’s Tip from South Carolina
For a better looking paint job, use a brush to cut-in like you normally do, but follow immediately
with a Jumbo-Koter and roll as close as possible to eliminate any cut-in differences. Then
when the rest of the walls are rolled, you see no cut lines or different textures.
Minirollers are great for any area with a lot of fixtures, trim, windows, or doorways, resulting in
small wall spaces. Keep them in mind for these painting projects:
Kitchens & baths
Cabinets & cupboards
Closets & hallways
Baseboards & mouldings
Doors & railings
Cutting-in & trim work
JUMBO-KOTER
®
SYSTEM
Inner Pole
Made of
hexagonal-shaped
aluminum to
prevent twisting.
Grip
Textured, rubber-like
material provides comfort
and nonslip leverage.
Tip
Holds the roller frame or
other tool in place on the
end of the pole and keeps
them from twisting or
loosening.
Outer Pole
Rugged yet lightweight
fiberglass adds strength
to eliminate bowing.
A durable extension pole is a solid investment because it can last many years. Choosing a quality
pole ultimately saves time and money.
Pole Lock Lever
Easily adjusts pole length every
6 inches with a touch of the
thumb and locks securely in
place so it won’t collapse.
Painter’s Tip from California
Lightly spray non-stick cooking spray on the Sherlock aluminum inner pole before painting,
and when you’re done you just easily wipe off the paint. You don’t get paint buildup on the
extension pole, the pole is easier to use, and it doesn’t get stuck.
EXTENSION POLE PARTS
What to Look For in an Extension Pole
Poles
15
13
Minirollers
16
GT
Tip Lever
Found only on Sherlock GT
®
poles, it allows tools to be
attached and released with
just one press of the lever.
The Wooster Brush Company
Wooster, OH • Reno, NV • 800-392-7246
For more information about paint applicators and additional painting tips, visit
woosterbrush.com
D-201613 9/17
More saving. More doing.
with global materials
MADE IN USA
  • Page 1 1
  • Page 2 2
  • Page 3 3
  • Page 4 4
  • Page 5 5
  • Page 6 6
  • Page 7 7
  • Page 8 8
  • Page 9 9
  • Page 10 10
  • Page 11 11

Wooster 0H21410020 User manual

Type
User manual

Ask a question and I''ll find the answer in the document

Finding information in a document is now easier with AI