1
GENERAL INFORMATION
The Warm & Serve Drawer can be used:
• Asastandaloneappliance
• Asacombination27"or30"Warm&ServeDrawerwith
a27"or30"(76cm)built-inovenmountedabove.
IMPORTANT:Thewarmerdrawermustbe
installedonasurfacethatisleveledfrom
lefttoright,reartofront,andiscapable
ofsupporting100lbs(45Kg).
P/N318201823(1004)Rev.A
Combination Warm & Serve Drawer/
27" or 30" (76 cm) Built-in Oven Installation
NOTE:A60"(152cm)longcableissuppliedwith
theWarm&ServeDrawer.
FLOOR
Warm&ServeCutout
Warm & Serve Drawer
60" (152 cm) Cord
Minimumdistanceto
oor4½"(11.4cm)
IMPORTANT:TheWarm&ServeDrawerrunsoa
singlephasethree-wire120volt,60hertz,AConly
electricalsupplywithground.
H*=11-7/8"(30,2cm)Min.isthe
spacebetweenthebottomofthewarmerdrawercutoutand
thebottomoftheovencutout.Thisisacriticaldimension
andmustbeprovided.
J**=3"(7.6cm)Max.ElectricalJunctionBoxforwalloven
mustbelowerthanwarmerdrawercutout.
Bottomofovencutout
CAUTION:Installtwo3"(7.6cm)
widex3.4"(1.9cm)thickplanks
capableofsupporting200lbs
(90.7Kg)
PrintedintheUSA
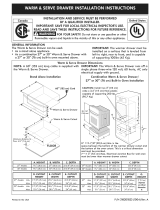
WARM & SERVE DRAWER INSTALLATION INSTRUCTIONS
INSTALLATION AND SERVICE MUST BE PERFORMED
BY A QUALIFIED INSTALLER.
IMPORTANT: SAVE FOR LOCAL ELECTRICAL INSPECTOR'S USE.
READ AND SAVE THESE INSTRUCTIONS FOR FUTURE REFERENCE.
FOR YOUR SAFETY:Donotstoreorusegasolineorother
ammablevaporsandliquidsinthevicinityofthisoranyotherappliance.
Canada
United States
Warm & Serve Drawer Dimensions
Stand Alone Installation
A. HEIGHT B. WIDTH C. DEPTH
27" Models 11¼" (28.6 cm) 27" (68.6 cm) 23 3/8" (59.4 cm)
30" Models 11¼" (28.6 cm) 30" (76.2 cm) 23 3/8" (59.4 cm)
D. CUTOUT
HEIGHT
E. CUTOUT
WIDTH
E. CUTOUT
DEPTH
27" Models Min
.
9 7/8" (25.1 cm)
25½" (64.8 cm)
23 5/8" (60cm)
Max. 10¼" (26 cm)
25¾" (65.4 cm)
24" (61 cm)
30" Models Min. 9 7/8" (25.1 cm)
28½" (72.4 cm)
23 5/8" (60cm)
Max. 10¼" (26 cm)
28¾" (73 cm)
24" (61 cm)
A. HEIGHT B. WIDTH C. DEPTH
27" Models
11¼" (28.6 cm) 27" (68.6 cm)
23 3/8" (59.4 cm)
30" Models
11¼" (28.6 cm) 30" (76.2 cm)
23 3/8" (59.4 cm)
D. CUTOUT
HEIGHT
E. CUTOUT
WIDTH
E. CUTOUT
DEPTH
G.
HEIGHT
27" Min
.
9 7/8" (25.1 cm) 25½" (64.8 cm) 23 5/8" (60cm) 2" (5.1 cm)
Depends
on critical
dimension
H
Max.
10¼" (26 cm) 25¾" (65.4 cm) 24" (61 cm)
30" Min.
9 7/8" (25.1 cm) 28½" (72.4 cm) 23 5/8" (60cm)
Max.
10¼" (26 cm) 28¾" (73 cm) 24" (61 cm)