
INS0790 Rev A 04/05
Home Theater Power Conditioner
M4300-EX
POWER AND FILTRATION
BANK 1
ALWAYS ON
U
N
S
A
FE
V
O
L
T
A
G
E
W
IR
IN
G
O
K
B
A
N
K
2
O
N
M4300-EX
1
1
1
1
2
2
3
3
Home Theater Power Conditioner
POWER AND FILTRATION
BANK 1
ALWAYS ON
U
N
S
A
FE
V
O
L
T
A
G
E
W
IR
IN
G
O
K
B
A
N
K
2
O
N
Home Theater Power Conditioner
M5400-EX
B
A
N
K
1
A
L
W
A
Y
S
O
N
B
A
N
K
2
A
L
W
A
Y
S
O
N
B
A
N
K
3
O
N
B
A
N
K
4
O
N
B
A
N
K
5
O
N
W
IR
IN
G
O
K
M
E
T
E
R
L
IG
H
T
S
POWER AND FILTRATION
M5400-EX
3
3
Home Theater Power Conditioner
B
A
N
K
1
A
L
W
A
Y
S
O
N
B
A
N
K
2
A
L
W
A
Y
S
O
N
B
A
N
K
3
O
N
B
A
N
K
4
O
N
B
A
N
K
5
O
N
W
IR
IN
G
O
K
M
E
T
E
R
L
IG
H
T
S
POWER AND FILTRATION
1
1
1
1
2
2
Replacing the front bezel on Panamax EX Component products
•
If the unit is not already unplugged, do so now!
• Installing a new bezel can cause the indicator LEDs to be pushed into the unit if the
installation is not done carefully!
The “EX” component family has a four piece bezel assembly consisting of upper and lower extruded aluminum
bezels and 2 plastic end caps.
EX Components - Silver Bezel Installation Instructions
1. Use the 3mm hex wrench
(included) to remove the 4 flat head
Allen screws in the corners of the
bezel.
2. Using both hands, carefully
remove the upper section of the
black bezel by pulling it up and
away from the unit at a 90° angle.
See illustration.
3. Remove the lower portion of the
black bezel in the same way.
M4000-EX Series
M5000-EX Series
BEZEL REMOVAL

Home Theater Power Conditioner
BANK 1
ALWAYS ON
BANK 2
ALWAYS ON
BANK 3
ON
BANK 4
ON
BANK 5
ON
WIRING
OK
METER
LIGHTS
POWER AND FILTRATION
M5400-EX
1
1
2
2
3
3
BEZEL INSTALLATION
Please contact Panamax Customer Support at 800-472-5555 or [email protected] if you have any questions.
1. Align the new lower bezel with the chas-
sis (the indicator LEDs should be directly
above the top edge of the bezel) and attach
it loosely with the flat head Allen screws.
Do not tighten the screws at this time.
2. Align the new upper bezel so that its
bottom edge is directly above the indicator
LEDs and attach it loosely with the other 2
Allen screws.
Do not tighten the screws
at this time.
3. Insert the plastic end caps so that their
outer surface is flush with the edge of the
bezel.
4. Verify the proper alignment of the
upper and lower bezels with the
end caps and tighten the Allen
screws so that the bezel is securely
held in place.
Do not over tighten
the screws!
1. Attach the end caps to the bezel backing plate. See Illustration.
2. Slide the new lower bezel up over the end caps and align it
with the chassis (the indicator LEDs should be directly above
the top edge of the bezel). Attach it loosely with 2 of the flat
head Allen screws.
Do Not tighten the screws at this time.
3. Slide the new upper bezel down over the
end caps and align it with the chassis
(the indicator LEDs should be directly
below the bottom edge of the bezel).
Attach it loosely with 2 of the flat
head Allen screws.
Do not tighten
the screws at this time.
4. Verify the proper alignment of the upper and lower bezels
with the end caps and tighten the Allen screws so that the bezel
is securely held in place.
Do not over tighten the screws!
M4300-EX
1
1
2
Home Theater Power Conditioner
POWER AND FILTRATION
B
A
N
K
1
A
L
W
A
Y
S
O
N
U
N
S
A
F
E
V
O
L
T
A
G
E
W
IR
IN
G
O
K
B
A
N
K
2
O
N
2
Home Theater Power Conditioner
M4300-EX
POWER AND FILTRATION
B
A
N
K
1
A
L
W
A
Y
S
O
N
U
N
S
A
F
E
V
O
L
T
A
G
E
W
IR
IN
G
O
K
B
A
N
K
2
O
N
3
3
M4000-EX Series
M5000-EX Series
1690 Corporate Circle
Petaluma, CA 94954
-
 1
1
-
 2
2
Panamax BEZ5400-EX User manual
- Type
- User manual
- This manual is also suitable for
Ask a question and I''ll find the answer in the document
Finding information in a document is now easier with AI
Related papers
-
 Panamax M7500 PRO Owner's manual
-
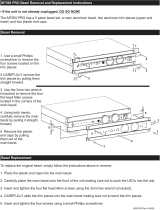 Panamax BEZ7500-PRO-S User manual
-
 Panamax M4300PM User manual
-
Panamax M4300EX Owner's manual
-
 Panamax M5400-EX User manual
-
 Panamax 5400-EX User manual
-
 Panamax M5100-PM User manual
-
 Panamax M5300-EX User manual
-
 Panamax M5100-EX Owner's manual
-
 Panamax MAX 7500-PRO User manual
Other documents
-
 Badger Meter M5000 User manual
-
 AGF Manufacturing 5400B Owner's manual
-
HP sx2000 User manual
-
Gateway 9315 User manual
-
innovative technology NV200 Technical Manual
-
Sun Microsystems 4000 User manual
-
HP 311059-111 User manual
-
Fujitsu M4000/M5000 User manual
-
Dell Precision M4300 Owner's manual
-
Sun Microsystems 60 User manual


