5
Setting Up Your Coffeemaker
Congratulations on the purchase of your new MR. COFFEE
®
coffeemaker! Please read these
instructions carefully before using your new coffeemaker. Proper use, care and maintenance
will ensure trouble-free operation and the long life of this appliance. Save these instructions
for cleaning and, if necessary, replacement parts information.
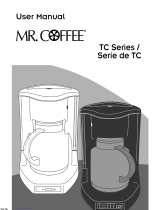
Coffeemaker Features
Your new MR. COFFEE
®
coffeemaker has the following features:
•
Brewing Capacity
•
12 Cups (TF Glass Decanter Series)
•
8 Cups (TFT Thermal Carafe Series)
•
Cord Storage
– Allows you to store extra cord length for a tidy countertop.
•
Drip-Free Decanter
– Designed to help prevent drips after pouring.
•
Ergonomically Designed Handle
– Provides comfort, control and confidence
when pouring.
•
Removable Filter Basket
– The filter basket will lift out of socket to allow you
to remove a filter and ground coffee before returning back to its socket.
•
ON/OFF Indicator Light
–
This safety feature reminds you that your coffeemaker is on.
•
Non-Stick Warming Plate
–
This feature prevents the decanter from sticking
to the surface of the warming plate.
•
Pause ’n Serve
– Can’t wait for the coffee to finish brewing? The Pause ’n Serve feature
allows you up to 30 seconds to pour a cup of coffee while the coffee is still brewing.
• Two-Hour Auto Shut-Off
(Not available on TF12/13)
:
This safety feature keeps your coffee
warm for 2 hours after you brew, then automatically turns off. (TFT Series - shut-off
occurs immediately after brewing cycle is complete).
•
Programmable Controls
(Programmable Models Only)
– Clock: The LED clock serves as a handy kitchen clock, and also allows you to set the
timer.
– Timer: Would you like to wake up to a fresh pot of coffee? The timer allows you
to preset when you would like the coffeemaker to brew your coffee automatically, up
to 24 hours in advance.
32
INFORMACIÓN SOBRE LA GARANTÍA
Garantía Limitada de 1 Año
Sunbeam Products Inc., o, en el Canadá, Sunbeam Corporation (Canada) Limited (“Sunbeam”
colectivamente) garantiza que, por un período de un año a partir de la fecha de compra, este producto
estará libre de defectos en el material y en la mano de obra. Sunbeam, a su criterio, reparará o
reemplazará este producto o cualquiera de los componentes del mismo que estén defectuosos durante
el período de garantía. El reemplazo será hecho con un producto o componente nuevo o reconstruido.
Si el producto ya no se encuentra disponible, se reemplazará con un producto similar de igual o mayor
valor. Esta es su garantía exclusiva.
Esta garantía es válida para el comprador original al detal a partir de la fecha inicial de compra al detal
y no es transferible. Conserve el recibo original de compra. La evidencia de compra es requerida para
honrar la garantía. Los concesionarios, centros de servicio de Sunbeam o tiendas al detal que vendan
productos Sunbeam, no tienen el derecho de alterar, modificar o cambiar de forma alguna los términos
o condiciones de esta garantía.
Esta garantía no cubre el desgaste por el uso normal de las piezas, o daños que resulten de
cualesquiera de las siguientes: uso negligente o incorrecto del producto, uso bajo un voltaje o corriente
inadecuados, uso contrario a las instrucciones de operación, desensamble, reparaciones o alteraciones
que no sean hechas por Sunbeam o por un centro de servicio autorizado Sunbeam. Además, la garantía
no cubre: factores de fuerza mayor tales como incendios, inundaciones, huracanes y tornados.
¿CUÁLES SON LOS LÍMITES DE LA RESPONSABILIDAD DE SUNBEAM?
Sunbeam no será responsable de ningún daño incidental o consecuente causado por el
incumplimiento de cualquier garantía o condición expresa, implícita o estatutaria. Excepto hasta donde
esté prohibido por el derecho aplicable, cualquier garantía o condición implícita de comercialización o
de aptitud para un propósito en particular están limitadas en duración al período de la garantía
antedicha. Sunbeam rechaza cualesquiera otras garantías, condiciones o representaciones, expresas,
implícitas, estatutarias o de otra índole. Sunbeam no será responsable de cualesquiera daños de clase
alguna que resulten de la adquisición, uso o mal uso de, o incapacidad para utilizar el producto,
incluyendo daños incidentales, especiales, consecuentes o similares, o la pérdida de ganancias, o por
cualquier incumplimiento de contrato, fundamental o de otra índole, o por cualquier reclamación
incoada contra el comprador por cualquier tercero. Algunas provincias, estados o jurisdicciones no
permiten la exclusión o limitación de daños incidentales o consecuentes o limitar la duración de una
garantía implícita, así que las limitaciones o exclusiones antedichas pueden no ser aplicables a usted.
Esta garantía le otorga derechos legales específicos, y usted puede también tener otros derechos que
varían de provincia en provincia, de estado en estado y de jurisdicción en jurisdicción.
CÓMO OBTENER EL SERVICIO DE LA GARANTÍA
En los EE.UU.: Si usted tiene cualquier pregunta con respecto a esta garantía o si desea obtener
servicio, favor de llamar al 1-800-672-6333 y se le proveerá una dirección de un centro de servicio de
acceso conveniente para usted.
En el Canadá: Si usted tiene cualquier pregunta con respecto a esta garantía o si desea obtener
servicio, favor de llamar al 1-800-667-8623 y se le proveerá una dirección de un centro de servicio de
acceso conveniente para usted.
En los EE.UU., esta garantía es ofrecida por Sunbeam Products, Inc., localizado en Boca Ratón, Florida
33431. En el Canadá, esta garantía es ofrecida por Sunbeam Corporation (Canada) Limited, localizado
en 5975 Falbourne Street, Mississauga, Ontario L5R 3V8.
FAVOR DE NO DEVOLVER ESTE PRODUCTO A CUALQUIERA DE ESTAS DIRECCIONES
O AL LUGAR DONDE LO ADQUIRIÓ.