Num'axes Canicom 800 User manual

Category
Pet care
Type
User manual

This manual is also suitable for

DECLARATION « CE » DE CONFORMITE
« EC » DECLARATION OF CONFORMITY
Directive R&TTE 1999/5/CE
NUM’AXES
déclare que
declares that
les colliers de dressage
training collars
CANICOM 800 – CANICOM 1500
satisfont à toutes les dispositions de la Directive N° 1999/5/CE
du 07/04/99 du Conseil Européen
comply to all dispositions of the European Council Directives below N° 1999/5/CE
et sont conformes aux normes suivantes
and comply with standards below :
ETSI EN 300 220
NUM’AXES
745 rue de la Bergeresse – Z.A.C. des Aulnaies – BP 30157
45161 OLIVET CEDEX – FRANCE
Tél. + 33 (0)2 38 63 36 56 / Fax + 33 (0)2 38 63 31 00
User’s guide
Gb - 19
Any person with individual device for cardiac assistance (pacemaker, defibrillator) must take
precautions when they use CANICOM 800 or CANICOM 1500.
These devices emit some static magnetic fields (a magnet is located in the remote control)
(Frequency = 869 Mhz, at = 250 mW for CANICOM 800 and 500 mW for CANICOM 1500).
The devices comply with the European Standard ETSI EN 300 220.
Thank you for choosing a NUM’AXES product.
Before using your CANICOM 800 or CANICOM 1500, please read the instructions in this guide carefully
and keep it for future reference.
Before using CANICOM, we advise you to have your dog checked by your vet to ensure it is fit to wear
a collar.
Check your dog’s neck regularly, the repeated rubbing of the contact points against the animal’s
skin may cause irritation. If this happens, remove the collar until all signs of skin irritation have
disappeared.
Start with the lowest level of stimulation and define the level from which your dog reacts by increasing
gradually.
Do not hesitate to contact a professional trainer for any further advice.
WARNING
Gb - 20
Index Page
Contents of the product CANICOM 800 .............................................................................................................21
Contents of the product CANICOM 1500 ...........................................................................................................21
Description of the product .................................................................................................................................21
First use from new.............................................................................................................................................23
How to use the remote control ..........................................................................................................................25
Checking/replacing battery(ies) of remote control ...........................................................................................27
Checking/replacing battery of receiver collar ..................................................................................................28
Changing the contact points ..............................................................................................................................28
How to check that your CANICOM 800/CANICOM 1500 is functioning properly ..............................................29
Getting the best results .....................................................................................................................................29
Fitting the collar ................................................................................................................................................29
Starting out with the training collar ..................................................................................................................30
The difference between « continuous » and « flash » stimulation ...................................................................30
Cautions for use .................................................................................................................................................30
Maintenance ......................................................................................................................................................31
Troubleshooting .................................................................................................................................................31
Technical specifications ....................................................................................................................................32
Receiver collar battery life ................................................................................................................................32
Guarantee ..........................................................................................................................................................32
Guarantee conditions .........................................................................................................................................33
Spare parts ........................................................................................................................................................33
Collection and recycling of your device at the end of its life ............................................................................33
Gb - 21
Contents of the product CANICOM 800
- CANICOM collar fitted with short contact points
- CANICOM 800 remote control fitted with 1 lithium 3 Volts CR2 battery
- lithium 3 Volts CR2 battery for the collar
- test lamp
- pair of long contact points
- carry strap
- DVD
- this user’s guide
Contents of the product CANICOM 1500
- CANICOM collar fitted with short contact points
- CANICOM 1500 remote control fitted with 2 LR06 alkaline batteries
- lithium 3 Volts CR2 battery for the collar
- test lamp
- pair of long contact points
- carry strap
- DVD
- this user’s guide
Description of the product
Red mark
Area where the On/Off switch
magnet is located
On/Off indicator
+ indicator of radio reception
+ battery level indicator
2 contact points
(short or long)
Receiver collar module -
Diagram 1
On/Off switch
+
LCD screen
retro-lightning
Booster button
Continuous
stimulations limited
to 8 seconds
Flash stimulations
shorter than
1 second
Area where the On/Off
switch magnet is
located
Beep key
LCD screen
Adjustment of
the level of
stimulations
Selection key
Dog B
yellow collar
Selection key
Dog A
black collar
Indicator of
radio transmission
Stimulation level
indicator
from 1 to 15
Battery level
indicator
Collar selection
indicator
A or B
CANICOM 800 LCD screen -
Diagram 4
CANICOM 800 remote control -
Diagram 2
On/Off switch
+
LCD screen
retro-lightning
Booster button
Continuous
stimulations limited
to 8 seconds
Flash stimulations
shorter than
1 second
Beep key
Area where
the On/Off
switch magnet is
located
LCD screen
Adjustment of
the level of
stimulations
Selection key
Dog 1
black collar
Selection key
Dog 2
yellow collar
Selection key
Dog 4
blue collar
Selection key Dog 3
orange collar
Indicator of
radio
transmission
Battery level
indicator
Stimulation level
indicator
from 1 to 18
Collar selection
indicator
1, 2, 3 or 4
CANICOM 1500 LCD screen -
Diagram 5
CANICOM 1500 remote control -
Diagram 3
Gb - 22
Gb - 23
First use from new
Fitting the battery in the receiver collar
- Unscrew the 4 screws of the top of CANICOM using a screwdriver.
- Insert the battery (3V Lithium CR2) paying attention to follow polarity indicated on the battery
housing (ref. Diagram 6).
- A beep sound (low pitch) is emitted, indicating the correct installation of the battery.
If you do not hear any beep after having inserted the battery, remove it immediately from its housing.
Check the polarity before trying again.
- Before putting the lid back in place check that the rubber seal is in its groove.
- Screw up the 4 screws with care (do not overtighten them).
Activate/deactivate the remote control
Remote control is supplied with battery(ies) fitted.
- Activate: Press the On/Off red button located on the side of the remote control for 1 second
(ref. Diagram 2 or 3)
. Indications appear on the LCD screen.
- Deactivate: Press the On/Off red button for 1 second. The LCD screen is off.
To increase the battery life of the remote control, we recommend you to deactivate the unit if you are
not using it for a long period.
Activate/deactivate the receiver collar
A magnet located in the remote control is used to either switch on/off the receiver collar.
- Activate: Approach the area where the On/Off switch magnet is located in the remote control until
coming in contact on red mark located on the collar, hold for 1 second
(ref. Diagram 7 or 8)
. The
Polarity « - » of the battery
Polarity « + » of the battery
Seal
Diagram 6
Gb - 24
indicator light on the collar will flash in green indicating that the collar is on.
- Deactivate: Approach the area where the On/Off switch magnet is located in the remote control
until coming in contact on red mark located on the collar, hold for 1 second
(ref. Diagram 7 or 8)
.
The indicator light on the collar will flash from green to red and then off: the collar is off.
If you have several collars, renew the same procedure for each one.
To increase the battery life of the collar, we recommend you to deactivate the unit if you are not using
it for a long period.
Coding of the remote control and receiver collar
The coding of the remote control with the receiver collar enables the two units to work together. You can
add additional collars at any time.
IMPORTANT : before beginning the coding (first use of the receiver or re-coding), make sure no other
person is using his CANICOM 800/CANICOM 1500 or other products from the NUM'AXES range close
by. Your receiver could accidentally record the code of his remote control. If that occurs, re-code the
remote control with the receiver collar.
For CANICOM 800 :
Collar A = black collar – Collar B = yellow collar
For CANICOM 1500 :
Collar 1 = black collar – Collar 2 = yellow collar – Collar 3 = orange collar – Collar 4 = blue collar
Coding procedure for the first use :
Warning : If you have several collars, you have to code them one at a time.
1. Activate the remote control: Press the On/Off red button
located on the side of the remote control
for 1 second.
Approach until coming in
contact those 2 areas
during 1 second
Activate/deactivate a
receiver collar
with a CANICOM 800 remote
control
Diagram 7
Activate/deactivate a
receiver collar
with a CANICOM 1500
remote control
Diagram 8
Approach until coming in
contact those 2 areas
during 1 second
Gb - 25
2. Select the collar you want to code on the remote control:
For CANICOM 800 :
Press the A or B key in order to select the collar (the letter A or B will appear on the LCD screen).
For CANICOM 1500 :
Press the 1, 2, 3 or 4 key in order to select the collar (the number 1, 2, 3 or 4 will appear on the LCD
screen).
3. Activate the receiver collar: Approach the area where the On/Off switch magnet is located in
the remote control until coming in contact on red mark located on the receiver collar, hold for 1
second.
4. Move the remote control away from the collar.
5. Press the beeper button
of the remote control. A beep sound is emitted, the collar is then
synchronized with your remote control.
If you have several collars, renew the same procedure for each one.
Re-coding procedure (for all the codings other than the first):
Warning : If you have several collars, you have to recode them one at a time.
1. Activate the remote control: Press the On/Off red button located on the side of the remote control
for 1 second.
2. Select the collar you want to code on the remote control:
For CANICOM 800 :
Press the A or B key in order to select the collar (the letter A or B will appear on the LCD screen).
For CANICOM 1500 :
Press the 1, 2, 3 or 4 key in order to select the collar (the number 1, 2, 3 or 4 will appear on the LCD
screen).
3. Receiver collar in position « deactivated » (off, indicator off): Approach the area where the On/Off
switch magnet is located in the remote control until coming in contact on red mark on the receiver
collar, hold for 6 seconds. The indicator on the collar lights in fixed green, then flashes in red.
4. Move the remote control away from the collar.
5. Press the beeper button
of the remote control. A beep sound is emitted, the collar is then
synchronized with your remote control.
If you have several collars, renew the same procedure for each one.
Reprogram a receiver collar
Receiver collar can be re-coded indefinitely, either with the same remote control, or with a new
CANICOM remote control.
Ref. Re-coding procedure.
How to use the remote control
The CANICOM 800 remote control is designed to operate with 1 or 2 receiver collars.
The CANICOM 1500 remote control is designed to operate with 1, 2, 3 or 4 receiver collars.
Before sending any training instruction (beep sound or stimulations), you have to select the dog you
want to send a message to:
- dog A (black collar) or dog B (yellow collar) for CANICOM 800
Gb - 26
- dog 1 (black collar), dog 2 (yellow collar), dog 3 (orange collar) or dog 4 (blue collar) for
CANICOM 1500
To select the dog you want to train on the remote control:
For CANICOM 800: Press the A or B key in order to select the collar (the letter A or B will appear on the
LCD screen).
For CANICOM 1500: Press the 1, 2, 3 or 4 key in order to select the collar (the number 1, 2, 3 or 4 will
appear on the LCD screen).
Button : beeper
If you press the « Beeper » button
the collar will emit sound signals. There is no time limit for this
function: the beeper will continue to sound for as long as the button is pressed.
A « transmission » symbol will appear on the LCD screen of the remote control; the indicator light on the
collar goes from flashing green to permanent green for as long as the button is pressed.
It’s up to you to use the beep key depending on the way you want to train your dog. With the beeper you
can:
- send a sound to your dog when it is disobedient,
- draw its attention,…
It’s very important to always use the beeper in the same way in order not to disturb your dog.
“F” button: Flash stimulation
Press the « F » button to send a warning to your dog using stimulations transmitted by the two contact
points located on the receiver collar for a defined length of time of less than one second.
A « transmission » symbol will appear on the LCD screen of the remote control; the indicator light on the
collar goes from flashing green to permanent red while the stimulations are being sent.
“C” button: Continuous stimulation
Press the « C » button to send a warning to your dog using stimulations transmitted by the two contact
points located on the receiver collar, this will last for as long as the button is pressed but limited to 8
seconds maximum.
“B” button : booster
Press the Booster button to stop your dog instantaneously.
You can choose the level of stimulation you think to be the best for an immediate effect. As a result, you
do not need to press the “+” button.
Those stimulations are transmitted by the two contact points located on the collar for as long as the
button is pressed but no more than 8 seconds max.
The level of stimulations selected thanks to the “Booster” button can be different for each collar.
Gb - 27
Configuration of the “Booster” button:
Programming the Booster button for the dog A or 1 (black collar):
- press the « A » or « 1 » button for approximately 5 seconds until the level of stimulations flashes
on the LCD screen
- press the « + » or « - » button to modify the level of stimulations
- press the « A » or « 1 » button to confirm the level selected
Renew the same procedure to program the Booster button for the dog B or the dogs 2, 3 and 4.
« + » and « - » : control buttons
Use the +/- buttons for rapid adjustment of the stimulation level of the receiver collar.
15 levels are available for CANICOM 800.
18 levels are available for CANICOM 1500.
Level 1: very weak stimulations. Level 15 or 18: strong stimulations.
Always start with the lowest level of stimulation.
Retro-lightning of the LCD screen
You can light the LCD screen for approximately 6 seconds by pressing briefly the On/Off switch
(approx. 1/2 second).
Checking/replacing battery(ies) of remote control
Performance (radio range) of the remote control may deteriorate as battery(ies) become(s) weak.
Be prepared to replace the battery(ies).
To check the condition of the battery(ies), turn “on” the CANICOM 800/CANICOM 1500 remote control and
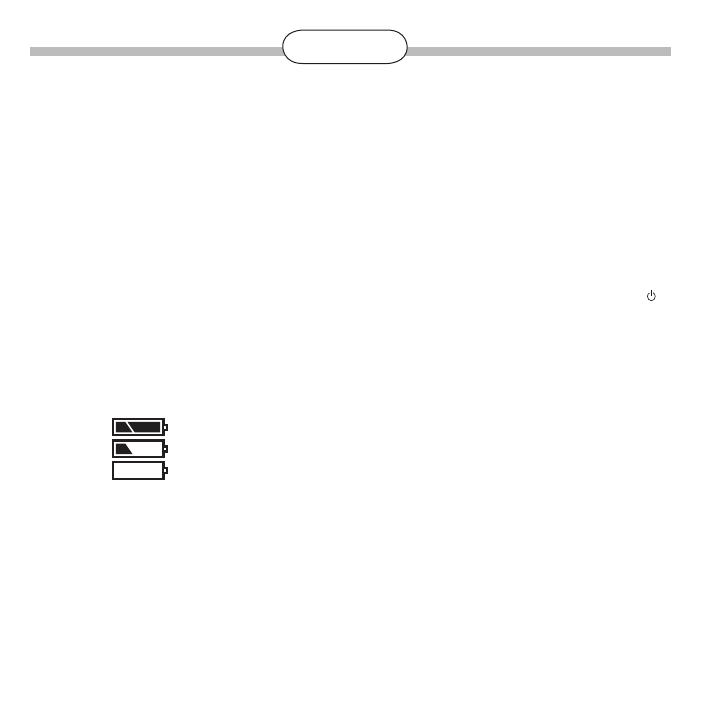
look at the battery level indicator on the LCD screen. The symbols which appear indicate the following:
Battery fully charged.
Weak battery: prepare to replace the battery.
Dead battery: your CANICOM 800/CANICOM 1500 switches to safety mode and
the system locks up. The battery(ies) must be replaced.
Remove the old batteries and replace them:
- 1 3-V Lithium CR2 battery for the CANICOM 800 remote control
- 2 LR06 alkaline batteries for the CANICOM 1500 remote control
NUM’AXES advises to use the same type and same brand of batteries as those supplied in your new
purchased product. Other brands of batteries may not operate, or may not be completely compatible
with your product. You can purchase the suitable batteries from NUM’AXES or from your distributor.
Replace the battery(ies) as follows:
- On the back of the remote control, unscrew the screw and remove the battery cover (ref.
Diagram 9 or 10)
Fig. 6
Mise en place ou remplacement
de la pile dans la télécommande
CANICOM 500
ATTENTION
Respectez bien les polarités
Fr-10
Usure/remplacement de la pile de la télécommande
En cas d’usure de la pile, les performances (portée radio) de la télécommande se trouvent
diminuées. Ne tardez pas à la remplacer !
Pour pouvoir contrôler la pile, mettez en service votre télécommande CANICOM 500 et observez le
témoin d’usure de la pile affiché sur l’écran LCD. Les divers symboles de cet indicateur ont les
significations suivantes :
La pile est en bon état.
La pile est faible : prévoyez sans tarder une pile de rechange.
La pile est usagée : votre CANICOM 500 se met en sécurité, le système « se bloque » : vous
devez remplacer la pile.
NUM’AXES vous recommande d’utiliser des piles de même modèle et de même marque que celles qui
vous ont été fournies lors de l’achat de votre produit. Des piles d’autres marques pourraient ne pas
fonctionner ou ne pas être totalement compatibles avec votre produit.
Vous pouvez vous procurez les piles adéquates auprès de NUM’AXES ou de votre distributeur.
Remplacez la pile usagée en procédant de la façon suivante :
- Au dos de la télécommande, ôtez la vis et la trappe à pile.
- Enlevez la pile usagée.
- Insérez la pile neuve (3V Lithium CR 2) dans son support
en respectant la polarité indiquée près du logement
de la pile (cf. Fig. 6).
- Repositionnez la trappe à pile.
- Fixez la trappe en utilisant la vis.
- Vérifiez le bon fonctionnement de votre télécommande.
Gb - 28
- Remove the old battery(ies).
- Insert the new battery(ies) paying attention to follow polarity indicated on the battery
housing.
- Put the battery cover back in place.
- Retighten the screw.
- Check the remote control operates correctly.
Checking/replacing battery of receiver collar
To check the condition of the receiver collar battery, observe the On/Off indicator located on the front
of the receiver collar:
- Battery fully charged: flashes slowly green.
- Weak battery: flashes quickly red. Replace it with a new lithium 3 Volts CR2 battery (See § First
use from new: fitting the battery in the receiver collar).
Check the receiver collar operates correctly.
NUM’AXES advises to use the same type and same brand of batteries as those supplied in your new
purchased product. Other brands of batteries may not operate, or may not be completely compatible
with your product. You can purchase the suitable batteries from NUM’AXES or from your distributor.
Changing the contact points
Two different series of contact points are supplied. The length of the contact points must be sufficient to
have proper contact with the dog’s skin, enabling the device to operate correctly.
If you have a long-haired dog and the short contact points fitted to the collar in the factory are inadequate,
remove and replace them with the long ones supplied with the kit. Carefully tighten them manually (do
not use a key).
Replacing battery
of CANICOM 800
remote control
Diagram 9
Replacing batteries
of CANICOM 1500
remote control
Diagram 10
WARNING
Make sure the polarity is correct
Gb - 29
How to check that your CANICOM 800/CANICOM 1500 is functioning properly
You can check that your CANICOM 800/CANICOM 1500 is operating correctly at any time.
- Before doing so, make sure that the receiver collar is turned « off ».
- Place the test lamp in contact with each of the contact points (by unscrewing them then by
screwing them up in order to grip wires of the test lamp under the contact points).
- Turn « on » the remote control and receiver collar you want to test.
- Select the receiver collar you want to test on the remote control:
For CANICOM 800: Press the A or B key in order to select the collar (the letter A or B will appear on the
LCD screen).
For CANICOM 1500 : Press the 1, 2, 3 or 4 key in order to select the collar (the number 1, 2, 3 or 4 will
appear on the LCD screen).
- Press the « F » or « C » button and modify the intensity level of stimulations: the test lamp will
light with more or less intensity.
Renew the same procedure for each receiver collar.
Getting the best results
The training instructions you give to your dog are sent from the remote control to the receiver collar by
radio waves. These radio waves are sensitive and the range reaches approximately 800 meters for the
CANICOM 800 and 1500 meters for the CANICOM 1500 (depending on geography and environment).
The performances of your CANICOM 800/CANICOM 1500 will be optimal if you respect the following
recommendations :
- To obtain a good radio range, do not cover the antenna when you hold the remote control in your
hand.
- The position of the receiver collar around the neck of the dog should be in the following way: the
“On/Off” indicator is visible and is not in contact with the breast of the dog.
- Check the batteries (remote control and receiver collar) before using the unit and replace them
as soon as the level of load is weak.
- The performances of the batteries decrease slightly under temperatures lower than 0°C. If
possible keep the remote control warm (e.g. inside a pocket) before using it.
Fitting the collar
The strap must be adjusted so that the contact points are in contact with the skin of the dog.
- If the strap is too loose, the collar is likely to move and repeated friction can irritate the skin of
your dog. Furthermore, it will not function correctly.
- If the collar is too tight, the dog will have breathing difficulties.
Do not leave the collar positioned at the same place for long periods (i.e. over 3 hours) because this can
cause irritations. If your dog must wear the collar for long periods, regularly change the position on
the neck of your dog. Regularly check your dog’s neck as repeated rubbing of the contact points on the
dog’s skin may cause irritation. If this happens, remove the collar until all signs of skin irritation have
disappeared. Do not leave the collar more than 8 hours a day around your dog’s neck and take the time
to check that there are no signs of irritation when your dog is not wearing it.
Gb - 30
Starting out with the training collar
•Youcanstartusingthecollarwith6month-oldpuppiesthathavealreadyreceivedsomebasictraining:
« stay », « sit », or at least « no ».
•Donotusethecollarwithdogsthatarenotingoodphysicalshape(i.e.cardiacproblems,epilepsy)or
have behavioural problems.
•Yourdogwillneedtogetusedtothecollar;forafewdaysletthedogwearthecollarbutdonotuseit.
•Positiveandeffectivetrainingtakestime.Do not rush:
- Choose a familiar area, a place your dog is used to.
- Define the level of stimulation from which your dog reacts by starting with the level of the
lowest intensity and increasing gradually.
- Choose the right moment to press the button: at the exact time your dog does something wrong.
- Give your dog plenty of encouragement: it will learn faster and its desire to respond will only
increase.
•Donothesitatetocontactaprofessionaltrainerforanyfurtheradvice.
The difference between « continuous » and « flash » stimulation
Both functions are extremely interesting and useful, since they can be adapted to any dog and any
situation.
« continuous » stimulation
Should be typically used for training at a location that is familiar to the dog (at the beginning).
Because the stimulation is continuous, use the lowest intensity and take advantage of the length of the
stimulation rather than of the intensity, so your dog has time to understand.
« flash » stimulation
Use this function to correct your dog. A low stimulation will attract its attention; it will feel something
unpleasant at the precise moment it is behaving badly.
Cautions for use
- Before using CANICOM, we advise you to have your dog checked by your vet to ensure it is fit to wear
a collar.
- The CANICOM receiver collar is totally waterproof. Your dog can swim in water. In order to maintain
water tightness, we recommend the replacement of the seal located in the receiver collar every
year.
- The remote control is showerproof only: it is only designed to remain a short time in the rain. Put it
in a dry place as soon as possible. If the remote control falls into the water, it could be damaged in an
irreversible way.
- The dog should not wear a medal, metallic collar, or any other kind of collar together with the
CANICOM training collar.
- Avoid placing the remote control close to objects sensitive to magnetic fields which could be
irreversibly damaged.
- Do not place or keep the unit in places exposed to high temperatures.
Gb - 31
- It is necessary to replace the battery every two years, even if the unit has not been used for long
periods.
- Never leave a discharged battery in the unit: leakage could damage your product.
- Remove the battery from the receiver collar and the remote control if you are not using the appliance
for 3 months or more. The collar will memorize the configuration chosen (coding).
- Keep your unit out of reach of children. It is not a toy for you or your children.
Maintenance
- Avoid cleaning the unit with volatile liquids such as solvents or cleaning fluids. Use a soft cloth and
neutral detergent.
- In order to maintain water tightness, we recommend the replacement of the seal located in the
receiver collar every year.
Troubleshooting
Should your CANICOM 800 / CANICOM 1500 stop working or develop a fault, first read this user’s guide
over, then check the batteries and replace them if necessary and retry. Also check that you are using the
product correctly.
If you encounter any problem, re-code the receiver collar (ref. re-coding procedure).
Re-initialize the system by removing the battery from its housing, then with a metallic tool (e.g. screwdriver,
scissors) touch each of the 2 battery contacts for approximately 2 seconds (ref. Diagram 11). Insert the
battery again: One beep is emitted, indicating the battery is in correct position.
Restart your CANICOM using the remote control.
If the problem persists, contact your distributor or check out on www.numaxes.com.
You can also contact NUM’AXES at +33.2.38.63.03.84
or by Email [email protected].
Depending on the extent of the malfunction, you may have to return your product for service and repair.
For all repairs, please supply the following:
- the complete product
- the proof of purchase (invoice or sales receipt)
If you omit one of these items, the After Sales Service will have to invoice you for any repair costs
incurred.
Diagram 11
Reset: connect
the 2 supports of
the battery
Gb - 32
Technical specifications
Receiver collar battery life
- 7 months in stand by: for a use of 4 hours a day
- 2 months in continuous use: about 5 000 stimulations of 2 seconds at maximum level
To increase the battery life of the collar, we recommend you deactivate the unit if you are not using it
for a long period.
Guarantee
NUM’AXES guarantees the products against all manufacturing defects for two years after purchase.
All postage and packing charges will be the purchaser’s sole responsibility.
CANICOM 800 remote control CANICOM 1500 remote control CANICOM receiver collar
Power 1 3-V lithium battery CR2 2 LR06 alkaline batteries 1 3-V lithium battery CR2
Battery life Continuous use: Continuous use: In stand by: approximately
approximately 30 000 triggers approximately 50 000 triggers 7 months
Continuous use: approximately
2 months
Frequency (Power) 869,525 MHz (250 mW) 869,525 MHz (500 mW) 869,525 MHz
Antenna flexible flexible integrated
Range approximately 800 m approximately 1500 m
Hermetic seal watertight watertight waterproof
Radio operator safety and coding by microcontroller by microcontroller by microcontroller
Indicator of battery wear indicator on LCD screen indicator on LCD screen indicator light
Levels of stimulation 15 18
Use temperature between – 20°C and +40°C between – 20°C and +40°C between – 20°C and +40°C
Dimensions : H x L x D. 108 mm x 55 mm x 24 mm 132 mm x 62 mm x 31 mm 38 mm x 68 mm x 43 mm
Weight (with the battery) 85 g 130 g 75 g (without strap)
collar adjustable to neck
sizes from 20 to 50 cm
Gb - 33
Guarantee conditions
1. The guarantee will be valid only if the proof of purchase (invoice or sales receipt), without cancellation,
is submitted to the distributor or to NUM’AXES. The guarantee is limited to the original purchaser.
2. This guarantee does not cover the following:
- Changing the battery
- Changing the strap
- Direct or indirect transport risks incurred when sending the article back to the distributor or
NUM’AXES
- Damage to the article caused by:
- negligence or incorrect use (ex: bites, breakage, cracking)
- use contrary to the instructions or not envisioned therein
- repairs performed by unauthorized persons
- Loss or theft
3. If the product is found to be defective, NUM’AXES will either decide to repair or to replace it.
4. No claim may be advanced against NUM’AXES, particularly in relation to incorrect use or
breakdown.
5. NUM’AXES reserves the right to modify the characteristics of its products with a view to making
technical improvements or to comply with new regulations.
6. The information contained in this guide may be subject to amendment without prior notice.
7. Photos and drawings are not contractual.
Spare parts
You can purchase spare parts (batteries, straps, additional collar…) from your supplier at any time.
Collection and recycling of your device at the end of its life
The pictogram which appears on your product means that this one can not be thrown with
household refuse.
You have to bring the device to a collection location suitable for treatment, development, recycling, of
electronic wastes or bring it back to your distributor.
Adopting this process, you do something for the environment, you contribute to the preservation of
natural resources and to the protection of human health.
Gb - 34
www.numaxes.com
www.numaxes.com
Indice D
  • Page 1 1
  • Page 2 2
  • Page 3 3
  • Page 4 4
  • Page 5 5
  • Page 6 6
  • Page 7 7
  • Page 8 8
  • Page 9 9
  • Page 10 10
  • Page 11 11
  • Page 12 12
  • Page 13 13
  • Page 14 14
  • Page 15 15
  • Page 16 16
  • Page 17 17
  • Page 18 18
  • Page 19 19
  • Page 20 20
  • Page 21 21
  • Page 22 22
  • Page 23 23
  • Page 24 24
  • Page 25 25
  • Page 26 26
  • Page 27 27
  • Page 28 28
  • Page 29 29
  • Page 30 30
  • Page 31 31
  • Page 32 32
  • Page 33 33
  • Page 34 34
  • Page 35 35
  • Page 36 36
  • Page 37 37
  • Page 38 38
  • Page 39 39
  • Page 40 40
  • Page 41 41
  • Page 42 42
  • Page 43 43
  • Page 44 44
  • Page 45 45
  • Page 46 46
  • Page 47 47
  • Page 48 48
  • Page 49 49
  • Page 50 50
  • Page 51 51
  • Page 52 52
  • Page 53 53
  • Page 54 54
  • Page 55 55
  • Page 56 56
  • Page 57 57
  • Page 58 58
  • Page 59 59
  • Page 60 60
  • Page 61 61
  • Page 62 62
  • Page 63 63
  • Page 64 64
  • Page 65 65
  • Page 66 66
  • Page 67 67
  • Page 68 68
  • Page 69 69
  • Page 70 70
  • Page 71 71
  • Page 72 72
  • Page 73 73
  • Page 74 74
  • Page 75 75
  • Page 76 76
  • Page 77 77
  • Page 78 78
  • Page 79 79
  • Page 80 80
  • Page 81 81
  • Page 82 82
  • Page 83 83
  • Page 84 84

Num'axes Canicom 800 User manual

Category
Pet care
Type
User manual
This manual is also suitable for

Ask a question and I''ll find the answer in the document

Finding information in a document is now easier with AI