- 7 -
1-2 Installing the RAID Driver and Operating System
WiththecorrectBIOSsettings,youarereadytoinstalltheoperatingsystem.
A. Installing Windows
AssomeoperatingsystemsalreadyincludeRAIDdriver,youdonotneedtoinstallseparateRAIDdriverduring
theWindowsinstallationprocess.Aftertheoperatingsystemisinstalled,werecommendthatyouinstallall
requireddriversfromthemotherboarddriverdiscusing"XpressInstall"orfromtheGIGABYTEAPPCenterto
ensuresystemperformanceandcompatibility.Iftheoperatingsystemtobeinstalledrequiresthatyouprovide
additionalRAIDdriverduringtheOSinstallationprocess,pleaserefertothestepsbelow:
Step1:
Method1:CopytheHw10 folderunderthe\BootDrvfolderinthedriverdisctoyourUSBthumbdrive.
Method2:GotoGIGABYTE'swebsite,browsetothemotherboardmodel'swebpage,downloadtheAMD RAID
Preinstall DriverleontheSupport\Download\SATA RAID/AHCIpage,unziptheleandcopythe
lestoyourUSBthumbdrive.
Step2:
BootfromtheWindowssetupdiscandperformstandardOSinstallationsteps.Whenthescreenrequestingyou
toloadthedriverappears,selectBrowse.
Step3:
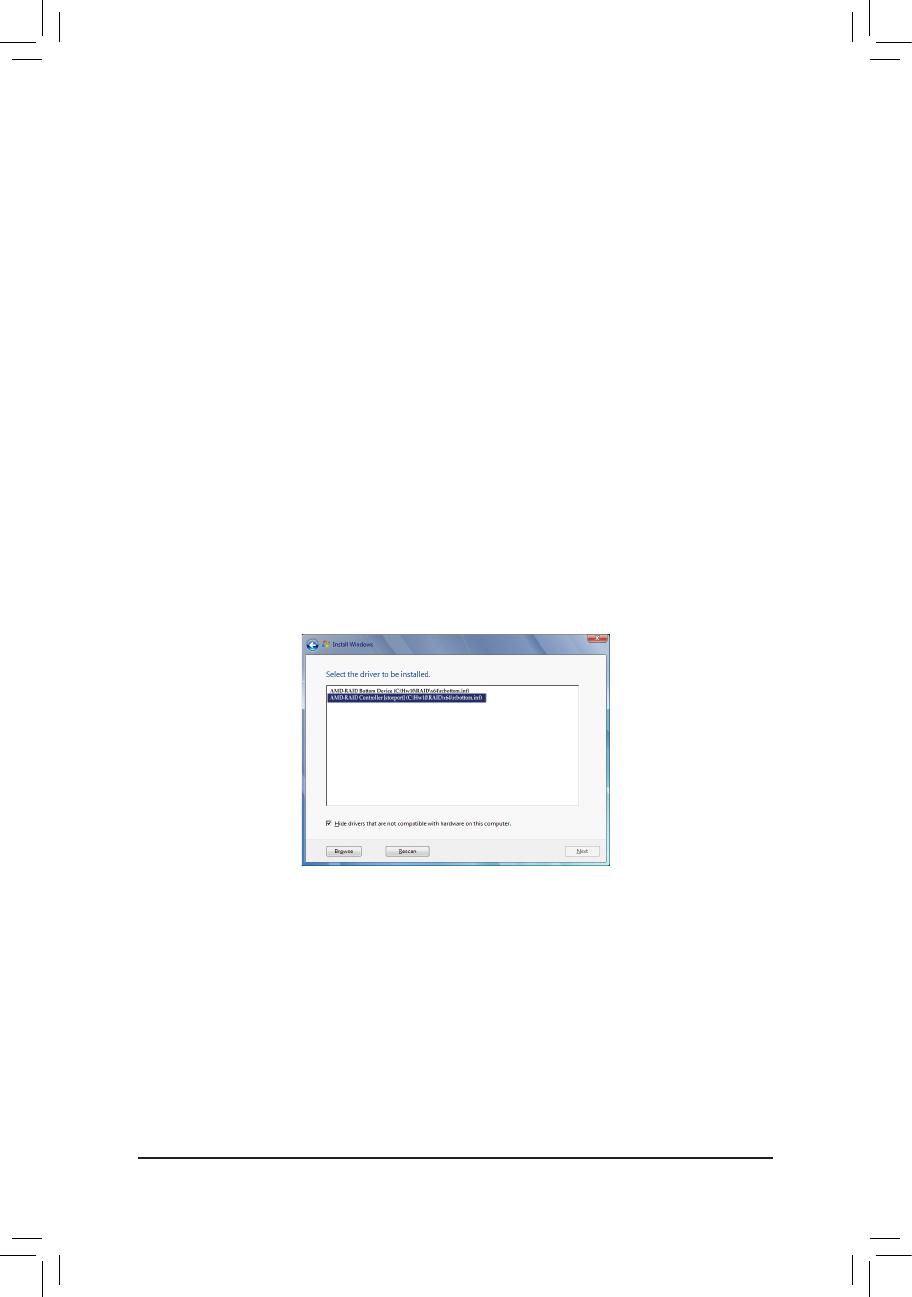
InserttheUSBthumbdriveandthenbrowsetothelocationofthedriver.WhenascreenasshowninFigure
1appears,selectAMD-RAID Bottom DevicerstandclickNexttoloadthedriver.ThenselectAMD-RAID
ControllerandclickNexttoloadthedriver.Finally,continuetheOSinstallation.
Figure1


