Rittal SK 3387.xxx Assembly Instructions Manual

Type
Assembly Instructions Manual
Schaltschrank-
Kühlgerät
Cooling unit
Climatiseur
Koelaggregaat
Kylaggregat
Condizionatore
per armadi
Refrigerador
para armarios
Montageanleitung
Assembly instructions
Notice de montage
Montage-instructie
Montageanvisning
Istruzioni di montaggio
Instrucciones de montaje
Umschalten auf Perfektion
SK 3382.xxx
SK 3359.xxx
SK 3383.xxx
SK 3384.xxx
SK 3385.xxx
SK 3386.xxx
SK 3387.xxx
00_Umsch_Ti_SK3382.fm Seite 1 Freitag, 5. März 2004 4:24 16
2
375
415
326
170
597
415
365
Ø 80
30
Abb. 3.1
Montageausschnitte
Fig. 3.1
Mounting cutouts
Fig. 3.1
Découpes de montage
Afb. 3.1
Montage-uitsparingen
Bild 3.1
Håltagning
Fig. 3.1
Dime di foratura
Fig. 3.1
Recorte del montaje
Montageausschnitt
SK 3359.... / SK 3382....
Montageausschnitt
SK 3383.... / SK 3384.... / SK 3385....
Montageausschnitt
SK 3386.... / SK 3387....
475
260
326
375
597
475
415
420
280
597
415
380
Ø 100
27
490
597
420
390
475
580
520
392
796
692
470
796
538
Ø 150
38.5
580
238
Ø 150
01_SK3382_2_3.fm Seite 2 Freitag, 5. März 2004 4:27 16
Tab. 2.1
Technische Daten
Tab. 2.1
Technical data
Tab. 2.1
Données techniques
Tab. 2.1
Technische gegevens
Tab. 2.1
Tekniska data
Tab. 2.1
Caratteristiche tecniche
Tab. 2.1
Datos técnicos
Farbton
RAL
7035
Edelstahlhaube
1.4301
Bemessungs-
spannung
Bemes-
sungs-
strom
Anlauf-
strom
Vor-
siche-
rung T
Einschalt-
dauer
Bemessungs-
leistung
Nutzkühlleistung Kältemittel zul.
Druck
PS
Temperatur-
bereich
Geräusch-
pegel
Schutzart
Innenkreislauf
Außenkreislauf
Abmessungen
(B x H x T)
mm
Gewicht
Colour
RAL
7035
Stainless
steel cover
1.4301
Operating
voltage
Rated
current
Starting
current
Pre-fuse
T
Duty cycle Nom.
refrigeration
Useful cooling
output
Refrigerant Permis-
sible
pressure
Temperature
range
Noise
level
Protection categ.
Internal circuit
External circuit
Dimensions
(W x H x D)
mm
Weight
Coloris
RAL
7035
Capot en acier
inoxydable
1.4301
Tension
nominale
Courant
nominal
Courant de
démarrage
Dispositif
de
sécurité T
Durée de
mise en
circuit
Puissance
nominale
Puissance
frigorifique
de régime
Fluide
frigori-
gène
Pression
de régime
autor.
Plage de
température
Niveau
sonore
Degré de protect.
Circuit intérieur
Circuit extérieur
Dimensions
(L x H x P)
mm
Poids
Kleur
RAL
7035
RVS mantel
1.4301
Bedrijfs-
spanning
Nominale
stroom
Aanloop-
stroom
Primaire
zekering
T
Inschakel-
duur
Nominaal
vermogen
Nuttig
koelvermogen
Koel-
middel
p. max. Temperatuur-
bereik
Geluids-
nivo
Beschermklasse
Inwendig circuit
Uitwend. circuit
Afmetingen
(B x H x D)
mm
Gewicht
Färgton
RAL
7035
Huv i rostfritt
stål 1.4301
Anslutnings-
spänning
Märk-
ström
Startström För-
säkring
gL
Inkopp-
lingstid
Märkeffekt Effektiv
kyleffekt
Kylmedel Tillåtet
drifts-
övertryck
Temperatur-
område
Ljudnivå Kapslingsklass
Inre kretslopp
Yttre kretslopp
Mått
(B x H x D)
mm
Vikt
Colore
RAL
7035
Cover in acciaio
inox 1.4301
Tensione
nominale
Corrente
nominale
Corrente
di spunto
Fusibili T Ciclo d’in-
serzione
Potenza
nominale
Potenza
frigorifera utile
Fluido
frigorigeno
Pressione
max.
Campo di
temperatura
Livello
di rumore
Grado di protez.
Circuito interno
Circuito esterno
Dimensioni
(L x A x P)
mm
Peso
Color
RAL
7035
Cubierta de acero
inoxidable
1.4301
Tensión
de
servicio
Intensidad
nominal
Intensidad
de
arranque
Fusible T Duración
de
conexión
Potencia
nominal
Potencia
frigorífica útil
Fluido
frigorífico
Presión
máxima
admis.
Campo de
temperaturas
Nivel
de ruido
Protección
Circuito interior
Circuito exterior
Dimensiones
(anch. x alt.
x prof.) mm
Peso
RAL
7035
1.4301
L35 L35
L35 L50
DIN 3168/EN 814
L35 L35
L35 L50
EN 60 529
SK 3382.100
SK 3382.500
SK 3382.200
SK 3382.600
230 V,
50/60 Hz
2.7 A/
2.9 A
9.2 A/
10.2 A
10.0 A/
10.0 A
100 %
360 W/410 W
410 W/450 W
500 W/510 W
270 W/370 W
R134a,
250 g
25 bar
+20 –
+55°C
<64dB(A)
IP 54
IP 34
597 x 415 x 375
30 kg
SK 3382.110
SK 3382.510
SK 3382.210
SK 3382.610
115 V,
50/60 Hz
5.5 A/
6.0 A
18.4 A/
18.4 A
10.0 A/
10.0 A
100 %
370 W/420 W
420 W/470 W
R134a,
250 g
+20 –
+55°C
<64dB(A)
IP 54
IP 34
35 kg
SK 3359.100
SK 3359.500
SK 3359.200
SK 3359.600
230 V,
50/60 Hz
3.0 A/
3.9 A
10.0 A/
10.7 A
10.0 A/
10.0 A
100 %
410 W/520 W
490 W/600 W
750 W/810 W
545 W/590 W
R134a,
300 g
25 bar
+20 –
+55°C
<64dB(A)
IP 54
IP 34
596 x 415 x 375
32 kg
SK 3359.110
SK 3359.510
SK 3359.210
SK 3359.610
115 V,
50/60 Hz
6.0 A/
7.8 A
20.0 A/
21.4 A
16.0 A/
16.0 A
100 %
420 W/535 W
500 W/615 W
R134a,
300 g
+20 –
+55°C
<64dB(A)
IP 54
IP 44
34 kg
SK 3359.140
SK 3359.540
SK 3359.240
SK 3359.640
400 V, 2 ~,
50/60 Hz
1.7 A/
2.2 A
5.8 A/
6.2 A
10.0 A/
10.0 A
100 %
R134a,
300 g
+20 –
+55°C
<64dB(A)
IP 54
IP 34
34 kg
SK 3383.100
SK 3383.500
SK 3383.200
SK 3383.600
230 V,
50/60 Hz
4.3 A/
4.5 A
15.5 A/
15.5 A
10.0 A/
10.0 A
100 %
550 W/650 W
660 W/750 W
1000 W/1080 W
760 W/ 820 W
R134a,
500 g
25 bar
+20 –
+55°C
<64dB(A)
IP 54
IP 34
597 x 415 x 475
40 kg
SK 3383.110
SK 3383.510
SK 3383.210
SK 3383.610
115 V,
50/60 Hz
8.3 A/
8.7 A
25.3 A/
24.3 A
16.0 A/
16.0 A
100 %
580 W/660 W
670 W/755 W
R134a,
500 g
+20 –
+55°C
<64dB(A)
IP 54
IP 44
46 kg
SK 3383.140
SK 3383.540
SK 3383.240
SK 3383.640
400 V, 2 ~,
50/60 Hz
2.4 A/
2.4 A
8.0 A/
8.8 A
10.0 A/
10.0 A
100%
R134a,
500 g
+20 –
+55°C
<64dB(A)
IP 54
IP 34
46 kg
SK 3384.100
SK 3384.500
SK 3384.200
SK 3384.600
230 V,
50/60 Hz
5.7 A/
6.8 A
16.6 A/
17.1 A
10.0 A/
10.0 A
100%
815 W/ 930 W
950 W/1090 W
1500 W/1520 W
1100 W/1210 W
R134a,
500 g
25 bar
+20 –
+55°C
<64dB(A)
IP 54
IP 34
41 kg
SK 3384.110
SK 3384.510
SK 3384.210
SK 3384.610
115 V,
50/60 Hz
12.5 A/
14.1 A
30.7 A/
29.1 A
20.0 A/
20.0 A
100%
850 W/ 950 W
1000 W/1150 W
R134a,
500 g
+20 –
+55°C
<64dB(A)
IP 54
IP 34
47 kg
SK 3384.140
SK 3384.540
SK 3384.240
SK 3384.640
400 V, 2 ~,
50/60 Hz
3.4 A/
4.0 A
9.8 A/
9.6 A
10.0 A/
10.0 A
100%
R134a,
500 g
+20 –
+55°C
<64dB(A)
IP 54
IP 34
47 kg
SK 3385.100
SK 3385.500
SK 3385.200
SK 3385.600
230 V,
50/60 Hz
5.7 A/
6.6 A
16.8 A/
18.4 A
10.0 A/
10.0 A
100 %
1000 W/1175 W
1100 W/1310 W
2000 W/2130 W
1570 W/1670 W
R134a,
950 g
25 bar
+20 –
+55°C
<64dB(A)
IP 54
IP 34
42 kg
SK 3385.110
SK 3385.510
SK 3385.210
SK 3385.610
115 V,
50/60 Hz
13.0 A/
14.2 A
36.0 A/
32.0 A
20.0 A/
20.0 A
100 %
1050 W/1250 W
1160 W/1380 W
R134a,
950 g
+20 –
+55°C
<64dB(A)
IP 54
IP 34
48 kg
SK 3385.140
SK 3385.540
SK 3385.240
SK 3385.640
400 V, 2 ~,
50/60 Hz
3.3 A/
3.8 A
10.0 A/
12.0 A
10.0 A/
10.0 A
100%
R134a,
950 g
+20 –
+55°C
<64dB(A)
IP 54
IP 34
48 kg
SK 3386.140
SK 3386.540
SK 3386.240
SK 3386.640
400 V, 3 ~,
50 Hz,
460 V, 3 ~,
60 Hz
3.0 A/
3.1 A
8.0 A/
9.0 A
10.0 A*/
10.0 A*
100%
1180 W/1490 W
1430 W/1770 W
3000 W/3300 W
2460 W/2750 W
R134a,
1600 g
25 bar
+20 –
+55°C
<67dB(A)
IP 54
IP 34
796 x 470 x 580
70 kg
SK 3387.140
SK 3387.540
SK 3387.240
SK 3387.640
400 V, 3 ~,
50 Hz
460 V, 3 ~,
60 Hz
3.5 A/
3.6 A
17.0 A/
19.0 A
100%
1620 W/2060 W
1870 W/2340 W
4000 W/4200 W
3250 W/3490 W
R134a,
1800 g
25 bar
+20 –
+55°C
<67dB(A)
IP 54
IP 34
77 kg
Technische Änderungen vorbehalten.
Technical modifications reserved.
Sous réserve de modifications techniques.
Technische wijzigingen voorbehouden.
Tekniska ändringar förbehålles.
Rittal si riserva di apportare eventuali modifiche tecniche.
Se reserva el derecho a realizar cambios técnicos.
* Motorschutzschalter, motor circuit breaker, disjoncteur-protecteur, motorbeveiligingsschakelaar, motorskyddsbrytare, salvamotore, guardamotor.
D
GB
F
NL
S
I
E
J
3
01_SK3382_2_3.fm Seite 3 Freitag, 5. März 2004 4:27 16
8
Contents
1. Application
2. Technical data
3. Assembly of roof-mounted units
4. Safety notices
5. Electrical connection
6. Commencing operation and control
behaviour
7. Supplementary functions
8. BUS system
9. Technical information
10. Handling Instructions
11. Scope of supply and guarantee
12. Display screen and system analysis
13. Comfort control programming
1. Application
Enclosure cooling units are designed and built
to dissipate heat from enclosures by cooling the
air inside the enclosure and protecting tempera-
ture-sensitive components. Enclosure cooling
units are particularly suitable for a temperature
range of +40°C to +55°C.
2. Technical data
(see table 2.1)
3. Assembly of
roof-mounted units
The roof-mounted unit can be assembled as
standard. Make the cutout at the mounting place
as shown in Fig. 3.1. Attach the enclosed sealing
plate under the plastic base of the cooling unit
and the enclosed sealing frame to the cut out roof
plate. After the assembly of the unit, screw
double-threaded bolts in the holes of the plastic
base at the bottom side of the unit. After this,
insert the sliding part, slide it over the cutout
and fasten it by means of washers and nuts.
4. Safety notices
The following safety notices are to be observed
in their entirety for the correct use of the
equipment:
Prior to mounting, ensure that:
the site for the enclosure, and hence the
arrangement of the cooling unit, is selected
so as to ensure good ventilation;
the location is free from excessive dirt and
moisture;
the cutout for air extraction is located in the
upper area of the enclosure;
the mains connection ratings, as stated on
the rating plate, are available;
the ambient temperature does not exceed
+55°C;
the packaging shows no signs of damage.
Traces of oil on damaged packaging are an
indication of refrigerant loss and of leakage in
the unit system. Any damage to the packaging
may be the cause of subsequent mal-
functions;
the enclosure is sealed on all sides (IP 54).
Condensation will occur if the enclosure is
leaky;
the distance of the units from the wall should
not be less than 200 mm;
air inlet and outlet are not obstructed on the
inside of the enclosure;
units are only fitted horizontally in the speci-
fied position.
Max. deviation from the true horizontal: 2°;
condensate drainage is provided
(see 9.3);
electrical connection and repair are carried
out only by authorised personnel. Use only
original replacement parts!
to avoid an increase in condensation, a door-
operated switch (e.g. PS 4127.000) should be
used which will switch the cooling unit off
when the enclosure door is opened (see 7.3);
losses from the components installed in
the enclosure must not exceed the specific
refrigeration capacity of the cooling unit itself;
the customer must not modify the cooling unit
in any way.
Important note:
In order to achieve a permanent seal between
cooling unit and enclosure, the mounting surface
should be reinforced or supported where neces-
sary (see example fig. 3.2), especially in case of
larger roof surfaces. Observe assembly instruc-
tion under heading 3.
Fig. 3.2
Roof plate reinforcement
with TS 8 enclosure
Accessory for roof plate reinforcement with TS:
Mounting rail
Sliding nut
Mounting bracket
Threaded block
(see Accessories in the Rittal Catalogue)
Transportation by means of a crane:
Remove blanking plug in the cover and
screw in eyebolt M12.
5. Electrical connection
The connected voltage and frequency must
correspond to the values stated on the rating
plate. During commissioning, the data on the
rating plate of the device shall apply. The cooling
unit must be connected to the mains via an all-pin
isolating device, which ensures at least 3 mm
contact opening when switched off. The unit must
not have any additional temperature control
connected up-stream at the supply end. The fans
and compressors built into single and three-
phase devices are intrinsically safe (thermal
winding protection).
This also applies to SK 3382...., SK 3359....,
SK 3383...., SK 3384...., SK 3385....
transformer types, and to specially rated units
which are also fitted with a transformer.
Line protection should be provided by means of
the pre-fuse specified on the rating plate. Only
one automatic cutout should be connected bet-
ween the cooling unit and the power supply. A
time-lag backup-fuse as specified on the rating
plate (safety cutout K-characteristic or time-lag
lead fuse) is mandatory.
The three phase supplies for the SK 3386.... /
SK 3387.... must be connected via a motor
safety switch to a TN grid with grounded star
point. Summation current as specified on the
rating plate. Specially rated three-phase units
must be protected by means of transformer safety
switches (category AC-6A) specified on the rating
plate.
For units designed for three phase 400/460 V,
the rotary field or the absence of a phase is also
monitored. If the rotary field is incorrect or a phase
is absent, the unit will not run. Observe the
relevant regulations during installation!
6.Commencing operation
and control behaviour
Following the completion of mounting and a
waiting period of approximately 30 minutes
(to allow oil to collect in the compressor in order
to ensure lubrication and cooling).
6.1 Basic control system
Version .....100 / .110 / .140
The cooling unit operates automatically, i.e. after
electrical connection, the evaporator fan will run
continuously to circulate the air inside the enclo-
sure. The installed basic controller (setting the
desired internal temperature; factory setting
+35°C) provides automatic control switch-off of
the cooling unit by the set value of the fixed
switching difference of 5 K.
English
6.1.1 Temperature setting at the basic
controller
First of all, the louvred grille with the incorporated
display is to be removed from the unit. The display
lock is then to be slackened and this is to be
pushed forward off the louvred grille. Finally, the
display screen (1) is carefully removed, e.g. with a
screwdriver. The desired nominal temperature can
be set on the potentiometer (2) which is now
accessible. After the temperature has been set,
the display of all screens in the louvred grille is to
be locked once more. The louvred grille is to be
fastened to the unit again.
Fig. 6.1
Basic controller
6.1.2 Operation of the basic controller
The basic controller monitors and controls the
cooling unit. After the supply voltage has been
connected, the green LED (3) lights to indicate
readiness for operation. The green LED is
connected in series with a door limit switch, and
flashes if the enclosure door is opened. The red
LED (4) signals too high a temperature inside the
enclosure; at 5 K above the set value, the red LED
comes on permanently. In addition, the excess
temperature message can still be queried via an
integrated potential-free contact in the cooling
unit connection terminal.
K1 fault signal relay with changeover contact
Ter minal 3: NC (normally closed)
Ter minal 4: C (connection between voltage
supply and fault signal relay)
Ter minal 5: NO (normally open)
The definitions NC and NO refer to the de-
energised state. As soon as voltage is applied to
the cooling unit, the fault signal relay picks up.
As a result, the relay contacts change their state
(contact 3 – 4 open; contact 4 – 5 closed),
representing the normal operating status of the
cooling unit. As soon as a system message
occurs or the voltage supply is interrupted, the
relay drops out. (see circuit diagrams on
page 37).
The high pressure alarm in the cooling circuit is
indicated by the red LED flashing. In this case,
the unit is to be reset manually, by pressing the
rubberized potentiometer display (5) for
3 seconds (see 6.1.1).
6.2 Comfort controller control
Version .....500 / .510 / .540
Fig. 6.2
Comfort controller
34
1
2
5
H2 = Button
H4 = Button
/set
°C
H3 = Button
°F
H1 = Display terminal
03_SK3382_8_11_eng.fm Seite 8 Freitag, 5. März 2004 4:33 16
9
After electrical connection the internal fan turns on
and circulates the enclosure air. This helps assure
even temperature distribution within the enclosure.
The condenser fan and compressor are controlled
by the Comfort controller. The minimum break time
is 3 min. The switching difference is 5 K, but
can be set in the range 2 – 10 K. To avoid short
switching cycles and hence the danger of
inadequate or only partial cooling in some
sections of the enclosure, the switching difference
should be set to be only as low as necessary.
For economic reasons (energy saving), the
nominal value of the internal enclosure
temperature T
i
should also be set to be only
as low as necessary.
6.2.1 Operation of the Comfort controller
(see diagram 13.1 Programming)
The display terminal H1 consists of a 3 position
7-segment display which indicates the enclosure
internal temperature in °C or °F (changeable) as
well as any fault codes. The actual enclosure
internal temperature is constantly displayed on
H1. When a system message is generated, this
alternates in the display with the current internal
enclosure temperature. While programming the
unit, the programming level and prescribed value
are also displayed.
Test mode
By simultaneously holding down keys H2
(
°C key) and H4 ( /set key) for 5 seconds, the
cooling unit will commence cooling operation,
irrespective of the setpoint. The door limit switch
function is disregarded in such cases. After
approximately 5 minutes or upon reaching 15°C,
the device deactivates cooling operation once
again.
6.2.2
Programming
(see 13.1 Comfort controller
programming)
In the EEPROM of the Comfort controller various
parameters are stored which can be changed by
using the buttons H2, H3 and H4. 24 changeable
parameters can be set via 24 programme levels in
the stated ranges (max. and min. values).
To this end, input code “22” is required
(see diagram 13.1).
The H2, H3 and H4 keys are multiple occupancy.
To access programming mode, set 5 sec is to be
pressed and held down.
Primary occupancy (only diode displays):
H2: °C, H3: °F, H4: Alarm
Secondary occupancy (for programming):
H2: Arrow upwards, H3: Arrow downwards,
H4: set
Programming via diagnostic software (order no.
SK 3159.100) is also an option. The programming
cable interface is the connecting cable plug,
located on the rear of the Comfort controller. To do
this, the louvred grille also is to be removed if
necessary.
6.2.3 System messaging equipment
All system messages at the cooling unit are
recorded and displayed as an error number
by H1. System messages alternate in the display
with the current internal enclosure temperature.
(see 12. Comfort control fault display and error
analysis).
6.2.3.1 System message contacts
(K1 and K2; potential free)
Both relays are normally closed.
All system messages assigned to an individual
relay result in it opening. If the control voltage
fails, this also results in the relay opening and can
hence be captured and documented in the log
file. According to individual weighting, all system
messages can be assigned to both relays or
suppressed. Terminal strip X3 provides the
connection. See the wiring diagram for contact
data and occupancy.
K1/K2 fault signal relay (normally open contact):
Ter minal 3: Fault signal relay 1
Ter minal 4: Voltage supply connection for both
fault signal relays
Ter minal 5: Fault signal relay 2
(see the circuit diagrams on page 37).
7. Supplementary functions
7.1 Filter mat use and changing
The PU foam filter mat available as an accessory
is coarse and filters large dust particles or fluff
from the air. Metallic filter mats are used to trap
oil condensate. These are also available as an
accessory. Subject to the suction of the blower
being high enough, fine dust is blown through
the filter mat and the external circuit of the unit.
This does not affect the unit's operation.
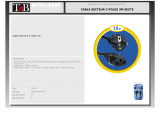
Fig.7.1
Filter mat replacement
7.2 Filter mat monitoring
Function of the filter mat monitor:
The filter mat is monitored for soiling by measur-
ing the temperature difference in the external cir-
culation of the cooling unit (see diagram 13.1:
Programming on page 45). In the event of any
filter mat soiling, the temperature difference will
increase. The nominal value of the temperature
difference in the external circuit is matched to the
relevant operating points in the characteristic
fields. Hence there is no requirement to adjust the
nominal value for different unit operating points.
7.3 Door limit switch S1
(supplied by customer)
Where a door limit switch is used and the enclo-
sure door is open (contact is closed when door is
open), the cooling unit (fans and condenser) will
switch off after approx. 15 s. This only applies to
devices with a Comfort controller and devices
with a three-phase connection to the basic con-
troller. For devices with a basic controller (115 V,
230 V and 400 V, 2~), the internal fan is not
switched off when using a door limit switch.
Thereby avoiding an increase in condensation
while the door is open. To avoid cyclic operation,
switch-on of condenser and external fan is
delayed by about 3 minutes after the cooling unit
has been switched off.
The internal fan will start up after about 15 s on
closure of the door. Connection is made at the
terminals 1 and 2. The extra low voltage is
supplied by the internal power pack, current is
approx. 30 mA DC. Each door limit switch must
only be assigned to one cooling unit. Several door
limit switches may be operated on one cooling
unit (parallel connection). The minimum cross-
section of the connection cable is 0.3 mm
2
for a
cable length of 2 m. The resistance of the door
limit switch contact must not exceed a maximum
of 50
.
Only connect the door limit switch to the
cooling unit’s own DC supply!
7.4 Interface X3 (option)
(Connector X3)
Note!
The electrical signals at the interface are of an
extra-low voltage (not extra-low safety voltages
to EN 60 335).
The 9-pin SUB-D socket X3 can be used to
connect additional interface cards for integrating
cooling units with higher level monitoring systems.
These cards are also available as an accessory.
(Interface card: Model No. SK 3124.200).
1.
2.
8. BUS system
(Model No.: Master-slave cable SK 3124.100)
8.1 General
The BUS system allows a maximum of 10 cool-
ing units to be interconnected.
As a result, the following functions are available
to the operator:
Parallel unit control (the cooling units in the
network can be simultaneously switched
on and off)
Parallel door status messages (“door open”)
Parallel collective fault message
The data exchange is carried out using master-
slave cables (shielded, two-wire leads). All units
are assigned an address. This address also
includes the ID for “master” or “slave”.
8.2 Installation notices for the X2 interface
(Jack X2)
Note!
The electrical signals at the interface are of an
extra-low voltage (not extra-low safety voltages
to EN 60 335). Always heed the following notes!
De-energise the cooling units to be
connected.
Ensure proper electrical insulation.
Make sure the cables are not laid in parallel
to power lines.
Make sure that the lines are short.
8.3 Programming the cooling unit
See diagram 13.1 for details on programming.
ID’s:
Note
Only one unit may be configured as master; the
address ID must match the number of slave
units.
The individual slave units must have different
addresses; the addresses must be in ascending
order (without gaps in between).
Example:
1 master cooling unit with 2 slave cooling units
(see wiring example of master/slave and door
limit function, page 42/43).
Master cooling unit Slave cooling unit
00 Basic state 00 Basic state
01
Master
with 1 slave
11
Slave
with address 1
02
Master
with 2 slaves
12
Slave
with address 2
03
Master
with 3 slaves
13
Slave
with address 3
04
Master
with 4 slaves
14
Slave
with address 4
05
Master
with 5 slaves
15
Slave
with address 5
06
Master
with 6 slaves
16
Slave
with address 6
07
Master
with 7 slaves
17
Slave
with address 7
08
Master
with 8 slaves
18
Slave
with address 8
09
Master
with 9 slaves
19
Slave
with address 9
Master
02
Slave
11
Slave
12
03_SK3382_8_11_eng.fm Seite 9 Freitag, 5. März 2004 4:33 16
10
Fig. 9.3
Condensate discharge
10. Handling Instructions
Storage, maintenance, transport and disposal
As a maintenance-free, hermetically sealed
system, the cooling circuit has been filled in the
factory with the required amount of refrigerant,
and tested for leaks and subjected to a function
trial run.
The installed maintenance-free fans use ball
bearings, they are protected against moisture and
dust, and are fitted with a temperature monitor.
The life expectancy is at least 30,000 operating
hours. The cooling unit is thus largely mainte-
nance free. All that may be required from time to
time is that the components of the external air
circuit are cleaned by compressed air. The use of
a filter mat is recommended only if large particles
of lint are present in the air, so that blockage of the
condenser is prevented. (Filter mat replacement,
fig. 7.1). Note: Prior to any maintenance work, the
power to the cooling unit must be disconnected.
Storage temperature: The cooling units must not
be exposed to temperatures above +70°C.
Transport position: The cooling units must always
be transported upright.
Waste disposal: The closed cooling circuit
contains refrigerant and oil which must be
correctly disposed of for the protection of the
environment. Disposal can be carried out at
Rittal.
We reserve the right to make technical
modifications.
11. Scope of supply and
guarantee
1 cooling unit, ready for connection
1 drilling template
1 sealing plate
1 sealing frame
1 set of mounting and operating instructions
1 plug-in terminal strip
Guarantee:
This unit is covered by a 1-year guarantee from the
date of supply, subject to correct usage (see also
Safety notices under heading 4.). Within this period,
the returned unit will be repaired in the factory or
replaced free of charge. The cooling unit is to be
used for the cooling of enclosures only. If it is con-
nected or handled improperly the manufacturer’s
guarantee does not apply and in this case we are
not liable for any damage caused.
1
/
2
′′
9.Technical information
The cooling unit (compressor refrigeration unit)
consists of four main components: the coolant
compressor, evaporator, condenser, and the
control or expansion valve, which are connected
by suitable pipework. This circuit is filled with
a readily boiling substance, the refrigerant. The
R134a (CH
2
FCF
3
) refrigerant is free from chlo-
rine. It has an ozone destroying potential (ODP)
of 0 and is therefore environmentally friendly. A
filter dryer which is integrated in the hermetically
sealed cooling circuit, provides effective protec-
tion against moisture, acid, dirt particles, and
foreign bodies within the cooling circuit.
9.1 Operation of the cooling unit
Fig. 9.1
Operation of the cooling unit
The compressor takes the gaseous refrigerant
from the evaporator and compresses it to a
higher pressure in the condenser. During this
process the temperature of the refrigerant rises
above the ambient temperature and heat can be
dissipated to the environment via the surface of
the condenser. Then the refrigerant is liquefied
and, by means of a thermostatically controlled
expansion valve, returned to the evaporator,
where it evaporates at low pressure. The heat
required for complete evaporation is drawn from
the enclosure interior causing it to cool down.
The cooling cycle is thus completed, the afore-
mentioned process of the heat transfer starts
afresh.
9.2 Safety equipment
The cooling circuit of the cooling unit has a
component-tested, high-pressure monitor to
EN 12 263, which is set to maximum PS (allowed
pressure) and operates via an automatic reset
device in case of recurring pressure drop. Tem-
perature monitoring will prevent the evaporator
from icing up. If there is a risk of icing up, the
compressor is switched off and automatically
switched on again at higher temperatures.
The refrigerant compressor and the fans are
equipped with thermal winding protection
switches against excess current and excess
temperatures.
9.3 Condensate discharge
A cast gutter in the evaporator tray ensures that
any condesate which may form on the evapora-
tor (at high air humidity, low temperatures inside
the enclosure), is drained away to the right or
rear of the unit. For this purpose, a length of
hose should be fitted to one of the two conden-
sate pipe connection pieces (see fig. 9.3). The
other drain that is not used has to be sealed
accordingly. The condensate must be able to
run off freely. If the condensate is to be drained
off over a greater distance, then care must be
taken that the hose is free from kinks and a
check for correct drainage made. Units with a
comfort controller have an additional conden-
sate alarm.
Fan 2
Fan 1
Compressor
Evaporator
External circuit
Internal circuit
Expansion valve
Thermostat
Filter
dryer
Liquefier
PSA
monitor
H
English
03_SK3382_8_11_eng.fm Seite 10 Freitag, 5. März 2004 4:33 16
11
12. Comfort control display screen and system analysis
Alarm no. System message Cause Remedy
A01 Open the enclosure door Door open or door limit switch not correctly
positioned
Close door, position door limit switch correctly,
check connection if necessary
A02
Internal temperature of enclosure too
high
Cooling capacity too low/unit undersize
Sequence errors in messages A03 to A17
Check cooling capacity
A03 Filter monitoring Filter mat soiled Clean or exchange
A04
Ambient temperature too high/too low Ambient temperature outside the permissible
operating range (+10°C to +60°C)
Raise or lower the ambient temperature
(e.g. heat or ventilate the room)
A05 Icing hazard Icing hazard display according to operating
mode
Increase the nominal value of
the internal enclosure temperature
A06 PSA
H
monitor
Ambient temperature too high Unit operating limits exceeded
Condenser soiled Clean
Filter mat soiled Clean or exchange
Condenser fan defective Exchange
E-valve defective Repair by refrigeration engineer
PSA
H
monitor fault Refrigeration engineer to exchange
A07 Evaporator Refrigerant fault Repair by refrigeration engineer
A08 Condensate warning Condensate drainage does not work Check condensate drainage; repair kinks or
blockages in the hose as necessary
A09 Condenser fan Blocked or defective Clear the blockage; exchange if necessary
A10 Condenser fan Blocked or defective Clear the blockage; exchange if necessary
A11 Compressor
Compressor overloaded
(internal winding protection)
Unit switches in again independently
Defective (check by measuring the
winding resistance)
Refrigeration engineer to exchange
A12 Condenser temperature sensor Open or short circuit Exchange
A13 Ambient temperature sensor Open or short circuit Exchange
A14 Icing temperature sensor Open or short circuit Exchange
A15
Condensate warning temperature
Open or short circuit Exchange
A16 Internal temperature sensor Open or short circuit Exchange
A17
Phase monitoring
Incorrect rotary field/phase absent Exchange two phases
A18 EPROM error
A19 LAN/Master-Slave Master and slave not linked Setting or check cable
A20 Voltage drop Fault display is not illustrated Event is saved in the log file
E0 Display signal
Connection problem (display and control board)
Reset by means of power supply (OFF/ON)
Cable faulty; plug connection loose Replacement of the boards
The fault displays A03, A06 and A07 are to be reset manually. To do this, hold down the
and
keys simultaneously for 5 seconds.
13. Comfort control programming
Level Display
screen
changeable
parameter
min.
value
max.
value
Factory
setting
Explanation
1 St
Nominal value of
the internal
enclosure
20 55 35 The nominal value of the internal enclosure temperature is set at the factory to 35°C and is
variable over a 20°C range to 55°C.
2Fi Filter mat
monitoring
10 60
(99 = off)
99 For activation of filter mat monitoring, the display is to be set to a minimum of 10 K above
the temperature difference shown in programming mode “Fi”; filter mat monitoring is
switched off at the factory. (Display 99 = off).
3 Ad Master-slave
programming
0 19 0 see 8.3 “Cooling unit programming”
4 CF
Temperature
conversion
0 1 0 The temperature display can be switched from °C (0) to °F (1). The corresponding LED
displays the current unit of temperature.
5 H1
Temperature
switching
2 10 5 The cooling unit is set in the factory for a switching cycle of 5 K. This parameter should only
be changed after agreement with the manufacturer.
6 H2 Difference for error
message 2
3 15 5 If the internal enclosure temperature exceeds the set value by more than 5 K, then error
message 2 (internal enclosure temperature too high) appears on the display terminal. The
difference of 5 K can be changed if required over the rang 3 K to 15 K.
7 A1 Relay connection 0 2 0
The fault messages (1 to 19) depicted in the display can also be evaluated using two
potential-free fault message relays. Comfort control provides the option to group fault
messages accordingly and assign them to both fault message relays. The value “1” is to
be programmed for assignment and evaluation of the relevant fault message via relay 1.
If the fault is to be evaluated via relay 2, then the value “2” is to be programmed accordingly.
If the value is set to “0”, the system message appears only in the display.
This accordingly enables the user to define the system weighting himself, by apportioning
between relays 1 and 2.
8 A2 Relay connection 0 2 0
9 A3 Relay connection 0 2 0
10 A4 Relay connection 0 2 0
11 A5 Relay connection 0 2 0
12 A6 Relay connection 0 2 1
13 A7 Relay connection 0 2 2
14 A8 Relay connection 0 2 1
15 A9 Relay connection 0 2 1
16 A10 Relay connection 0 2 1
17 A11 Relay connection 0 2 2
18
A12
Relay connection 0 2 1
19 A13 Relay connection 0 2 1
20 A14 Relay connection 0 2 1
21 A15 Relay connection 0 2 1
22 A16 Relay connection 0 2 1
23 A17 Relay connection 0 2 1
24 A18 Relay connection 0 2 0
25 A19 Relay connection 0 2 0
03_SK3382_8_11_eng.fm Seite 11 Freitag, 5. März 2004 4:33 16
36
Anschlussschema
Comfortcontroller
A1 = Leistungsplatine
A2 = Anzeigeterminal
A3 = Anlassrelais und RC Glied
B1 = Temperaturfühler Innentemperatur
B2 = Temperaturfühler Vereisungsschutz
B3 = Temperaturfühler außen 1
B4 = Temperaturfühler außen 2
B5 = Kondensatwarnsensor
C1-C4 = Betriebskondensatoren
F2 = PSA
H
-Wächter
F3 = Thermokontakt Verdichter
K1 = Relais Sammelstörung 1
K2 = Relais Sammelstörung 2
L1 = LED Betrieb grün
L2 = LED Alarm rot
M1 = Verdichter
M2 = Verflüssigerventilator 1
M3 = Verflüssigerventilator 2
M4 = Verdampferventilator
R1 =
Potentiometer zur Setpoint-Einstellung
S1 = Türendschalter (ohne Türendschalter
Klemme 1, 2 offen)
T1 =
Trafo
X1 = Hauptanschlussklemmleiste
X2 = Master/Slave-Anschluss
X3 = Optionale Schnittstelle
Aansluitschema
comfortcontroller
A1 = Hoofdstroomprint
A2 = Display
A3 = Startrelais en RC-element
B1 = Temperatuursensor interne temp.
B2 = Temperatuursensor ijsvorming
B3 = Temperatuursensor buiten 1
B4 = Temperatuursensor buiten 2
B5 = Condens waarschuwingssensor
C1-C4 = Motorcondensator
F2 = PSA
H
-pressostaat
F3 = Thermisch relais compressor
K1 = Relais verzamelstoring 1
K2 = Relais verzamelstoring 2
L1 = LED bedrijf, groen
L2 = LED alarm, rood
M1 = Compressor
M2 = Condensorventilator 1
M3 = Condensorventilator 2
M4 = Verdamperventilator
R1 = Potmeter
voor instellen gewenste waarde
S1 = Deurschakelaar (zonder deur-
schakelaar klem 1, 2 open)
T1 = Transformator
X1 = Hoofdaansluitklemmenstrook
X2 = Master/slave-aansluiting
X3 = Optionele interface
Esquema de conexiones
del controlador Confort
A1 = Pletina de potencia
A2 = Pantalla indicadora
A3 = Relé de arranque y fusible RC
B1 = Sonda térmica de la temp. en el
interior del armario
B2 = Sonda térmica protección
contra congelación
B3 = Sonda térmica exterior 1
B4 = Sonda térmica exterior 2
B5 = Sensor de condensación
C1-C4 = Condensador electrolitico de servicio
F2 = Presostato PSA
H
F3 = Contacto térmico compresor
K1 = Relé de fallo 1
K2 = Relé de fallo 2
L1 = LED servicio verde
L2 = LED alarma rojo
M1 = Compresor
M2 = Ventilador del condensador 1
M3 = Ventilador del condensador 2
M4 = Ventilador del evaporador
R1 = Potenciómetro para ajuste de valores
S1 = Interruptor de puerta (sin interruptor
final borne 1, 2 abierto)
T1 = Transformador
X1 = Regleta de bornes principal
X2 = Conexión maestro/esclavo
X3 = Interfaz opcional
D
NL
E
Wiring diagram
comfort controller
A1 = Power PCB
A2 = Display terminal
A3 = Start-up relay and RC component
B1 = Internal temperature sensor
B2 = Icing hazard temperature sensor
B3 = Temperature sensor, external 1
B4 = Temperature sensor, external 2
B5 = Condensate warning sensor
C1-C4 = Operating capacitors
F2 = PSA
H
monitor
F3 = Compressor thermal contact
K1 = Relay collective fault 1
K2 = Relay collective fault 2
L1 = Green operating LED
L2 = Red alarm LED
M1 = Compressor
M2 = Condenser fan 1
M3 = Condenser fan 2
M4 = Evaporator fan
R1 = Setpoint adjustment potentiometer
S1 =
Door limit switch (without door operated
switch terminal 1, 2 open)
T1 = Transformer
X1 = Main terminal strip
X2 = Master/slave connection
X3 = Optional interface
Anslutningsschema
comfortcontroller
A1 = Drivkort
A2 = Display terminal
A3 = Startrelä och RC länk
B1 = Temperaturgivare innertemperatur
B2 = Temperaturgivare nedisningsrisk
B3 = Temperaturgivare yttre 1
B4 = Temperaturgivare yttre 2
B5 = Kondensvarningssensor
C1-C4 = Startkondensator
F2 = PSA
H
-vakt
F3 = Termokontakt kompressor
K1 = Samlingsrelä felsignaler 1
K2 = Samlingsrelä felsignaler 2
L1 = LED drift grön
L2 = LED alarm röd
M1 = Kompressor
M2 = Kondensorfläkt 1
M3 = Kondensorfläkt 2
M4 = Förångarfläkt
R1 = Potentiometer för setpoint-inställning
S1 = Dörrströmbrytare (utan dörrström-
brytarklämma 1, 2 öppna)
T1 = Trafo
X1 = Huvudkontaktplint
X2 = Master/Slave-anslutning
X3 = Optional anslutning
GB
S
J
Schéma électrique
régulateur confort
A1 = Platine de puissance
A2 = Display terminal
A3 = Relais de démarrage temporisé
B1 = Sonde te température, temp. intérieure
B2 = Temp. sensor danger de givrage
B3 = Sonde de température extérieure 1
B4 = Sonde de température extérieure 2
B5 = Avertisseur de condensats
C1-C4 = Condensateur de régime
F2 = Témoin pression PSA
H
F3 = Contact bilame du compresseur
K1 = Relais défauts 1
K2 = Relais défauts 2
L1 = LED fonction – verte
L2 = LED alerte – rouge
M1 = Compresseur
M2 = Ventilateur du condenseur 1
M3 = Ventilateur du condenseur 2
M4 = Ventilateur de l’évaporateur
R1 = Potentiomètre d’étalonnage
S1 = Interrupteur de porte (en absence
d'interrupteur bornes 1, 2 ouvertes)
T1 = Transformateur
X1 = Bornier principal
X2 = Port maître/esclave
X3 = Interface (option)
Schema allacciamenti
controllore Comfort
A1 = Scheda di potenza
A2 = Display terminale
A3 = Relais start ed elemento RC
B1 = Sonda temperatura interna
B2 = Sonda temperatura,
pericolo di formazione di ghiaccio
B3 = Sonda temperature esterna 1
B4 = Sonda temperature esterna 2
B5 = Sensore allarme condensa
C1-C4 = Condensatore d’esercizio
F2 = Controllo PSA
H
F3 = Contatto termocompressore
K1 = Relè segnalatore guasti 1
K2 = Relè segnalatore guasti 2
L1 = LED esercizio verde
L2 = LED allarme rosso
M1 = Compressore
M2 = Ventilatore del condensatore 1
M3 = Ventilatore del condensatore 2
M4 = Ventilatore dell’evaporatore
R1 = Potentiometro per setpoint
S1 = Interruttore della portina (senza inter-
ruttore i morsetti 1, 2 sono aperti)
T1 = Trasformatore
X1 = Morsettiera raccordo principale
X2 = Raccordo Master/Slave
X3 = Interfaccia opzione
F
I
10_SK3382_36_47.fm Seite 36 Freitag, 5. März 2004 4:51 16
M2
L1
L2
N
PE
1
23
4
5
L
123
12321
N
PE
5
Power
S1
Kx
M1
1
2
3
2
1
NTC I
NTC E
Te r m
L2
L1
R1
2
2
8
B1
B2
P
F2
M4
M
1~
M
1~
C1
R
S
C
C2
Netz
S1
X1
T1
L1
LN
L2
22
21
PE
A1
M2
1
2
3
M4
1
2
3
F2
A2
M1
F3
M2
X1
L1
L2
N
PE
1
23
4
5
L
123
12321
N
PE
5
Power
M1
1
2
3
M2
1
2
3
2
1
NTC I
Serial
2
2
2
B1
B2
P
M4
M
1~
M
1~
C1
R
S
F3
C
C2
S1
22
21
X2 X3
8
3
A2
NTC E
NTC C
NTC A
Level
2
2
4
Te r m
F2
F2
B3
B4
B5
S1
Kx
K2
K1
MS1
M1
L1
L2
N
T1
Netz
A1
M4
1
2
3
M3
L1
L2
N
PE
1
23
4
5
S1
PE
5
L
123
N
Power
Kx
M1
1
2
3
NTC I
NTC E
Te r m
L2 L1
R1
P
M4
M
1~
M
1~
C
R
S
F3
X1
Netz
A2
2
2
8
B1
B2
F2
2
1
F2
S1
1232
1
PE
M1
C1
L2
L1
L
N
22
21
A1
M2
1
2
3
M4
1
2
3
nicht bei 3383.xxx
C4
nur bei 3383.xxx sowie 3384.xxx
nur bei 3385.xxx
C
R
S
F3
C1
M2
M
1~
C2
M1
1
C1
A3
2
3
R
C
L1
L2
N
PE
1
23
4
5
S1
PE
5
X1
Netz
L1
L2
N
T1
M3
L
123
N
Power
Kx
M1
1
2
3
NTC I
NTC E
Level
P
M4
M
1~
M
1~
C
R
S
F3
A2
2
B1
B2
F2
2
1
F2
1232
1
M1
C1
nicht bei 3383.xxx
nur bei 3383.xxx sowie 3384.xxx
C
S
F3
C1
M2
M
1~
C2
M1
1
A3
2
3
R
C
A1
K2 K1
MS1
NTC C
NTC A
Te r m
Serial
21
22
3
8
2
X2 X3
2
2
2
2
4
B3
B4
B5
C4
M2
1
2
3
M4
1
2
3
R
nur bei 3385.xxx
37
Anschlussschema
Wiring diagram
Schéma électrique
Aansluitschema
Anslutningsschema
Schema allacciamenti
Esquema de conexiones
Kontaktdaten K1
Contact Data K1
Caracteristiques des contacts K1
Kontaktgegevens K1
Kontaktdata K1
Caratteristiche dei contatti K1
Características del contacto K1
SK 3382.100 / .110, SK 3359.100 / .110 / .140,
SK 3382.200 / .210, SK 3359.200 / .210 / .240
SK 3382.500 / .510, SK 3359.500 / .510 / .540,
SK 3382.600 / .610, SK 3359.600 / .610 / .640
SK 3383.100 / .110 / .140, SK 3384.100 / .110 / .140,
SK 3385.100 / .110 / .140
SK 3383.200 / .210 / .240, SK 3384.200 / .210 / .240,
SK 3385.200 / .210 / .240
SK 3383.500 / .510 / .540, SK 3384.500 / .510 / .540,
SK 3385.500 / .510 / .540
SK 3383.600 / .610 / .640, SK 3384.600 / .610 / .640,
SK 3385.600 / .610 / .640
AC
cosf = 1
DC
L/R = 40 ms
I max. = 5 A
U max. = 230 V
I min. = 10 mA
U max. = 100 V
I max. = 200 mA
U max. = 20 V
I max. = 5 A
Technische Daten siehe Typenschild
Technical data see name plate
Données techniques voir plaque signalétique
Technische gegevens zie typenplaatje
Tekniska data se typskylt
Caratteristiche tecniche vedi targhetta
Datos técnicos véase placa de características
10_SK3382_36_47.fm Seite 37 Freitag, 5. März 2004 4:51 16
L1
PE
1
23
4
5
321
12241
PE
5
Power
Kx
M1
1
23
NTC I
NTC E
Te r m
L2
L1
R1
2
2
8
B1
B2
P
F2
M
3~
R
S
C
X1
22
21
PE
A2
F3
Netz
L2 L3
RS T
S1
A1
3
4
F3
1
234
M2
1
234
F4
1
23
M4
1
23
F5
1
2
F2
M1
M2
M
3~
M3
M
3~
M4
S1
L1
PE
1
23
4
5
321
12 2 4 1
PE
5
Power
Kx
M1
1
23
P
F2
M
3~
R
S
C
X1
22
21
F3
L2 L3
RS T
3
4
F3
1
234
M2
1
234
F4
1
23
M4
1
23
F5
1
2
F2
M1
M2
M
3~
M3
M
3~
M4
NTC I
NTC E
Level
A2
2
B1
B2
NTC C
NTC A
Te r m
2
2
2
2
4
B3
B4
B5
Netz
S1
X2 X3
3
8
S1
K2 K1
A1
SerialMS1
L1
PE
1
23
4
5
321
12
2
41
PE
5
Power
Kx
M1
1
23
NTC I
NTC E
Te r m
L2
L1
R1
2
2
8
B1
B2
P
F2
M
3~
R
S
C
X1
22
21
PE
A2
L2 L3
RS T
S1
3
4
F3
1
234
M2
1
234
F4
1
23
M4
1
2
3
F5
1
2
F2
M2
M
3~
M3
M
3~
M4
S1
Netz
A1
M1
L1
PE
1
23
4
5
321
12
241
PE
5
Power
Kx
M1
1
23
P
M
3~
R
S
C
X1
22
21
L2 L3
RS T
3
4
F3
1
234
M2
1
234
F4
1
23
M4
1
2
3
F5
1
2
F2
M2
M
3~
M3
M
3~
M4
NTC I
NTC E
Level
A2
2
B1
B2
NTC C
NTC A
Te r m
2
2
2
2
4
B3
B4
B5
X2
X3
3
8
S1
K2
K1
Serial
MS1
Netz
S1
A1
M1
F2
38
Anschlussschema
Wiring diagram
Schéma électrique
Aansluitschema
Anslutningsschema
Schema allacciamenti
Esquema de conexiones
Kontaktdaten K1
Contact Data K1
Caracteristiques des contacts K1
Kontaktgegevens K1
Kontaktdata K1
Caratteristiche dei contatti K1
Características del contacto K1
AC
cosf = 1
DC
L/R = 40 ms
I max. = 5 A
U max. = 230 V
I min. = 10 mA
U max. = 100 V
I max. = 200 mA
U max. = 20 V
I max. = 5 A
SK 3386.140 / .240 SK 3386.540 / .640
SK 3387.140 / .240 SK 3387.540 / .640
Technische Daten siehe Typenschild
Technical data see name plate
Données techniques voir plaque signalétique
Technische gegevens zie typenplaatje
Tekniska data se typskylt
Caratteristiche tecniche vedi targhetta
Datos técnicos véase placa de características
10_SK3382_36_47.fm Seite 38 Freitag, 5. März 2004 4:51 16
39
D
E J
GB NL
I
F
S
Bei Bestellung unbedingt angeben
Typ:
Fabrikations-Nr.:
Herstelldatum:
Ersatzteil-Nr.:
Absolutely necessary in case of order
Type:
Fabrication no.:
Manufacturing date:
Spare part no.:
Position
Item
Pos.
Pos.
Pos.
Pos.
Posición
2
Ersatzteil-
liste
Spares
list
Liste
de pièces
détachées
Lijst
reserve-
delen
Reserv-
delslista
Lista dei
pezzi di
ricambio
Lista de
piezas de
repuesto
Bezeichnung Description Signification Benaming Benämning Descrizione Descripción
1Verdichter Compressor Compresseur Kompressor Kompressor Compressore Compresor
5
Verflüssiger-
ventilator
Condensing fan
Ventilateur
du condenseur
Condensor-
ventilator
Kondensorfläkt
Ventilatore
del condensatore
Ventilador
del condensador
10
Verdampfer-
ventilator
Evaporator fan
Ventilateur
de l’évaporateur
Verdamper-
ventilator
Förångarfläkt
Ventilatore
dell’evaporatore
Ventilador
del evaporador
15 Versandbeutel Dispatch bag
Pochette
d’accessoires
Zakje toebehoren Tillbehörspåse
Sacchetto
accessori
Bolsa de
accesorios
20 Expansionsventil Expansion valve
Soupape de
détente
Expansieventiel Expansionsventil
Valvola
d’espansione
Válvula de
expansión
25 Filtertrockner Filter dryer Assècheur de filtre Filterdroger Filtertork Filtro essicatore Secador del filtro
30 PSA
H
-Wächter PSA
H
monitor
Témoin pression
PSA
H
PSA
H
-pressostaat PSA
H
-vakt Controllo PSA
H
Presostato PSA
H
40 Controller-Box Controller box Processeur box Controller E-box Kontroll box Box controller
Carcasa
controlador
45 Lamellengitter 1 Louvred grille 1 Grille à lamelles 1 Rooster 1 Lamellgaller 1 Griglia a lamelle 1 Rejilla 1
46 Lamellengitter 2 Louvred grille 2 Grille à lamelles 2 Rooster 2 Lamellgaller 2 Griglia a lamelle 2 Rejilla 2
50 Abdeckblende Infill panel Plastron Afdekplaat Täckplåt Copertura cieca Pantalla cubierta
55 Anzeige Display Affichage Display Display Comando Indicación
65 Folientastatur
Membrane
keyboard
Clavier
membrane
Folietoetsenbord
Folietangenter
tryckknappar
Tastiera a
membrana
Teclado de
membrana
66 Abdeckfolie
Covering
membrane
Feuille de
recouvrement
Afdekfolie Täckfolie
Lamina di
copertura
Lámina cubierta
70
Temperaturfühler,
Vereisung
Icing
sensor
Sonde de
givrage
Aanwijzings-
sensor
Nedisnings-
givare
Sonda
riferimento
Sensor
referencial
71 Temperaturfühler
Temperature
sensor
Sonde de
température
Temperatuur-
sensor
Temperaturgivare
Sonda di
temperatura
Sonda térmica
75 Haube Cover Couvercle Afdekkap Huv Calotta Capucha
80 Transformator Transformer Transformateur Trafo Trafo Trasformatore Transformador
90 Verdampfer Evaporator Evaporateur Verdamper Förångare Evaporatore Evaporador
95
Bodenwanne,
komplett
Bottom tray,
complete
Bac de rétention,
complète
Bodemplaat,
kompleet
Bottentråg,
komplett
Vaschetta di racc.
cond., completa
Tapa de fondo,
completa
100 Verflüssiger Condenser Condenseur Condensor Kondensor Condensatore Condensador
10_SK3382_36_47.fm Seite 39 Freitag, 5. März 2004 4:51 16
40
40
75
30
1
80
15
25
10
90
20
70
95
45
55
71
100
5
SK 3382.xxx / SK 3359.xxx
10_SK3382_36_47.fm Seite 40 Freitag, 5. März 2004 4:51 16
41
15
95
25
20
45
55
100
75
30
90
5
71
10
70
80
1
40
SK 3383.xxx / SK 3384.xxx / SK 3385.xxx
10_SK3382_36_47.fm Seite 41 Freitag, 5. März 2004 4:51 16
43
CMC
RTT
Master
Adr.: 09
X1
X2
X3
RTT
Slave
Adr.: 11
X1
X2
X3
RTT
Slave
Adr.: 12
X1
X2
X3
RTT
Slave
Adr.: 19
X1
X2
X3
X2
X3
X2
X2
X2
X2
X2
X2
X2
X2
St.
Bu.
St.
St.
St.
Bu.
Bu.
St.
St.
Bu.
Beschreibung
Die Adresse des Masters ist abhängig von der Anzahl der angeschlossenen
Slave-Geräte (09 = Master mit 9 Slave-Geräten). Die Adresse eines Slave-Gerätes
beginnt immer mit der 1. Die 2. Zahl stellt die eigentliche Adressierung dar.
Maximal können 9 Slave-Geräte an einer Master-Einheit betrieben werden, wobei
jedes Gerät Master sein kann. Maximale Gesamtlänge aller anzubindenden
Geräte 50 m. Es können 1-phasige und 3-phasige Geräte angeschlossen werden.
RTT= Rittal TopTherm Kühlgeräte
X1 = Netzanschluss/Türendschalter/Alarme
X2 = Master-Slave-Anschluss SUB-D 9-polig
X3 = Serielle Schnittstelle SUB-D 9-polig
St. = Stecker SUB-D 9-polig
Bu. = Buchse SUB-D 9-polig
Description
The address of the master depends on the number of attached Slave units.
(09 = master connected with 9 Slave units). The address of the Slaves starts with
1. The 2nd number represents the address of the Slave unit. Max. 9 Slave units
can be connected to one master unit. Maximum length of the Master/Slave LAN all
over is 50 m. Cooling units with different voltages can be connected in a Master/
Slave Network.
RTT= Rittal TopTherm cooling units
X1 = AC power supply/door switch/alarms
X2 = Master Slave connection SUB-D 9-pole
X3 = Serial Interface SUB-D 9-pole
St. = Plug SUB-D 9-pole
Bu. = Jack SUB-D 9-pole
Description
L’adresse de l’appareil maître dépend du nombre d’appareils asservis (09 =
appareil maître connecté à 9 appareils asservis). L’adresse d’un appareil asservi
commence toujours par le chiffre 1. Le deuxième chiffre représente l’adresse de
l’appareil esclave. Chaque appareil peut occuper la fonction d’appareil maître.
Et chaque unité maître permet de raccorder 9 unités esclaves au maximum. La
longueur totale maximale du réseau maître/esclaves est de 50 m. Il est possible
de connecter des appareils de refroidissement de voltages différents (monopha-
sés et triphasés) dans un réseau maître/esclaves.
RTT= Climatiseurs TopTherm de Rittal
X1 = Raccordement au secteur/interrupteur de porte/alarmes
X2 = Raccordement maître/esclave SUB-D 9 pôles
X3 = Interface série SUB-D 9 pôles
St. = Fiche SUB-D 9 pôles
Bu. = Prise SUB-D 9 pôles
Beschrijving
Het adres van de master is afhankelijk van het aantal aangesloten slave aggraga-
ten (09 = master met 9 slaves). De adressen van de slave aggregaten beginnen
altijd met een 1. Het getal 2 komt overeen het het aantal werkelijke adressen.
Maximaal kunnen er 9 slave aggregaten en 1 master geconfigureerd worden,
waarbij elke aggregaat de master kan zijn. De maximale lengte van alle gekop-
pelde aggregaten bedraagt 50 m. Er kunnen 1- en 3-fasen aggregaten worden
aangesloten.
RTT= Rittal TopTherm koelaggregaten
X1 = Netaansluiting/deurschaklaar/Alarm
X2 = Master-slave aansluiting SUB-D 9-polig
X3 = Seriële interface SUB-D 9-polig
St. = Connector SUB-D 9-polig
Bu. = Bus SUB-D 9-polig
D
GB
F
NL
Beskrivning
Master-aggregatets adress är beroende på antalet anslutna Slave-aggregat
(09 = Master med 9 Slave-agg.). Slave-aggregatets adress börjar alltid med 1.
Den 2. siffran visar slave-enhetens adress.
Maximalt 9 Slave-aggregat kan kopplas upp till en master, varvid varje aggregat kan
vara master. Maximal längd av denna Master-Slave LAN är 50m. Aggregat med
olika spänningar kan kopplas upp i nätet.
RTT= Rittal TopTherm kylaggregat
X1 = Nätanslutning/dörrströmbrytare/larm
X2 = Master-Slave anslutning 9-polig D-Sub
X3 = Seriellt gränssnitt 9-polig D-Sub
St. = Stiftdon 9-polig D-Sub
Bu. = Hylsdon 9-polig D-Sub
Descrizione
L'indirizzo del Masters dipende dalla quantità di apparecchi Slave collegati
(09 = Master con 9 apparecchi). L'indirizzo di un apparecchio Slave
comincia sempre con «1». La seconda cifra corrisponde al vero e proprio indirizzo.
E' possibile azionare max. 9 apparecchi Slave su di un'unità Master, laddove
ci sia un apparecchio Master. La lunghezza massima totale di tutti gli apparecchi
collegati è di 50 m. E' possibile collegare apparecchi monofase e trifase.
RTT= Condizionatore Rittal TopTherm
X1 = Allacciamento di rete/Interruttore porta/Allarme
X2 = Connessione Master-Slave SUB-D 9-poli
X3 = Interfaccia seriale SUB-D 9-poli
St. = Presa SUB-D 9-poli
Bu. = Connettore SUB-D 9-poli
Descripción
La dirección del esclavo depende de la cantidad de aparatos esclavos conectados
(09=maestro con 9 aparatos esclavo). La dirección de un aparato esclavo siempre
empieza por 1. El número 2 representa la dirección propia. Una unidad maestro no
puede gestionar más de 9 aparatos esclavo, cualquier aparato puede ser maestro.
La longitud total máxima de todos los aparatos a conectar es de 50 m. Pueden
conectarse aparatos de una y tres fases.
RTT= Refrigeradores TopTherm de Rittal
X1 = Conexión a red/Interruptor de puerta/Alarmas
X2 = Conexión maestro-esclavo SUB-D 9 polos
X3 = Interfaz serie SUB-D 9 polos
St. = Conector SUB-D 9 polos
Bu. = Casquillo SUB-D 9 polos
S
I
E
J
Anschlussbeispiel: Master-Slave-Betrieb
Connection example: Master/slave operation
Schéma d’installation typique : régime maître-esclave
Aansluitvoorbeeld: master-slave functie
Uppkopplingsexempel: Master-Slave installation
Esempi di connessione: funzione Master-Slave
Ejemplo de conexión: Funcionamiento maestro-esclavo
Serielle Schnittstelle
Serial interface
Interface série
Seriële interface
Seriellt gränssnitt
Interfaccia seriale
Interfaz serie
Master Slave BUS Kabel, Best.-Nr.: SK 3124.100
Master/slave BUS cable, Model No. SK 3124.100
Câble Bus maître esclave, référence SK 3124.100
Master-slave BUS-kabel, bestelnr: SK 3124.100
Master Slave busskabel, Best nr: SK 3124.100
Cavo interfaccia Master Slave BUS, Nr. d’ord.: SK 3124.100
Cable maestro-esclavo BUS, Ref. SK 3124.100
Serielles Schnittstellenkabel
Serial interface cable
Câble d'interface série
Seriële interfacekabel
Seriellt gränssnittskabel
Cavo di interfaccia seriale
Cable de interfaz serie
10_SK3382_36_47.fm Seite 43 Freitag, 5. März 2004 4:51 16
44
X10
L1
L2
N
PE
1
23
4
5
1
X10
X10 X10 X10 X10
X2 X2 X2 X2 X2 X2
X2
L1
PE
1
23
4
5
L1
L2
N
PE
1
23
4
5
L2 L3
L1
PE
1
23
4
5
L2 L3
L1
PE
1
23
4
5
L2 L3
L1
PE
1
23
4
5
L2 L3
L1
L2
N
PE
1
23
4
5
X10
2
3
4
56
Schaltschrank 2-türig mit
zwei Türendschaltern
2-door enclosure with
two door limit switches
Armoire électrique à deux portes
avec deux interrupteurs de porte
Dubbeldeursschakelkast en
twee deurschakelaars
Tvådörrars apparatskåp med
2 dörrströmbrytare
Armadio doppia porta
con due interruttori porta
Armario de distribución de
2 puertas con dos interruptores
de puerta
Schaltschrank mit
Türendschaltern
Enclosure with
door limit switches
Armoire électrique avec
interrupteurs de porte
Schakelkast met
deurschakelaars
Apparatskåp med
dörrströmbrytare
Armadio con
interruttore porta
Armario de distribución con
interruptor de puerta
Schaltschrank mit
Türendschaltern
Enclosure with
door limit switches
Armoire électrique avec
interrupteurs de porte
Schakelkast met
deurschakelaars
Apparatskåp med
dörrströmbrytare
Armadio con
interruttore porta
Armario de distribución con
interruptor de puerta
Schaltschrank 2-türig mit
zwei Türendschaltern
2-door enclosure with
two door limit switches
Armoire électrique à deux portes
avec deux interrupteurs de porte
Dubbeldeursschakelkast en
twee deurschakelaars
Tvådörrars apparatskåp med
2 dörrströmbrytare
Armadio doppia porta
con due interruttori porta
Armario de distribución de
2 puertas con dos interruptores
de puerta
Verdrahtungsbeispiel: Türendschalter und Master-Slave-Betrieb
Wiring example: Door limit switch and master/slave operation
Schéma de câblage typique : Interrupteur de porte et régime maître-esclave
Bekabelingsvoorbeeld: deurschakelaar en master-slave functie
Kopplingsexempel: Dörrströmbrytare och Master-Slavedrift
Esempio di cablaggio: interruttore porta e Funzione Master-Slave
Ejemplo de conexión: Funcionamiento maestro-esclavo
Master Adr.: 06
Kühlgerät
Master cooling unit
Climatiseur maître
Master koelaggregaat
Master kylaggregat
Condizionatore Master
Refrigerador maestro
Slave Adr.: 11
Kühlgerät
Slave cooling unit
Climatiseur asservi
Slave koelaggregaat
Slave kylaggregat
Condizionatore Slave
Refrigerador esclavo
Slave Adr.: 12
Kühlgerät
Slave cooling unit
Climatiseur asservi
Slave koelaggregaat
Slave kylaggregat
Condizionatore Slave
Refrigerador esclavo
Slave Adr.: 13
Kühlgerät
Slave cooling unit
Climatiseur asservi
Slave koelaggregaat
Slave kylaggregat
Condizionatore Slave
Refrigerador esclavo
Slave Adr.: 14
Kühlgerät
Slave cooling unit
Climatiseur asservi
Slave koelaggregaat
Slave kylaggregat
Condizionatore Slave
Refrigerador esclavo
Slave Adr.: 15
Kühlgerät
Slave cooling unit
Climatiseur asservi
Slave koelaggregaat
Slave kylaggregat
Condizionatore Slave
Refrigerador esclavo
Adr.: 16
Slave
Kühlgerät
Slave
cooling unit
Climatiseur
asservi
Slave
koelaggre-
gaat
Slave
kylaggregat
Condiziona-
tore Slave
Refrigerador
esclavo
10_SK3382_36_47.fm Seite 44 Freitag, 5. März 2004 4:51 16
45
Kennlinienfeld (DIN 3168)
Performance diagram
Diagramme aéraulique
Karakteristiek
Effektdiagram
Diagramma delle potenze
Diagrama de potencia
Dauer-Nutzkühlleistung (W)
Cooling output
Puissance frigorifique utilisée
Nuttig koelvermogen
Kyleffekt
Potenza frigorifera utile
Potencia útil de refrigeración
Q
·
K
Schaltschrank-Innentemperatur (°C)
Enclosure internal temperature
Température intérieure de l’armoire
Temperatuur in de kast
Temperatur inne i skåpet
Temperatura interna dell’armadio
Temperatura interior del armario
de mando
T
i
=
Umgebungstemperatur (°C)
Ambient temperature
Température ambiante
Omgevingstemperatuur
Omgivningstemperatur
Temperatura ambiente
T
u
=
20 25 30 35 4540 50 55
20
25
30
35
40
45
50
55
Q
K
.
T
u
T
i
1050
900
750
600
450
300
150
0
20 25 30 35 4540 50 55
20
25
30
35
40
45
50
55
Q
K
.
T
u
T
i
2000
1750
1500
1250
1000
750
500
250
20 25 30 35 4540 50 55
Q
K
.
T
u
3000
2600
2200
1800
1400
1000
600
200
55
45
40
35
30
25
20
T
i
20 25 30 35 4540 50 55
55
50
45
40
35
30
25
20
Q
K
.
T
u
T
i
4000
3500
3000
2500
2000
1500
1000
500
20 25 30 35 4540 50 55
55
45
40
35
30
25
20
Q
K
.
T
u
T
i
4500
4000
3500
3000
2500
2000
1500
1000
20 25 30 35 4540 50 55
20
25
30
35
40
45
55
Q
K
.
T
u
T
i
7000
6000
5000
4000
3000
2000
1000
20 25 30 35 4540 50 55
20
30
40
55
Q
K
.
T
u
T
i
1050
900
750
600
450
300
150
0
20 25 30 35 4540 50 55
20
25
30
35
40
45
55
Q
K
.
T
u
T
i
2000
1750
1500
1250
1000
750
500
250
20 25 30 35 4540 50 55
20
25
30
35
40
45
55
Q
K
.
T
u
T
i
3000
2600
2200
1800
1400
1000
600
400
20 25 30 35 4540 50 55
20
25
30
35
40
45
50
55
Q
K
.
T
u
T
i
4000
3500
3000
2500
2000
1500
1000
500
20 25 30 35 4540 50 55
Q
K
.
T
u
4000
3500
3000
5000
4500
2500
2000
1500
T
i
55
45
40
35
30
25
20
1000
20 25 30 35 4540 50 55
20
25
30
35
40
45
50
55
Q
K
.
T
u
T
i
7000
6000
5000
4000
3000
2000
1000
0
Kennlinienfeld
SK 3382....
(DIN 3168) (50 Hz)
Kennlinienfeld
SK 3383....
(DIN 3168) (50 Hz)
Kennlinienfeld
SK 3384....
(DIN 3168) (50 Hz)
Kennlinienfeld
SK 3385....
(DIN 3168) (50 Hz)
Kennlinienfeld
SK 3386....
(DIN 3168) (50 Hz)
Kennlinienfeld
SK 3387....
(DIN 3168) (50 Hz)
Kennlinienfeld
SK 3382....
(DIN 3168) (60 Hz)
Kennlinienfeld
SK 3383....
(DIN 3168) (60 Hz)
Kennlinienfeld
SK 3384....
(DIN 3168) (60 Hz)
Kennlinienfeld
SK 3385....
(DIN 3168) (60 Hz)
Kennlinienfeld
SK 3386....
(DIN 3168) (60 Hz)
Kennlinienfeld
SK 3387....
(DIN 3168) (60 Hz)
Kennlinienfeld
SK 3359....
(DIN 3168) (50 Hz)
Kennlinienfeld
SK 3359....
(DIN 3168) (60 Hz)
20 25 30 35 4540 50 55
20
25
30
35
40
45
50
55
Q
K
.
T
u
T
i
1750
1500
1250
1000
750
500
250
0
20 25 30 35 4540 50 55
20
25
30
35
40
45
55
Q
K
.
T
u
T
i
1750
1500
1250
1000
750
500
250
0
10_SK3382_36_47.fm Seite 45 Freitag, 5. März 2004 4:51 16
46
Diagramm 13.1: Programmierung
Diagram 13.1: Programming
Diagramme 13.1 : Programmation
Diagram 13.1: Programmering
Diagram 13.1: Programering
Diagramma 13.1: Programmazione
Diagrama 13.1: Programación
10_SK3382_36_47.fm Seite 46 Freitag, 5. März 2004 4:51 16
259 231
Umschalten auf Perfektion
Rittal GmbH & Co. KG · Postfach 1662 · D-35726 Herborn
Tel.: +49(0)2772 505-0 · Fax: +49(0)2772 505-2319 · eMail: [email protected] · www.rittal.de
4. Aufl.
03/04
(07/02)
Schaltschrank-Systeme
Industrial Enclosures
Systèmes d’armoires électriques
Schakelkastsystemen
Apparatskåpssystem
Sistemi di armadi per quadri di comando
Sistemas de armarios de distribución
Elektronik-Aufbau-Systeme EL
Electronic Packaging EL
Systèmes d’intégration électronique EL
Elektronica opbouwsystemen EL
Elektronikuppbyggnad och inkapsling EL
Sistemi di allestimento per l’elettronica industriale EL
Sistemas para electrónica EL
Power Distribution SV
IT Solutions
IT-Solutions
Communication Systems CS
System Climate Control SK
Stromverteilung SV
System-Klimatisierung SK
Distribution du courant SV
Stroomverdeling SV
Strömfördelning SV
Distribuzione di corrente SV
Distribución de corriente SV
Solutions IT
IT-Solutions
IT-lösningar
Soluzioni per IT
Soluciones TI
Solutions Télécom CS
Outdoor-behuizingen CS
Utomhusskåp CS
Soluzioni outdoor CS
Sistemas para comunicaciones CS
Systèmes de climatisation SK
Systeemklimatisering SK
Systemklimatisering SK
Soluzioni di climatizzazione per quadri di comando SK
Climatización de sistemas SK
00_Umschl_RS_SK3382.fm Seite 48 Montag, 8. März 2004 10:30 10
  • Page 1 1
  • Page 2 2
  • Page 3 3
  • Page 4 4
  • Page 5 5
  • Page 6 6
  • Page 7 7
  • Page 8 8
  • Page 9 9
  • Page 10 10
  • Page 11 11
  • Page 12 12
  • Page 13 13
  • Page 14 14
  • Page 15 15
  • Page 16 16
  • Page 17 17
  • Page 18 18
  • Page 19 19

Rittal SK 3387.xxx Assembly Instructions Manual

Type
Assembly Instructions Manual

Ask a question and I''ll find the answer in the document

Finding information in a document is now easier with AI