Page is loading ...

1
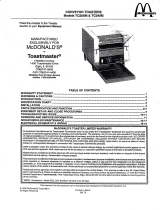
BATCH TOASTER
Models MBT208/MBT240
Place this chapter in the Toaster
Section of your Equipment Manual.
MANUFACTURED
EXCLUSIVELY FOR
MCDONALDS
®
BY
TOASTMASTER
®
A Middleby Company
1400 Toastmaster Drive
Elgin, IL 60120
PHONE: 1 (847) 741-3300
FAX: 1 (847) 741-4406
24-hour Service Hotline: 1 (800) 238-8444
TABLE OF CONTENTS
WARRANTY STATEMENT ............................................................................................................................................................................. 1
INTRODUCTION ............................................................................................................................................................................................. 2
SAFETY ........................................................................................................................................................................................................... 2
SPECIFICATIONS .......................................................................................................................................................................................... 3
INSTALLATION ............................................................................................................................................................................................... 4
SET-UP, OPERATION, AND CLOSE PROCEDURES ................................................................................................................................. 6
TROUBLESHOOTING .................................................................................................................................................................................... 9
PARTS IDENTIFICATION AND FUNCTION ............................................................................................................................................... 10
ORDERING AND SERVICE INFORMATION .............................................................................................................................................. 12
ELECTRICAL WIRING DIAGRAM ............................................................................................................................................................... 14
ELECTRICAL SCHEMATIC .......................................................................................................................................................................... 15
This manual is for the exclusive use of licensees and employees of McDonalds Systems, Inc.
© 2000 Toastmaster, A Middleby Company. All rights reserved. P/N 42495 Rev. C V1 5/00
McDONALDS LIMITED WARRANTY
This warranty is effective on all Toastmaster equipment manufactured for McDonalds sold on or after 4/1/2000, and supersedes all previous warranties.
Toastmaster warrants equipment that it manufactures to be free from defects in material and workmanship. Toastmasters obligation is limited to
repairing or replacing, at Toastmasters option, without cost to the customer, any part found to be defective, as well as any labor or material expense
required to replace the part. All Toastmaster products will be serviced on-site during the warranty period. This warranty is valid worldwide.
Length of Warranty
This warranty is effective for a period of 18 months from the date of shipment from Toastmaster, or 12 months from the date of purchase by the Buyer,
whichever is earlier.
Exceptions
· This warranty is valid only for the original owner/operator of the equipment.
· This warranty does not apply to normal maintenance functions, including (but not limited to) cleaning and lubrication.
· This warranty does not apply to service required due to customer abuse, including (but not limited to) improper operation, installation, or the use of
an improper utility supply.
· This warranty is valid only if the equipment is used in a commercial setting. The equipment is designed and constructed for commercial use by
trained professionals only. Any use of the equipment in private or domestic applications immediately voids this warranty.
· This warranty does not apply to any parts, labor, and material expenses for service that is NOT performed by a Toastmaster Authorized Service
Agent. Any such service immediately voids this warranty.
· This warranty does not apply to any parts, labor, and material expenses associated with the installation of parts that are not factory-approved for use
in the equipment. Any use of such parts immediately voids this warranty.
· This warranty is not valid if terms of payment have not been met.
Toastmaster reserves the right to change the design and specifications of this equipment at any time. The Buyer is not entitled to upgrades resulting
from these changes.
This warranty is exclusive and supersedes all other warranties for the equipment, both expressed and implied. There are no implied warranties of
merchantability or of fitness for a particular purpose.
The foregoing is Toastmasters sole and exclusive obligation and the Buyers sole and exclusive remedy for any action including breach of contract or
negligence. In no event shall Toastmaster be liable for a sum in excess of the purchase price of the equipment, or for any prospective or lost profits of
the Buyer.

2
INTRODUCTION
Batch Toaster Information
The Model MBT208/MBT240 Batch Toaster is a com-
mercial batch toaster designed to uniformly toast En-
glish muffins, bagels, and other bakery products in
large quantities. Up to six individual program settings
can be selected and programmed to toast a wide vari-
ety of bakery products.
About This Manual
Retain this Manual for future reference. It is an im-
portant tool for the operator of the toaster, and should
be kept readily available.
This Manual provides detailed information on:
Toaster safety
Toaster installation
Toaster operation
Toaster troubleshooting
Toaster servicing
IMPORTANT
Using any parts other than genuine Toastmaster fac-
tory-supplied parts relieves the manufacturer of all li-
ability.
IMPORTANT
Your Batch Toaster comes with a warranty from Toast-
master. Terms and conditions of this warranty are
described on the front cover of this Manual. During
this warranty period, all parts replacement and ser-
vicing should be performed by your Toastmaster Au-
thorized Service Agent. A service agency listing is
supplied with your toaster. Service that is performed
by parties other than your Toastmaster Authorized
Service Agent will void your toasters warranty.
NOTE
Toastmaster (the manufacturer) reserves the right to
change specifications and product design for this
toaster without notice. These revisions do not entitle
the buyer to corresponding changes, improvements,
additions, or replacements for previously purchased
equipment.
NOTE
This equipment is manufactured in the United States
of America and uses American sizes of hardware. All
metric hardware sizes that are listed in this manual
are conversions that may be approximations.
SAFETY
WARNING: IN CASE OF FIRE
In case of fire, IMMEDIATELY disconnect the toaster
from its electrical power supply.
Use only fire extinguishers which are suitable for use
on electric equipment, such as CO
2
.
For your safety, do not use or store any flammable
liquids or vapors in the vicinity of this or any other
appliance.
WARNING: Hazard Communication
Standard (HCS)
Some procedures in this Manual specify the use of
chemical products. These chemical products will be
highlighted with boldface letters followed by the ab-
breviation (HCS). See the Hazard Communication
Standard (HCS) Manual for the appropriate Material
Safety Data Sheet(s) (MSDS).
WARNING: General
Never attempt to move the toaster by inserting
the hands into the entrance/exit opening. Severe
injury may result.
Never attempt to move the toaster while it is
plugged into a power socket.
The toaster should always be unplugged for ser-
vicing. Electrical tests which require power to the
unit should only be performed by authorized ser-
vice personnel.
WARNING: Electrical Utility Connections
The toaster should be grounded according to local
electrical codes to prevent the possibility of electric
shock. The toaster requires a grounded receptacle
with separate electric lines, protected by fuses or cir-
cuit breakers of the proper rating.
WARNING: Electric Component Servicing
Inspection, testing, and repair of any electrical com-
ponents of the toaster should only be performed by
authorized service personnel. Extreme care should
be taken during electrical circuit tests, as live circuits
may be exposed.

3
SPECIFICATIONS
Overall Dimensions
Width 17-1/2 (445mm)
Depth (inc. rear cord clearance, peel removed) 28 (711mm)
Depth (inc. rear cord clearance, peel in toaster) 32 (813mm)
Height (inc. legs) 10-1/2 (267mm)
Toasting Area Dimensions
Width, Loading Area of Peel 11-1/4 (286mm)
Length, Loading Area of Peel 16-1/2 (419mm)
Vertical Clearance Above Peel in Toasting Chamber 1-3/4 (44mm)
Toaster Information
Approximate Net Wt. 58.0 lbs. (26.3kg)
Approximate Shipping Wt. 69.4 lbs. (31.5kg)
Construction Formed and welded sheet steel
Finish Stainless steel
Pre-Heat Time 15 minutes
Normal Product Load 12 muffin halves or 6 bagel halves
Capacity 720 muffin halves per hour
Electrical Specifications
Operating Voltage Model MBT208: 208V
Model MBT240: 230V or 240V
Frequency 50/60Hz
Phase 1 Ph
kW Rating Model MBT208: 2.45kW at 208V
Model MBT240: 2.45kW at 230V
2.67kW at 240V
Current Draw Model MBT208: 11.8A at 208V
Model MBT240: 10.7A at 230V
11.1A at 240V
Cord and Plug Information USA & standard export:
3-wire cord (2 hot, 1 gnd), #12 AWG, with 30A pin-and-sleeve plug
OR
3-wire cord (2 hot, 1 gnd), #12 AWG, with 30A twist-lock plug
OR
HO7RN-F harmonized cord with 3x4,0mm conductors
and 30A twist-lock plug
Europe:
HO7RN-F harmonized cord with 3x4,0mm conductors
and 32A pin-and-sleeve plug
OR
HO7RN-F harmonized cord with 3x4,0mm conductors
and 16A pin-and-sleeve plug (Germany MBT240 only)

4
IMPORTANT
It is the customers responsibility to report any con-
cealed or non-concealed damage to the freight com-
pany.
IMPORTANT
The Batch Toaster may only be installed in a single-
unit, countertop configuration.
Assembly
1. Pull the door handle up and forward to open the
door. Then, remove all components from inside
the toaster.
2. Remove and discard all packing material from the
toaster and components.
3. Position the toaster in place. Adjust the bottom
section of each leg as necessary to level the
toaster.
4. Adjust the heat curtain at the rear of the toaster
so that it sits on the countertop. Tighten the screws
that hold the curtain in place. See Figure 2.
5. The door handle is pre-installed on the left side of
the toaster. If it is necessary to move the door
INSTALLATION
Figure 1 - Moving the Door Handle to the Right Side of the Toaster (if so desired)
Slide lower
deck into
toaster
Install legs (4). Then,
adjust bottom section
of legs to level toaster
Store peel
underneath
toaster
handle to the right side of the toaster, perform the
following procedure:
Rotate the door handle in a COUNTER-
CLOCKWISE direction until it is free of its
mounting shaft. See Figure 1.
Remove the round metal plug that covers the
handle mounting hole on the right side of the
toaster.
Reinstall the round metal plug into the left
handle mounting hole.
Install the handle in place on its shaft on the
right side of the toaster. Rotate it in a
CLOCKWISE direction until it is firmly in place.
Check that the door handle points DOWN
while the door is in the closed position, as
shown in Figure 1. If it is necessary to
reposition the handle, loosen its 5/32/4mm
Allen set screw. Reposition the handle, then
tighten the screw to fasten the handle in place.
6. Slide the lower deck into the toaster as shown in
Figure 2.
7. Store the peel in a clean, dry location underneath
the toaster.
1. Remove
door handle
2. Remove
plug
3. Reinstall
handle and plug
on OPPOSITE
sides of toaster
Figure 2 - Assembly
4. (If necessary) Loosen Allen
set screw and reposition
handle to point DOWN, then
tighten set screw
5/32/4mm
Allen wrench
(not supplied)
Adjust heat curtain to
sit on countertop, then
tighten screws (2)

5
2. Check that the appropriate receptacle is available
for the power cord plug.
3. Insert the power cord plug into its receptacle.
4. If required by national or local codes, connect an
equipotential ground wire to the lug next to the
symbol (shown in Figure 3). The equipotential
ground connection must meet all applicable na-
tional and local code requirements.
Checking the Installation
1. Check that the toaster is properly connected to
the electrical power supply.
2. Switch the circuit breaker/fused disconnect to the
ON (I) position.
3. Switch the switch to the ON (I) position. The
display will flash as the toaster pre-heats.
4. Allow the toaster to pre-heat for 15 minutes, until
appears in the display.
CAUTION - HOT SURFACES
USE CAUTION TO AVOID INJURY.
5. Look inside the toasting chamber and visually
check that the heating elements are heating and
glowing red.
6. Push and hold the key for 2 seconds.
7. Push the key.
8. Check that the digital timer begins counting down.
9. Wait for the preset time to elapse. The control
should sound an alarm as follows:
The control will beep 5 times at 1-second intervals.
Next, the control will beep very rapidly for another
5 seconds.
Next, the control will sound a steady tone.
10. Press the key. The timer will reset, and the
steady tone will shut off.
11. Switch the switch to the OFF (O) position.
The fan will remain in operation to allow the toaster
to cool.
12. After the fan stops, switch the circuit breaker/fused
disconnect to the OFF (O) position.
Electrical Connection
IMPORTANT
An electrical schematic for the toaster is provided
at the back of this Manual.
The electrical connection to the toaster requires a
circuit breaker/fused disconnect. Consult appli-
cable national and local code requirements to de-
termine the rating of the breaker/disconnect. Elec-
trical specifications are listed on the toasters se-
rial plate and in the Specifications section of this
Manual.
The toasters power cord and plug provide an
electrical ground connection. A separate
equipotential ground connection must also be
made if required by national or local codes. The
location of the equipotential ground lug is shown
in Figure 3.
Consult all applicable national and local codes for
further electrical connection requirements.
1. Before proceeding with the electrical connection,
check that the electrical supply matches the
toasters requirements. Refer to the serial plate
and to the Specifications section of this Manual.
WARNING
ENSURE THAT BOTH THE CIRCUIT
BREAKER/FUSED DISCONNECT AND THE
SWITCH ARE IN THE O (OFF) POSITION BE-
FORE PROCEEDING.
WARNING
ENSURE THAT ANY PACKING MATE-
RIAL RESIDUE HAS BEEN REMOVED FROM
INSIDE THE TOASTING CHAMBER.
Figure 3 - Equipotential Ground Connection
Equipotential ground
lug and symbol

6
CAUTION - HOT SURFACES
DURING OPERATION, THE PEEL AND
TOASTER ARE HOT. USE CAUTION AS YOU
HANDLE THE PEEL AND OPERATE THE TOASTER
TO AVOID INJURY.
Setup
1. Replace the lower deck inside the toaster.
2. Switch the circuit breaker/fused disconnect to the
ON (I) position.
3. Switch the switch to the ON (I) position. The
display will flash as the toaster pre-heats.
IMPORTANT
If electrical power to the toaster is briefly inter-
rupted, hold down the and keys while
switching the switch to the ON (I) position.
This bypasses the normal 15 minute pre-heat pe-
riod. If the pre-heat period is bypassed while the
toaster is cool, toasting will be inconsistent.
4. Allow the toaster to pre-heat for 15 minutes. When
the toaster has finished pre-heating,
(ready) will appear in the display. The toaster is
now ready for normal operation.
Operation
1. Push and hold the appropriate key (Program
Key) for 2 seconds, until the control beeps once.
The green light above the key will illuminate
to show that the program has been selected.
2. Load the bakery product onto the peel, with the
cut side facing UP.
3. Pull the door handle forward to open the door.
4. Slide the peel into the toaster to load the product.
5. Release the door handle to allow the door to close.
8. Wait for the preset time to elapse. The control
will beep 5 times at 1-second intervals when the
preset time reaches , and the display will
flash to show that the end of the preset time has
been reached.
9. Push the key.
10. Pull the door handle forward to open the door.
11. If you removed the peel in Step 6, insert it into the
toaster and underneath the bakery product.
12. Remove the peel (now holding the bakery prod-
uct) from the toaster.
CAUTION
When the preset time elapses, the bakery prod-
uct is correctly toasted. Leaving the product
inside the toaster after the first beep sounds
will begin to burn the bakery product. The fol-
lowing alerts will sound if the product is left inside
the toaster:
The control will beep 5 times as described
above. The product is correctly toasted when
the first beep sounds.
Next, the control will beep very rapidly for
another 5 seconds.
Next, the control will sound a continuous tone
until the key is pressed and the prod-
uct is removed.
Always remove the product promptly when the first
beep sounds!
13. Remove the bakery product from the peel.
14. Proceed as follows:
If you will be toasting another batch of the
same bakery product, go back to Step 2.
If you will be toasting another type of bakery
product, go back to Step 1.
During idle periods, store the peel in a clean,
dry location underneath the toaster.
SET-UP, OPERATION, AND CLOSE PROCEDURES
POWER ON/OFF (I/O)
switch: Switches the
toaster on (I) and off (O)
Figure 4 - Control Panel Functions: Operating Mode
STOP/START key:
Starts/stops a program
PROGRAM 1-6 keys:
Select a menu program
Display: Displays the remaining set time, a ready
indication, or diagnostic information, as appropriate
Green lights: Illuminate to
show that a menu program
(1-6) has been selected
6. During toasting, the peel can either be
left inside the toaster, or removed, as
you prefer. If you wish to remove the
peel, slide it out of the toaster while hold-
ing the door handle in the closed posi-
tion. The closed door will hold the bak-
ery product inside the toasting cham-
ber.
7. Push the key. The digital timer
will begin counting down.

7
Programming
The Batch Toaster is pre-programmed with standard
menu programs at the factory. Perform the following
steps ONLY if you wish to change a programs settings.
IMPORTANT
Programming a new menu program will OVERWRITE
an existing program. Do not overwrite a program that
you wish to keep!
Refer to Figure 5 for an illustration of the controls used
to program a menu selection.
1. Select a Program to Change
a. Push and hold the appropriate key. Af-
ter 2 seconds, the control will beep once,
showing that the program has been selected.
DO NOT RELEASE THE KEY AT THIS TIME.
b. Continue to hold the key until the control
beeps twice and the display shows .
Release the key. The P shows that
programming mode is now active, and #:##
is the currently-programmed set time. The
green light above the key will also flash
to inform you which program will be changed.
2. Adjust the Set Time and Relays
NOTE
The toaster regulates heat through three relays.
Each relay controls four of the twelve heating
elements. Switching the relay on or off will also
switch the four heating elements on or off. This
allows the operator to adjust the toasting
temperature.
Setting the relays to different on/off combinations
for different menu programs allows the toaster to
accomodate a variey of toasting temperatures.
Refer to the electrical wiring diagram at the back
of this Manual for a listing of the heating elements
that are controlled by each relay.
When programming mode is active, push the
key to toggle the display between the
following settings:
a.
#:## is the currently-programmed set time.
When this display is shown, the set time can
be adjusted using the and keys.
b. or
Shows whether Relay 1 (and the heating
elements that it controls ) is currently on (on)
or off (--). When this display is shown, Relay
1 can be toggled on or off as desired with the
or keys.
c. or
Displays the current setting for Relay 2 (and
the heating elements that it controls). This
setting can be changed as desired with the
or keys.
d. or
Displays the current setting for Relay 3 (and
the heating elements that it controls). This
setting can be changed as desired with the
or keys.
If necessary, you can continue to press the
key to repeat the cycle.
3. Save Changes and Return to Operating Mode
When your changes are complete, press the
key to save the changes. The toaster will return
to normal operating mode. Access the new
program by pressing the appropriate key.
STOP/START key:
Locks in changes to a program
PROGRAM 5 and 6 keys:
Adjust the set time up or down,
or toggle relay settings on or off
PROGRAM 4 key:
Toggles display between time
and Relay 1, 2, and 3 settings
Display:
Shows changes to the set time and relay settings
Figure 5 - Control Panel Functions: Programming Mode
Green lights: Flash to show
that a menu program (1-6) is
being programmed

8
Close
1. Switch the switch to the OFF (O) position.
The fan will remain in operation to allow the toaster
to cool.
2. After the fan stops, switch the circuit breaker/fused
disconnect to the OFF (O) position.
3. Cleaning the Peel and Lower Deck
CAUTION - HOT SURFACES
DO NOT TOUCH HOT SURFACES ON
THE TOASTER. DO NOT REACH INTO THE
TOASTING CHAMBER UNTIL THE UNIT HAS
COOLED THOROUGHLY.
a. Remove the lower deck from inside the
toaster. To remove the lower deck:
Pull the door handle forward to open the
door.
Lift the front edge of the lower deck, and
then pull it forward and out of the toaster.
See Figure 6.
Release the door handle.
b. Wash the peel and the lower deck using a hot
solution of McD All Purpose Concentrate
(APC) (HCS). If necessary, scrub these com-
ponents using a McD No Scratch Pad to re-
move discolorations.
c. Rinse the peel and lower deck thoroughly.
d. Immerse the peel and lower deck in McD Sink
Sanitizer Solution (HCS). Use 1 pack of so-
lution for 10 gallons of water.
e. Remove the parts from the sanitizer solution,
and allow them to air dry.
4. Cleaning the Toaster
WARNING
WHEN CLEANING THE TOASTER,
NEVER APPLY ENOUGH LIQUID TO STAND IN
PLACE ON THE UNIT. DO NOT SPRAY, RINSE,
OR SUBMERGE THE TOASTER. EXCESSIVE
MOISTURE IN THE UNIT WILL CAUSE A SE-
VERE ELECTRICAL HAZARD AND MAY OTH-
ERWISE DAMAGE THE TOASTER.
CAUTION
DO NOT clean your toaster using abrasive clean-
ers or pads. Both will scratch and dull the finish.
a. Thoroughly clean the fan (on the back wall of
the toaster) using a stiff nylon brush. See Fig-
ure 7.
CAUTION
The fan must be cleaned regularly. If the fan
is blocked or plugged, bakery products will not
be properly toasted and the toasters interior
components may be damaged.
b. Wipe the exterior of the toaster with a clean,
sanitized towel dampened with a hot solution
of McD All Purpose Concentrate (APC)
(HCS), as drawn from the sink proportioner.
c. Wipe the exterior of the toaster with a clean,
sanitized towel dampened in water to remove
any residual foreign material or cleaning so-
lution. Ensure that all visible moisture has
been removed from the unit.
d. Allow the exterior of the toaster to air dry.
5. Replace the lower deck inside the toaster.
6. Store the peel in a clean, dry location underneath
the toaster.
7. Pull the door handle forward to open the door.
Check that the back side of the door is slippery to
the touch. If necessary, apply a thin coating of
McD Bun Toaster Release Agent (HCS) to the
back side of the door using a paper towel.
Figure 7 - Cleaning the Fan
Figure 6 - Removing the Lower Deck
1. Pull door
handle forward
2. Lift front
edge of
lower deck
3. Pull lower
deck forward
4. Release
door handle

9
TROUBLESHOOTING
PROBLEM
Product is toasted
too dark or too
light.
PROBABLE CAUSE
Toaster was not adequately
preheated.
Preset toasting time is incor-
rect.
Using refrigerated or frozen
bakery products.
CORRECTIVE ACTION
Allow toaster to preheat until (ready) ap-
pears in the display. This should occur about 15
minutes after electrical power is restored to the
toaster.
Enter Programming Mode to increase or decrease
the toasting time as necessary. Refer to the Pro-
gramming section of this Manual.
Bakery products must be at room temperature BE-
FORE toasting for consistent results. Allow a 2-
day-old rotation when using fresh bakery products.
Bakery product is
jammed in toaster.
Loading is excessive.
OR
Product is loaded incorrectly.
OR
Carbonized deposits on
lower deck are sticking to the
bakery product.
Switch the switch to the OFF (O) position. Wait
for the fan to stop operating. Then, switch the circuit
breaker/fused disconnect to the OFF (O) position
and allow the toaster to cool.
Next, carefully clear the jam using a long object as
a probe. The probe should preferably be made of
wood, which is less likely to damage the heating
elements.
WARNING
NEVER USE A PLASTIC OR METAL
OBJECT AS A PROBE TO CLEAR A JAM.
WARNING
DO NOT INSERT THE HANDS INTO THE
TOASTING CHAMBER TO CLEAR A JAM. IF THE
UNIT HAS NOT COMPLETELY COOLED, SEVERE
INJURY MAY RESULT.
After clearing a jam, thoroughly clean the peel and
the lower deck before resuming operation. Refer to
Cleaning the Peel and Lower Deck in this Manual.
Toaster overheats
and shuts down.
Cooling fan is dirty or inop-
erative.
Switch the switch to the OFF (O) position. Wait
for the fan to stop operating. Then, switch the circuit
breaker/fused disconnect to the OFF (O) position
and allow the toaster to cool.
Thoroughly clean the fan before resuming operation.
Refer to Cleaning the Toaster in this Manual.
If the problem persists, or is not described above, contact your Authorized Service Agent.
Switch the switch to the OFF (O) position. Wait
for the fan to stop operating. Then, switch the circuit
breaker/fused disconnect to the OFF (O) position
and allow the toaster to cool.
Restart the toaster, following the procedure in the
Set-up, Operation, and Close Procedures section.
High Limit system has acti-
vated, shutting down the
toaster.

10
PARTS IDENTIFICATION AND FUNCTION
37
38
5
7
6
9
29
28
10
8
28
25
28
22
24
16
17
36
36
20
19
35
36
36
32
12
13
21
31
2
30
28
24
23
41
11
27
40
39
30
14
1
26
15
18
3
34
33
4
28
28
42

11
Parts List
1 41706 1 PANEL, LEFT SIDE
2 39806 1 PANEL, RIGHT SIDE
3 32458 1 PANEL, REAR
4 41902 1 PANEL, SSR MOUNTING
5 39804 1 LOWER DECK
6 42482 1 CONTROL PANEL
7 41837 1 DECAL, CONTROL PANEL
8 41733 1 TIMER BOARD
9 35824 1 SWITCH, POWER ON/OFF 2-POLE
10 43161 4 LEG, 1-1/2 (38mm)
11 41805 1 HINGE, DOOR
12 41806 1 DOOR
13 41807 1 HANDLE, DOOR, WITH 5/32/4mm
ALLEN SET SCREW
14a 42902 3 RELAY, TELEDYNE, SOLID STATE
240V 25A
14b 38469 3 RELAY, CROUZET, SOLID STATE
240V 25A
15 3000639 1 CONTACTOR
16 41872 1 TRANSFORMER, 230Vp : 24Vs
17 97525 1 FAN, 230V
18 27470-0004 1 FAN GRILLE
19 30519 1 HIGH LIMIT THERMOSTAT, NOR-
MAL CLOSED - 250°F/121°C
20 38079 1 COOLDOWN THERMOSTAT, NOR-
MAL OPEN - 120°F/49°C
21 33406 1 TERMINAL BLOCK, 3-POLE
22 41879 1 PANEL, INSULATION COVER, LEFT
23 41840 1 PANEL, INSULATION COVER,
RIGHT
24 41921 2 INSULATION, PRE-CUT
25a 41771 12 HEATING ELEMENT, 208V TOAST-
ERS - 104V/204W
25b 41842 12 HEATING ELEMENT, 230V TOAST-
ERS - 115V/204W
26 41841 1 RETAINER PANEL, HEATERS
27 34753 1 PLUG, METAL, 1/25mm DIA.
28 3B20A8801 A/R SCR, HWH #8-32 X 3/8
29 B301A8827 A/R SCR, PANHD #6-32 X 1/4
30 2000105 A/R SCR, SLT TRSHD #8-32 X 3/8
31 1411D8805 A/R SCR, PANHD #6-32 X 3/4
32 220210 A/R SCR, SLT PANHD #6-32 X 1/4
BLACK
33 2000023 A/R SCR, SLT HWH #6-32 X 1/4
34 4005A8801 A/R SCR, PHIL PANHD #10-32 X 3/8
35 K1DS195 A/R SCR, SLT PANHD #5-40 X 1/4
36 2001327 A/R HEX NUT, KEPS #6-32
37 42456 1 ASSEMBLY, PEEL (inc. Items 38-39)
38 41698 1 HANDLE, PEEL
39a 42950 1 LABEL, INTERNATIONAL CAU-
TION-HOT SYMBOL
39b 1112B8303 1 LABEL, ENGLISH CAUTION-
HOT
40a 42950 1 LABEL, INTERNATIONAL CAUTION-
HOT SYMBOL
40b 1112B8303 1 LABEL, ENGLISH CAUTION-HOT
41 36440 1 STRAIN RELIEF, CORD/PLUG SET
42 43339 1 REAR HEAT CURTAIN
Item Part No. Qty. Description
NOT SHOWN:
Item Part No. Qty. Description
AS SHOWN ON THE PREVIOUS PAGE:
Item Part No. Qty. Description
43a 30640 1 CORD/PLUG SET, USA & STD. EX-
PORT, WITH 30A PIN-AND-SLEEVE
PLUG
43b 31974 1 CORD/PLUG SET, USA & STD. EX-
PORT, WITH 30A TWIST-LOCK
PLUG
43c 30641 1 CORD/PLUG SET, EUROPE, WITH
32A PIN-AND-SLEEVE PLUG
43d 31998 1 CORD/PLUG SET, EUROPE (Ger-
many only), WITH 16A PIN-AND-
SLEEVE PLUG
43e 31973 1 CORD/PLUG SET, EUROPE, WITH
30A TWIST-LOCK PLUG
44 42997 1 ALLEN KEY, 5/32 (4mm)
45 43005 1 CAPACITOR, 250VAC, 1µF (Euro-
pean MBT240 only)
Item Part No. Qty. Description
46 43006 1 RESISTOR, 470k OHMS, 0.5W (Eu-
ropean MBT240 only)
47 39205 1 FUSE, 0.25A
48 27159-0003 1 CORDSET, COOLING FAN
49 42497 1 WIRESET, MBT TOASTER
50a 43084 1 MANUAL ASSEMBLY, ENGLISH (in-
cludes Equipment Manual, PM Card
and Quick Reference Sheet)
50b 43162 1 MANUAL ASSEMBLY, GERMAN
50c 43238 1 MANUAL ASSEMBLY, FRENCH
50d 43239 1 MANUAL ASSEMBLY, SPANISH
50e 43240 1 MANUAL ASSEMBLY, MANDARIN
51 1002040 1 TOASTMASTER AUTHORIZED SER-
VICE AGENCY LISTING

12
ORDERING AND SERVICE INFORMATION
Ordering Parts
Use only genuine Toastmaster (manufacturer)
replacement parts in your toaster. Use of parts other
than those supplied or approved by Toastmaster will
void the toasters warranty and agency approval.
If your toaster requires a replacement part, locate the
part in the drawing in the Parts Identification and
Function section of this Manual. Then, find the part
number and description in the parts list.
Parts orders should be placed with your Toastmaster
Authorized Service Agency. The agency has a current
parts price list, and can inform you of the cost of your
order. Please have the following information ready
when you call:
Toaster information (above)
Number and description of part(s) required (list
below for easy reference)
Return Policy
An RGA number (Return Goods Authorization) must
be obtained from Toastmaster before returning a
product. All shipping charges must be prepaid by the
buyer. Returned goods are subject to Toastmasters
inspection and acceptance.
Requesting Service
If technical help is needed, or if your toaster requires
professional servicing, contact your Toastmaster
Authorized Service Agency. Please have the following
information ready when you call:
Toaster information (above)
List of problems experienced with toaster (list
below for easy reference)
Toaster Information
IMPORTANT
Record the following toaster information for easy access when ordering parts and service for your toaster. The
serial number of your toaster is stamped on the serial plate, located on the back panel.
Manufacturer: Toastmaster
®
Model Number: MBT______________ Batch Toaster
Serial Number: _____________________________
Delivery Date: ________ / ________ / ________
Authorized Service Agent: _____________________
Address: __________________________________
__________________________________
Phone: __________________________________
P/N DESCRIPTION
_____________ ___________________________
_____________ ___________________________
_____________ ___________________________
_____________ ___________________________
_____________ ___________________________
_____________ ___________________________
IMPORTANT
You Batch Toaster comes with a warranty from Toastmaster. Terms and conditions of this warranty are
described on the front cover of this Manual. During this warranty period, all parts replacement and servic-
ing should be performed by your Toastmaster Authorized Service Agent. A service agency listing is sup-
plied with your toaster. Service that is performed by parties other than your Toastmaster Authorized Ser-
vice Agent will void your toasters warranty.
P/N DESCRIPTION
_____________ ___________________________
_____________ ___________________________
_____________ ___________________________
_____________ ___________________________
_____________ ___________________________
_____________ ___________________________

13
NOTES

14
ELECTRICAL WIRING DIAGRAM
TERMINAL
BLOCK
TSTAT
NC
HI LIMIT
TSTAT
NO
COOL DN
FAN
CONTACTOR
POWER
ON/OFF
(I/O)
SWITCH
HEATING
ELEMENTS
TRANSFORMER
230Vp : 24Vs
TIMER BOARD
AC
IN
R3 R2 R1 12V+
+
-
+
-
+
-
RELAY 1 RELAY 2 RELAY 3
1234 56789101112
Wiring Diagram Notes:
Capacitor and resistor inside dashed box are used ONLY on European MBT240
Heating elements are numbered back-to-front
Relay 1 powers elements 1, 4, 7, and 10
Relay 2 controls elements 2, 5, 8, and 11
Relay 3 controls elements 3, 6, 9, and 12
SEE
NOTE
BELOW
0.5A
FUSE
1µF
470k OHMS

15
L1
(X)
L2
(Y)
FAN
C
TSTAT NO
COOL DOWN
TSTAT NC
HIGH LIMIT
POWER ON/OFF (I/O) SWITCH 2 POLE
TFRMR
230Vp:24Vs
C2
C1
+12V R1 R2 R3
TIMER BOARD
SSR 1 SSR 2 SSR 3
HEATING
ELEMENTS
HEATING
ELEMENTS
HEATING
ELEMENTS
GND
(E)
Schematic Notes:
Capacitor and resistor inside dashed box are used ONLY on European MBT240
SEE
NOTE
BELOW
ELECTRICAL SCHEMATIC
0.5A
FUSE
1µF
470k OHMS

16
Toastmaster 1400 Toastmaster Drive Elgin, IL 60120 USA (847)741-3300 FAX (847)741-4406
Middleby Corp 24-Hour Service Hotline 1-800-238-8444
www.middleby.com
A Middleby Company
/