Most top oven cooking should be carried
out using the shelf provided in shelf position
2. However when cooking a small joint or a
deep cake you can use the shelf on the base
of the top oven to allow enough air to
circulate around the food.
For safety the shelves will only pull out so far. If you want to remove
a shelf completely, pull it forward as far as it will go, raise the front edge
and lift it out. To put the shelf into a different position, keep the front
edge raised, slot the shelf on to the runner, lower the front edge and
slide the shelf in.
Baking trays and dishes
Leave a gap of 13mm (½") between all
dishes and the sides of the oven so the
heat can circulate properly.
Do not push dishes too far back as food
will burn if it overhangs the burner flames.
For the best results from the main oven we recommend that you use a
baking tray which is 310mm (12") square. If you use a tray or tin which is
larger than this, you may need to turn it around during cooking.
The size of tray which should be used in the top oven should not be
bigger than 310mm x 230mm (12" x 9"). Place the longest side parallel
with the door.
Place single dishes on the centre of the shelf. You may need to turn
large items around during cooking. Turn all food round in the top oven.
Z C G 7 6 9 0 / 7 6 8 0
14
The ovens
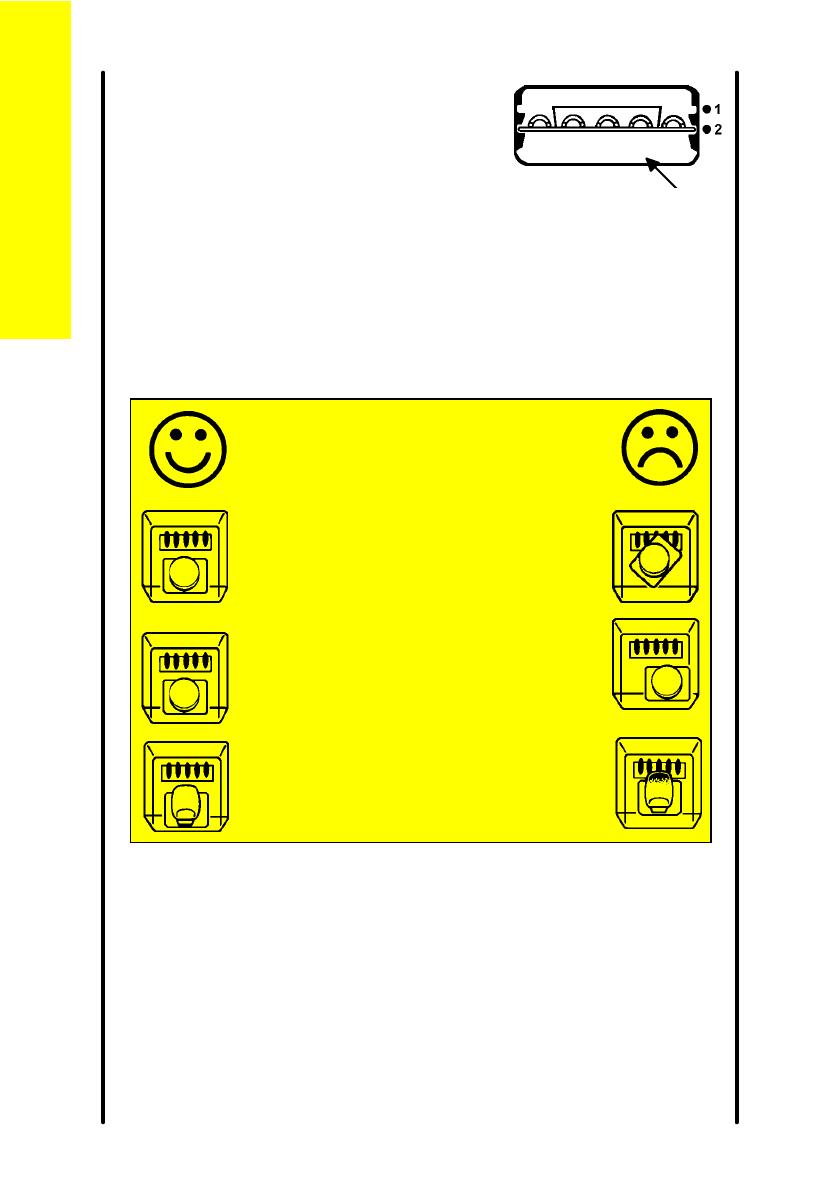
For your safety
Never place cooking dishes, trays and
so on over the oven burners. This will
damage the appliance as well as the
cookware and possibly the floor
covering underneath the appliance.
Leave a gap of 13mm (½") between all
dishes and the sides of the oven so the
heat can circulate properly.
Do not push dishes too far back as
food will burn if it overhangs the
burner flames.
Shelf on base


