Electrolux EI23BC82SS Owner's manual

Category
Side-by-side fridge-freezers
Type
Owner's manual

This manual is also suitable for

EN FRENCH DOOR BOTTOM
FREEZER/REFRIGERATOR
FR RÉFRIGÉRATEUR À PORTES
FRANÇAISES/CONGÉLATEUR EN BAS
ES REFRIGERADOR CON CONGELA-
DOR INFERIOR DE PUERTA DOBLE
A05947701 August 2016
USE AND CARE GUIDE
GUIDE D’UTILISATION ET D’ENTRETIEN
GUIA DE USO Y CUIDADO
2
Finding Information
Please read and save this
guide
Thank you for choosing Electrolux, our
new premium brand in home appliances.
This Use & Care Guide is part of our
commitment to customer satisfaction and
product quality throughout the service life
of your new appliance.
Purchase date
Electrolux model number
Electrolux serial number
Keep a record for quick
reference
Finding Information ................................. 2
Safety ..................................................... 3
Feature Overview .................................... 5
Installation .............................................. 6
Removing the Doors ............................. 10
Installing Door Handles ......................... 13
Connecting the Water Supply ............... 14
Controls ................................................ 16
Dispenser Model -
Automatic Ice Maker/Water Dispenser ..... 23
Automatic Ice Maker - Freezer .............. 25
Storage Features .................................. 27
Storing Food and Saving Energy .......... 31
Normal Operating Sounds .................... 32
Changing the Water and Air Filters ........ 33
Care and Cleaning ................................ 35
Solutions to Common Problems ........... 37
Warranty ............................................... 42
Table of contents
Questions?
For toll-free telephone support in the U.S.
and Canada: 1-877-4ELECTROLUX
(1-877-435-3287)
For online support and product information
visit http://www.electroluxappliances.com
Doors
Handles are secure and tight
Door seals completely to cabinet on
all sides
Leveling
Refrigerator is level side-to-side and
slightly elevated in front to assist
with door and drawer closing (front
should be higher than back)
Toe grille is properly attached to
refrigerator
Cabinet is setting solid on all corners
Electrical Power
House power turned on
Refrigerator plugged in
Ice Maker
House water supply connected to
refrigerator
No water leaks present at all
connections - recheck in 24 hours
Ice maker is turned ON
Ice & water dispenser operates correctly
Final Checks
Shipping material removed
Fresh food and freezer temperatures set
Crisper humidity controls set
Registration card sent in
Installation Checklist
NOTE
Registering your product with Electrolux
enhances our ability to serve you. You can
register online at
www.electroluxappliances.com or by sending
your Product Registration Card in the mail.
3
Safety
Important safety instructions
General Safety
Safety Precautions
Do not attempt to install or operate your unit
until you have read the safety precautions
in this manual. Safety items throughout this
manual are labeled with a Danger, Warning,
or Caution based on the risk type.
Definitions
This is the safety alert symbol. It is
used to alert you to potential personal
injury hazards. Obey all safety messages
that follow this symbol to avoid possible
injury or death.
Do not store or use gasoline or other
flammable liquids near this or any
other appliance. Read product labels
for warnings regarding flammability
and other hazards.
Do not operate the refrigerator in the
presence of explosive fumes.
Avoid contact with any moving parts
of the automatic ice maker.
Remove all staples from the carton to
avoid injury. Staples can also damage
finishes if they come in contact with
other appliances or furniture.
Child Safety
Packing Materials:
Packing cartons covered with rugs,
bedspreads, plastic sheets, or stretch
wrap may become airtight chambers
and can quickly cause suffocation.
Destroy or recycle the product’s carton,
plastic bags, and any other exterior
wrapping material immediately after
the refrigerator is unpacked. Children
should never play with these items.
Child Entrapment and Suffocation:
These problems are not limited to the
past. Whether junked, abandoned,
or temporarily stored (even for a few
hours), unattended refrigerators and
freezers are dangerous. Please take
the precautions listed below.
Proper Disposal of Refrigerators/
Freezers
We strongly encourage responsible
appliance recycling/disposal methods.
Check with your utility company or visit
www.energystar.gov/recycle for more
information on recycling your old refrigerator.
Before you recycle or dispose of your
old refrigerator/freezer:
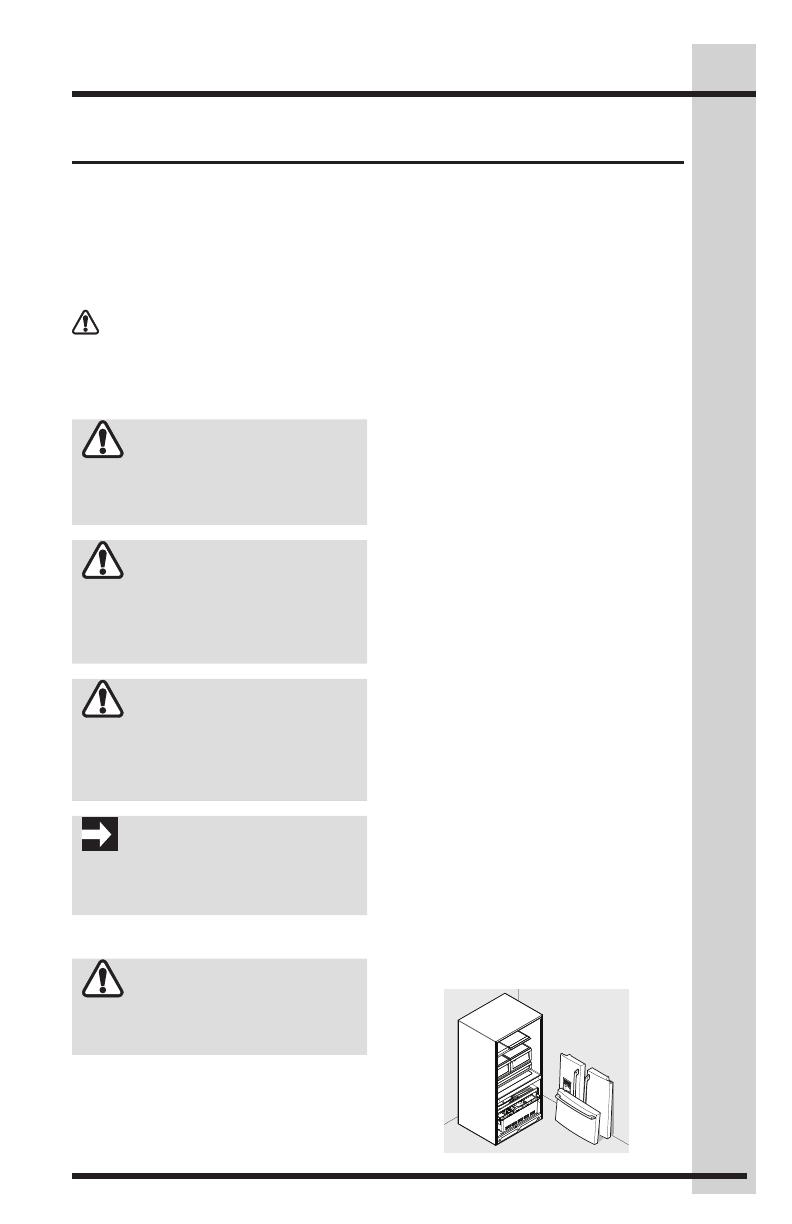
Remove the doors.
Leave the shelves and baskets in place
so children may not easily climb inside.
Have refrigerant and compressor oil
removed by a qualified service technician.
WARNING
WARNING indicates a potentially
hazardous situation which, if not
avoided, could result in death or serious
injury.
IMPORTANT
Indicates installation, operation, or
maintenance information which is
important but not hazard-related.
CAUTION
CAUTION indicates a potentially
hazardous situation which, if not
avoided, may result in minor or
moderate injury.
DANGER
DANGER indicates an imminently hazardous
situation which, if not avoided, will result in
death or serious injury.
WARNING
Please read all safety instructions before
using your new refrigerator.
4
The refrigerator must be plugged into
its own dedicated 115 Volt, 60 Hz,
AC-only non-GFCI electric outlet.
The power cord of the appliance
is equipped with a three-prong
grounding plug for your protection
against electrical shock hazards.
It must be plugged directly into
a properly grounded three-prong
receptacle. The receptacle must be
installed in accordance with local
codes and ordinances. Consult a
qualified electrician. Do not use an
extension cord or adapter plug.
If the power cord is damaged,
it should be replaced by the
manufacturer, service technician, or a
qualified person.
Never unplug the refrigerator by pulling
on the power cord. Always grip the
plug firmly and pull straight out from
the receptacle to prevent damaging
the power cord.
To avoid electrical shock, unplug the
refrigerator before cleaning and before
replacing a LED light.
Performance may be affected if
the voltage varies by 10% or more.
Operating the refrigerator with
insufficient power can damage the
compressor. Such damage is not
covered under your warranty.
Do not plug the unit into an outlet
controlled by a wall switch or pull cord
to prevent the refrigerator from being
turned off accidentally.
Electrical information
Grounding type wall receptacle
Power cord with 3-prong
grounded plug
Do not, under any
circumstances,
cut, remove, or
bypass the
grounding prong.
Safety
WARNING
You must follow these guidelines to
ensure that your refrigerator’s safety
mechanisms are operating correctly.
IMPORTANT
To turn off power to your refrigerator,
unplug the power cord from the wall
outlet.
5
Feature Overview
Understanding features and terms
Your Electrolux refrigerator is designed for optimal convenience and storage flexibility.
The illustration below is provided to assist you with familiarizing yourself with product
features and terminology.
*Wire Shelf
(inside freezer drawer)
NOTE
*Features may vary according to model. Dispenser model shown. Model is shown
without freezer drawer cover.
IMPORTANT
Features not included with your
refrigerator can be purchased at
www.electroluxappliances.com or by
calling 1-877-435-3287.
*Luxury-Design
®
Glass Shelves
*Wine Rack
(Inside PTD)
*Removable
Ice Bin
*Perfect Temp
TM
Drawer
(PTD)
or Deli Drawer
Freezer Baskets
with organizers
Toe Grille
Tilt
Can Bin
Flipper
Mullion
Air Filter
LED LightFlipper Guide*Ice Maker*Ice Bin
*Freezer Ice
Maker
Water Filter
Luxury-Glide
®
Crisper Drawers
Luxury-Glide
®
Crisper Drawers
*Luxury-Design
®
Glass Shelves
6
Installation
This Use & Care Guide provides general
installation and operating instructions
for your model. We recommend using a
service or kitchen contracting professional
to install your refrigerator. Use the
refrigerator only as instructed in this Use &
Care Guide. Before starting the refrigerator,
follow these important first steps.
Location
Choose a place that is near a
grounded, non-GFCI, electrical outlet.
Do Not use an extension cord or an
adapter plug.
If possible, place the refrigerator out
of direct sunlight and away from the
range, dishwasher, or other heat
sources.
The refrigerator must be installed on a
floor that is level and strong enough to
support a fully loaded refrigerator.
Consider water supply availability for
models equipped with an automatic
ice maker.
Installation
Allow the following clearances for ease
of installation, proper air circulation,
and plumbing and electrical
connections:
Sides & Top 3/8 inch (9.5 mm)
Back 1 inch (25.4 mm)
Door opening
Your refrigerator should be positioned
to allow easy access to a counter when
removing food. For best use of refrigerator
drawers and freezer baskets, the
refrigerator should be in a position where
both can be fully opened.
Top Hinge
Cover Front
Screw
Top Hinge
Cover Rear
Screw
Lower
Hinge
Screw
Top
Hinge
Screw
Components Provided:
Required Tools
You will need the following tools:
CAUTION
DO NOT install the refrigerator where
the temperature will drop below 55°F
(13°C) or rise above 110°F (43°C).
The compressor will not be able to
maintain proper temperatures inside the
refrigerator.
DO NOT block the toe grille on the lower
front of your refrigerator. Sufficient air
circulation is essential for the proper
operation of your refrigerator.
NOTE
If your refrigerator is placed with the
door hinge against a wall, you may have
to allow additional space so the door
can be opened wider.
NOTE
The refrigerator doors are designed to
shut by themselves within a 45 degree
opening.
Tools Necessary:
Phillips Head
or
Quadrex Head
Screwdriver
(OR)
OR
⅜" and ¼"
Socket
Wrench
Adjustable
Wrench
OR
⅜"
Fixed
Wrench
ANDAND
6mm
Allen Wrench
7
Installation
Toe Grille Must
Fit in Slot on
Anti-tip Bracket
Screw/Washer
Assembly
(3) Retaining Clips
4 After unit is leveled, lower anti-tip leg
using a 3/8 inch socket wrench until
it firmly contacts the floor.
Cabinet Leveling & Re-
frigerator Door Alignment
(if necessary)
Guidelines for final positioning of your
refrigerator:
All four corners of the cabinet must
rest firmly on the floor.
The front should be slightly elevated
to ensure that doors close and seal
properly.
Doors should align with each other
and be level.
Most of these conditions can be met by
raising or lowering the adjustable front rollers.
To level the cabinet using the front rollers:
1 Slightly open freezer drawer if the toe
grill is installed. Lift the toe grille and
gently pull forward.
2 Make initial cabinet adjustments by using
the front roller height adjusting screws.
Use a 3/8 inch socket wrench to turn the
adjustment screws (1 per side).
To raise: turn adjustment screw
clockwise.
To lower: turn adjustment screw
counterclockwise.
3 Ensure both doors are bind-free with
their seals touching the cabinet on all
four sides and that cabinet is stable.
Raise
Lower
Anti-tip
Leg
Door
Door
5 Install the toe grille by fitting into place.
DO NOT
Loosen
or
Remove
These 3
Hex
Screws
CAUTION
Do Not loosen or remove these 3 hex
screws.
Raise
To make final door height adjustments:
1. Open freezer drawer to make lower
hinge visible.
2. Insert 6mm Allen wrench into the
shaft of the lower hinge.
3. Adjust the height by turning clockwise
or counterclockwise. Turning
clockwise will lower the door. Turning
counterclockwise will raise the door.
Default setting is to the lowest height
when you receive your appliance.
8
Installation
Screw
Flipper
Mullion
Hinge
Flipper
Mullion
Adjusting Flipper Mullion Screw
To adjust the flipper mullion:
1 Loosen the screw located on the
flipper mullion hinge.
2 Adjust flipper mullion height. For
proper connection with the flipper
mullion guide, there should be a
separation about the thickness of
a coin (0.060 inches, or 1.5 mm)
between the guide and flipper
mullion.
3 Re-tighten screw.
Flipper
Mullion
Mullion
Guide
Thickness
of a Coin
Adjusting Flipper Mullion Height
Installing Shelves (select models)
Your refrigerator was shipped with the
shelf hanger and glass shelves in a
shipping pack. Below are the instructions
to install and remove the shelves in your
desired locations.
1 Place top hooks of the hanger into
the desired slot, and lower straight
down until lower hooks rest on the
ladder.
2 Relock shelf by pushing the slide
mechanism away from you.
3 While holding shelf at a 45-degree angle
with the gray handle facing you, push
the shelf into the back of the hanger.
CAUTION
Shelves must be removed prior to
moving the refrigerator.
9
4 Gently set the shelf onto the hanger
once the back is secured by the hanger.
Installation
5 Remove shelf from its locked position
by pulling the slide mechanism
toward you.
6 Lift the hanger directly upwards and
pull toward you to remove it from the
ladder.
Reposition the Air Seal
(select models)
1 Remove air seal by pushing seal
straight back.
2 Position the air seal towards the outside
edge of the shelf to avoid the air tower
when shelf is pushed back into place.
3 Install seal by sliding the open
channel end of the seal onto back
edge of shelf until seal sits snug on
back of shelf and flap sits at about a
10 degree angle from shelf surface.
Air Seal
Air Seal
10
Installation
Reposition the Air Seal (select models)
For slide-out shelves:
1 Remove air seal by pushing down on
the flap with a downward rotation.
2 Position the air seal towards the outside
end of the shelf to avoid the air tower
when shelf is pushed back into place.
3 Install seal by sliding lower tab of seal
up into bottom rear slot of shelf with
seal at a downward angle then pulling
up on seal flap until seal sits snug on
back of shelf and flap sits at about a
10 degree angle from shelf surface.
Your refrigerator includes glass shelves that are
designed to catch and hold accidental spills.
You can easily adjust shelf positions in
the fresh food compartments to suit
your needs. The shelves have mounting
brackets that attach to slotted supports at
the rear of each compartment.
To change the position of a shelf:
1 Before adjusting a shelf, remove all food.
2 Lift the front edge up and pull the shelf out.
3 Replace by inserting the mounting bracket
hooks into the desired support slots.
4 Lower the shelf and lock into position.
CAUTION
To avoid injury from breakage, handle
tempered glass shelves carefully.
NOTE
Features may vary according to model.
Shelf features (select models)
Full Luxury-Design
TM
Shelf (varies by model)
11
2 Disconnect the harness by grasping
both sides of the connector firmly,
depress the latch, and pull apart.
Remove the two screws from the top
hinge. Lift the door off of the bottom
hinge and set it aside.
3 Detach the water tube from the
connector located behind the
refrigerator and pull the tube back out
to the front of the unit. The connector
releases when you press inward on
the outer sleeve while pushing the
tube toward the connector then while
continuing to hold in the sleeve, pull
the tube away.
Removing the Doors
Getting through narrow
spaces
If your refrigerator will not fit through an
entrance area, you can remove the doors.
Check first by measuring the entrance.
To prepare for removing the doors:
1 Make sure the electrical power cord
is unplugged from the wall outlet.
2 Open the freezer drawer and remove
the toe grille (see Installation section).
3 Remove any food from the door
shelves and close the doors.
To remove the top hinge covers:
1 Remove the two screws from each
cover over the top door hinges.
2 Lift inside edge of hinge cover and tilt back.
Rear
Cover
Screw
Ground
Screw
Top
Hinge
Top Hinge
Cover
Hinge
Screws
Multi-wire
Cables
Leave
Hinge
With
Door
Front
Cover Screw
Water
Line
Rear
Cover
Screw
Top
Hinge
Ground
Screw
Front
Cover Screw
Top Hinge
Cover
Hinge
Screws
Leave
Hinge
With
Door
To remove the refrigerator doors
1 Trace lightly around the door’s top
hinges with a pencil. This makes
reinstallation easier.
NOTE
DO NOT remove the ground screw from hinge.
NOTE
Use care while pulling the water tube from the
unit to be sure that you do not kink the tube.
12
Removing the Doors
Once both doors are in place, ensure they
are aligned with each other and level (Please
see the Installation section for more
details), and replace the top hinge cover.
Lower Hinge Removal
4 Unscrew the three lower hinge
screws and slide the hinge inwards.
CAUTION
Be sure doors are set aside in a secure
position where they cannot fall and
cause personal injury, or damage to the
doors or handles.
NOTE
You will be pulling approximately five
feet of water tube from the back of the
refrigerator.
NOTE
When reinserting the water tube and
replacing the top hinge cover, use care
to be sure you do not kink the tube.
Press
Press
Approximately
5 feet
Water
Line
Insert tube
up to the
marking
line
NOTE
Upon replacement, the tube needs to be
fully inserted up to the marking line.
Press
Press
Approximately
5 feet
Water
Line
To reinstall the refrigerator doors:
Reverse the above steps.
13
Removing the Doors
CAUTION
Drawer is heavy. Use caution when
lifting.
Removing Freezer Drawer
Remove
Hex Head
Drawer Screw
DO NOT
Remove
Other
Screws
DO NOT
Loosen
or
Remove
These 3
Hex
Screws
Replacing Freezer Drawer
1 Lower drawer back into place.
2 Replace 4 hex head drawer screws
and tighten.
1 Remove 4 hex head drawer screws.
2 Lift up drawer to remove.
14
Installing Door Handles
Door Handle Mounting Instructions
End
Cap
End
Cap
End
Cap
End
Cap
Mounting
Refrigerator
Handles
End
Cap
End
Cap
Mounting
Freezer
Handle
CAUTION
Wear gloves and safety goggles. Use extreme CAUTION when installing these handles.
NOTE
An Allen wrench is supplied in the handle packaging. When using the Allen wrench to tighten the
Allen set screws (C), it is imperative that force be applied to the longer arm of the Allen wrench to
ensure that the set screws are completely tightened so that handles are flush with doors/drawer.
1. Remove handles from protective packaging.
2. Position fresh food handle end caps (A) over upper and lower pre-installed shoulder
bolts (B) that are fastened into door, ensuring the holes for the set screws are facing
towards the opposite door.
3. While holding handle firmly against door, fasten upper and lower Allen set screws
(C) with supplied Allen wrench.
4. Repeat steps 2 and 3 to install opposite handle. Ensure the holes for the set screws
are facing towards the first door.
5. Position freezer handle end caps over left and right pre-installed shoulder bolts (B) that
are fastened to the drawer, ensuring the holes for the set screws are facing down.
6. While holding handle firmly against drawer, fasten left and right Allen set screws (C)
with supplied Allen wrench.
15
Connecting the Water Supply
WARNING
To avoid electric shock, which can
cause death or severe personal injury,
disconnect the refrigerator from
electrical power before connecting a
water supply line to the refrigerator.
IMPORTANT
Ensure that your water supply line
connections comply with all local
plumbing codes.
CAUTION
To Avoid Property Damage:
Copper or Stainless Steel braided
tubing is recommended for the
water supply line. Water supply
tubing made of ¼ inch plastic is
not recommended to be used.
Plastic tubing greatly increases the
potential for water leaks, and the
manufacturer will not be responsible
for any damage if plastic tubing is
used for the supply line.
DO NOT install water supply tubing
in areas where temperatures fall
below freezing.
Chemicals from a malfunctioning
softener can damage the ice maker.
If the ice maker is connected to soft
water, ensure that the softener is
maintained and working properly.
NOTE
Check with your local building authority
for recommendations on water lines and
associated materials prior to installing
your new refrigerator. Depending
on your local/state building codes,
Electrolux recommends for homes
with existing valves its Smart Choice®
water line kit 5305513409 with a 6
ft. (1.8 meters) Stainless Steel Water
Line and for homes without an existing
valve, Electrolux recommends its Smart
Choice® water line kit 5305510264 with
a 20 ft. (6 meters) Copper Water Line
with self-tapping saddle valve). Please
refer to www.electroluxappliances.com
for more information.
Before installing the water supply line,
you will need:
1. Basic Tools: adjustable wrench,
flat-blade screwdriver, and Phillips
TM
screwdriver
2. Access to a household cold water
line with water pressure between 30
and 100 psi.
3. A water supply line made of ¼ inch
(6.4 mm) OD, copper or stainless
steel tubing. To determine the length
of tubing needed, measure the
distance from the ice maker inlet
valve at the back of the refrigerator
to your cold water pipe. Then add
approximately 7 feet (2.1 meters), so
the refrigerator can be moved out for
cleaning.
4. A shutoff valve to connect the water
supply line to your household water
system.
5. Do NOT reuse compression fitting or
use thread seal tape.
6. A compression nut and ferrule
(sleeve) for connecting a copper
water supply line to the ice maker
inlet valve.
16
To connect water supply line to ice
maker inlet valve:
1. Disconnect refrigerator from electric
power source.
2. Place end of water supply line into
sink or bucket. Turn ON water supply
and flush supply line until water
is clear. Turn OFF water supply at
shutoff valve.
3. Remove plastic cap from water valve
inlet and discard cap.
4. If you use copper tubing - Slide brass
compression nut, then ferrule (sleeve)
onto water supply line. Push water
supply line into water valve inlet as far
as it will go (¼ inch / 6.4 mm). Slide
ferrule (sleeve) into valve inlet and
finger tighten compression nut onto
valve. Tighten another half turn with
a wrench; DO NOT over tighten. See
Figure 1.
If you use braided flexible stainless
steel tubing - The nut is already
assembled on the tubing. Slide nut
onto valve inlet and finger tighten nut
onto valve. Tighten another half turn
with a wrench; DO NOT over tighten.
See Figure 2.
5. With steel clamp and screw, secure
water supply line (copper tubing only)
to rear panel of refrigerator as shown.
6. Coil excess water supply line (copper
tubing only), about 2½ turns, behind
refrigerator as shown and arrange
coils so they do not vibrate or wear
against any other surface.
7. Turn ON water supply at shutoff valve
and tighten any connections that
leak.
8. Reconnect refrigerator to electrical
power source.
9. To turn ice maker on, lower wire
signal arm (freezer ice maker) or use
the digital control setting to turn the
ice maker’s On/Off switch to the On
position (fresh food ice maker).
Figure 1
Plastic Water Tubing
to Ice Maker
Fill Tube
Steel
Clamp
Brass
Compression
Nut
Ferrule
(Sleeve)
Copper
water line
Water Valve
Bracket
Valve Inlet
Water Valve
Copper water line
from household
water supply
(Include enough tubing in loop to allow
moving refrigerator out for cleaning)
Figure 2
Steel
Clamp
Braided
Flexible
Stainless
Steel
Water Line
Water Valve
Bracket
Valve Inlet
Water Valve
6 ft (1.8 Meters) Braided flexible
stainless steel water line from
household water supply.
Plastic Water Tubing
to Ice Maker
Fill Tube
(Include enough tubing in loop to allow
moving refrigerator out for cleaning.)
Connecting the Water Supply
17
Controls - Dispenser Models
Wave-Touch
TM
IQ-Touch
TM
18
Controls - Dispenser Models
Wave-Touch
TM
(select
models)
Your refrigerator is equipped with a Wave-
Touch
TM
control panel display. It is only
necessary to gently touch the glass. There
are three levels of display.
1st Level: Sleep Mode
Sleep Mode displays only the water, cubes
and crushed options. Touch an icon to
activate the desired dispenser mode. The
active dispenser mode is more brightly
illuminated.
2nd Level: Awakened Display Mode
3rd Level: User Variable Options
Touching the options icon displays the
following options:
vacation mode Conserves energy by increas-
ing the time between automatic
defrost. This feature is automati-
cally activated during long periods
between door openings. Vacation
mode is manually activated when
the indicator is lit.
water filter Touch to display filter condition
status. Press and hold for three
seconds to reset after filter change.
air filter Touch to display filter status. Press
and hold for three seconds to reset
after filter change.
temp display When active, it allows the display of
the freezer and fridge setting during
Sleep Mode. The setting is displayed
when the indicator is lit.
temp mode Touch to toggle display from
Fahrenheit to Celsius.
mute sounds Tones emitted by each keypress
can be turned off based on user
preference. The sounds are muted
when the indicator is lit. Warning
signals will stay active.
factory default Resets all refrigerator settings such
as temp, temp display, and alarm
tones to their factory default settings.
on off Press and hold for three seconds
to turn off the cooling system to
clean the refrigerator. It also turns
off the Fresh Food ice maker, all
dispenser functions, and the Perfect
Temp
TM
drawer (select models). The
temperature display will read OFF.
The control panel is awakened by touching
anywhere on the glass where there is an
indicator. Black space will not awaken the
display. After 10 seconds of inactivity, the
control panel will return to the Sleep mode.
The following dispenser options are
illuminated:
ice off Press and hold for three seconds
to turn the ice maker ON or OFF.
The ice maker is OFF when the
LED above the Ice Off icon is
illuminated. If there is no indicator,
then the ice maker is ON.
fast freeze Activates a faster rate for freezing food
and increased freezer ice production.
(Fresh Food
Ice Maker)
dispenser light On / Off
control lock Press and hold for three seconds
to activate and deactivate. This
restricts undesired changes to the
refrigerator’s settings and prevents
use of the ice and water dispenser.
NOTE
Refer to Automatic Ice Maker-Freezer
section for freezer ice maker controls.
19
Controls - Dispenser Models
Setting cooling temperatures
1 Touch
the glass
panel to
illuminate
the 2nd
level of
display.
2 Select the
options
icon. Plus
(+) and
minus (-)
indicators will appear on either side of
the displayed temperatures.
3 Press the + or – indicator to adjust
the temperature to the desired
temperature settings.
The temperature setting display will
begin to blink with the first touch. After
five seconds of inactivity, the display will
beep to accept the new temperature.
After 10 seconds, the display times out
and returns to the basic display.
IMPORTANT
Pressing the system on/off icon does not
turn off power to your refrigerator. You must
unplug the power cord from the wall outlet.
Alarms
Door Ajar If the door has been left open for
an extended period of time, an
alarm will sound and the door ajar
indicator will display on the center of
the display. The alarm is turned off
by closing the door. The alarm off
key will blink to prompt the reset of
any pending alarms. Press this key
to reset any system alarms.
High Temp In the event of a high temperature
condition, the temperature display
will blink and display HI. After 20
minutes, the high temp alert will
be displayed and the alarm off
icon will illuminate until pressed,
acknowledging the alarm, at which
time the highest temperature
reached will be displayed and the
refrigerator will resume normal op-
eration. All other modes are turned
off until the alarm is acknowledged.
Power Fail In the event of a power failure, the
power fail alert will be displayed
and the alarm off key will blink
until the alarm off icon is pressed,
acknowledging the alarm. Other
modes may be turned off until the
alarm is acknowledged. When the
power fail alert is turned off, the
refrigerator will resume normal
operation. The high temp alarm
may also be illuminated until a safe
operating range temperature has
been reached.
NOTE
The recommended settings for a product
installed in a kitchen is 37˚F for the fresh
food compartment and 0˚F for the freezer.
IMPORTANT
If your product has food freezing in the
fresh food compartment, increase the
temperature setting 1 or 2 degrees.
IMPORTANT
If you place food within 1 inch in front of
the air ports, there may be the chance
of freezing food.
Air Port
20
Sabbath Mode and the Perfect Temp
TM
Drawer
The Perfect Temp
TM
Drawer should be turned
off for the Sabbath/Holidays. Before putting
the refrigerator into the Sabbath mode, turn
the Perfect Temp
TM
Drawer off by pressing
the drawer on/off button. The display will
show OFF and the drawer will turn off. Then
enter the Sabbath mode function on the main
refrigerator display. (See Wave-Touch/IQ-Touch
Sabbath Mode section.) When in Sabbath
mode, the display will not illuminate and the
drawer will remain off. The drawer can still be
used as a non-temp controlled drawer in this
mode. When the refrigerator is taken out of
Sabbath mode, the Perfect Temp
TM
Drawer will
have to be turned back on.
IQ-Touch
TM
(select models)
NOTE
While in Sabbath Mode, neither the
lights, dispenser, nor the control panel will
work until Sabbath Mode is deactivated.
Refrigerator stays in Sabbath Mode after
power failure recovery. It must be deactivated
with the buttons on the control panel.
NOTE
During Sabbath Mode, the freezer ice
maker will continue to work and must be
manually turned off to be compliant with
the Sabbath observances.
NOTE
If the Perfect Temp
TM
Drawer is not turned
off prior to putting the unit into Sabbath
Mode, it will continue to adjust itself to
maintain the set point even if the display
does not illuminate to show that it is still on.
Your refrigerator is equipped with a glass touch
control panel. It is only necessary to gently touch
the glass. There are three dispenser modes:
1 Water
2 Ice Cubes
3 Crushed Ice
The Sabbath Mode is a feature that disables
portions of the refrigerator and its controls
for both Wave-Touch
TM
and IQ-Touch
TM
, in
accordance with observance of the weekly
Sabbath and religious holidays within the
Orthodox Jewish community.
Wave-Touch
TM
/ IQ-
Touch
TM
Sabbath Mode
NOTE
While in Sabbath Mode, the Wave-
Touch
TM
model will only illuminate the –/+
keys used to turn the Sabbath Mode Off.
Sabbath Mode is turned on and off by
simultaneously pressing and holding the freezer
temperature – and the refrigerator temperature
+ indicators for five seconds for both the
Wave-Touch
TM
and IQ-Touch
TM
modes. The
display shows Sb while in Sabbath mode.
In the Sabbath Mode, the High Temp alarm
is active for health reasons. For example,
if the door is left ajar the High Temp alarm
is activated. The refrigerator will function
normally once the door is closed, without
any violation of the Sabbath/Holidays. The
High Temp alarm is permitted when cabinet
temperature is outside the safe zone for 20
minutes. The alarm silences itself after 10
minutes while the High Temp icon stays lit
until the Sabbath mode is exited.
For further assistance, guidelines for
proper usage and a complete list of
models with the Sabbath
feature, please visit the web at
http:\\www.star-k.org.
Controls - Dispenser Models
  • Page 1 1
  • Page 2 2
  • Page 3 3
  • Page 4 4
  • Page 5 5
  • Page 6 6
  • Page 7 7
  • Page 8 8
  • Page 9 9
  • Page 10 10
  • Page 11 11
  • Page 12 12
  • Page 13 13
  • Page 14 14
  • Page 15 15
  • Page 16 16
  • Page 17 17
  • Page 18 18
  • Page 19 19
  • Page 20 20
  • Page 21 21
  • Page 22 22
  • Page 23 23
  • Page 24 24
  • Page 25 25
  • Page 26 26
  • Page 27 27
  • Page 28 28
  • Page 29 29
  • Page 30 30
  • Page 31 31
  • Page 32 32
  • Page 33 33
  • Page 34 34
  • Page 35 35
  • Page 36 36
  • Page 37 37
  • Page 38 38
  • Page 39 39
  • Page 40 40
  • Page 41 41
  • Page 42 42
  • Page 43 43

Electrolux EI23BC82SS Owner's manual

Category
Side-by-side fridge-freezers
Type
Owner's manual
This manual is also suitable for

Ask a question and I''ll find the answer in the document

Finding information in a document is now easier with AI