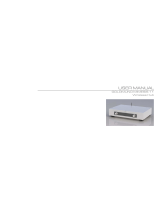
MIMESIS 22 HISTORY

Goldmund MIMESIS 22 HISTORY User manual

  • Hello! I am an AI chatbot trained to assist you with the Goldmund MIMESIS 22 HISTORY User manual. I’ve already reviewed the document and can help you find the information you need or explain it in simple terms. Just ask your questions, and providing more details will help me assist you more effectively!
  • What is the recommended power amplifier to pair with the Goldmund MIMESIS 22H preamplifier?
    What type of interconnect cables are advised for connecting sources and amplifiers to the preamplifier?
    Where should the preamplifier be placed to ensure proper ventilation?
    What is the appropriate line voltage range for the Goldmund MIMESIS 22H preamplifier?
    How do I activate and deactivate the preamplifier?
    How do I select the desired input source?
    How do I adjust the volume level?
USER MANUAL
GOLDMUND MIMESIS 22 HISTORY
Analog Preamplifier
Thank you for purchasing the Goldmund MIMESIS 22H ANALOG PREAMPLIFIER.
Please take some time to read this manual. It will provide you with useful information to make your
pleasure of listening to the MIMESIS 22H even higher.
INTRODUCTION
GOLDMUND MIMESIS 22 HISTORY Analog Preamplifier
Goldmund was founded in 1978 and has ever since been dedicated to the accurate reproduction
of sound and image.
At Goldmund, we strive to lead in the creation, development and manufacture of the industry’s
most advanced technologies, including audio and video systems, home-networking and music
distribution.
The guiding principle at Goldmund is to produce a precise sound with the least possible loss of
quality through the different stages. Goldmund will never adopt a technology before it is sufficiently
developed to satisfy the high quality standards we set. This is why Goldmund has often rejected
mainstream technologies and developed its own.
GOLDMUND MIMESIS 22H- Analog Preamplifier -3
Table of Contents
1 SETTING UP THE MIMESIS 22H 5
2 POWER SUPPLY 9
3 CONTROLS & UTILIZATION 10
4 SOUND QUALITY OPTIMIZATION 15
5 SAFETY FEATURES & MAINTENANCE 16
6 TECHNICAL SPECIFICATIONS 17
GOLDMUND MIMESIS 22H- Analog Preamplifier -4
W A R N I N G !
W A R N I N G !W A R N I N G !
W A R N I N G !
No connection or manipulation may be made
before reading these instructions and observing
all safety warnings.
This extremely high quality preamplifier
possesses new technical features which are or
will become necessary for accurate power
amplification of high quality analog sources.
Observe general electrical safety precautions
particularly with regard to avoiding water,
moisture and heat. To reduce the risks of
electric shock do not remove the covers and
refer servicing to qualified personnel.
The installation instructions must be carried out
in full and the mentioned precautions taken to
provide the satisfaction the MIMESIS 22H is
designed to provide and to avoid jeopardizing
personal and equipment safety or impairing
performance.
Nevertheless, in the MIMESIS 22H
Preamplifier, Goldmund engineering excellence
delivers extreme performance in a simple and
convenient format that we hope you will enjoy
for many years to come.
GOLDMUND MIMESIS 22H- Analog Preamplifier -5
1 SETTING UP THE MIMESIS 22H
1.1 PRELIMINARIES
For exacting technicians, musicians, and all high-fidelity music purists who demand the
very best in reproduction, we strongly recommend the use of top quality power amplifiers,
since most of the analog signal integrity delivered by the preamplifier can be destroyed by
using lower quality amplifiers.
For perfect analog amplification, Goldmund recommends the Goldmund Telos series of
power amplifiers.
The connection between the analog sources and the preamplifier as well as between the
preamplifier and the power amplifiers are also critical. Ultra low reflection interconnect
cables are absolutely mandatory to retain the time integrity that the preamplifier is designed
to provide. In all typical cases Goldmund recommends using the special Goldmund Lineal
interconnect cables.
1.2 UNPACKING
You will find within the two GOLDMUND MIMESIS 22H transit boxes:
- The Analog Preamplifier.
- The Power Supply Unit.
- Preamplifier to Power Supply cable.
- The mains powercord.
- The remote control and batteries.
- This manual.
Please keep the packaging in case you need to transport the MIMESIS 22H any time in the
future.
This packaging has been designed specifically to protect the MIMESIS 22H in transit. Use
of alternative packaging is likely to result in damage, invalidating warranty cover.
GOLDMUND MIMESIS 22H- Analog Preamplifier -6
1 SETTING UP THE MIMESIS 22H (Ctd.)
1.3 CHOICE OF PREAMPLIFIER LOCATION
The Goldmund MIMESIS 22H preamplifier generates a significant amount of heat. It is
necessary to allow adequate ventilation for proper cooling of the heat sinks. Avoid any
location which is not properly ventilated. Avoid stacking equipment and do not locate the
preamplifier close to equipment that is sensitive to temperature.
The power unit has been especially designed to minimize transformer vibration effects on
the audio circuits. One consequence of this strategy is that the power supply unit is
physically separate, connected by only the 150mm cabling. The power supply and
preamplifier should be located as far apart as the cabling allows. The preamplifier should
ideally not be located above the power supply. The power supply most certainly should
never be located above the preamplifier as this would force transformer vibration
evacuation through the audio circuits on its way to ground.
The power supply also generates a significant amount of heat and the ventilation
requirements noted above also apply.
The preamplifier has been designed with four adjustable conical feet. These are used to
ensure proper vibration transmission to the preamplifier support in order to evacuate all
detrimental vibrations inside the unit, following the famous Goldmund "Mechanical
Grounding" principle. Depending on the flatness of the chosen location, you may have to
adjust one or more of these feet.
GOLDMUND MIMESIS 22H- Analog Preamplifier -7
1 SETTING UP THE MIMESIS 22H (Ctd.)
1.4 LINE V0LTAGE ADJUSTMENT
Warning! If the line voltage provided is not appropriate as supplied, please consult your
dealer.
ATTENTION: At the 220V position, the Goldmund MIMESIS 22H preamplifier will function
properly for main line voltages between 200V and 240V. At the 110V position, the main line
must deliver between 105 and 125V. If your main supply operates out of these tolerances,
please consult your Goldmund dealer.
This fuse is located on the power cord receptacle and can be accessed by raising the
cover using a small screwdriver when the powercord has been removed (ensuring power is
disconnected before handling). Use a 2.5A slow-blow fuse.
Warning! Always ensure that the fuse cover is fitted. Fuses are for fire prevention and do
not protect against risk of electric shock.
1.5 CONNECTIONS
Warning! Always remember that a plug with bared connectors is dangerous if in contact
with a live socket. This appliance must be earthed.
Connect the non-rewirable power cord supplied to the back of the power supply and plug it
into the nearest wall plug. Use only a 3 lugs grounded plug, for safety and noise reasons.
Replacement mains leads can be obtained from your Goldmund retailer.
To get the best sound of the preamplifier, avoid any multiple plugs or extension cords.
GOLDMUND MIMESIS 22H- Analog Preamplifier -8
1 SETTING UP THE MIMESIS 22H (Ctd.)
1.5 CONNECTIONS (Ctd.)
Warning! Take care to always handle the cable by the connectors. Never twist the cable
excessively or attempt to connect or disconnect the connector by handling the cable body
in place of the connector.
Connect the cabling from the power supply output to the preamplifier input point labeled
“Power”.
Warning! The next stage in setting up your MIMESIS 22H is to connect your sources,
power amplifiers and other peripheral devices. All devices should be disconnected from
mains power until safe.
Connect the preamp analog output interconnects to the power amp using the RCA female
sockets labeled “analog outputs”.
Connect the interconnect cables from source devices to the line inputs numbered 1 to 7
labeled ‘IN1’ to ‘IN7’.
Connect tape machines to any inputs and to the Tape output RCA plugs.
Note:
Do not use the direct input labeled “SSP Input” if you are not using a linked configuration
with a Goldmund Mimesis 20. If your configuration includes the special software modules
which allow the connection of several units together, use the DB9 terminated cable
provided with this option to connect the MIMESIS 22H to these units and follow the
instructions delivered with the software.
In that case only, use only the direct input marked SSP Input” to connect the analog
output of the Mimesis 20 to the MIMESIS 22H analog input module.
GOLDMUND MIMESIS 22H- Analog Preamplifier -9
2 POWER SUPPLY
2.1 POWER SUPPLY
The main POWER switch is located on the back panel of the Goldmund MIMESIS 22H
power supply. In regular use, this switch should be left permanently ON and the circuits of
the preamplifier activated or deactivated using the STANDBY ON/OFF.
When the POWER switch is switched ON, the preamp will become operative after few
seconds delay to ensure proper stabilization of all the circuitry and avoid any unwanted
noise. After this delay, the output of the preamplifier is connected to the power amplifier.
The preamplifier can be powered off by switching the POWER switch to the OFF position.
A special safety circuit switches the preamp to MUTE to avoid any disturbance reaching
the power amplifier and the speakers, even if the preamplifier is disconnected from the
mains supply by accident. However, to optimize the sound quality of the preamplifier and
ensure the reliability, the M22S should remain powered ON continuously and is only
deactivated using the Standby function.
GOLDMUND MIMESIS 22H- Analog Preamplifier -10
3 CONTROLS & UTILIZATION
The Goldmund MIMESIS 22H is designed to capture, control, shape and nurture the fragile
source inputs, supporting adjustment of volume and balance to deliver your desired output
signal. The primary control functions supporting these processes are outlined below.
3.1 STANDBY
To activate the preamplifier (set to ON) put it into STANDBY ON mode by pressing the
SET/PWR (1) and the MUTE/PWR (3) buttons simultaneously.
To deactivate the Preamplifier (set to OFF) press these same SET/PWR (1) and
MUTE/PWR (3) buttons simultaneously once more.
In standby mode, the two red leds near the PWR button will be illuminated intermittently
(approximately every five seconds).
3.2 INPUT SELECTION
To select the source you want to listen to, use buttons ‘IN1’ to ‘IN7’ (2) to activate each of
the 7 input options. When the input is activated, the Led on the button corresponding to the
selected input will be illuminated.
3.3 VOLUME ADJUSTMENT
The right-hand volume level adjustment knob (7) is used to adjust VOLUME. If volume is
set to a value of zero, outputs will be muted.
GOLDMUND MIMESIS 22H- Analog Preamplifier -11
3 CONTROLS & UTILIZATION (Ctd.)
3.4 BALANCE ADJUSTMENT
The left-hand rotary switch (6) is used to adjust BALANCE.
If the volume value is set to zero, balance modification is not visible: Left and right volume
will be displayed at zero.
The left and right output volumes can be re-equalized after balance adjustment by using
the “Center” selector on the Remote Control.
3.5 MUTE
Press the MUTE/PWR button (3) to mute output.
This switch turns off the output of the preamplifier, without disconnecting the power supply.
It can be used to temporarily turn the volume down without touching the volume control.
Volume and balance adjustment are still possible when the preamplifier is muted.
3.6 ABSOLUTE PHASE
The PHASE/EDIT switch (4) reverses the polarity of the signal (180
o
out of phase)
simultaneously on both channels. A red Led is illuminated to indicate the activation of the
phase modification.
3.7 RECORD
To select the RECORD INPUT function press the REC/MENU button (5). The display will
read ‘SELECT REC INPUT’. Then press the input button (2) to select RECORD INPUT.
GOLDMUND MIMESIS 22H- Analog Preamplifier -12
3 CONTROLS & UTILIZATION (Ctd.)
3.7 RECORD (Ctd.)
If you do not want to select “NO RECORD INPUT”, press the MUTE/PWR button (3). If an
input is already selected as record input, the corresponding green Led will be illuminated
intermittently.
Note: If an input is already selected as ‘Tape In’, it cannot be selected for record input
(green Led off).
3.8 PARAMETERS MENU
To access to this menu, press the SET/PWR (1) and the REC/MENU (5) buttons
simultaneously. Press REC/MENU button (5) to move on to the next menu ‘page’.
To exit the menu press the SET/PWR (1) and the REC/MENU (5) buttons simultaneously
once more.
1. Display brightness
The MIMESIS 22H supports seven display brightness levels.
Press PHASE/EDIT button (4) to increase display brightness
Press MUTE/PWR button (3) to decrease brightness
2. Display timing
The MIMESIS 22H supports four time out values are available.
These are:
- 10 seconds of display time,
- 20 seconds,
- 30 seconds or
- Permanent display
Press PHASE/EDIT button (4) to increase the value
Press MUTE/PWR button (3) to decrease the value
GOLDMUND MIMESIS 22H- Analog Preamplifier -13
3 CONTROLS & UTILIZATION (Ctd.)
3.8 PARAMETERS MENU (Ctd.)
3. Balanced input
The MIMESIS 22H supports the option of either unbalanced or balanced inputs on
inputs 5, 6 and 7.
The default setting is for the inputs to be unbalanced. Select balanced input functions
using the ‘IN5’ to ‘IN7’ buttons (2).
Use these input selectors in conjunction with the PHASE/EDIT button (4) to change
input properties.
4. Tape in
Select input with ‘IN1’ to ‘IN7’ button (2)
To select no Tape In, press the MUTE/PWR button (3)
5. SSP input
The SSP input function supports a direct link from input to output bypassing
preamplifier circuits. Select input using the ‘IN1’ to ‘IN7’ buttons (2)
To select ‘SSP INPUT = NONE’ (for example to avoid lopping a Tape Out monitor,
select MUTE/PWR (3)
3.9 EDIT MENU
To access to this menu, select the SET/PWR (1) and the PHASE/EDIT (4) buttons
simultaneously.
Press PHASE/EDIT button (4) to pass to the next menu ‘page’
To exit the menu, select the SET/PWR (1) and the PHASE/EDIT (4) buttons
simultaneously again.
GOLDMUND MIMESIS 22H- Analog Preamplifier -14
3 CONTROLS & UTILIZATION (Ctd.)
3.9 EDIT MENU (Ctd.)
1. Global gain
Global input gain limits can be modified to between +12 to –12dB.
Use the right rotary switch VOLUME (7) to change preamplifier global gain. The new
limit set will be displayed. The input gain value can then be modified if outside the new
limits.
Global Gain should always be set before adjusting Input Gain. If this rule is not followed
the global adjustment may conflict with the individual input gain adjustment. The Input
Gain should therefore be re-checked and re-adjusted.
2. Input gain
Select input using the ‘IN1’ to ‘IN7’ button (2)
Use the right rotary switch VOLUME (7) to change input gain
Input gain limits are fixed by the global gain.
The maximum gain difference between inputs is 24dB.
3. Input name
The default Input Channels can be reassigned using up to 14 characters.
Select input with ‘IN1’ to ‘IN7’ button (2)
Use the left rotary switch BALANCE (6) to select the character to be changed.
Use the left rotary switch VOLUME (7) to change the character.
GOLDMUND MIMESIS 22H- Analog Preamplifier -15
4 SOUND QUALITY OPTIMIZATION
4.1 WARM-UP SONIC EFFECT
If the preamplifier has been left un-powered for some time, the optimum sound quality may
only be attained after many hours. The critical circuits have to warm up to around +55
degrees Celsius (+131 degrees Fahrenheit) before achieving their optimal performances.
This is why Goldmund recommends that the MIMESIS 22H is always powered on.
4.2 ABSOLUTE PHASE
Your MIMESIS 22H preamplifier has an absolute phase inverter switch.
Absolute phase optimization can be difficult to achieve with CD's since at the current state
of the technology, the phase coherency of this source is not sufficient to allow an adequate
difference between the two positions.
Many vinyl recordings are made without care for the absolute phase and different LP's can
have different optimum positions. Trial and error is therefore often necessary.
4.3 GOLDMUND “MECHANICAL GROUNDING”
In the Goldmund Mimesis 22 Signature edition preamplifier, Goldmund has implemented its
renowned construction method to provide an optimized vibration evacuation path.
To get all the benefits of this improvement, the MIMESIS 22H must be located on a very
rigid support, directly coupled to the building. Avoid any decoupling material. If carpet
decouples the preamplifier and ground, use pin-point supports to couple the furniture to the
floor.
GOLDMUND MIMESIS 22H- Analog Preamplifier -16
5 SAFETY FEATURES & MAINTENANCE
5.1 PROTECTION CIRCUIT
The Goldmund MIMESIS 22H preamplifier uses a special protection circuit to protect the
power amplifier and the speakers against a power supply failure or AC shut-down of the
preamplifier.
5.2 MAINTENANCE
To clean your Mimesis use only a soft, clean, dry or slightly damp cloth. Avoid using
domestic cleaning products.
Warning! Always turn the power off before cleaning your preamplifier.
There are no user serviceable parts inside the Mimesis 22S. Unauthorized servicing or
alteration invalidates the manufacturer’s warranty.
All inquiries relating to product servicing and operation should be referred to the local
authorized retailer supplying and supporting your Goldmund equipment.
GOLDMUND MIMESIS 22H- Analog Preamplifier -17
6 TECHNICAL SPECIFICATIONS
OUTPUT LEVEL
OUTPUT LEVELOUTPUT LEVEL
OUTPUT LEVEL
Nominal level: 1.55 V RMS.
Maximum output level (balanced) : 9.6 V RMS.
Maximum output level (unbalanced): 4.8 V RMS.
Output impedance: 50 Ohms.
FREQUENCY RESPONSE
FREQUENCY RESPONSE FREQUENCY RESPONSE
FREQUENCY RESPONSE
These values for any level to 10 V RMS:
+/- 0 dB, 20 - 20 kHz.
+/- 3 dB, 0.2 – 1.2 MHz.
INPUT SENSITIVITY
INPUT SENSITIVITYINPUT SENSITIVITY
INPUT SENSITIVITY
Nominal level: 100 mV.
Saturation level: 5 V RMS.
Nominal input impedance: 39 kOhms.
Separated input level adjustment for each of the 7 line inputs:
-12 to 12 dB.
INPUT LEVEL
INPUT LEVELINPUT LEVEL
INPUT LEVEL
Maximum input level (balanced) : 9.6 V RMS.
Maximum input level (unbalanced): 4.8 V RMS.
GROUP DELAY
GROUP DELAYGROUP DELAY
GROUP DELAY
Propagation delay <300 ns stable with frequency from DC to 200 kHz.
DISTORTION
DISTORTIONDISTORTION
DISTORTION
1 V rms output level, 80 KHz measurement bandwidth
600 ohms termination impedance
THD unbalanced in to unbalanced out 0.0002% flat with frequency
THD balanced in to balanced out 0.0001% flat with frequency
IMD unbalanced in to unbalanced out 0.0002%
IMD balanced in to balanced out 0.0001%
GOLDMUND MIMESIS 22H- Analog Preamplifier -18
6 TECHNICAL SPECIFICATIONS (Ctd.)
SPEED
SPEEDSPEED
SPEED
Slew rate of the amplification stages : 2500V/us
Rise time: < 400 ns.
CROSSTALK
CROSSTALKCROSSTALK
CROSSTALK
Separation: > 105 dB between channels.
(20Hz – 20kHz)
NOISE
NOISENOISE
NOISE
Signal-to noise ratio on line input: > 120 dB (0.01 Hz - 10 MHz).
Weighted ASA A: > 130 dB.
OPERATING TEMPERATURE
OPERATING TEMPERATURE OPERATING TEMPERATURE
OPERATING TEMPERATURE
Room temperature: -30 to +40 degrees Celsius.
Internal temperature: +45 to +70 degrees Celsius.
POWER
POWER POWER
POWER
Nominal line voltage: 117 or 234 V.
Input voltage range: +/- 10 %.
Maximum power consumption: 70 W.
GROUNDING
GROUNDINGGROUNDING
GROUNDING
Separated ground and earth signal.
Connection optional between earth and ground to cancel all ground loops.
SAFETY FEATURES
SAFETY FEATURESSAFETY FEATURES
SAFETY FEATURES
Automatic switching to MUTING if the AC line drops or is interrupted.
Automatic protection against tape loops.
GOLDMUND MIMESIS 22H- Analog Preamplifier -19
6 TECHNICAL SPECIFICATIONS (Ctd.)
FRONT PANEL CONTROLS
FRONT PANEL CONTROLSFRONT PANEL CONTROLS
FRONT PANEL CONTROLS
MUTING/POWER switch with Led control.
VOLUME control.
BALANCE control.
RECORD/MENU switch.
PHASE/EDIT switch.
7 INPUT CONTROL switches (with Led control).
REAR PANEL CONNECTORS AND CONTROLS
REAR PANEL CONNECTORS AND CONTROLS REAR PANEL CONNECTORS AND CONTROLS
REAR PANEL CONNECTORS AND CONTROLS
Power connector.
Earthing post (yellow-green).
Output connectors XLR (right and left) balanced.
Output connectors RCA (right and left) for Tape and line outputs.
Signal grounding post (black).
Input connectors XLR (right and left) balanced.
Input connectors RCA (right and left) for Tape and line inputs.
Link float.
RS232 Connector.
POWER SUPPLY CONTROLS
POWER SUPPLY CONTROLSPOWER SUPPLY CONTROLS
POWER SUPPLY CONTROLS
POWER cord socket (3 lugs).
MAINS FUSE (2.5A slow-blow).
VOLTAGE SELECTOR 110/115 V and 220/230 V.
SIZE AND WEIGHT
SIZE AND WEIGHTSIZE AND WEIGHT
SIZE AND WEIGHT
Preamplifier
440 W x 375 D x 140 H (mm).
Power Supply
440 W x 360 D x 110 H (mm).
Total Weight: 17 kg.
WARRA
WARRAWARRA
WARRANTY
NTYNTY
NTY
3 years, parts and labor.
Note:
Note:Note:
Note:
Information and product specifications
contained in this manual are subject to
change without prior notice. Updated
versions of this manual will be posted on our
website at www.goldmund.com.
Please visit our support page at
http://www.goldmund.com/support/register to
register your Goldmund product for
warranty
.
/