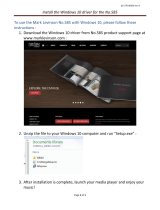
Page is loading ...


CITROËN lets you view your vehicle's docu-
mentation on line, to see earlier versions and the
latest information, simply and free of charge.
YOUR HANDBOOK
ON THE INTERNET!
Connect to http://service.citroen.com :
1
|
Select your language and register,
click on the link in the "Private customer access" zone to consult
the vehicle documentation; a window opens providing access to all
of the handbooks,
select your vehicle, choose the body type then the date of issue of
the handbook,
fi nally, click on the heading of your choice.
2
|
3
|
4
|

1
Consulting your "Handbook" should
enable you to adjust the equipment
and confi gurations available on your
vehicle for optimum comfort and driv-
ing conditions.
Two levels of reading:
the 1 st offers general instructions to
welcome you at a glance.
the 2
nd, from the contents, lists the
functions. They are marked by a
graphic and guide you in detail.
Key
This key will allow you to distinguish
the special features of your vehicle:
Key
this symbol marks warnings
which it is essential to ob-
serve for your own safety,
for the safety of others or to
avoid any risk of damaging
your vehicle.
this symbol invites you to refer
to the pages which provide
details of the function.
Welcome
CITROËN thanks you for your trust
and wishes you many pleasant jour-
neys.
Light van
Ludospace (5 seat version)
Each model may only be fi tted with
some of the equipment shown,
depending on the specifi cation and
the characteristics of the country in
which it is sold.
Warning:
Page reference:
Please note the following point:
The fi tting of electrical equipment or accessories which are not recommended by
CITROËN may result in a failure of your vehicle's electronic system. Please note
this specifi c warning. It is advisable to contact a CITROËN dealer to be shown the
recommended equipment and accessories.

CONTENTS
2-
44 - 51 ACCESS and STARTING
Keys 44
Alarm 46
Front and side doors 47
Rear doors 49
Opening the bonnet 51
Filling with fuel 51
52 - 55 VISIBILITY
Lights 52
Windscreen wiper stalk 53
Electric windows 54
Rear windows 54
Exterior mirrors 55
Interior mirror 55
4 - 16 FAMILIARISATION
17 - 25
MONITORING and DISPLAY SCREENS
Instrument panel 18
Warning lamps 19
Temperature indicator 21
Instrument panel display 22
Distance recorder zero reset 24
Lighting rheostat 24
Clock 24
Display A 25
26 - 31 COMFORT
Ventilation 26
Heating 28
Air conditioning 30
32 - 43 SEATS
Front seats 32
Multifunction passenger seat 34
Rear bench seat
(5 seat version) 35
Child seats 36
Installing child seats using the
seat belt 38
Isofi x mountings 39
Isofi x child seat 40
Seat belts 42

3
CO
NTENTS
-
109 - 120 AUDIO
Audio system 109
121 - 128 VISUAL INDEX
56 - 61 LIFE ON BOARD
Front layout 56
Courtesy lights 57
Headlamp adjustment 58
Steering wheel adjustment 58
Lashing rings 59
Rear layout 60
62 - 69 DRIVING
Handbrake 62
ABS and EBFD systems 62
Speed limiter 63
Cruise control 65
Airbags 67
70 - 95 PRACTICAL INFORMATION
Under the bonnet 70
Levels 75
Checks 76
Changing a wheel 77
Changing a bulb 80
Changing a fuse 86
Battery 90
Energy economy mode 90
Fitting audio equipment,
speakers 91
Snow screen 92
Towing 93
Towing a trailer 94
Accessories 95
96 - 108 TECHNICAL DATA
Dimensions 96
Engines 100
Light van weights and loads 104
Ludospace weights
and loads 106
Identifi cation features 108

F
AMILIARISATI
ON
4-

5
FAMILIARISATI
O
N
-
IN
S
TRUMENT
S
AND CONTROL
S
12. Wiper/screenwash controls.
13. Audio system steering mounted
controls.
14. Steering lock and ignition.
15. Fusebox.
16. Passenger’s airbag deactivation
switch.
17. Alarm.
18. Steering wheel adjustment
control.
19. Passenger’s electric mirror
control.
20. Headlamp height adjustment.
21. Heated seats control.
22. Parking brake.
23. Cigarette lighter.
24. Portable ashtray.
25. Gear lever.
26. Storage compartment.
27. Heating/air conditioning controls.
28. Audio system.
29. Lower glove box.
30. Upper glove box or passenger’s
airbag.
31. Bonnet release lever.
32. Side adjustable heating/
ventilation vents.
33. Door window demisting vents.
1. Speaker (tweeter).
2. Windscreen demisting vents.
3. Controls:
- Electric windows.
- Rear door windows demisting.
- Air conditioning.
4. Central locking button.
5. Multifunction screen or clock.
6. Hazard warning lamps switch.
7. Central adjustable heating/
ventilation vents.
8. Lighting and direction indicator
control stalk.
9. Speed limiter/cruise control
switches.
10. Instrument panel.
11. Driver’s airbag.
Horn.

F
AMILIARISATI
ON
6-
KEY
S
The keys allow you to switch on the
ignition and operate the passenger’s
airbag deactivation switch, as well as
to independently operate the locks
on the doors and the fuel fi ller cap.
S
TARTING Remote control
Central locking
From the front doors, the keys allow
you to lock and unlock the doors and
tailgate.
If one of the doors or the tailgate is
open, the central locking does not
operate.
The remote control performs the
same functions at a distance.
Unlocking
Press button B to unlock the vehicle.
This is confi rmed by rapid fl ashing of
the direction indicators.
Locating the vehicle
To locate your vehicle, previously
locked, in a car park:
) press button A , the courtesy
lamps come on and the direction
indicators fl ash for a few sec-
onds.
44
Locking
Press button A to lock the vehicle.
This is confi rmed by fi xed lighting of
the direction indicators for approxi-
mately two seconds.
STOP position (S):
The ignition is off.
To release the steering, turn the
steering wheel slightly while turning
the key, without forcing it.
Accessories position (A):
The ignition is off but various sys-
tems can be used.
On position (M):
The ignition is on.
Starting position (D):
Operates the starter.
Release the key when the engine
has started. Never operate the start-
er while the engine is running.

7
FAMILIARISATI
O
N
-
WINDSCREEN WIPERS
STEERING MOUNTED
CONTROLS
LIGHTING
Front foglamps (1 st turn of the ring
forwards).
Front foglamps and rear foglamp
(2 nd turn of the ring forwards).
To switch off: turn the ring rear-
wards.
Lighting off
Sidelamps
Dipped/main beam head-
lamps
Vehicles fi tted with a rear
foglamp (ring B)
Turn the ring forwards.
Vehicles fi tted with
front foglamps and a
rear foglamp (ring B)
Off Wash-
wipe
Intermittent
wipe
Rear
52 53
Front and rear lamps (ring A)
Front
2 Rapid wipe (heavy rain).
1 Normal wipe (moderate rain).
I Intermittent wipe.
0 Off.
È Single wipe.
Screenwash: pull the stalk towards
you.

F
AMILIARISATI
ON
8-
FRONT
S
EAT
S
Never travel with the head
restraints removed.
2. Armrest.
3. Seat back angle adjustment.
4. Forwards-backwards adjustment.
5. Storage drawer
(passenger).
32
1. Head restraint height adjustment.

9
FAMILIARISATI
O
N
-
Deactivating the passenger’s
airbag
) With the ignition off , insert the
ignition key into the passenger’s
airbag switch 1 and turn it to the
"OFF" position.
) As soon as you remove the child
seat, turn the airbag switch to the
"ON" position to activate the air-
bag again.
Deactivation check
With the ignition switched on
(2 nd notch), illumination of
this warning lamp indicates
that the passenger’s airbag
is deactivated (switch in the
"OFF" position).
The warning lamp remains on until
the airbag is activated again.
69
Front airbags
These are fi tted in the centre of the steering
wheel for the driver and in the dashboard
for the front passenger. They are deployed
simultaneously, except in cases where the
passenger’s airbag is deactivated.
Precautions regarding the
passenger’s airbag
) deactivate the airbag if you install
a rear-facing child seat,
) activate the airbag for an adult
passenger.
68
Lateral airbags *
The lateral airbags are fi tted into the
front seat backrest frame, on the
door side.
They are deployed independently of
each other, on whichever side the
collision occurs.
AIRBAG
S
* According to version.

F
AMILIARISATI
ON
10 -
STEERING WHEEL HEIGHT
A
DJUSTMENT
) When stationary, push the control
A forwards to release the steering
wheel adjustment mechanism.
) Adjust the height of the steering
wheel.
) Lock the steering wheel adjust-
ment it by pulling control A to-
wards you fully.
1. Driver’s electric window.
2. Passenger’s electric window.
DOOR MIRRORS
) Move the manual control 3 in all
four directions to adjust.
Electric control for the
passenger’s side mirror
) From the driver’s seat, adjust in
all four directions by operating
the control 4 .
Manual mode:
) Press the switch. The window
stops as soon as the switch is re-
leased.
Automatic mode (driver):
) Press and hold the switch. One
touch completely opens or closes
the window.
54 55 58

11-
SPEED LIMITER * CRUISE CONTROL *
65 63
If the vehicle is fi tted with
a speed limiter and cruise
control, these functions can-
not both be activated at the
same time.
This limiter indicates the status of
selection of the function on the in-
strument panel and displays the
programmed speed. The minimum
speed which can be programmed is
at least 18 mph (30 km/h).
It prevents exceeding of the speed
programmed by the driver, this func-
tion remains active regardless of any
action on the brake or clutch pedals.
On the other hand, pressing the ac-
celerator pedal to the point of resist-
ance does not have any effect.
It is possible to exceed the pro-
grammed speed temporarily by
pressing the accelerator fi rmly be-
yond this point of resistance.
The operating actions must be car-
ried out with the engine running.
The cruise control has a display on
the instrument panel to indicate the
programmed reference speed.
It enables the vehicle to maintain the
reference speed programmed by the
driver.
In order for it to be programmed or
activated, the vehicle speed must be
greater than 25 mph (40 km/h) with
at least fourth gear engaged.
* According to version.

F
AMILIARISATI
ON
12 -
N° Symbol Function
1 Air fl ow adjustment.
2
Air fl ow adjustment
and air intake
control.
3
Temperature
adjustment.
4
Air distribution
adjustment.
N° Symbol Function
1
Air conditioning control.
2
Air fl ow adjustment and
air intake control.
3
Temperature
adjustment.
4
Air distribution
adjustment.
28
30
HEATING
AIR CONDITIONING

13
FAMILIARISATI
O
N
-
RECOMMENDED INTERIOR
S
ETTING
S
I require...
Heating or Manual air conditioning
Air distribution Air fl ow
Air recirculation/
Intake of exterior air
Temperature Manual AC
HOT
COLD
DEMISTING
DE-ICING

F
AMILIARISATI
ON
14 -
FRONT FITTING
S
1. Storage compartments in the
doors.
A. Bottle holder.
B. Cup holder.
C. Storage compartment.
2. Overhead storage.
3. Map reading lamp.
4. Courtesy lamp.
5. Sun visors.
6. Glove box.
7. Cigarette lighter.
8. Removable ashtray.
9. Storage drawer (passenger).
57

15
FAMILIARISATI
O
N
-
REAR FITTING
S
Stowing rings
For greater safety, always en-
sure that the loads transported
are secured fi rmly.
59
1. Load space cover.
2. High load retaining net.
3. Stowing rings.
4. Side door storage compartment.
5. Trays between the front and rear
seats.
6. Seat back storage pockets.
60

F
AMILIARISATI
ON
16 -
This operation must be carried out
with the engine switched off .
) Insert the key then turn it to the
left.
) Remove the fi ller cap.
A label indicates which type of fuel to
use.
When you fi ll your tank, do not continue
after the third cut-off of the pump. This
could cause engine malfunctions.
The capacity of the tank is approxi-
mately 55 litres for petrol engines
and 60 litres for Diesel engines.
From the time this light comes on,
you have enough fuel left to cover
approximately 30 miles (50 km) .
Note: the right-hand sliding side door
cannot be opened while the fuel fi ller
cap is removed.
Outside the vehicle: Lift the safety
catch, raise the bonnet and secure
the stay to hold the bonnet open.
OPENING THE BONNET
Inside the vehicle: Pull the lever on
the left-hand side, under the dash-
board.
Low fuel level
warning lamp
51 51
FILLING WITH FUEL


MO
NIT
O
RING and DISPLAY SCREENS
18 -
* Version indicating kilometres, ac-
cording to country.
1. Seat belt not fastened warning light
2. Passenger airbag disarmed
warning light
3. Front and side airbags warning
light
4. Front fog lamps indicator light
5. Anti-lock braking system (ABS)
warning light
6. Rear fog lamp indicator light
7. Diesel pre-heat warning light
8. Left hand direction indicator
9. Total distance recorder, service
indicator and engine oil level
indicator
10. Right hand direction indicator
11. Emission control system warning
light
12.
Main beam headlamps indicator light
13. Handbrake, low brake fl uid
level and electronic brake force
distribution warning light
14. Dipped beam headlamps
indicator light
15. Battery charge warning light
16. Engine oil pressure and
temperature warning light
17. Water in diesel fi lter warning light
18. Low coolant level warning light
19. Coolant temperature indicator
20. Total distance recorder button
21. Central (STOP) warning light
22. Speedometer *
23. Rev counter
24. Lighting rheostat button
25. Fuel level indicator
26. Low fuel level warning light
27. Speed limiter/cruise control
display
INSTRUMENT PANEL: PETROL - DIESEL
/