Brandt IF-ZONE90HS Owner's manual
- Category
- Hobs
- Type
- Owner's manual
This manual is also suitable for
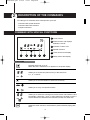
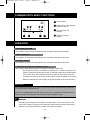
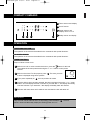
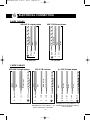
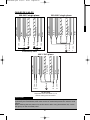
Brandt IF-ZONE90HS is a modern induction hob that offers a range of advanced features to make cooking easier and more efficient. With its four cooking zones, including a large 28 cm zone with a 3,600-watt power output, you can quickly and evenly heat your pots and pans. The hob's intuitive touch controls allow you to precisely adjust the power level and cooking time, while the timer function ensures that your food is cooked to perfection. Additionally, the hob's safety features, such as child lock and automatic switch-off, provide peace of mind while cooking.
Brandt IF-ZONE90HS is a modern induction hob that offers a range of advanced features to make cooking easier and more efficient. With its four cooking zones, including a large 28 cm zone with a 3,600-watt power output, you can quickly and evenly heat your pots and pans. The hob's intuitive touch controls allow you to precisely adjust the power level and cooking time, while the timer function ensures that your food is cooked to perfection. Additionally, the hob's safety features, such as child lock and automatic switch-off, provide peace of mind while cooking.


-
 1
1
-
 2
2
-
 3
3
-
 4
4
-
 5
5
-
 6
6
-
 7
7
-
 8
8
-
 9
9
-
 10
10
-
 11
11
-
 12
12
-
 13
13
-
 14
14
-
 15
15
-
 16
16
-
 17
17
-
 18
18
-
 19
19
-
 20
20
-
 21
21
-
 22
22
-
 23
23
-
 24
24


Brandt IF-ZONE90HS Owner's manual
- Category
- Hobs
- Type
- Owner's manual
- This manual is also suitable for
Brandt IF-ZONE90HS is a modern induction hob that offers a range of advanced features to make cooking easier and more efficient. With its four cooking zones, including a large 28 cm zone with a 3,600-watt power output, you can quickly and evenly heat your pots and pans. The hob's intuitive touch controls allow you to precisely adjust the power level and cooking time, while the timer function ensures that your food is cooked to perfection. Additionally, the hob's safety features, such as child lock and automatic switch-off, provide peace of mind while cooking.
Ask a question and I''ll find the answer in the document
Finding information in a document is now easier with AI
Related papers
-
Groupe Brandt IF-800R Owner's manual
-
Groupe Brandt 60EC Owner's manual
-
-
-
Groupe Brandt IF-LIGHT30S Owner's manual
-
-
-
-
-