Page is loading ...

BACKPLATE
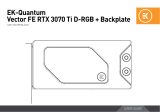
EK-Classic GPU Backplate
RX 6800/6900 - Black
INSTALLATION MANUAL

This product is intended for installation by expert users only. Please
consult with a qualified technician. Improper installation may result
in damage to your equipment. EK assumes no liability whatsoever,
expressed or implied, for the use of this product or its installation. The
following instructions are subject to change without notice. Please, read
the manual carefully before beginning with the installation process. For
updates, you can visit our official website www.ekwb.com.
Before you start using this product, please follow these basic guidelines:
Carefully read the manual before beginning with the
installation process.
Remove your graphics card from the computer for the safest
mounting process, to prevent any possible damage to your
GPU or its circuit board (PCB).


- 4 -
BOX CONTENTS
EK-Classic GPU Backplate RX 6800/6900 - Black
M2.5x7 AX1 Screw (7 pcs)
Thermal PAD G 1.5 mm - (120x24mm) (3 pc)
Thermal PAD G 2.0 mm - (120x24mm) (1 pcs)
120 mm
24 mm
120 mm
24 mm
Universal Mounting Mechanism – You may
not need every screw from this package.
7 mm

- 5 -
BACKPLATE DIMENSIONS
263.70 mm
107.55 mm4.80 mm
Phillips Head Screwdriver Scissors
REQUIRED TOOLS

- 6 -
INSTALLING THE BACKPLATE
STEP 1
PREPARING THE GRAPHICS CARD
First, complete the installation of your EK-Classic GPU RX 6800/6900
D-RGB water block according to its installation manual.
In case the water block is already installed, remove the seven (7) AX1
screws and their PVC washers, as shown in the image.
STEP 2
CUTTING AND PLACING THERMAL PADS
Your backplate comes with thermal pads that have to be cut into
smaller pieces to cover all the VRM components. EK made sure to
provide you with more than an adequate quantity of thermal pads to
complete this Step.
CAUTION: You must remove the protective foil from both
sides of the thermal pad before installation.
Replacement thermal pads:
3x Thermal PAD G 1,5 mm - (120 x 24 mm) – EAN: 3830046996749
1x Thermal PAD G 2,0 mm - (120 x 24 mm) – EAN: 3830046996756
120 mm
24 mm
1.5 mm
Thermal PAD G 1.5mm (120 x 24 mm)
120 mm
24 mm
2 mm
Thermal PAD G 2.0 mm (120 x 24 mm)
STEP 1
STEP 2

- 7 -
STEP 3
Once cut to size, thermal pads should be placed on the backplate,
as illustrated below.
Thermal Pad G 1.5mm
Thermal Pad
G 2.0 mm
STEP 4
ATTACHING THE BACKPLATE
Place the backplate on the PCB and make sure all holes are aligned.
Position an M2.5X7 AX1 screw in each of the seven (7) mounting
holes (as shown in the image) and tighten them evenly with a
Phillips head screwdriver. Do not use excessive force!
For this Step, you will need:
M2.5x7 AX1
Screw (7 pcs)
M2.5x7 AX1 Screw
Phillips Head
Screwdriver
7 mm
STEP 3
STEP 4

- 8 -
TESTING THE LOOP
To ensure the installation of EK components was successful, we
recommend you perform a 24-hour leak test.
When your loop is complete and filled with coolant, connect the pump
to a PSU outside your system. Do not connect power to any of the other
components. Turn on the PSU and let the pump run continuously.
Inspect all parts of the loop, and in case the coolant leaks, fix the issue
and repeat the testing process. To prevent possible damage, please
ensure that all hardware is dry before the system is powered on.
WARRANTY
Our products are warranted against defects of materials and quality
for a period of 24 months, starting with the date of delivery to the
end-user. During this period, products will be repaired or have parts
replaced at our discretion, provided that 1) the product is returned
to the agent from whom it was purchased; 2) the product has been
purchased by the end-user and has not been used for commercial
purposes; 3) the product has not been misused, handled carelessly,
or used in a manner other than the way described in the instructions
manual. This warranty does not confer rights other than those
expressly set out above and does not cover any claims for
consequential loss or damage. This warranty is offered as an extra
benefit and does not affect your statutory rights as a consumer. This
warranty is voided if the product comes in contact with aggressive
UV additives or other improper liquids. EK water blocks are sealed
with a warranty-voiding circular label, proving the water block has
withstood a pressure leak test. Removing the label will void the
leak-free guarantee, but not the guarantee on the product itself.
Any other RMA issues can be reported to EK Customer Support at
www.ekwb.com/support for further analysis.

In case you need assistance, please contact:
http://support.ekwb.com/
EKWB d.o.o.
Pod lipami 18
1218 Komenda
Slovenia - EU
EKWaterBlocks
@EKWaterBlocks
ekwaterblocks
ekwaterblocks
EKWBofficial
SUPPORT AND SERVICE
SOCIAL MEDIA
/