Page is loading ...

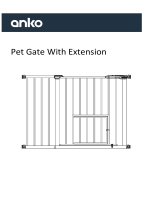
Pet Gate With Extension

Contents
Before assembly After assembly
Please note that this is how the door appears Once installed correctly, the latch
prior to installation will connect with the frame.

Assembly Instructions
Step 1.
Take out cap screw (No.2) and plastic nut (No.3), screw them together by following below
right image. Please pay attention on the direction of plastic nuts at this step.
Step 2. Without extension
Insert upper plastic cap (No. 6) into upper side holes of safety gate (No.1) on both sides.
Insert lower plastic cap (No.7) into lower side holes on both sides. Then insert the four
accessories assembled in step 1 into the upper and lower caps (No. 6 and No. 7) holes of the
gate.

Step 3.
Put the pet gate (No.1) on the ground and make sure the gate is vertical and flat on the floor.
Mark the four corner positions and distances of the door according to the below middle
picture. Then remove the gate, thread the self-tapping screw (No. 5) through the wall cup
(No.4) and attach to the wall (marked position) with a screw driver. Repeat it at other three
marked positions. Please place the flat side of the wall cups (No.4) against the wall.
Step 4.
Put the gate into right side of wall cups first. Adjust the distance between plastic nuts (No. 3)
and cap screws (No.2) on the four corners to make sure you can put left side gate in. Keep
the gate switch horizontal. Then tighten the plastic nuts (No.3) at four corners by using
spanner (No.8), make sure to tightly connect the gate switch part to left frame. Once these
are tightened properly, the gap between the door latch and the frame will be closed.

Step 5. Using extension option
The gate base can be equipped with extension tube (No.11) at either side. Please refer to
below image. Use upper extension plastic cap (No. 9) and lower extension plastic cap
(No. 10) inserted into safety gate (No.1) and extension tube (No. 11) as image below. Then
follow step 2 above to attach (No. 2, 3, 6 and 7) to extension tube (No. 11)
Step 6.
Open the pet gate: push the button①, lift the back side of the handle②, open the gate③;
Close the pet gate: press down the handle until you hear a “click” sound.

Step 7.
Un-Installation: twisting the four plastic nuts (No.3) in a reverse way, loosen the four corners
of the pet gate to remove it from pressure-mounted position.
WARNING:THIS GATE IS FOR PET USE ONLY.
WARNING:THIS GATE MUST NOT BE FITTED ACROSS OR BETWEEN WINDOWS.
THIS GATE MUST BE FITTED BETWEEN RIGID SURFACES SUCH AS DOORWAYS OR WALLS,
ALONG WITH MOUNTING CUPS SECURED WITH SCREWS.
NEVER USE WITHOUT MOUNTING CUPS.
TO MAKE YOUR PET IS SAFE, INSTALL THE GATE SECURELY AND INSPECT THE COMPONENTS
ARE TIGHT REGULARLY.
DO NOT USE THE GATE IF ANY COMPONENTS ARE DAMAGED OR MISSING.
USE ONLY WITH THE LOCKING/LATCHING MECHANISM SECURELY ENGAGED.
READ THE INSTRUCTIONS BEFORE INSTALLATION AS INCORRECT INSTALLATION CAN BE
DANGEROUS.
THIS PET GATE IS FOR DOMESTIC USE ONLY.
Maintenance
Inspect regularly and remove if damaged.
Clean the product with dampened soft fabric.
/

