Page is loading ...

PROJI Projection Clock with Temperature
Model: BAR368P/BAR368PU
User Manual
EN
INTRODUCTION
Clock with Temperature (model: BAR368P/BAR368PU). This
device bundles precise time keeping, alarm, temperature and
weather monitoring features into a single tool you can use from the
convenience of your home. Keep this manual handy as you use
your new product. It contains practical step-by-step instructions,
PACKAGE CONTENTS
1
Main unit
Power adapter
Remote sensor
(THN132N)
AAA batteries for main unit x 2
AA battery for remote sensor
OVERVIEW
FRONT & TOP VIEW
1
2
3
4
5
6
1. + - Press to increase settings, or toggle between channel 1-5
and auto-loop. Press and hold to increase rapidly in settings, or
search for the sensor for all channels in idle.
2. SNOOZE I LIGHT - Press to snooze an alarm or activate
the backlight and projection, press and hold until you hear a
beep to activate the projection for 5 minutes.
3.
- Press to toggle between current time, calendar or
alarm 1/2 displays for 5 seconds. Press and hold to enter
setting mode.
4. – - Press to decrease settings, press and hold to decrease
settings rapidly.
5. Projection lens.
6.
- Press to turn on/off alarms, press and hold to enter alarm
setting mode.
REAR VIEW
1
2
345
6
1. Battery compartment.
2.
- Projection focus knob.
3. RESET - Press to reset the unit to default.
4.
/ PROJECTION
180°. Press and hold to toggle continuous projection on/off.
5. RCC – Press to turn on and search RCC signal. Press and hold
to turn off.
6. Battery compartment cover.
LCD SCREEN
1
2
3
4
5
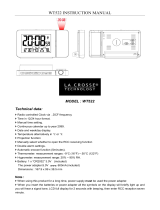
1. Time display
2. Weather forecast display
3. Outdoor temperature display (Channel 1-5)
4. Weekday display
5. Indoor temperature display
Symbol Description
Alarm 1 is on
Alarm 2 is on
RCC signal received
Outdoor sensor low battery
Main unit low battery
Receiving sensor signal
Outdoor sensor auto-loop function is on
Outdoor sensor channels
PROJECTION
2
1
1. Time display
2. Outdoor Temperature display
REMOTE SENSOR (THN132N)
1. LED status indicator
2. Wall mount hole
3. Battery compartment
4. RESET hole
5. CHANNEL switch
NOTE
This package includes a 3-channel sensor. For sensor
with up to 5-channel, you may purchase additional accessory
sensors as per your own preference, for more details about
accessory sensors, please visit
.
GETTING STARTED
INSERT BATTERIES
1. Gently push the battery compartment cover downwards to
remove it from the main unit.
2. Insert the batteries, matching the polarities (+/-).
NOTE
Replace the batteries when displays, or when the
display is dim.
DC POWER
Plug the power cable to the power jack and plug the power adapter
into a suitable power outlet.
NOTE
It is recommended to insert the battery as a backup power
source.
REMOTE SENSOR
The main unit can collect data from up to 5 sensors.
To set up the sensor:
1. Open the battery compartment.
2. Insert the batteries, matching the polarities (+/-).
3. Select a channel then press RESET.
4. Close the battery door.
5. Place the sensor within 30 m (98 ft) of the main unit using
the table stand or wall mount.
TIP
Ideal placements for the sensor would be in any location on the
exterior of the home at a height of 1.5 m (5 ft) and which can shield
it from direct sunlight or wet conditions for an accurate reading.
1.5m(5ft)
NOTE
Use alkaline batteries for longer usage and consumer
grade lithium batteries in temperatures below freezing.
SENSOR DATA TRANSMISSION
To search for a sensor:
Press and hold +.
The sensor reception icon in the remote sensor area shows
the status:
Icon Description
Searching for sensor(s).
Sensor is found.
TIP
The transmission range may vary depending on many
factors. You may need to experiment with various locations to get
the best results.
CLOCK
CLOCK RECEPTION
This clock synchronizes automatically with a clock signal. Press
RCC to turn on and search for the clock signal. The main unit is
able to receive RF clock data with different RCC signal:
Model number Region Signal
BAR368P EU DCF
BAR368PU UK MSF
Clock signal reception indicator:
Icons Description
Main unit is searching for
clock signal strength
Main unit is searching for
clock signal
No clock signal
Strong RCC signal received
Weak RCC signal received
NOTE
It takes 2-10 minutes to receive the clock signal. If the
signal is weak, it could take up to 24 hours to receive a valid signal.
SET THE CLOCK MANUALLY
1. Press and hold . The screen displays ZONE and the
2. Press once or press and hold +/- to adjust the setting. For EU/
UK, the time-zone offset sets the clock up to +/- 23 hours from
the received clock signal time.
3. Press
4. Press once or press and hold +/- to adjust the setting for 12/24h
hour format, hour, minute, year, calendar format (month-day/
day-month), month, date, temperature unit (°C/°F) and
language.
5. Press
NOTE
• The language options are English (ENG), Spanish (SPA),
Italian (ITA), French (FRE) and German (GER).
• The RCC signal reception is on after each reset or battery
replacement.
• While in the setting mode, press and hold
to save the
settings and leave the setting mode.
ALARM
SETTING/ADJUSTING ALARM TIME
1. Press and hold .
2. Press once or press and hold +/- to adjust the hour and minute
setting, then press
3. Press +/- to toggle the weekday alarm ON/OFF, then press
The alarm rings only on weekdays when the setting is ON.
4. Repeat step 2 – 4 for alarm 2 setting.
TURN ON/OFF ALARMS:
Press to turn on/off the alarm in sequence:
Alarm1
> Alarm 2 > Both ON > Both OFF.
OPERATION
• Press to stop. The alarm will ring again on the next day.
• Press SNOOZE I LIGHT to snooze. The alarm rings again after
8 minutes.
WEATHER FORECAST
This product forecasts the next 6 hours of weather within a
19-31 mile (30-50 km) radius.
Symbol Description
Sunny
Snowy
Cloudy
Rainy
TEMPERATURE
The current indoor temperature is always displayed in the
bottom right corner of the screen display. To receive outdoor
temperature information, you can connect up to 5 remote
sensors to the main unit:
To toggle sensor display:
Press +/-.
NOTE
When the indoor temperature is lower than -5
o
C (23.0
o
F),
the screen displays LL.L. When the temperature is higher than
50
o
C (122.0
o
F), the screen displays HH.H.
To auto-loop between sensors:
Press +/- repeatedly until
displays. The data on each sensor
displays for 3 seconds. Press +/-again turn off the auto-loop, the
icon turns off.
NOTE
The sensor displays in ascending order. If all 5 sensors are
not present, the main unit skips the absent sensor and advances to
the next present sensor.
PROJECTION
The projector displays the time and outside temperature on your
ceiling for easy viewing in a darkened room. For the optimal
projection results, place the unit within 1.5 - 2 m (5 – 6.5 ft) from
the ceiling or wall.
• Press SNOOZE I LIGHT to activate the backlight and
projection for 5 seconds.
• Press and hold SNOOZE I LIGHT until you hear a beep to activate
the projection for 5 minutes
• Press
/ PROJECTION
• Press and hold
/ PROJECTION to toggle the continuous
projection on/off.
• Adjust the focus (1.5 -2 m) using the focus knob.
NOTE
The continuous projection function is disabled when the
main unit is not connected to the power adapter.
PRECAUTIONS
• Do not subject the unit to excessive force, shock, dust, temperature
or humidity.
• Do not cover the ventilation holes with any items such as
newspapers, curtains etc.
• Do not immerse the unit in water. If you spill liquid over it, dry it
immediately with a soft, lint-free cloth.
• Do not clean the unit with abrasive or corrosive materials.
• Do not tamper with the unit’s internal components. This
invalidates the warranty.
• Only use fresh batteries. Do not mix new and old batteries.
• Images shown in this manual may differ from the actual display.
• When disposing of this product, ensure it is collected separately
for special treatment and not as normal household waste.
• Placement of this product on certain types of wood may result
responsible. Consult the furniture manufacturer’s care instructions
for information.
• The contents of this manual may not be reproduced without the
permission of the manufacturer.
• Do not dispose old batteries as unsorted municipal waste.
Collection of such waste separately for special treatment
is necessary.
• Please note that some units are equipped with a battery safety
strip. Remove the strip from the battery compartment before
NOTE
contents of the user manual are subject to change without notice.
NOTE
Features and accessories will not be available in all
countries. For more information, please contact your local retailer.
SPECIFICATIONS
MAIN UNIT
L x W x H
128 x 26 x 91 mm
(5.04 x 1.02 x 3.58 in)
Weight 158g (5.57 oz) without batteries
Temperature range
-5°C to 50°C
(23°F to 122°F)
Accuracy
0°C to 40°C: ± 1°C (± 2.0°F)
< 0°C and >40°C: ± 2°C (± 4.0°F)
Resolution 0.1°C (0.2°F)
Power
2 x UM-4 (AAA) 1.5 V batteries
3.6V adapter
REMOTE UNIT (THN132N)
L x W x H
96 x 50 x 22 mm
(3.78 x 1.97 x 0.87 in)
Weight 50 g (1.76 oz) without batteries
Transmission range 30 m (98 ft) unobstructed
Temperature range
-20 °C to 60 °C
(-4 °F to 140 °F)
Signal frequency 433 MHz
Power 1 x UM-3 (AA) 1.5 V batteries
ABOUT OREGON SCIENTIFIC
Visit our website to learn more about
For any enquiry, please contact our Customer Services at
.
interpret and construe any contents, terms and provisions in this
user manual and to amend it, at its sole discretion, at any time
without prior notice. To the extent that there is any inconsistency
between the English version and any other language versions, the
English version shall prevail.
EU-DECLARATION OF CONFORMITY
Clock with Temperature (model: BAR368P / BAR368PU) is in
compliance with the essential requirements and other relevant
provisions of Directive 1999/5/EC. A copy of the signed and dated
Declaration of Conformity is available on request via our Oregon
COUNTRIES RTTE APPROVED COMPLIED
All EU countries, Switzerland
CH
N
and Norway
FCC STATEMENT
This device complies with Part 15 of the FCC Rules. Operation
is subject to the following two conditions: (1) This device may
not cause harmful interference, and (2) This device must accept
any interference received, including interference that may cause
undesired operation.
WARNING
by the party responsible for compliance could void the user’s
authority to operate the equipment.
NOTE
This equipment has been tested and found to comply
with the limits for a Class B digital device, pursuant to Part 15 of
the FCC Rules. These limits are designed to provide reasonable
protection against harmful interference in a residential installation.
This equipment generates, uses and can radiate radio frequency
energy and, if not installed and used in accordance with the
instructions, may cause harmful interference to radio
communications. However, there is no guarantee that
interference will not occur in a particular installation. If this
equipment does cause harmful interference to radio or television
reception, which can be determined by turning the equipment off
and on, the user is encouraged to try to correct the interference by
one or more of the following measures:
• Reorient or relocate the receiving antenna.
• Increase the separation between the equipment and receiver.
• Connect the equipment into an outlet on a circuit different from
that to which the receiver is connected.
• Consult the dealer or an experienced radio/TV technician for
help. This Class B digital apparatus complies with Canadian
ICES- 3(B)/NMB-3(B)
DECLARATION OF CONFORMITY
The following information is not to be used as contact for support
or sales. Please call our customer service number (listed on our
website at
), or on the warranty card for
this product) for all inquiries instead.
We
Name:
Address: 10778 SW Manhasset Drive.
Tualatin, Oregon 97062 USA
Telephone No.: 1-800-853-8883
declare that the product
Product No.: BAR368P/BAR368PU
Product Name: PROJI Projection Clock with Temperature
Manufacturer: IDT Technology Limited
Address: Block C, 9/F, Kaiser Estate,
Phase 1, 41 Man Yue St.,
Hung Hom, Kowloon, Hong Kong
is in conformity with Part 15 of the FCC Rules. Operation is
subject to the following two conditions: 1) This device may not
cause harmful interference. 2) This device must accept any
interference received, including interference that may cause
undesired operation.
INFORMATION FOR USERS
Pursuant to and in accordance with Article 14 of the
Directive 2012/19/EU of the European Parliament on
waste electrical and electronic equipment (WEEE), and
pursuant to and in accordance with Article 20 of the
Directive 2006/66/EC of the European Parliament on batteries and
accumulators and waste batteries.
The barred symbol of the rubbish bin shown on the equipment
indicates that, at the end of its useful life, the product must be
collected separately from other waste.
Please note that the batteries/rechargeable batteries must
be removed from the equipment before it is given as waste. To
the user manual. Therefore, any products that have reached the
end of their useful life must be given to waste disposal centers
specializing in separate collection of waste electrical and
electronic equipment, or given back to the dealer when purchasing
a new WEEE, pursuant to and in accordance with Article 14 as
implemented in the country.
The adequate separate collection for the subsequent start-up
of the equipment sent to be recycled, treated and disposal of in
an environmentally compatible way contributes to preventing
possible negative effects on the environment and health and
optimizes the recycling and reuse of components making up the
apparatus.Abusive disposal of the product by the user involves
application of the administrative sanctions according to the laws
in force.
/