Page is loading ...

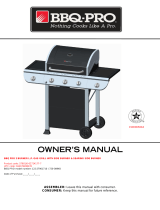
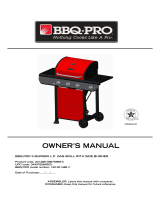
OWNER’S MANUAL
Date of purchase: _____/ _____/ _____
18” TABLETOP GAS GRILL
Product code: 23765 / 0-03946210-6
UPC code: 0 45774 87563 8

Safety Guidelines................................
Safety Instructions.............................. 2-3
Assembly Instructions
1
...................... 4-8
Lighting Instructions.......................... 9
Care and Maintenance......................... 10
Read this Use and Care Guide carefully
and completely before using your grill to
reduce the risk of fire, burn hazard or
other injury.
!
!
WARNING
DANGER
If you smell gas
1 Shut off gas to the appliance
2 Extinguish any open flame
3 Open lid
4 If odor continues, keep away from the appliance and immediately
call your gas supplier or your fire department.
Failure to follow these instructions could result in fire or explosion which could cause
property damage, personal injury or death.
:
..
..
..
.
WARNING
For Your Safety
1 Do not store or use gasoline or other flammable vapors and liquids
in the vicinity of this or any other appliance
2 An LP cylinder not connected for use shall not be stored in the
vicinity of this or any other appliance.
Failure to follow these instructions could result in fire or explosion which could cause
property damage, personal injury or death.
.
.
.
DANGER
1 Never operate this appliance unattended
2 Do not store spare LP cylinder within 10 feet 3 05m of this appliance.
3. Do not store or use gasoline or other flammable liquids or vapors within 25 feet (7.62m)
or this appliance.
Failure to follow these instructions could result in fire or explosion which could cause
property damage, personal injury or death.
..
.(.)
Read and follow all Safety, Assembly, and Use and Care Instructions
in this Guide before assembling and cooking with this grill.
Failure to follow all instructions in this Use and Care Guide may lead
to fire or explosion, which could result in property damage, personal
injury or death.
CALIFORNIA PROPOSITION 65
.
This product contains chemicals, including lead and lead compounds in brass fittings. It also
produces combustion by-products when used. These substances are known to the State of
California to cause cancer, birth defects or other reproductive harm.
Wash your hands after using this product
!
!
WARNING

1

2
Check burner air inlet openings for insect nests or blockages.
Read this Use and Care Guide carefully before assemblingandoperatingyour gasgrill.
Do not use your gas grill in garages, porches, breezeways, sheds or other enclosed areas. Your gas
grill is to be used outdoors only, with the back and sides of the grill at least 3 feet away from any
combustible wall or surface. The grill should not be placed under overhead unprotected combustible
construction.Do not obstruct the flow of combustion and ventilation air around the grill housing.
with parts from any other brand. See parts list for replacement items(.)

3
Grill Regulator Operation
The regulator must be tightly connected to the propane cylinder.
Turn on Turn off
CAUTION: Only cylinders marked propane are to be used with this grill. Propane gas is heavier than air and
ndoors if the LP gas cylinder is
Turn knob clockwise to OFF to stop gas flow to burner.
WARNING Propane is a flammable gas Improper handling may result in an explosion:.
e
Care should be taken when threading the cylinder to the regulator to engage threads correctly to achieve
the proper and intended connection When disconnecting or connecting the gas cylinder, be careful that the
regulator does not strike the grill, the ground, or any other surface. Replace the protective cap over the
threaded cylinder connection when removed from grill. If any difficulty at all occurs when connecting or
disconnecting the cylinder to the regulator assembly, contact your local gas supplier for assisstance.
.
When connecting the LP gas cylinder to the regulator, be sure to hand-tighten until snug. This connection
should be inspected for damage and leak tested after connecting. Leak test by brushing a mild soapy
solution over regulator connection points and onto seams of LP cylinder. Presence of bubbles indicates
a leak. If leaks appear, do not use grill and have regulator and cylinder checked by a qualified gas technician.
The threaded cylinder connection should be kept clean and free of dust, dirt, sand or any foreign materials.
Clean both regulator and LP cylinder threaded areas prior to connecting cylinder with regulator.
Keep any electrical supply cord or fuel supply hose away from any heated surfaces.
PUSH TO TURN ON. You must push IN on the knob to release the knob to release
the knob from the locked OFF position. Turn knob counterclockwise for gas flow.
HIGH.This position provides the highest gas flow and hottest cooking temperatures.
MED.This position provides cooking temperatures between HIGH and LOW.
LOW.This position provides the lowest cooking temperatures.
ONLY A FACTORY SUPPLIED GAS VALVE/REGULATOR SHOULD BE USED.
See parts list for replacement items.
“”
“”

4
5
3 16 nut
:
/
pcs
”
(20 )
44
3 16 x 1-3/4
:( )
/
pcs
bolt””
32
316 x138
:( )
/-/
pcs
bolt””
214
316 x 8
:( )
//
pcs
bolt””
3
1 3pcs
x 7 8 bolt
:( )
/
1/4””
L. Support Bracket (2)
M. Lower Hinge (2)
N. Heat Shield (1)
O. Leg Assembly (4)
D. Heating Plate (1)
C. Cooking Grid (1)
B. Bottom Bowl (1)
E. Gas Regulator (1)
F. Side Handle (2)
G. Upper Hinge (2)
H. Burner (1)
I.Warming Rack (1)
J. Lid Handle (1)
P. Washer (3)
G
A
J
P
I
C
D
H
E
L
M
B
K
F
N
O
P
200465N
210347N
300575N
300576N
300560N
220019N300577N
300578N
300579N
300580N
300585N300581N
300582N
300583N 300584N
300586N
A.Lid (1)
K2.()Brace
Verify that all parts are included with your Grill BEFORE beginning assembly by checking the Parts
List. For your convenience, some parts may be pre-assembled or attached to grill components.
If all parts are not included, do not attempt to assemble grill. Return grill to Kmart with receipt
for replacement unit. If any parts are missing, call 1-877-998-1697 for assistance.
Table Top Gas Grill
Assembly Instructions
Screwdriver (not provided)
Open end wrench (not provided)
Tools needed for assembly:

5
1
P
A
J
G
2
4
4
2
2
5
5
5
B
L
K
F
M
5
5
5
Table Top Gas Grill
Assembly Instructions
STEP 1: Attach lid ) to lid (A)
by inserting 2 bolts
through lid
Attach to lid (A) by inserting bolt (2)
through
)
,
handle (J
handle (1
(A) 2 washers (P)
and into lid handle (J).
one upper hinge (G)
upper hinge (G)into lid (A) and screwing nut (5).
Repeat the same procedure for the other upper hinge (G).
STEP 2: Attach side handle (F) to bottom bowl (B) by inserting 2 bolts (4) through
side handle (F), brace (K), bottom bowl (B) and into support bracket (L). Secure 2
bolts (4) with 2 nuts (5). Repeat same procedure for the other side handle (F).
Attach one lower hinge (M) to bottom bowl (B) by inserting 2 bolts (2) through lower
hinge (M) and into bottom bowl (B). Secure 2 bolts (2) with 2 nuts (5). Repeat the same
procedure for the other lower hinge (M).

6
O
B
2
2
2
2
1
5
5
5
5
B
H
E
N
P
Table Top Gas Grill
Assembly Instructions
STEP 3: Attach leg (O) to bottom
bowl (B) by inserting 2 bolts (2)
through leg (O) and into the bottom
bowl (B). Secure 2 bolts (2) with
2 nuts (5). Repeat same procedure
for the other legs (O).
STEP 4: Insert burner (H) into the hole of the bottom bowl (B). Attach burner (H)
to bottom bowl by inserting screw bolt (1) through heat shield (N), washer (P),
bottom bowl (B) and into burner (H). Tighten screw bolt. Connect the valve stem
of the regulator (E) into the end of burner (H).
WARNING: Failure to securely insert valve stem into burner will result in gas
leaking and possible fire and serious personal injury.

7
G
M
I
C
D
3
3
5
A
B
Table Top Gas Grill
Assembly Instructions
STEP 5: Attach upper hinge (G) to lower
hinge (M) with 2 bolts (3) and nuts (5).
STEP 6: Place heating plate (D) onto support
brackets (L). Insert tabs of support brackets(L)
into tab slots in heating plate (D).
Put cooking grid (C) into bottom bowl (B).
Insert the rail of warming rack (I) into the
holes on lid (A) and insert the leg of warming
rack (I) into the holes on bottom bowl (B).
Note: Fix the latch on front of bottom bowl over
edge of lid for easy carrying by lid handle.

HEATING PLATE
GAS REGULATOR
SIDE HANDLE
UPPER HINGE
BURNER
LID HANDLE
15-
200465N
210347N
300575N
300576N
300560N
300577N
300578N
300579N
300580N
220019N
K
2
BRACE
300581N
300582N
L
2
2
SUPPORT BRACKET
LOWER HINGE
300583N
M
Table Top Gas Grill
Assembly Instructions
WARMING RACK
N
1
HEAT SHIELD
LEG ASSEMBLY
WASHER
O
P
4
3
300584N
300585N
300586N
8

9
1. Make sure all hardware is tightened completely before attaching propane gas canister onto
Gas Regulator. When assembled properly, all connections will be securely fastened.
2. Attach the propane gas cylinder onto the gas regulator as described in the safety instructions
section of this Use and Care Guide.
3. Open lid. Always open lid when lighting.
4. For safety, use a commercial accessory butane lighter, such as a 12” (minimum) trigger style
Butane lighter, to light your grill. DO NOT USE CIGARETTES, CIGARS, ROLLED UP
PAPER, OR ANY OTHER HIGHLY FLAMMABLE OBJECTS TO LIGHT YOUR GAS GRILL.
5.
6.
7. Adjust dial on gas regulator to Low, Med or High for your cooking needs.
To light your Gas Grill burner, push down on the gas regulator dial and turn counterclockwise
gradually while touching the Butane lighter flame to the burner.
IF IGNITION DOES NOT OCCUR IN 3-5 SECONDS, TURN BURNER OFF.
WAIT 5 MINUTES FOR GAS TO CLEAR AWAY AND REPEAT THE LIGHTING PROCEDURE.
IF THE BURNER SHOULD GO OUT FOR ANY REASON, TURN CONTROL
KNOB TO OFF POSITION. WAIT 5 MINUTES BEFORE ATTEMPTING TO
RE-LIGHT.
If the grill fails to light after the second attempt, call 1-877-998-1697 for assistance.
With the burner lit, gently close lid and allow grill to warm up for 20-30 minutes prior to use.
CAUTION:

10
Important
MOVING INSTRUCTIONS
It is important that the grill be lit and allowed to operate at least 30 minutes before any
food is placed on the grill grid. Some smoke may appear during the initial operation of the grill. This is
normal burn-off of materials used during manufacturing. After initial heating, grill is ready for use. After
burning off the grill, spray the cooking grid, and inside of the lid, so food does not stick to the grid
and the inside is easier to clean.
THIS COOKING APPLIANCE IS FOR OUTDOOR USE ONLY AND SHALL NOT BE USED IN A
BUILDING, GARAGE OR ANY OTHER ENCLOSED AREA.
Never move the grill with burner lit.
Make sure gas control is off. Disconnect propane cylinder from regulator. Remove
regulator from grill. Be sure grill has completely cooled for at least 30 minutes.
Find a flat surface. Grill must be on a level surface to operate properly.
First-time use:
CAUTION:
Transporting grill
Setting up for use:
:
This unit should be kept in an area clear and free from combustible materials, gasoline and other
flammable vapors and liquids.
Check to be sure all openings into grill body are free of blockages or debris. Make sure there are no objects
or materials blocking the flow of combustion or ventilation.
When grill is not use, turn regulator knob to OFF , and remove propane cylinder from regulator.
The propane cylinder must be disconnected when the appliance is not in use.
For outdoor use only, if stored indoors, detach cylinder and leave it outdoors. Cylinders must be stored out
of reach of children.
WARNING: To ensure that it is safe to eat, food must be cooked
to the minimum internal temperatures listed in the table below.
*United States Department of Agriculture.
USDA* Recommended Safe Minimum Internal Temperatures
Beef, Veal, Lamb and Pork: Whole Cuts**
Fish
Beef, Veal, Lamb and Pork: Ground
Egg Dishes
Turkey, Chicken & Duck: Whole, Pieces & Ground
145° F
145° F
160° F
160° F
165° F
**Allow meat to rest three minutes before carving or consuming.
Care Maintenance&Care Maintenance&
This warranty gives you specific legal rights, and you may also have other rights
which vary from state to state.
Kmart Corporation, Hoffman Estates, IL 60179
For further information, contact the manufacturer, toll free at 1-877-998-1697.
90 Day Limited Warranty
If this BBQ-Pro product fails due to a defect in material or workmanship within 90
days from the date of purchase, return it to any Kmart store or other BBQ-Pro
outlet in the United States with your proof of purchase for free replacement.

Made in / Hecho en CHINA for Kmart Corporation, Hoffman Estates, IL 60179
SHOP kmart.com
See our extensive assortment of outdoor living products
on-line at www.sears.com and www.kmart.com
/