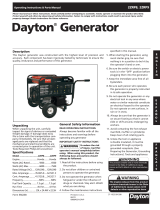
Dayton Operating Instructions and Parts Manual
4
Dayton Diesel Electric Generator
®
4W315C
107358
General Safety Information
Engine exhaust
contains poisonous
carbon monoxide gas. Overexposure
will cause loss of consciousness and
will lead to death. Use only in well-
vented areas. Make sure area has
plenty of free-moving, fresh, outside
air. Never run generator in an enclosed
or confined area. Never run generator
inside occupied building.
Early signs of carbon monoxide
poisoning resemble the flu, with
headaches, dizziness, or nausea. If you
have these signs, get fresh air at once!
Some people are more affected by
carbon monoxide than others. These
include pregnant women, persons with
heart or lung disease or anemia, those
under the influence of alcohol, and
those at high altitudes.
Guard against fire
hazard. Keep
operation area well-vented. Keep
generator at least three feet away
from any object. Do not place flam-
mable objects near generator.
• Do not use generator where flam-
mable vapors are present. Some
vapors are heavier than air. These
vapors settle in low-lying places.
• Do not use generator in enclosed
spaces. This includes motor home or
RV generator compartments.
IMPORTANT: Read these instructions and
engine owner’s manual carefully. Become
familiar with generator before trying to
operate or service it. Know its uses,
limitations, and any hazards involved.
Improper use of generator can cause
severe injury or death from explosion, fire,
burns, electrical shock, or carbon monox-
ide poisoning.
Make certain you read and understand all
warnings. Keep these instructions for
reference. They are your guide to safe and
proper operation of this generator.
Safety information appears throughout
these instructions. Pay close attention to
them. Below are definitions for the safety
information listed throughout this manual.
Under this heading,
installation, operat-
ing, and maintenance procedures or
practices will be found that, if not carefully
followed, WILL result in IMMEDIATE
serious personal injury or death.
Under this heading,
installation, operat-
ing, and maintenance procedures or
practices will be found that, if not carefully
followed, COULD result in severe personal
injury or death.
Under this heading,
installation, operat-
ing, and maintenance procedures or
practices will be found that, if not carefully
followed, MAY result in minor personal
injury, product or property damage.
Guard against
electric shock.
Generator produces high voltage. This
high voltage can cause severe electric
shock. Only responsible adults should
use the generator.
•Properly ground generator before
starting.
• Never let anyone operate or service
generator without proper instruc-
tions.
•Avoid contact with live terminals or
bare wires.
• Do not use generator outdoors in
rain or snow.
• Do not use generator near standing
water or snow.
• Do not use if generator is wet or
damp.
• Do not use generator in highly
conductive areas. These areas include
metal decking and steelwork.
• Only use grounded extension cords.
• Do not use any worn or damaged
electric cords. Electric shock or
damage to generator may result.
• On construction sites, you must use a
Ground Fault Circuit Interrupter
(GFCI). This helps guard against
electric shock. OSHA and the Na-
tional Electrical Code requires this.
• Do not wear damp clothing or wet
shoes when using generator.
Diesel fuel pre-
sents a hazard of
fire. Diesel fuel is flammable.
• Keep fuel out of children’s reach.
• Refuel generator in a well-vented
area. Do not fill fuel tank in the dark.
Do not refuel while engine is
running. Unhook all electrical loads
and shut off engine before refueling.
• Do not overfill fuel tank. Always
allow room for fuel to expand. If you
overfill tank, fuel can overflow onto
hot generator. This can cause fire.
After refueling, tightly close fuel
tank cap.
• Do not spill fuel. If fuel spills, make
sure area is dry before starting
engine.
• Never smoke in refueling area. Never
allow open flames or sparks in area.
• Store fuel in approved container.
Store fuel in a well-vented area free
of open flames or sparks.