Page is loading ...

ULTRAVIEW REMOTE 2
KVM Access Over IP
10707 Stancliff Road Phone (281) 933-7673
Houston, Texas 77099 Internet: WWW.ROSE.COM
INSTALLATION AND OPERATIONS
MANUAL

LIMITED WARRANTY
Copyright Rose Electronics 2008. All rights reserved.
No part of this manual may be reproduced, stored in a retrieval system, or transcribed in any form or any means, electronic or mechanical,
including photocopying and recording, without the prior written permission of Rose Electronics.
Rose Electronics Part # MAN-UVR2
Printed In the United States of America Revision 1.4
Rose Electronics warrants the UltraView Remote 2™ to be in good working order for one year from the
date of purchase from Rose Electronics or an authorized dealer. Should this product fail to be in good
working order at any time during this one-year warranty period, Rose Electronics will, at its option, repair
or replace the Unit as set forth below. Repair parts and replacement units will be either reconditioned or
new. All replaced parts become the property of Rose Electronics. This limited warranty is valid only if
repairs are performed by Rose Electronics or a Rose qualified service technician. This limited warranty is
void if repairs are not performed by Rose Electronics or a Rose qualified service technician. This limited
warranty does not include service to repair damage to the Unit resulting from accident, disaster, abuse, or
unauthorized modification of the Unit, including static discharge and power surges.
Limited Warranty service may be obtained by delivering this unit during the one-year warranty period to
Rose Electronics or an authorized repair center providing a proof of purchase date. If this Unit is delivered
by mail, you agree to insure the Unit or assume the risk of loss or damage in transit, to prepay shipping
charges to the warranty service location, and to use the original shipping container or its equivalent. You
must call for a return authorization number first. Under no circumstances will a unit be accepted without a
return authorization number. Contact an authorized repair center or Rose Electronics for further
information.
ALL EXPRESS AND IMPLIED WARRANTIES FOR THIS PRODUCT INCLUDING THE WARRANTIES
OF MERCHANTABILITY AND FITNESS FOR A PARTICULAR PURPOSE, ARE LIMITED IN DURATION
TO A PERIOD OF ONE YEAR FROM THE DATE OF PURCHASE, AND NO WARRANTIES, WHETHER
EXPRESS OR IMPLIED, WILL APPLY AFTER THIS PERIOD. SOME STATES DO NOT ALLOW
LIMITATIONS ON HOW LONG AN IMPLIED WARRANTY LASTS, SO THE ABOVE LIMITATION MAY
NOT APPLY TO YOU.
IF THIS PRODUCT IS NOT IN GOOD WORKING ORDER AS WARRANTIED ABOVE, YOUR SOLE
REMEDY SHALL BE REPLACEMENT OR REPAIR AS PROVIDED ABOVE. IN NO EVENT WILL ROSE
ELECTRONICS BE LIABLE TO YOU FOR ANY DAMAGES INCLUDING ANY LOST PROFITS, LOST
SAVINGS OR OTHER INCIDENTAL OR CONSEQUENTIAL DAMAGES ARISING OUT OF THE USE OF
OR THE INABILITY TO USE SUCH PRODUCT, EVEN IF ROSE ELECTRONICS OR AN AUTHORIZED
DEALER HAS BEEN ADVISED OF THE POSSIBILITY OF SUCH DAMAGES, OR FOR ANY CLAIM BY
ANY OTHER PARTY.
SOME STATES DO NOT ALLOW THE EXCLUSION OR LIMITATION OF INCIDENTAL OR
CONSEQUENTIAL DAMAGES FOR CONSUMER PRODUCTS, SO THE ABOVE MAY NOT APPLY TO
YOU. THIS WARRANTY GIVES YOU SPECIFIC LEGAL RIGHTS AND YOU MAY ALSO HAVE OTHER
RIGHTS WHICH MAY VARY FROM STATE TO STATE.
IBM ®, AT, and PS/2 are trademarks of International Business Machines Corp.
Microsoft ® and Microsoft Windows™ are registered trademarks of Microsoft Corp.
Apple, Macintosh, and ADB are trademarks of Apple Computer, Inc.
Sun is a registered trademark of Sun MicroSystems Inc. Any other trademarks mentioned in this manual
are acknowledged to be the property of the trademark owner.
NOTE: This equipment has been tested and found to comply with the limits for a Class A digital
device, pursuant to Part 15 of the FCC Rules. These limits are designed to provide reasonable
protection against harmful interference when the equipment is operated in a commercial
environment. This equipment generates, uses, and can radiate radio frequency energy and, if not
installed and used in accordance with the instruction manual, may cause harmful interference to
radio communications. Operation of this equipment in a residential area is likely to cause harmful
interference in which case the user will be required to correct the interference at his own expense.

TABLE of CONTENTS
Contents Page
Disclaimer ........................................................................................................................................................................ 1
Introduction ...................................................................................................................................................................... 1
Features .......................................................................................................................................................................... 2
Compatibility .................................................................................................................................................................... 2
Rose Electronics web site ............................................................................................................................................... 3
Product Registration ........................................................................................................................................................ 3
System overview ............................................................................................................................................................. 4
UltraView Remote 2 Installation ...................................................................................................................................... 6
Connecting the KVM station ........................................................................................................................................ 6
Connecting the Computers / Servers .......................................................................................................................... 7
Connecting to the network ........................................................................................................................................... 7
Configuring the UltraView Remote 2 IP Input module ................................................................................................. 9
Logoff ............................................................................................................................................................................. 12
Restore mouse functions ............................................................................................................................................... 12
Configuration ................................................................................................................................................................. 12
Access mode ................................................................................................................................................................. 12
Host ............................................................................................................................................................................... 12
Return to host ................................................................................................................................................................ 12
Connecting Remotely .................................................................................................................................................... 13
Remote Configuration ................................................................................................................................................... 13
User Accounts ............................................................................................................................................................... 14
Unit Configuration .......................................................................................................................................................... 15
Time and Date Configuration ........................................................................................................................................ 17
Network configuration .................................................................................................................................................... 18
Host Configuration ......................................................................................................................................................... 19
Logging and Status ....................................................................................................................................................... 20
KVM Switch Module Configuration ................................................................................................................................ 21
Configure System .......................................................................................................................................................... 22
Expansion .................................................................................................................................................................. 22
Scan settings ............................................................................................................................................................. 23
Configure computers ..................................................................................................................................................... 24
Configure overlay ....................................................................................................................................................... 25
Miscellaneous ............................................................................................................................................................ 25
Computer select window ............................................................................................................................................ 26
Security .......................................................................................................................................................................... 29
Remote System Operation ............................................................................................................................................ 30
Connecting using a web browser .............................................................................................................................. 30
VNC Viewer Toolbar ...................................................................................................................................................... 31
Controls Tab .................................................................................................................................................................. 31
Host Tab ........................................................................................................................................................................ 33
Keyboard Commands .................................................................................................................................................... 35
Troubleshooting ............................................................................................................................................................. 36
Maintenance and Repair ............................................................................................................................................... 38
Technical Support ......................................................................................................................................................... 38

Figures Page
Figure 1. UltraView Remote 2 Models ............................................................................................................................ 5
Figure 2. Connecting a KVM ........................................................................................................................................... 6
Figure 3. Connecting Computers .................................................................................................................................... 7
Figure 4. Connecting to the Network .............................................................................................................................. 7
Figure 5. Cascading units ............................................................................................................................................... 8
Figure 6. Configuration Menu.......................................................................................................................................... 9
Figure 7. Unit Configuration Menu .................................................................................................................................. 9
Figure 8. Network Configuration Menu ......................................................................................................................... 10
Figure 9. Secure Keys Encryption................................................................................................................................. 11
Figure 10. Logon screen ............................................................................................................................................... 11
Figure 11. Remote Configuration Menu ........................................................................................................................ 13
Figure 12. Main configuration menu (Ctrl + F12) .......................................................................................................... 21
Figure 13. Configure system menu ............................................................................................................................... 22
Figure 14. Configure computers.................................................................................................................................... 24
Figure 15. Configure overlay ......................................................................................................................................... 25
Figure 16. Configure security ........................................................................................................................................ 29
Figure 17. VNC Viewer Toolbar .................................................................................................................................... 31
Figure 18. Host Configuration window .......................................................................................................................... 33
Figure 19. Computer Select Window ............................................................................................................................ 34
Tables Page
Table 1. Typematic rate ................................................................................................................................................ 23
Appendices Page
Appendix A – Specifications .......................................................................................................................................... 40
Appendix B – Parts and cables ..................................................................................................................................... 40
Appendix C - RackMount .............................................................................................................................................. 41
Appendix D – Firmware upgrade .................................................................................................................................. 41
Appendix E – IP Access Control ................................................................................................................................... 42
Appendix F – VNC Viewer connection options ............................................................................................................. 44
Appendix G – VNC viewer window options ................................................................................................................... 47
Appendix H – Browser viewer options .......................................................................................................................... 48
Appendix I – Supported video modes ........................................................................................................................... 49
Appendix J – Hotkey sequence codes .......................................................................................................................... 50
Appendix K – Video distance capability ........................................................................................................................ 51

INTRODUCTION
ULTRAVIEW REMOTE 2 INSTALLATION AND OPERATIONS MANUAL
1
Disclaimer
While every precaution has been taken in the preparation of this manual, the manufacturer assumes no responsibility
for errors or omissions. Neither does the manufacturer assume any liability for damages resulting from the use of the
information contained herein. The manufacturer reserves the right to change the specifications, functions, or circuitry
of the product without notice.
The manufacturer cannot accept liability for damages due to misuse of the product or other circumstances outside
the manufacturer’s control. The manufacturer will not be responsible for any loss, damage, or injury arising directly
or indirectly from the use of this product.
(See limited warranty)
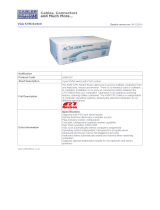
Introduction
Thank you for choosing Rose Electronics UltraView Remote 2™ for your remote server access requirements. The
UltraView Remote 2 is the result of Rose Electronics commitment to provide the best, most versatile, products for the
business community. Now you can have access to all your servers locally or over IP. The multi-platform model
allows you to connect different types of computers directly to the unit. If your system requires access to more than
16 computers, the UltraView Remote 2 can easily be expanded to access up to 256 computers using our UltraView
KVM switch as expansion units.
Remote users have the ability of connecting to any computer over IP. This allows you to use, control, and monitor the
remote computers directly from the unit, from your network workstation, or from any from anywhere in the world using
the internet and a web browser.
The UltraView Remote 2 consists of an IP input module and a KVM switch module. Each module serves a unique
purpose in access control and KVM switching control. The IP input module controls the accessibility, security, and
state-of-the-art encryption to the unit. It can be accessed locally, remotely over your network, or from any workstation
connected to the internet. All access methods require a user ID and password to gain access to the units IP input
module. Access to the units IP input module from any remote user is via any supported web browser. The UltraView
Remote 2 is further enhanced by the use of Real VNC that allows for the creation of ciphered user communications.
Additionally, an optional user ID and password and other set-up parameters can be set-up to gain access and use
the KVM switch module. This additional user ID can be set-up for each user needing access to the KVM switch
module.
Installing the UltraView Remote 2 consists of
configuring the unit to be compatible with
your existing network, connecting
the unit to local KVM station
and to your network.
Once connected you have
full control of the selected
computer provided your security
profile permits it.

2 ULTRAVIEW REMOTE 2 INSTALLATION AND OPERATIONS MANUAL
Features
Six models available:
4-port model (PC or Multi-platform)
8-port model (PC or multi-platform)
16-port model (PC or multi-platform)
Supports PC or Multi-platform systems
Solid-state embedded unit, has no disk drive for maximum reliability
Remote application (Real VNC or Java applet) can be installed directly from the unit
Local KVM port for configuring and direct access to the connected computers
Connect to the unit directly, from a network workstation, or over IP using any supported web browser.
Access remote computers by simple keyboard commands or an on-screen list of computers
Access up to 256 computers in an expanded system
Supports video resolution up to 1280 x 1024 @ 75hz
Password security prevents unauthorized configuration and Unit access
Remote access requires a user ID and password.
IP lockout feature for incorrect login (IP address shown as “Blacklisted” in log file)
All transmissions to and from a remote user are encrypted with the latest AES 128 bit encryption technology.
Up to 16 remote user accounts can be set-up each with separate access permission levels.
Scan function sequences through the connected computers at rates of 1 to 999 seconds
Four different screen savers are available
Rack mount kits available for 19”, 23”, or 24” racks
Flash memory technology with free firmware upgrades which provide new features and support for the latest
devices; available at ROSE.COM
Made in the USA
Package contents
The package contents consist of the following:
The UltraView Remote 2 unit
RJ12 Serial Cable
RJ to DB9 adapter
Installation and operations manual CD
Quick Start Guide
Cables are usually ordered separately. If the package contents are not correct, contact Rose Electronics or your
reseller so the problem can be quickly resolved.
Compatibility
Computers
Industry standard PCs, Sun, Unix computers such as RS/6000, HP, SGI, DEC, and others.
Monitors
VGA
Keyboards
PC/Unix US, most foreign Qwerty keyboards, Korean and Japanese, keyboards with or
without Windows keys (101, 102, 104, 105, 106, 109 keys), USB*, Sun*, Apple ADB*.
Mouse
Standard PS/2, PS/2 wheel
Network
TCP/IP protocol
Network
workstations
Windows 98 or better PC connected to the network
* Multi-platform models only

ULTRAVIEW REMOTE 2 INSTALLATION AND OPERATIONS MANUAL
3
Rose Electronics web site
Visit our web site at www.rose.com for additional information on the UltraView Remote 2 and other products offered
by Rose Electronics that are designed for data center applications, classroom environments, and many other access
and switching applications.
Product Registration
Take advantage of the following when you register your Rose Electronics products online at
http://www.rose.com/htm/online-registrationform.htm:
Rose Standard Warranty Plus...
Free Lifetime Firmware Updates
Free Lifetime Technical Support
30 Day Money Back Guarantee
Priority “First-in-Line” Status for Tech Support

OVERVIEW
4 ULTRAVIEW REMOTE 2 INSTALLATION AND OPERATIONS MANUAL
System overview
The UltraView Remote 2 is a versatile and powerful product that can extend the range of access to your computers
from anywhere in the world. It is designed to provide seamless and trouble-free access from any workstation on your
network or any remote user to any connected computer. You can connect to and control any of the connected
computers by simple keyboard commands or an on-screen list of computers. Each computer can be assigned a
unique name that makes sense for your system. Names like sales, production, and administration make it easy to
recognize and connect to.
Access control for the users can be set-up to provide access restrictions to the configuration and unit. The
installation and configuration section explains all the features and functions of the UltraView Remote 2 and how to
customize it to fit your business needs.
The UltraView Remote 2 is designed with the highest regard for security. Remote access requires a user ID and
password. All transmissions, to and from a remote workstation and UltraView Remote 2 uses the versatile and very
secure RealVNC viewer and are encrypted with the latest encryption technology. Login, time-out, User ID and
password add to the security of the system.
Typical connection diagram
Network
Computers Local KVM Remote
(4, 8, 16,
workstations
or more) (unlimited number)
UltraView Remote
Local workstation

MODELS
ULTRAVIEW REMOTE 2 INSTALLATION AND OPERATIONS MANUAL
5
UPR-1R04UB/2 - UER-1R04UB/2
Connector
Type
Power
IEC320
CPU (4)
DB25F
KVM (1)
DB25F
RS232
RJ12F
Network
RJ45F
UPR-1R08UB/2 - UER-1R08UB/2
Connector
Type
Power
IEC320
CPU (8)
DB25F
KVM (1)
DB25F
RS232
RJ12F
Network
RJ45F
UPR-1R16UB/2 - UER-1R16UB/2
Connector
Type
Power
IEC320
CPU (16)
DB25F
KVM (1)
DB25F
RS232
RJ12F
Network
RJ45F
Figure 1. UltraView Remote 2 Models
Note: Model part numbers UPR-xxxxx are PC / Unix models
UPE-xxxxx are Multi-platform models

INSTALLATION
6 ULTRAVIEW REMOTE 2 INSTALLATION AND OPERATIONS MANUAL
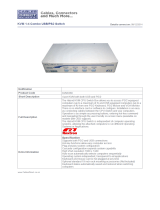
UltraView Remote 2 Installation
Installing the UltraView Remote 2 is a very easy process and should be performed by a designated administrator.
The administrator will install, configure, and set-up user access profiles. A network administrator will need to assign
an IP address to the unit (if needed) and set-up firewall and network access to the unit.
The following installation procedure is a guide to properly install and configure the UltraView Remote 2. The
following items are needed to install the UltraView Remote 2:
1. A valid IP address to assign to the unit (if not using DHCP feature)
2. VGA monitor
3. PS/2 keyboard
4. PS/2 mouse
5. RJ45 network cable
6. KVM Adapter cable (DB25M to PS/2F-PS/2F-HD15F)
7. CPU Adapter cable(s) (DB25M to PS/2M-PS/2M-HD15M)
Connecting the KVM station
Connect the KVM stations PS/2 keyboard, video monitor and PS/2 mouse cables to the corresponding connectors on
the KVM adapter cable as shown in Figure 2. The KVM station’s video monitor should be equal or better than any of
the connected computers. Connect the DB25M end of the KVM cable to the KVM DB25F port on the rear panel of
the UltraView Remote 2 unit.
Figure 2. Connecting a KVM
KVM Adapter Cable
KVM Station

ULTRAVIEW REMOTE 2 INSTALLATION AND OPERATIONS MANUAL
7
Connecting the Computers / Servers
Connect each computer to the UltraView Remote 2 using the appropriate CPU adapter cable designed to interface to
the type of computer being connected (PS/2, Unix, SUN, DEC, Apple, etc). Connect the DB25M end of the CPU
adapter cable to the desired DB25F CPU port on the rear panel of the unit. Connect the other end of the cable to the
corresponding ports on the computer (keyboard, monitor, and mouse). Refer to Figure 3.
Figure 3. Connecting Computers
Connecting to the network
Connect a network cable from the RJ45 connector on the rear panel of the UltraView Remote 2 and to your network
(See Figure 4)
Figure 4. Connecting to the Network
Network connection
Remote
computer
connections
CPU adapter
cable(s)

8 ULTRAVIEW REMOTE 2 INSTALLATION AND OPERATIONS MANUAL
Cascading units
If your system demands are greater than a single model can provide, you can cascade the UltraView Remote 2 to
other UltraView Pro or ServeView Pro models. The total number of cascaded units that can be added is equal to the
total number of CPU ports on the unit identified as the “Master” unit. If the “Master” UltraView Remote 2 unit has 8
CPU ports, then 8 additional “Slave” units can be added, increasing the number of computers that can be accessed
from 8 on a single unit to 64 in a cascaded system. A 16 CPU port model can expand to as many as 256 computers
(16 CPU ports x 16 units). Figure 5 show a typical cascaded system using an UltraView Remote 2, 8 port master
and two ServeView Pro 8 port models as slaves. The Master can have 6 computers connected directly to the unit
and each Slave can have 8 computers connected to them giving a total computer access of 22.
If you plan to expand your system, the unit designated as the “Master” must be configured to identify that there is an
expanded system and how many expansion units have been added. This is explained in the “Switch configuration”
section.
Figure 5. Cascading units
Master
Slave #1 Slave #2

UNIT CONFIGURATION
ULTRAVIEW REMOTE 2 INSTALLATION AND OPERATIONS MANUAL
9
Configuring the UltraView Remote 2 IP Input module
When you locally connect to the UltraView Remote 2 unit for the first time the Unit and Network must be configured.
Follow the recommended procedure below to configure all models:
a. Make all cable connections to the KVM station, network, and computers
b. Make sure power is applied to all devices (Computer, UltraView Remote 2, and Monitor).
c. Make sure a computer is connected to CPU port #1 and that computer is powered on.
If no computer is connected to port #1, the OSD menu screens may not sync.
d. With power applied, a standard login screen will display on the KVM monitor
e. Login on to the unit using the default user ID, admin and no password
f. After a successful login, the remote computer’s video will display on the KVM monitor.
g. Press the CTRL + ALT + C keys simultaneously to display the configuration menu options
as shown below: (Unit connection screen may display after initial connection is made)
Figure 6. Configuration Menu
Select “Unit Configuration” and the below screen will display
Figure 7. Unit Configuration Menu

10 ULTRAVIEW REMOTE 2 INSTALLATION AND OPERATIONS MANUAL
Keyboard Layout
Using the left and right arrow keys, select the keyboard type expected from the host computers.
Admin password
Enter an administrator password of at least six characters that has a mix of letters and numerals. The background
color provides an indication of password suitability. It is initially red to indicate that the password is not sufficient.
When a password with reasonable strength has been entered it changes to blue.
Time and Date
Set the time and date to the correct values. Use the 24 hour base inputs. All entries in the activity log are time
stamped using this information.
Encryption
Arrange this setting according to your security requirements.
When all items have been updated, click on “Next” to configure the network information. The network information
entered (IP Address, Net Mask, and Gateway) must be compatible with the network UltraView Remote 2 will be
connected to.
Figure 8. Network Configuration Menu
MAC address
Media Access Control address – this is the unique and unchangeable code that was hard coded within your
UltraView Remote 2 unit when it was built. It consists of two 6-digit hexadecimal (base 16) numbers separated by
colons. A section of the MAC address identifies the manufacturer, while the remainder is effectively the unique
electronic serial number of your particular unit
Use DHCP/IP address/Net Mask/Gateway/VNC port/HTTP Port
1. You need to either set the DHCP option to ‘Yes’ or manually enter a valid IP address, Net mask and Gateway.
If you set the option to use DHCP, remote users must be informed of the IP address assigned so they can
remotely access the unit.
2. Change the IP Address to the IP address assigned to the unit by your network administrator
that is compatible with your network.
3. Change the Net Mask and Gateway addresses if needed.
4. The VNC and HTTP ports should remain set to 5900 and 80, respectively, unless they clash with an existing
setup within the network.
5. When all network information has been entered, click on “Next” to calculate a “Secure Key”.

.
ULTRAVIEW REMOTE 2 INSTALLATION AND OPERATIONS MANUAL
11
Screen #3 is a secure keys screen that will display after the network information has been entered.
Figure 9. Secure Keys Encryption
This screen uses mouse movements and keyboard inputs to create random data. This unpredictable information is
then combined with several other factors to develop the basis of the encryption keys that are used to establish
secure remote links.
With every mouse move and key press the single dash will move across the progression bar (unless the same key is
pressed repeatedly). Periodically, a new star character will be added to the bar as the random data are accepted as
part of the new encryption key. When the bar is full, the final encryption keys for your UltraView Remote 2 will be
created – this process takes roughly 30 to 40 seconds.
Once the secure key has been calculated, the UltraView Remote 2 will restart and present a standard logon screen
as shown below.
Figure 10. Logon screen
At this stage the username is still ‘admin’ but the password will be whatever you entered on the Unit Configuration
setup screen. Once the username and password has been validated, the screen should now show the host computer
screen.

12 ULTRAVIEW REMOTE 2 INSTALLATION AND OPERATIONS MANUAL
To view the menu options press <CTRL> <ALT> <C>.
(if the standard hotkeys were altered on the Configure Unit screen, use the new hotkeys plus C)
Logoff
Select this option to close your current session and display the screensaver.
Restore mouse functions
Select this tab to revive a mouse that has ceased to function correctly. The UltraView Remote 2 provides a feature to
reinstate PS/2 mouse communications. (Does not apply if using a USB mouse.)
There are two main types of data formats used by current PC mice; ‘PS/2’ format and the more recent ‘IntelliMouse
®
’
format introduced by Microsoft. These use slightly different data arrangements and it is important to know which type
was being used before you hot-plugged the computer to the UltraView Remote 2. The previous setting depends both
on the type of mouse and the type of driver, as various combinations of PS/2 and IntelliMouse are possible. Using
the incorrect restore function may produce unpredictable results and require the computer to be re-booted.
Using a keyboard and monitor directly connected to the
UltraView Remote 2, log on and then press the hotkey
sequence <Ctrl> <Alt> <C> to view the options menu.
1. Select the ‘Restore mouse functions’ option to
display:
2. Select one of the following options:
3. Restore Standard Mouse – if PS/2 mode is required,
or Restore IntelliMouse – if IntelliMouse mode is
required.
4. Select “Back” to return to the Control menu.
Configuration
Select the “Configuration” tab to gain access to the Unit and Network configuration menus. You can also reset the
UltraView Remote 2 to its initial state.
Access mode
Allows you to choose between the Shared mode (where all other logged on users can see your operations) and the
Private mode (where the screens of all other users are blanked).
Host
Indicates the currently selected host computer and allows you to select others. This item will be blank unless host
details have been set-up.
Return to host
Quits the menu and returns to the host screen.

ULTRAVIEW REMOTE 2 INSTALLATION AND OPERATIONS MANUAL
13
Connecting Remotely
With the Unit and the Network configured properly, start a web browser like IE or Netscape from any workstation
connected to the same network your UltraView Remote 2 is connected to. Type in the UltraView Remote 2’s
assigned IP address (Example (http://168.192.0.41) in the URL field. The UltraView Remote 2 will respond with the
below screen. There may be initial login and connect screens displayed.
(NOTE: See Appendix F for additional VNC Viewer options)
Click on the “Connect using built-in VNC viewer” option and the UltraView Remote 2 will install a temporary Java
applet on the requesting computer and then display the connected computer’s video in the browser’s VNC viewer
window. In the upper right corner of the window is a “Configure” tab. Click on this tab to display the remote
configuration option menu as shown below.
Remote Configuration
Connect to the UltraView Remote 2 unit from any network workstation. When connected, click on the “Configure” tab
in the upper right corner of the display. The below configuration menu will display.
Figure 11. Remote Configuration Menu
Clicking on the Configure tab
Displays the configuration window

14 ULTRAVIEW REMOTE 2 INSTALLATION AND OPERATIONS MANUAL
(Following describes each of the Configuration Tabs.
User Accounts
Allows you to create and manage up to sixteen separate user accounts, each with
separate access permissions. Account #1 is the admin account. Enter User name,
password. Tick/un-tick the Local and Remote options that are appropriate to the user.
Unit Configuration
Allows you to modify unit settings within the UltraView Remote 2. You can define the
keyboard, set-up the admin account, assign a name to the unit, screensaver time and
encryption options
Time & Date
Configuration
Set the time and date, this time stamps the log files
Network Configuration
Configures the network IP, network mask, gateway, VNC port, HTTP port. You can
alter any of the existing network settings plus you can set-up the IP access control
feature that lets you specifically include or exclude certain addresses or networks
Host Configuration
Allows configuration of various details for each host system connected to UltraView
Remote 2. 128 entries max, Add host names, Users, Hotkey, and power control
sequence.
Logging and Status
Provides various details about the UltraView Remote 2 activity
LDAP Configuration
Configures unit for LDAP
Return to Host
Exit the configuration menu system and return to the host computer
Following is an explanation and examples of each of the configuration items:
User Accounts
Selecting user accounts will display the following menu.
The first of the sixteen accounts is the admin account and is the only account with access rights to the configuration
menus. The user name and access rights are fixed for the admin account. The only change possible for this account
is the password.
There are fifteen user account positions.
To create a new account
1 Enter the required User Name to activate that position (the Password and access tick box positions will
become editable).
2 Optionally enter a password for the user account.
3 Tick/un-tick the Local, Remote, and Auto Logon options that are appropriate to the user.
4 Click the Save button to register your changes.

ULTRAVIEW REMOTE 2 INSTALLATION AND OPERATIONS MANUAL
15
User Name
All user names must consist of lower case characters or numbers only. No symbols or upper case characters are
permissible. The user name can be between 1 and 16 characters in length.
Password
Passwords are case sensitive and can include certain keyboard symbols. The password can be between 1 and 16
characters in length. The password background remains shaded in amber while the UltraView Remote 2 considers
your entered password to be too easy to guess. A suitable password is best constructed using a mixture of more
than 6 letters, numbers and punctuation characters.
Local
When ticked, the selected user can gain access using the local KVM station directly connected to the UltraView
Remote 2.
Remote
When ticked, the selected user can gain access via an IP network link, such as a local intranet or the wider Internet
(depending on how the UltraView Remote 2 is connected and the network access is configured.).
Auto-Logon
When ticked and power is applied to the unit, the user is automatically logged on. When not is use, the user should
logoff.
Unit Configuration
The ‘Unit Configuration “option tab will display the following menu.
Hardware Version
Indicates the version of the electronic circuitry within the UltraView Remote 2 unit.
Firmware Version
Indicates the version of the hardwired software within the UltraView Remote 2 flash memory. This may be updated
using the flash upgrade procedure.
Host Keyboard Layout
Use the arrow buttons to match the keyboard layout expected by the host system.
Admin Password
Enter the password that will be used to gain administrator access to the UltraView Remote 2. There can only be one
admin user and only that user is given access to the configuration menus.
Unit Name
The name entered here will be displayed on the local menus and the remote VNC viewer/browser windows.
Local Hot Key Sequence
Use the arrow buttons to select an appropriate hot key sequence for the locally connected keyboard. This sequence
is used in combination with other key presses to access the on-screen menus and to change between hosts. The
options are: Ctrl+Alt (default), Ctrl+Shift, Alt+Shift, Alt Gr, Left + Right Alt, Left Ctrl + Alt or Right Ctrl + Alt.

16 ULTRAVIEW REMOTE 2 INSTALLATION AND OPERATIONS MANUAL
Screensaver Timeout
Use the arrow keys to select an appropriate period of inactivity before a screensaver is displayed and the user is
logged out. This setting applies to local users only and once the screensaver is displayed, for security purposes the
user is required to log in again. The timeout period can be selected between 5 minutes and 1 day (24 hours), it
cannot be disabled.
Menu Bar Toggle Hot Key
Use the left or right arrow keys to choose the hot key to turn on or off the menu bar.
(NOTE: DO NOT assign a hot key value that will conflict with other hot key assignments. The KVM switch
module uses hotkeys to quickly perform an operation. Make sure the hot key assigned to toggle the menu
bar is unique)
Encryption
Three encryption options are available; Always on, Prefer off, Prefer on. The one to choose depends on the specific
details of your installation. The use of encryption imposes a slight performance overhead of roughly 10% but is highly
secure against third party intrusion.
Encryption settings
The Unit configuration page offers three encryption settings:
Always on - This setting will force all viewers to use encryption. Note: This setting will preclude any VNC
viewer versions that do not support encryption.
Prefer off - This setting does not enforce encryption unless a viewer specifically requests it. If a viewer has its
‘Let server choose’ setting, then an un-encrypted link will be set up.
Prefer on - This setting generally enforces encryption unless an earlier viewer version is unable to support it,
in which case the link will be un-encrypted. If a viewer has its ‘Let server choose’ setting, then the link will be
encrypted.
The “Advanced Configuration” tab will display advanced options that generally do not need modifying.
Force VNC protocol 3.3
IMPORTANT: The use of this option is not recommended. VNC protocol 3.3 is a legacy version that does not offer
any encryption.
Idle timeout
Determines the period of inactivity on a remote connection before the user is logged out. The idle timeout period can
be set to any time span, expressed in minutes. Note: The Screensaver option serves a similar purpose for local
connections. A value of 0 will disable the timeout.
Protocol timeout
Sets the time period by which responses should have been received to outgoing data packets. If the stated period is
exceeded, then a connection is considered lost and terminated.
/