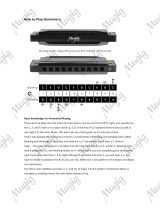
Pa1X / PA1X Pro EasyStart
S
S
e
e
l
l
e
e
c
c
t
t
i
i
n
n
g
g
a
a
n
n
d
d
P
P
l
l
a
a
y
y
i
i
n
n
g
g
S
S
t
t
y
y
l
l
e
e
s
s
There are 450 fully editable preloaded Styles in the Pa1X and room for over 150 more. A Style consists of up to eight
accompaniment tracks. One or two can be used (like drums and bass) to simply supply you with a rhythm section, or
all eight if you need a full big-band to back you up.
1. Press the STYLE PLAY mode button then press the KEYBOARD MODE SPLIT button.
2. Styles can be selected in two ways. First, select a Style by pressing anywhere in the “Style” area in the
upper left of the display. Select a Style category by pressing one of the “tabs” in the display then select a
Style within that category. You can also press a STYLE SELECT button to select a Style category and then
select a Style within the catagory.
3. Select a Style. Press the SYNCRO START button then press INTRO 1. Play a chord on the lower section of
the keyboard the Style will begin playing, first with an intro and then will automatically go to the main style.
4. There are four variations, three fills, three intros and two endings for each Style, allowing you to create a
realistic performance! Try out some of the Variations and Fills while playing the Style by pressing a
VARIATION or FILL button. Press one of the ENDING buttons to have the Style play a musical ending or
simply press the START/STOP button to stop the Style cold.
5. To change the tempo of a Style, press and hold the “Shift” button under the display and rotate
theTEMPO/VALUE dial.
There is a list a suggested Styles to try on page 7 of this EasyStart.
C
C
o
o
o
o
l
l
T
T
i
i
p
p
:
: Use a complex chord (7
th
, sus2, sus4, etc…) when auditioning Styles – the Style playback will be
more musical and interesting. For example, play a chord using the notes C, F and G.
A
A
d
d
d
d
i
i
n
n
g
g
t
t
h
h
e
e
R
R
e
e
a
a
l
l
-
-
T
T
i
i
m
m
e
e
T
T
r
r
a
a
c
c
k
k
s
s
The STYLE will play up to eight backing tracks, and you can play up to four additional tracks in real-
time; three layered on the UPPER half of the keyboard, and one on the LOWER portion of the
keyboard.
1. Press the STYLE PLAY button. The right side in the display shows which sounds are currently assigned to
this STYLE. A small “MUSIC NOTES” icon will appear next to a voice if that track is active (turned on). An
“M” icon next to a track indicates the track is muted (off). The top three sounds listed relate to the UPPER
half of the keyboard (labeled “UP1”-“UP3”). The last sound on this list is for the LOWER track of the
keyboard (labeled “LOW”).
2. To change the sound assigned to a track (Upper 1, etc.), press the sound name in the display. Select a bank
using the “tabs” or by pressing a SOUND SELECT button. Select the desired sound.
3. Below the DISPLAY are four buttons labeled SINGLE TOUCH SETTING (STS1-4). Press one of these, and
you can see the sounds assigned to the STYLE change. There are four STS (Single Touch Settings) for each
STYLE. This feature allows very quick set up of sounds that correspond to the selected STYLE. Press the
“STS Name” tab in the lower track of the display to view the sounds assigned to the STS buttons.
4. Try playing different STYLES and using the STS buttons to call up new sounds. Play with both hands to hear
these tracks.
5. To turn a track on, press the “M” (mute) to the right of the sound name so it changes to the “MUSIC
NOTES”.
6. To adjust the volume of a track use the SLIDERS labeled UPPER 1,UPPER 2, etc. You can view all eight of
the Style tracks in the display by pressing the TRK.SEL. button to the left of the STS buttons. Press the
TRK.SEL. button again to return to the previous screen.
4