Page is loading ...

Arrim ONE USER MANUAL (iOS)
Quick Start
Turn on / off Arrim ONE
Press on/off Switch to turn on Arrim ONE
Press on/off Switch for 3 seconds to turn off Arrim ONE. And it will be automatically shut off in 3
minutes after last measurement.
Charging
Use the Micro-USB charging cable in the package to charge Arrim ONE. When it is charging, blue
LED is on.
It takes one hour to fully charge Arrim ONE. You can check the battery status in Arrim ONE app.
Arrim ONE has over-charge protection, so it will not be damaged if it is charged for longer.
Laser Status
OFF
No light. Arrim ONE is off.
Rest
Dim light. Arrim ONE is turned on, but no connected to mobile
device via bluetooth
Activated
Bright Red. Arrim ONE is turned on and connected, ready to go.

1. Download Arrim ONE app to your mobile device.
•
Please search Arrim ONE on Apple App Store, and download it.
Arrim ONE supports iPhone 6S or later, and iPad 2017 or later. Please check the entire compatible list
in Appendix.

2. Attach Arrim ONE with Mobile Device
•
Insert Arrim ONE to the mobile device. Laser is facing out.
If your phone case is too thick to fit Arrim ONE, you can use an adapter as the extension. The adapter
can also allow the Arrim ONE be compatible with both iOS device and Android device with Type -C
port. The adapters are available on www.Arrim.net
Remember to turn on the adapter option in the Function & Setting.

3. Open Arrim ONE App
•
Arrim ONE connects the mobile device via Bluetooth, so please make sure your mobile device’s
bluetooth is turned on. You can go to Setting / Bluetooth to turn it on.
•
Open Arrim ONE app. When you first time open Arrim ONE, it will ask permission to access the
Camera. Please click “OK”
•
Software starts to detect the environment, please move the device around slowly until the animation
disappears.

•
Press on/off switch on the rear end to turn on Arrim ONE.
•
Arrim ONE will be connected automatically with the mobile device via Bluetooth. The laser will be
on, and you can see a bright red laser dot.
PRESS HERE
Laser Dot

4. Calibration
•
To achieve better accuracy, Arrim ONE requires a calibration before measuring. Just aim the laser to
a wall / floor, and make sure the distance between Arrim ONE and wall / floor is between 2 ft - 9 ft
(0.5 m - 3 m), and tap the calibration button on the right bottom
•
Calibration completed. And it is ready to go!
Tap Calibration Button

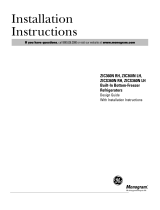
5. User Interface
Function & Setting
Tap to enter Function & Setting, you can select different functions,
set unit system/format and check the Arrim ONE battery status
Measure
Tap to define a virtual point, which is at same location of laser dot in
real world.
Take Picture
Snapshot the screen. The saved picture can be found in Function &
Setting > Folder or iOS Photos
Undo
Undo the last action
Undo All
Undo all the actions
Calibration
Use it to calibrate Arrim ONE to get better accuracy
Sub-Function
Will be introduced in detail in the specific function instruction
Introduction
Brief Introduction of current function
Current Function &
Instruction
Current function mode, and tell you what to do in next action

Function & Setting Interface
/