Thrustmaster Ferrari GT Experience Owner's manual

Type
Owner's manual
CouvQI_FGT3in1RF_5075833.indd 1 19/08/10 19:05:04
1/10
Compatible: PlayStation® 3 / PC
User Manual
TECHNICAL FEATURES
1 2 digital gearshift levers (UP and DOWN)
2 LED
3 Action buttons
4 D-Pad
5SE” and “ST” buttons:
- for Select and Start
- for programming
6Home” button for PlayStation® 3
7 USB selector (“PC” / “PS3”)
2/10
8 Pedal cable
9 RJ45 connector for pedal set
10 Table clamp
11 Clamp screw
12 USB connector (for PC and PlayStation®3)
13 Pedal set
3/10
INSTALLING THE WHEEL
Fixing the wheel in place
1. Place the wheel on a table or other flat surface.
2. Place the clamp screw (11) in the table clamp (10) and then screw the clamping unit into the hole on the
underside of the wheel until firmly fixed in place. Do not turn the screw too tightly, as you risk damaging
the clamping unit and/or the table.
Connecting the pedal set
1. Connect the pedal cable (8) to the wheel’s RJ45 connector (9).
PLAYSTATION® 3
INSTALLATION ON PLAYSTATION® 3
1. Set the wheel’s USB selector (7) to the “PS3” position.
2. Connect the USB connector (12) to a USB port on your console.
3. Turn on your console.
4. Launch the game.
You are now ready to play!
USING THE “HOME” BUTTON (6)
Your wheel’s “Home” button allows you to exit games and access your PlayStation®3 system’s menus.
IMPORTANT NOTES ON PLAYSTATION® 3
- The wheel’s USB selector (7) must always be set to the “PS3” position before connecting your wheel.
- In “1 Player” mode: If your official gamepad is turned on, you will have to switch it to “controller port 2” in
order for your wheel to be functional.
- On PlayStation® 3, the wheel is only compatible with PlayStation® 3 games (and will not function with
PlayStation® 2 games).
- On PlayStation® 3, vibration effects on the wheel are not supported (only on PC).
- In certain racing games, do not hesitate to test out your wheel’s 2 sensitivity modes in order to optimize
its precision and responsiveness.
4/10
PC
Installation on PC
The CD-ROM included with this product allows you to install the “Vibration Feedback” drivers.
1. Set the wheel’s USB selector (7) to the “PC” position.
2. Insert the installation CD-ROM into your CD-ROM drive. Follow the on-screen instructions to install
the “Vibration Feedback” drivers. Once the installation is complete, click Finish and restart your
computer.
3. Once your computer has restarted, connect the USB connector (12) to one of your computer’s USB
ports. Windows® will automatically detect the new device.
4. Driver installation
Drivers are installed automatically. Follow the on-screen instructions to complete the installation.
5. Click Start/Settings/Control Panel and then double-click Game Controllers (or Gaming Options,
depending on your operating system).
The Game Controllers dialog box displays the wheel’s name with OK status.
6. In the Control Panel, click Properties to configure your gamepad:
Test device: Allows you to test and visualize the buttons, D-pad and axes of the wheel and pedal
set.
Test forces: Allows you to test 8 vibration effects and configure effect and vibration settings.
You are now ready to play!
IMPORTANT NOTES ON PC
- The wheel’s USB selector (7) must always be set to the “PC” position before connecting your wheel.
- Your wheel and pedals automatically self-calibrate upon connection of the USB connector. In the event
of any problems, you can also carry out manual calibration by downloading the “Thrustmaster
Calibration Tool” software, available at the following address:
http://ts.thrustmaster.com
5/10
ADVANCED FUNCTIONS
ADJUSTING THE WHEEL’S SENSITIVITY
Your wheel’s steering has 2 sensitivity modes:
- Normal sensitivity (the default mode)
- High sensitivity (must be set)
Setting “High Sensitivity” mode:
Action LED color
Simultaneously press and release:
the D-Pad (4) + the 2 UP and DOWN levers (1)
FLASHES SLOWLY
Your wheel’s steering is now more sensitive.
(This procedure must be repeated each time you restart or disconnect your wheel)
Setting “Normal Sensitivity” mode (default mode):
Action LED color
Simultaneously press and release:
the D-Pad (4) + the 2 UP and DOWN levers (1)
DOES NOT FLASH
Your wheel’s steering has now returned to normal sensitivity (the default mode)
PROGRAMMING THE WHEEL AND PEDALS
Your wheel is fully programmable:
- All buttons as well as the D-Pad can be switched between themselves.
- All buttons as well as the D-Pad can be programmed onto the 2 pedals.
Examples of possible applications:
- On PS3: Programming L2/R2 or L3/R3 onto the 2 UP and DOWN digital levers (L1/R1).
- Programming a button(s) onto one or both pedals.
- Switching different buttons for greater accessibility.
Programming procedure
Steps Action LED color
1
Simultaneously press and release:
SE + ST (5)
OFF
2 Press and release the button to program.
FLASHES
QUICKLY
3
Press and release the button or pedal onto which
you wish to place your function.
ON
Your programming has now taken effect.
(You must repeat this procedure each time you restart or disconnect your wheel)
6/10
Erasing your programming
Steps Action LED color
1
Press and hold for 2 seconds:
SE + ST (5)
TURNS OFF THEN ON
AGAIN
Your programming has now been erased.
CONFIGURING THE PEDALS ON PLAYSTATION® 3
On Playstation® 3, your wheel’s accelerator and brake controls are in “separate” mode by default,
meaning that the pedals function on independent axes:
“Accelerator” = “R2” trigger & “Brake” = “L2” trigger
For a different type of control (to limit skidding, for example), you can switch your wheel to “combined” (2
axes) mode: the pedals then function on a single axis.
- On PlayStation® 3:
“Accelerator and Brake” = Up/Down direction on “Right mini-stick”
Setting “Combined Pedals” mode
Action LED color
Simultaneously press and release:
the 2 pedals (13) + the “Home” button (6)
GREEN
Your pedals are now combined
(You must repeat this procedure each time you restart or disconnect your wheel)
7/10
To return to “Separate Pedals” mode (the default mode)
Action LED color
Simultaneously press and release:
the 2 pedals (13) + the “Home” button (6)
On PlayStation® 3
RED
Your pedals have now returned to the default mode: “Separate”
CONFIGURING THE PEDALS ON PC
Your wheel’s accelerator and brake controls are in “separate” (3 axes) mode by default, meaning that the
pedals function on independent axes.
3 axes mode allows you to considerably improve the precision of your driving.
If your game does not support 3 axes mode, your wheel’s pedals will not function properly. You will then
have to exit the game and select “combined” (2 axes) mode instead.
Mode LED color
Separate pedals (3 axes) RED
Combined pedals (2 axes) GREEN
Selecting axes via “Software”
(This setting will be saved even after you restart or disconnect your wheel)
On page 1 of the “Control Panel”: Select the mode you wish to use, then click OK.
Selecting axes via “Hardware”
(This setting will not be saved: It must be repeated each time you restart or disconnect)
(Allows you to select your mode directly in your game’s “Controls” options)
Simultaneously press and release: the 2 pedals (13) + the “Home” button (6)
8/10
TROUBLESHOOTING AND WARNINGS
My wheel doesn’t function correctly or appears to be improperly calibrated:
- Switch off your computer or your console, completely disconnect your wheel including all cables, then
reconnect the wheel and restart your game.
- If the problem persists on PC, download the “Thrustmaster Calibration Tool” manual calibration software
available at the following address: http://ts.thrustmaster.com
- Never move the wheel or pedals when connecting your wheel in order to avoid any calibration problems.
My pedal set does not work correctly:
- Reconfigure your wheel in your game’s controller options section.
- If the problem persists on PC, exit the game and switch the pedals to “combined” (2 axes) mode. You
can then return to your game to reconfigure the wheel with the new axes.
I can’t configure my wheel:
- On PS3: In your game’s “Options / Controller / Gamepads” menu: select the most appropriate
configuration.
- On PC: In your game’s “Options / Controller / Wheels” menu: select the most appropriate configuration.
- Please refer to your game’s user manual or online help for more information.
- You can also use your wheel’s “programming” function to resolve this type of problem.
On PC or PS3, my wheel does not work correctly:
- Exit your game, disconnect your wheel, verify that the “PC/PS3 ” USB selector (7) is in the proper
position, then reconnect everything and try again.
On PC, my game’s menus scroll by themselves:
- Exit the game and switch the pedals to “combined” (2 axes) mode. Then return to your game to
reconfigure the wheel with the new axes.
On PC, the vibrations are continuous:
- Decrease the intensity of force effects in your game’s controller options section or adjust the forces in the
wheel’s control panel.
- In your game’s controller options, select “Force type: Gamepad” (if the option is available).
My wheel’s steering is not responsive enough:
- Switch your wheel to high sensitivity mode.
9/10
TECHNICAL SUPPORT
If you encounter a problem with your product, please go to http://ts.thrustmaster.com
and click Technical
Support. From there you will be able to access various utilities (Frequently Asked Questions (FAQ), the
latest versions of drivers and software) that may help to resolve your problem. If the problem persists, you
can contact the Thrustmaster products technical support service (“Technical Support”):
By email
:
In order to take advantage of technical support by email, you must first register online. The information you
provide will help the agents to resolve your problem more quickly. Click Registration on the left-hand side
of the Technical Support page and follow the on-screen instructions. If you have already registered, fill in
the Username and Password fields and then click Login.
By telephone:
United Kingdom
08450800942
Charges at local rate
Monday to Friday from Noon to 4pm and 5pm to 10pm
Saturday from 9am to Noon and 1pm to 7pm
Sunday from 9am to Noon and 1pm to 4pm
United States
1-866-889-5036
Free
Monday to Friday from 7am to 11am and from Noon to 5pm
Saturday from 8am to 2pm
Sunday from 8am to 10am
(Eastern Standard Time)
Canada
1-866-889-2181
Free
Monday to Friday from 7am to 11am and from Noon to 5pm
Saturday from 8am to 2pm
Sunday from 8am to 10am
(Eastern Standard Time)
Denmark
80887690
Free
Monday to Friday from 1pm to 5pm and 6pm to 11pm
Saturday from 9am to 1pm and 2pm to 8pm
Sunday from 10am to 1pm and 2pm to 5pm
(English)
Sweden
0200884567
Free
Monday to Friday from 1pm to 5pm and 6pm to 11pm
Saturday from 9am to 1pm and 2pm to 8pm
Sunday from 10am to 1pm and 2pm to 5pm
(English)
Finland
0800 913060
Free
Monday to Friday from 2pm to 6pm and 7pm to Midnight
Saturday from 10am to 2pm and 3pm to 9pm
Sunday from 11am to 2pm and 3pm to 6pm
(English)
10/10
WARRANTY INFORMATION
Worldwide, Guillemot Corporation S.A. (“Guillemot”) warrants to the consumer that this Thrustmaster product will
be free from material defects and manufacturing flaws for a period of two (2) years from the original date of
purchase. Should the product appear to be defective during the warranty period, immediately contact Technical
Support, who will indicate the procedure to follow. If the defect is confirmed, the product must be returned to its
place of purchase (or any other location indicated by Technical Support).
Within the context of this warranty, the consumer’s defective product will, at Technical Support’s option, be either
repaired or replaced. Where authorized by applicable law, the full liability of Guillemot and its subsidiaries
(including for indirect damages) is limited to the repair or replacement of the Thrustmaster product. The
consumer’s legal rights with respect to legislation applicable to the sale of consumer goods are not affected by
this warranty.
This warranty shall not apply: (1) if the product has been modified, opened, altered, or has suffered damage as a
result of inappropriate or abusive use, negligence, an accident, normal wear, or any other cause not related to a
material defect or manufacturing flaw; (2) in the event of failure to comply with the instructions provided by
Technical Support; (3) to software not published by Guillemot, said software being subject to a specific warranty
provided by its publisher.
Additional warranty provisions
In the United States of America and in Canada, this warranty is limited to the product’s internal mechanism and
external housing. Any applicable implied warranties, including warranties of merchantability and fitness for a
particular purpose, are hereby limited to two (2) years from the date of purchase and are subject to the conditions
set forth in this limited warranty. In no event shall Guillemot Corporation S.A. or its affiliates be liable for
consequential or incidental damage resulting from the breach of any express or implied warranties. Some
States/Provinces do not allow limitation on how long an implied warranty lasts or exclusion or limitation of
incidental/consequential damages, so the above limitation may not apply to you. This warranty gives you specific
legal rights, and you may also have other legal rights which vary from State to State or Province to Province.
COPYRIGHT
© 2010 Guillemot Corporation S.A. All rights reserved. Thrustmaster
®
is a registered trademark of Guillemot
Corporation S.A. PlayStation
®
is a registered trademark of Sony Computer Entertainment Inc. Windows
®
is a
registered trademark of Microsoft Corporation. All other trademarks and brand names are hereby acknowledged
and are property of their respective owners. Illustrations not binding. Contents, designs and specifications are
subject to change without notice and may vary from one country to another. Made in China.
Retain this information. Colours and decorations may vary.
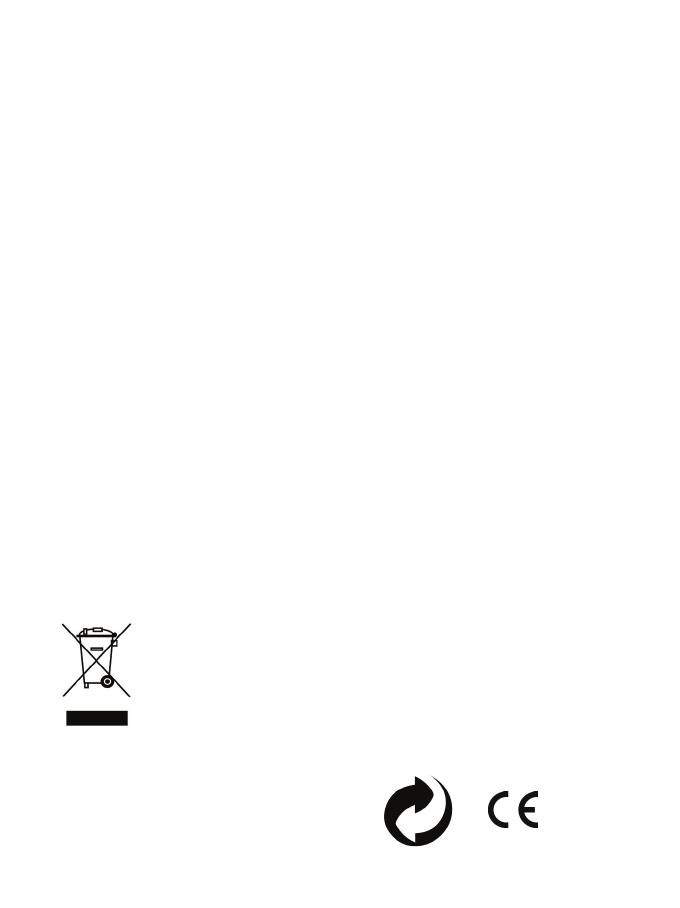
ENVIRONMENTAL PROTECTION RECOMMENDATION
At the end of its working life, this product should not be disposed of with standard household
waste, but rather dropped off at a collection point for the disposal of Waste Electrical and
Electronic Equipment (WEEE) for recycling.
This is confirmed by the symbol found on the product, user manual or packaging.
Depending on their characteristics, the materials may be recycled. Through recycling and
other forms of processing Waste Electrical and Electronic Equipment, you can make a
significant contribution towards helping to protect the environment.
Please contact your local authorities for information on the collection point nearest you.
Reference : 5075833
www.thrustmaster.com
9/10
SUPPORT TECHNIQUE
Si vous rencontrez un problème avec votre produit, rendez-vous sur le site http://ts.thrustmaster.com
et
cliquez sur Support Technique. Vous aurez alors accès à différents services (Foire Aux Questions
(FAQ), dernières versions des pilotes et logiciels) susceptibles de résoudre votre problème. Si le
problème persiste, vous pouvez contacter le support technique des produits Thrustmaster (« Support
Technique ») :
Par e-mail :
Pour bénéficier du support technique par e-mail, vous devez d’abord vous enregistrer en ligne. Les
informations fournies vont permettre aux techniciens de résoudre plus rapidement votre problème. Cliquez
sur Enregistrement à gauche de la page Support technique et suivez les instructions à l’écran. Si vous êtes
déjà enregistré, renseignez les champs Nom d’utilisateur et Mot de passe puis cliquez sur Connexion.
Par téléphone (si vous n’avez pas d’accès Internet) :
Canada
1-866-889-2181
Gratuit
Du lundi au vendredi de 7h à 11h et de 12h à 16h
Le samedi de 8h à 14h
Le dimanche de 8h à 10h
(Heure de l’Est)
France
02 99 93 21 33
Numéro fixe France Telecom
non surtaxé.
Tarif selon opérateur
Du lundi au vendredi de 13h à 17h et de 18h à 22h
Le samedi de 9h à 13h et de 14h à 20h
Le dimanche de 10h à 13h et de 14h à 17h
Suisse
0842 000 022
Tarif d’une communication
locale
Du lundi au vendredi de 13h à 17h et de 18h à 22h
Le samedi de 9h à 13h et de 14h à 20h
Le dimanche de 10h à 13h et de 14h à 17h
Belgique
078 16 60 56
Tarif d’une communication
nationale
Du lundi au vendredi de 13h à 17h et de 18h à 22h
Le samedi de 9h à 13h et de 14h à 20h
Le dimanche de 10h à 13h et de 14h à 17h
* Tarif indicatif (hors coût de mise en relation)
1/10
voor: pc / PlayStation® 3
Handleiding
TECHNISCHE KENMERKEN
1 Twee digitale schakelflippers (UP en DOWN)
2 LED
3 Actieknoppen
4 D-pad
5 SE- en ST-knoppen:
- voor SELECT en START
- voor programmeren
6 HOME-knop voor PlayStation® 3
7 USB-schakelaar (PC of PS3)
9/10
TECHNISCHE ONDERSTEUNING
Mocht u problemen ondervinden met dit product, ga dan naar http://ts.thrustmaster.com en klik op
Technical Support. U hebt daar toegang tot verschillende onderwerpen die u helpen bij het vinden van
oplossingen, zoals de FAQ (veelgestelde vragen) en de meest recente drivers en software. Als het
probleem op die manier niet kan worden verholpen, kunt u contact opnemen met de Thrustmaster product
technical support service (Technical Support).
Per e-mail:
Voordat u gebruik kunt maken van technische ondersteuning per e-mail dient u zich eerst online te
registreren. Met de door u verstrekte informatie kan uw probleem sneller en beter worden opgelost. Klik
op Registration aan de linkerzijde van de pagina Technical Support en volg de aanwijzingen op het
scherm. Indien u reeds geregistreerd bent, vult u de velden Username en Password in en klikt u op
Login.
Per telefoon:
* TIJDELIJK IS DE NEDERLANDSTALIGE TECHNISCHE DIENST ENKEL BEREIKBAAR VAN 13:00
TOT 17:00 EN VAN 18:00 TOT 22:00. TIJDENS DE ANDERE UREN KUNT U STEEDS TERECHT
VOOR ENGELS-, DUITS-, OF FRANSTALIGE SUPPORT.
Belgïe
078 16 60 56
Kosten van interlokaal
gesprek
Van maandag t/m vrijdag van 13:00 tot 17:00 en van 18:00 tot 22:00
(Nederlands)
Van maandag t/m vrijdag van 13:00 tot 17:00 en van 18:00 tot 22:00
Zaterdag van 9:00 tot 13:00 en van 14:00 tot 20:00
Zondag van 10:00 tot 13:00 en van 14:00 tot 17:00
(Engels)
Nederland
0900 0400 118
Kosten van lokaal
gesprek
Van maandag t/m vrijdag van 13:00 tot 17:00 en van 18:00 tot 22:00
(Nederlands)
Van maandag t/m vrijdag van 13:00 tot 17:00 en van 18:00 tot 22:00
Zaterdag van 9:00 tot 13:00 en van 14:00 tot 20:00
Zondag van 10:00 tot 13:00 en van 14:00 tot 17:00
(Engels)
3/10
УСТАНОВКА РУЛЯ
Крепление руля
1. Установите руль на стол или другую плоскую поверхность.
2. Установите зажимной винт (11) в зажим (10), затем ввинтите зажимное устройство в отверстие,
расположенное в нижней части руля. Затягивайте зажим до тех пор, пока руль не будет надежно
закреплен. Не затягивайте винт слишком туго во избежание повреждения
зажимного устройства
и (или) стола.
Подключение педалей
1. Подключите кабель педалей (8) к разъему руля RJ45 (9).
PLAYSTATION® 3
ПОДКЛЮЧЕНИЕ К PLAYSTATION® 3
1. Установите USB селектор руля (7) в положение PS3.
2. Подключите USB-разъем (12) к USB-порту на консоли.
3. Включите консоль.
4. Запустите игру.
Теперь можно начинать игру!
КНОПКА HOME (6)
С помощью кнопки “Home” руля можно выйти из игры и войти в меню системы PlayStation® 3.
ВАЖНЫЕ ЗАМЕЧАНИЯ ПО РАБОТЕ С PLAYSTATION® 3
- USB селектор руля (7) всегда должен быть установлен в положение “PS3” перед подключением
руля.
- В режиме одного игрока “1 Player”: Если контроллер (официальная версия) включен, необходимо
переключить его на “controller port 2”, чтобы руль работал.
- В приставке PlayStation® 3, руль совместим только с играми для PlayStation® 3 (и не будет
работать с играми PlayStation® 2).
- На приставке PlayStation® 3 не поддерживается эффект вибрации руля (только на ПК).
- В некоторых гоночных играх обязательно испытайте 2 режима чувствительности, чтобы повысить
точность и эффективность управления.
6/10
Удаление программирования
Этапы Действие Цвет светодиода
1
Нажмите и удерживайте в течение 2 секунд:
SE + ST (5)
ВЫКЛЮЧАЕТСЯ,
ЗАТЕМ
ВКЛЮЧАЕТСЯ
Пользовательская программа удалена.
НАСТРОЙКА ПЕДАЛЕЙ НА PLAYSTATION® 3
На PlayStation® 3 органы управления ускорением и тормозом находятся вотдельномрежиме по
умолчанию, то есть педали работают на независимых осях:
Ускорение” = триггер “R2” и “Brake” (Тормоз) = триггер “L2”
Для другого типа управления (например, чтобы снизить скольжение), можно переключить руль в
комбинированный” (2 оси) режим: педали будут работать на
одной оси.
- На PlayStation® 3:
Ускорение и Тормоз” = Направления Up/Down (Вверх/Вниз) направом мини-джойстике
Установка режимаОбъединенных педалей
Действие Цвет светодиода
Одновременно нажмите и отпустите:
2 педали (13) + кнопкуHome” (6)
ЗЕЛЕНЫЙ
Теперь педали объединены
(Эту процедуру нужно повторять каждый раз после перезапуска или отключения колеса)
7/10
Чтобы вернуться в режимОтдельные педали” (по умолчанию)
Действие
Цвет
светодиода
Одновременно нажмите и отпустите:
2 педали (13) + кнопкуHome” (6)
На PlayStation® 3
КРАСНЫЙ
Педали переключились в режим по умолчанию: “Отдельно
НАСТРОЙКА ПЕДАЛЕЙ НА ПК
Органы управления ускорением и тормозом руля находятся вотдельном” (3 оси) режиме по
умолчанию, то есть педали работают на независимых осях:
Режим 3 осей позволяет значительно улучшить точность вождения.
Если ваша игра не поддерживает режим 3 осей, то педали руля будут функционировать
неправильно. Вам придется выйти из игры и выбрать вместо этогокомбинированный” (2 оси)
режим.
Режим Цвет светодиода
Отдельные педали (3 оси) КРАСНЫЙ
Объединенные педали (2 оси) ЗЕЛЕНЫЙ
"Программный" выбор осей
(Эти установки сохранятся даже после перезапуска или отключения колеса)
На странице 1 “Панели Управления”: Выберите требуемый режим и нажмите OK.
"Аппаратный" выбор осей:
(Эти установки не сохранятся: Установки нужно повторять каждый раз после перезапуска или
отключения)
(Это позволяет выбирать режим непосредственно в
параметрах "Controls" (Органы
управления) игры.)
Одновременно нажмите и отпустите: 2 педали (13) + кнопкуHome” (6)
CouvQI_FGT3in1RF_5075833.indd 1 19/08/10 19:05:04
  • Page 1 1
  • Page 2 2
  • Page 3 3
  • Page 4 4
  • Page 5 5
  • Page 6 6
  • Page 7 7
  • Page 8 8
  • Page 9 9
  • Page 10 10
  • Page 11 11
  • Page 12 12
  • Page 13 13
  • Page 14 14
  • Page 15 15
  • Page 16 16
  • Page 17 17
  • Page 18 18
  • Page 19 19
  • Page 20 20
  • Page 21 21
  • Page 22 22
  • Page 23 23
  • Page 24 24
  • Page 25 25
  • Page 26 26
  • Page 27 27
  • Page 28 28
  • Page 29 29
  • Page 30 30
  • Page 31 31
  • Page 32 32
  • Page 33 33
  • Page 34 34
  • Page 35 35
  • Page 36 36
  • Page 37 37
  • Page 38 38
  • Page 39 39
  • Page 40 40
  • Page 41 41
  • Page 42 42
  • Page 43 43
  • Page 44 44
  • Page 45 45
  • Page 46 46
  • Page 47 47
  • Page 48 48
  • Page 49 49
  • Page 50 50
  • Page 51 51
  • Page 52 52
  • Page 53 53
  • Page 54 54
  • Page 55 55
  • Page 56 56
  • Page 57 57
  • Page 58 58
  • Page 59 59
  • Page 60 60
  • Page 61 61
  • Page 62 62
  • Page 63 63
  • Page 64 64
  • Page 65 65
  • Page 66 66
  • Page 67 67
  • Page 68 68
  • Page 69 69
  • Page 70 70
  • Page 71 71
  • Page 72 72
  • Page 73 73
  • Page 74 74
  • Page 75 75
  • Page 76 76
  • Page 77 77
  • Page 78 78
  • Page 79 79
  • Page 80 80
  • Page 81 81
  • Page 82 82

Thrustmaster Ferrari GT Experience Owner's manual

Type
Owner's manual

Ask a question and I''ll find the answer in the document

Finding information in a document is now easier with AI