Page is loading ...

SAFETY GUIDELINES
TRAMPOLINE PARTS LIST
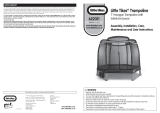
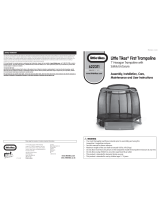
JUNIOR TRAMPOLINE - MO8681
FOR CHILDREN AGED 3+ YEARS
WARNING: Only one child at a time. Maximum weight 30kg.
Not suitable for children under three years, contains small parts and long elastic.
Adult supervision is required at all times.
Not for children with a body weight more than 30kg.
This equipment must be assembled and checked by an adult.
Two adults may be required for assembly.
For family domestic use only.
Suitable for indoor and outdoor use.
Please retain complete instructions for future reference.
Leave all fittings finger tight until assembly is complete, for ease of construction then tighten firmly.
Do not allow loose, hooded or baggy clothes to be worn since children can get trapped and may be unable to free
themselves.
Do not allow more than one child on the equipment at any one time.
Do not allow children on the equipment on any parts not intended for this purpose.
Do not position equipment on hard or abrasive surfaces such as tarmac or gravel. Position on soft ground, ideally
grass away from hazardous obstructions which will be which will reduce the risk of injury from falls.
Place the product on level surface at least 2 metres from any structures, obstructions or obstacles such as fences,
walls, overhanging branches, laundry lines, electrical wires, ponds, power lines, bushes or buildings.
Remove any obstructions from beneath the trampoline.
Bounce on mat only when dry.
Do not orientate trampoline directly towards the sun.
Check regularly all nuts, bolts and fittings for tightness and tighten if required. Failure to do so could result in injury.
Regularly check the items for wear and damage, removing the item from use until replacement parts are fitted or
repairs are carried out.
Failure to assemble and maintain this item as per instruction may cause injury to the user.
Check rope regularly for deterioration in the fibres and replace when necessary.
Check all coverings for bolts and sharp edges and replace when required.
Do not attempt or allow somersaults. Landing on head or neck can cause very serious injury.
Please keep this information for reference.
Made in China to European Standards.
Conforms to EN71
05.04.07 ISSUE 2
Long Bolt x 4
Spanner x 1
Allen Key x 1
Short Bolt x 4
IMPORTANT: Make sure you read the safety notice on the front page and always supervise
children while they are playing on the equipment. Once assembly is completed carefully check
equipment. In the unlikely event that you do find any problems, please contact us. Do not allow
children to use this product until the problem has been corrected.
1
1
F1
F2
2
2
2
2
3
3
4
4
5
5
6
7
7
8
9
CUSTOMER SERVICES
MV has taken great care to ensure that this toy has reached
you in good condition. Should you have a query, please contact:
[email protected] where your query will be
dealt with promptly. Alternatively, you can call on 0870 8404255.
MV Sports & Leisure Ltd.
35 Tameside Drive
Castle Bromwich
Birmingham B35 7AG
United Kingdom
email: [email protected]
www.mvsports.com
Handle tube

STEP 2
Handle Assembly
STEP 3
Legs & Handle Assembly
STEP 4
Mat Assembly
1
1
1 2 3 4 5
4
3
Threading - Mat
Starting at one corner, thread the elastic cord around the legs and up through two mat eyelets as shown, ensuring that
both lengths of the elastic cord are of equal length.
Please note that two adults may be required to pull the elastic cord around the trampoline frame.
First Corner
Start threading elastic cord to frame,
ensuring the elastic cord is as tight
as possible.
Middle Changeover
Change threading pattern after eyelet 2 by
taking the elastic cord around the leg tube
and pushing it down through eyelet 3 and
around leg tube. Repeat until side is threaded.
Second Corner
When eyelet 5 is reached thread
the elastic cord around the corner
as shown and repeat until remaining
three sides are threaded.
Hooking The Elastic Cord
A. When both ends of the elastic cord have threaded the last eyelet, push the flexible plastic sleeve over the end
and thread the metal hook through the eyelet in the elastic cord.
B. Wrap it around 2 times with the hook facing inwards and positioned underneathe the mat.
C. Hook on the other side of the elastic cord and cover the joint with the plastic sleeve.
D. For safety reasons, the elastic cord must be wrapped around the final leg two times.
Please take care when hooking the elastic cord around the final leg of the frame, as tension in the elastic cord will be high.
67
5
76
Long Bolt x 4
Leg
Handle
Leg
F2
F2
21
2
Short Bolt x 4
F1
F1
22
2
89
Spanner x 1 Allen Key x 1
STEP 1
Leg Assembly
Ensure both spring clips lock
into place when you fit poles
1 and 5 together
Spring Clip
Spring Clip
5
Clip facing inwards

STEP 5
Aligning The Trampoline
The trampoline mat and frame may need to be re-centred and re-aligned upon hooking the elastic
around the trampoline legs due to high tension in the elastic.
• Please ensure the gap between the mat and the frame is equal on all four sides by loosening or
tightening the cord where appropriate.
• If necessary please realign the frame by pushing the two opposing corner legs in an inwards direction
to make the fame even.
/