Samsung HW-H355 User manual

Category
Bluetooth music receivers
Type
User manual
Wireless Audio - Soundbar
(Active Speaker System)
user manual
imagine the possibilities
Thank you for purchasing this Samsung product.
To receive more complete service,
please register your product at
www.samsung.com/register
HW-H355
2
features
SoundConnect
SoundConnect lets you play TV audio from a Bluetooth compliant Samsung TV on your Wireless Audio - Soundbar via a Bluetooth
connection, and control the sound.
3D SOUND PLUS
The 3D SOUND PLUS feature adds depth and spaciousness to your listening experience.
Special Sound mode
You can select from 5 different sound modes - MUSIC, VOICE, SPORTS, CINEMA, and STANDARD - depending on the type of
content you want to enjoy.
Multi-function Remote Control
You can use the remote control supplied with your Soundbar to control the TV connected to this unit. (Works only for Samsung
TVs.)
The remote control has a TV hotkey that enables you to perform various operations with the simple press of a button.
Active Speaker System
This unit features an Active Speaker System that provides high sound quality in a single slim unit.
This unit does not require any satellite loudspeakers or speaker cabling, which are normally associated with conventional surround
sound systems.
USB Host support
You can connect and play music files from external USB storage devices such as MP3 players,
USB thumb drives, etc. using the Soundbar's USB HOST function.
Bluetooth Function
You can connect a Bluetooth device to the Soundbar and enjoy music with high quality stereo, all without wires!
LICENSE
2.0 Channel
Manufactured under license from Dolby Laboratories. Dolby and the double-D symbol are trademarks of Dolby Laboratories.
For DTS patents, see http://patents.dts.com. Manufactured under license from DTS Licensing Limited.DTS,the Symbol, &
DTS and the Symbol together are registered trademarks, and DTS 2.0 Channel is a trademark of DTS, Inc. © DTS, Inc. All
Rights Reserved.
2.0 Channel
3
ENG
safety information
SAFETY WARNINGS
TO REDUCE THE RISK OF ELECTRIC SHOCK, DO NOT REMOVE THE COVER(OR BACK).
NO USER-SERVICEABLE PARTS ARE INSIDE. REFER SERVICING TO QUALIFIED SERVICE PERSONNEL.
CAUTION
RISK OF ELECTRIC SHOCK
DO NOT OPEN
This symbol indicates “dangerous voltage”
inside the product that presents a risk of
electric shock or personal injury.
This symbol indicates important instructions
accompanying the product.
WARNING : To reduce the risk of fire or electric shock, do not expose this appliance to rain or moisture.
CAUTION : TO PREVENT ELECTRIC SHOCK, MATCH WIDE BLADE OF PLUG TO WIDE SLOT, FULLY INSERT.
This apparatus shall always be connected to a AC outlet with a protective grounding connection.
To disconnect the apparatus from the mains, the plug must be pulled out from the mains socket, therefore the mains
plug shall be readily operable.
CAUTION
Do not expose this apparatus to dripping or splashing. Do not put objects filled with liquids, such as vases on the
apparatus.
To turn this apparatus off completely, you must pull the power plug out of the wall socket. Consequently, the power
plug must be easily and readily accessible at all times.
4
PRECAUTIONS
3.9 inch 3.9 inch
2.7 inch
3.9 inch
99.1mm
99.1mm
99.1mm
68.6mm
Ensure that the AC power supply in your house complies with the power requirements listed on the identification sticker located on the
back of your product. Install your product horizontally, on a suitable base (furniture), with enough space around it for ventilation (3~4 inch-
es, 7~10 cm). Make sure the ventilation slots are not covered. Do not place the
unit
on amplifiers or other equipment which may become
hot. This
unit
is designed for continuous use. To fully turn off the unit, disconnect the AC plug from the wall outlet. Unplug the unit if you
intend to leave it unused for a long period of time.
During thunderstorms, disconnect the AC plug from the
wall outlet. Voltage peaks due to lightning could damage the unit.
Protect the product from moisture (vases, coffee cups, etc.), and excess
heat (fireplaces, heaters, etc.) or equipment creating strong magnetic or
electric fields. Disconnect the power cable from the AC supply if the unit
malfunctions. Your product is not intended for industrial use. This product
is for personal use only.
Condensation may occur if your
product
has been stored in cold temper-
atures. If transporting the
unit
during the winter, wait approxi
mately 2 hours
until the unit has reached room temperature before using.
Do not expose the unit to direct sunlight or other heat sources.
This could lead to overheating and cause the unit to malfunction.
The batteries used with this product contain chemicals that are harmful to
the environment.
Do not dispose of batteries in the general household trash.
Do not dispose of batteries in a fire.
Do not short circuit, disassemble or overheat the batteries.
Danger of explosion if battery is incorrectly replaced.
Replace only with the same or equivalent type.
Phones
5
ENG
contents
FEATURES
2 Features
2 License
2
SAFETY INFORMATION
3 Safety warnings
4 Precautions
3
GETTING STARTED
6 Before reading the user’s manual
6 What’s included
6
DESCRIPTIONS
7 Front Panel
8 Rear Panel
8 Installing the ferrite core on the Subwoofer
speaker cable
7
REMOTE CONTROL
9 Tour of the remote control
9
CONNECTIONS
11 Installing the wall mount
12 Connecting an external device using Audio
(Analog) cable or Optical (Digital) cable
11
FUNCTIONS
13 Input mode
13 Bluetooth
15 SoundConnect
16 USB
17 Using the remote control
20 Software upgrade
13
TROUBLESHOOTING
21 Troubleshooting
21
APPENDIX
22 Specifications
22
6
BEFORE READING THE USER’S MANUAL
Note the following terms before reading the user manual.
Icons used in this manual
Icon Term Definition
Caution
Indicates a situation where a function does not operate or settings may be
canceled.
Note
Indicates tips or instructions on the page that help you operate a function.
Safety Instructions and Troubleshooting
1) Be sure to familiarize yourself with the Safety Instructions before using this product. (See page 3)
2) If a problem occurs, check Troubleshooting. (See page 21)
Copyright
©2014 Samsung Electronics Co.,Ltd.
All rights reserved; no part or whole of this user’s manual may be reproduced or copied without the prior
written permission of Samsung Electronics Co.,Ltd.
getting started
WHAT’S INCLUDED
Check for the supplied accessories shown below.
POWER
TV POWER
AH59-02548A
TV VOL TV CH AUDIO SYNC
AUX USB TV SOURCE
TV PRE-CH
TV EXIT
SMART VOLUMESOUND EFFECT
S/W
LEVEL
S/W
LEVEL
VOL
VOL
3D SOUND
PLUS
DRC
TV INFOTV MUTE
AUTO POWER
DIMMERREPEAT
OPTICAL
MUTE
(Screw:2EA)
(Holder-screw:2EA)
Remote Control /
Batteries (AAA size)
User Manual Bracket-Wall Mount Screw USB Cable
Power Cord Adapter Audio Cable Toroidal Ferrite Core Wall Mount Guide
The appearance of the accessories may differ slightly from the illustrations above.
Use the dedicated USB cable to connect external USB devices to the unit.
(Wall Mount L: 1EA)
(Wall Mount R: 1EA)
7
ENG
DESCRIPTIONS
descriptions
FRONT PANEL
POWER BUTTON
Turns the Wireless Audio - Soundbar on and off.
FUNCTION
BUTTON
Selects the D.IN, AUX, BT, TV, USB input.
- While the Soundbar is on, pressing the
(
)
button for more than
3 seconds sets the button to act as MUTE button.
To cancel MUTE button setup, press
(
)
button for more than 3
seconds again.
VOLUME +/-
Controls the volume level.
DISPLAY
Displays the current mode.
When you turn on this unit, there will be a 4 to 5 second delay before it produces sound.
1 2 3
4
8
SUBWOOFER
CONNECTOR
TERMINAL
Connects the connector jack of the Subwoofer.
POWER SUPPLY
IN
1. Connect the AC adaptor's power cord to the AC power supply.
2.
Connect the AC power adaptor's mini-plug to Power Supply In on the unit.
3. Connect the AC adapter's power cord to a wall outlet.
USB PORT
Connect USB devices such as MP3 players here to the play files on
the devices.
- Use the supplied USB Cable if you have installed the product on a
wall.
OPTICAL IN
Connect to the digital (optical) output of an external device.
5
AUX IN
Connect to the Analog output of an external device.
When disconnecting the power cable of the AC power adaptor from the wall outlet, pull
the plug. Do not pull the cable.
Do not connect this unit or other components to an AC outlet until all connections
between components are complete.
descriptions
REAR PANEL
INSTALLING THE FERRITE CORE ON THE SUBWOOFER SPEAKER CABLE
Lift up to release the lock
and open the core.
Place the Subwoofer
speaker cable on the
opened core.
Close the lock.
3
AUX IN
AUDIO
OUT
L
R
AUDIO
OUT
L
R
OPTICAL IN
OPTICAL
OUT
OPTICAL
OUT
Red
White
Red
White
OPTICAL INAUX IN
AUX IN
AUDIO
OUT
L
R
AUDIO
OUT
L
R
OPTICAL IN
OPTICAL
OUT
OPTICAL
OUT
Red
White
Red
White
45
1
2
9
ENG
REMOTE CONTROL
remote control
TOUR OF THE REMOTE CONTROL
POWER BUTTON
Turns the Wireless Audio -
Soundbar on and off.
REPEAT
Select Repeat File, All, Random.
TV POWER BUTTON
Turns your Samsung TV on and off.
AUX
Press the AUX mode.
POWER TV POWER
TV VOL TV CH AUDIO SYNC
AUX TV SOURCE
TV PRE-CH
DIMMER
SMART VOLUMESOUND EFFECT
VOL
VOL
TONE
TV INFOTV MUTE
OPTICAL
MUTE
S/W
LEVEL
S/W
LEVEL
3D SOUND
PLUS
AUTO POWER
SoundConnect
USB/
REPEAT
CONTROL BUTTON
Play, pause, or stop playing
a music file, or search forwards or
backwards for a music file.
OPTICAL
Press the Optical mode.
SOUND EFFECT
Selects the Sound Effect:
(MUSIC, VOICE, SPORTS,
CINEMA, and STANDARD)
S/W LEVEL, VOLUME
Adjusts the Subwoofer level.
Adjusts the volume level of the unit.
USB, BLUETOOTH
Press the USB/ BLUETOOTH mode.
TV SOURCE
Press to select a connected TV's
video source.
SoundConnect
This produces TV sound on your
Soundbar via a Bluetooth connection
and controls the sound.
AUDIO SYNC
Used to help sync video to audio
when connected to a digital TV.
AUTO POWER
Synchronizes the Soundbar to a
connected Optical source via the
Optical jack so it turns on automatically
when you turn on your TV.
TV VOLUME
Adjusts the TV volume level.
TV CHANNEL
Switches between the available TV
channels.
TV MUTE
Mutes the sound from the TV. Press
again to restore the sound to the
previous volume level.
SMART VOLUME
Regulates and stabilizes the volume
level against a drastic volume change.
3D SOUND PLUS
This feature adds depth and
spaciousness to the sound.
TV INFO, TV PRE-CH
Displays the current TV status.
Moves to the previous TV channel.
DIMMER
You can control the brightness of the
Display.
TONE
Individual BASS, TREBLE adjustment. Use
VOL adjustment keys.
MUTE
Mutes the sound from the unit.
Press again to restore the sound to
the previous volume level.
10
remote control
Surround Sound Expansion Technology is Powered by Sonic Emotion.
The remote control can operate TVs made by SAMSUNG only.
Depending on the TV you are using, you may not be able to operate your TV with this remote
control. If you can't, operate the TV using the TV's remote control.
Installing batteries in the Remote Control
1.
Lift the cover at the back of
the remote control upward as
shown.
2.
Install two AAA size batteries.
Make sure to match the “+” and “–” ends
of the batteries with the diagram inside the
compartment.
3.
Replace the cover.
Assuming typical TV usage,
the batteries last for about
one year.
Operational Range of the Remote Control
You can use the remote control up to 23 feet (7 meters) in a straight line from the unit. You can also operate the
remote at a horizontal angle of up to 30° from the remote control sensor.
11
ENG
CONNECTIONS
connections
INSTALLING THE WALL MOUNT
You can use the wall mount bracket to mount this unit on a wall.
Installation Precautions
• Install on a vertical wall only.
• For the installation, avoid a location with high temperature or humidity, or a wall that cannot sustain the weight of the set.
• Check the strength of the wall. If the wall is not strong enough to support the unit, reinforce the wall or install the unit on a different wall
that can support the unit's weight.
• Purchase and use the fixing screws or anchors appropriate for the kind of wall you have (plaster board, iron board, wood, etc.). If
possible, fix the support screws into wall studs.
• Purchase wall mounting screws according to the type and thickness of the wall you will mount the Soundbar on.
• Diameter : M5
• Length: 1 3/8 in (35 mm) or longer recommended.
• Connect cables from the unit to external devices before you install it on the wall.
• Make sure the unit is turned off and unplugged before you install it. Otherwise, it may cause an
electric shock.
Do not hang onto the installed unit and avoid any impact to the unit.
Secure the unit firmly to the wall so that it does not fall off. If the unit falls off, it may cause an injury or damage the
product.
When the unit is installed on a wall, please make sure that children do not pull any of the connecting cables, as it
may cause it to fall.
For the optimal performance of a wall mount installation, install the speaker system at least 2 inches (5 cm) below
the TV.
For your safety, if you do not mount the unit on the wall, install it on a secure, flat surface where it is unlikely to fall.
1. Place the installation guide against the wall surface.
• The installation guide must be placed parallel to the wall.
• Installation should be done at least 2 inches (5 cm) below the TV.
2. Mark the location where the screws will go through on the wall using a
pen, and then remove the installation guide.
3. Fasten the wall mount and screw to the marked location.
• The left and right mounts are different shapes.
4. Secure the two holder screws to the screw holes on the back of the
Soundbar's main body, one on the left and one on the right.
5. Insert the USB cable into the unit before installing it on the wall.
6. Set the holder screws on the back of the Soundbar into the grooves of the
wall mount.
For safe installation, make sure to push the holder screws all the way to
the bottom of the grooves.
Detaching the Wall Mount
1 .Pull the Soundbar upwards as shown in the figure to separate it from the wall mount.
Using the Soundbar with Wall Mount
[Wall Mounting the Soundbar]
[Detaching the Soundbar from the Wall Mount]
Using the Soundbar with Wall Mount
2 inches(5 cm) or more
12
connections
CONNECTING AN EXTERNAL DEVICE USING AUDIO (ANALOG)
CABLE OR OPTICAL (DIGITAL) CABLE
This unit comes equipped with one optical in digital jack and one audio analog in jack, giving you two ways to
connect it to a TV.
or
HDMI IN
AUX IN
AUX IN
AUDIO
OUT
L
R
AUDIO
OUT
L
R
OPTICAL IN
OPTICAL
OUT
OPTICAL
OUT
Red
White
Red
White
Audio Cable
AUX IN
AUDIO
OUT
L
R
AUDIO
OUT
L
R
OPTICAL IN
OPTICAL
OUT
OPTICAL
OUT
Red
White
Red
White
Optical Cable
(not supplied)
BD/DVD player/
Set-top box/
Game console
AUX IN
Connect AUX IN (Audio) on the main unit to the AUDIO OUT of
the TV or Source Device.
Be sure to match connector colors.
or,
OPTICAL IN
Connect the Digital Input on the main unit to the OPTICAL OUT of
the TV or Source Device
.
Do not connect the power cord of this product or your TV to the wall outlet until all
connections between components are
complete.
Before moving or installing this product, be sure to turn off the power and disconnect the power
cord.
13
ENG
FUNCTIONS
functions
INPUT MODE
You can select D.IN, AUX, BT, TV input or USB input.
Press an appropriate button on the remote control to select a desired mode, or press (
) to select one from:
D.IN, AUX, BT, TV or USB mode.
Input mode Display
Optical Digital input
D.IN
AUX input
AUX
BLUETOOTH mode
BT
TV mode
TV
USB mode
USB
The unit turns off automatically in the following situations:
BT/TV/USB/D.IN MODE
- If there is not connected for about 25 minutes.
AUX Mode
- When the AUX cable is connected, if no key is pressed on the remote or unit panel for about 8 hours.
- If the AUX cable is disconnected for about 25 minutes.
Use the provided cable if a USB flash memory device cannot be connected directly to the unit.
BLUETOOTH
You can use a Bluetooth device to enjoy music with high quality stereo sound, all without wires!
What is Bluetooth?
Bluetooth is a technology that enables Bluetooth-compliant devices to interconnect easily with each other using
a short wireless connection.
• A Bluetooth device may cause noise or malfunction, depending on usage, when:
- A part of your body is in contact with the receiving/transmitting system of the Bluetooth device or the
Soundbar.
- It is subject to electrical variation from obstructions caused by a wall, corner, or office partition.
- It is exposed to electrical interference from same frequency-band devices including medical equipment,
microwave ovens, and wireless LANs.
• Pair the Soundbar with the Bluetooth device while they are close together.
• The further the distance is between Soundbar and Bluetooth device, the worse the quality is.
If the distance exceeds the Bluetooth operational range, the connection is lost.
• In poor reception-sensitivity areas, the Bluetooth connection may not work properly.
• The Bluetooth connection only works when the Bluetooth device is close to the set. The connection will be
automatically cut off if the Bluetooth device is out of range. Even within range, the sound quality may be
degraded by obstacles such as walls or doors.
• This wireless device may cause electric interference during its operation.
POWER
TV POWER
POWER
TV POWER
AH59-02548A
TV VOL TV CH AUDIO SYNC
AUX TV SOURCE
TV PRE-CH
DIMMER
SMART VOLUMESOUND EFFECT
VOL
VOL
DRC
TV INFOTV MUTE
OPTICAL
MUTE
S/W
LEVEL
S/W
LEVEL
3D SOUND
PLUS
AUTO POWER
SoundShare
USB/
REPEAT
PO
WER
TV P
O
WER
AH5
9
-
02
54
8A
T
V VOL TV
C
H AUDIO SYN
C
AU
X
TV SOURC
E
TV PRE-
CH
DIMME
R
S
MART V
O
LUM
E
SO
UND EFFE
C
T
VO
L
VO
L
DR
C
TV INF
O
TV MUTE
O
PTICA
L
M
UT
E
S
/W
LEVE
L
S
/W
LEVE
L
3D SOUND
3
P
LU
S
A
U
T
O
P
O
WER
Sou
n
dS
h
a
r
e
USB
/
REPEAT
OPTICAL AUX
USB/
14
functions
To connect the Soundbar to a Bluetooth device
Check if the Bluetooth device supports the Bluetooth compliant stereo headset function.
Connect
Bluetooth device
1.
Press the USB/Bluetooth button on the remote control of the Soundbar to display the BT message.
You will see BT READY on the front display of the Soundbar.
2.
On the Bluetooth device you want to connect, open the Bluetooth menu.(Refer to the Bluetooth
device's user manual.)
3.
Select the Stereo headset menu on the Bluetooth device.
You will see a list of scanned devices.
4. Select "[Samsung] Soundbar" from the list.
When the Soundbar is connected to the Bluetooth device, it will display Device name
BT on the front
display.
If the Bluetooth device has failed to pair with the Soundbar, delete the previous “[Samsung] Soundbar”
found by the Bluetooth device and have it search for the Soundbar again.
If the Soundbar is in another mode (except TV mode), you can shift it to Bluetooth mode using your smart
device.
5. Play music on the connected device.
• You can listen to the music playing on the connected Bluetooth device over the Wireless Audio - Soundbar
system.
• In BT mode, Repeat functions are not available. For some Bluetooth device, Play/Stop/Next/Prev function
are not available.
You may be required to enter a PIN code (password) when connecting the Bluetooth device to
the Soundbar. If the PIN code input window appears, enter <0000>.
The Soundbar supports SBC data (44.1kHz, 48kHz).
The AVRCP feature is supported.
Connect only to a Bluetooth device that supports the A2DP (AV) function.
You cannot connect to a Bluetooth device that supports only the HF (Hands Free) function.
Only one Bluetooth device can be paired at a time.
Once you have turned off Soundbar and the pairing is disconnected, the pairing will not be
restored automatically. To reconnect, you must pair the device again.
The Soundbar may not run the Bluetooth Search or Connection functions properly in the following
cases:
- If there is a strong electrical field around Soundbar.
- If several Bluetooth devices are simultaneously paired with Soundbar.
- If the Bluetooth device is turned off, not in place, or malfunctions
- Note that such devices as microwave ovens, wireless LAN adaptors, fluorescent lights, and gas
stoves use the same frequency range as the Bluetooth device, which can cause electric
interference.
15
ENG
FUNCTIONS
To disc
onnect the Bluetooth device from the Soundbar
You can disconnect the Bluetooth device from the Soundbar.
For instructions, see the Bluetooth device's user manual.
The Soundbar will be disconnected.
When the Soundbar is disconnected from the Bluetooth device, the Soundbar will display
BT DISCONNECTED on the front display.
To disconnect the Soundbar from the Bluetooth device
Press the ( ) button on the front panel of the Soundbar to switch from BT to another mode or turn off the Soundbar.
The connected Bluetooth device will wait a certain amount of time for a response from the Soundbar before
terminating the connection. (Disconnection time may differ, depending on the Bluetooth device)
The currently connected device will be disconnected.
In Bluetooth connection mode, the Bluetooth connection will be lost if the distance between the
Soundbar and the Bluetooth device exceeds 16.25 ft. (5m).
If the Bluetooth device comes back into the effective range after disconnecting, you can restart the
Soundbar to restore the pairing with the Bluetooth device.
Using the Bluetooth Power On
When the Soundbar is turned off, connecting your smart device to the Soundbar via Bluetooth connection to
turn it on.
Pair your smart device with the Soundbar via Bluetooth. (For information on Bluetooth connection, refer to
your smart device’s manual.)
Turn the Soundbar off, and then press and hold the F. button on the Soundbar front panel until the Soundbar
displays Bluetooth Power On.
Now, whenever the Soundbar is off, and you initiate a Bluetooth connection with your smart device, the
Soundbar will turn itself on automatically in Bluetooth mode.
Select the desired music to play from your smart device.
SOUNDCONNECT
SoundConnect lets you play TV audio from a Bluetooth compliant SAMSUNG TV on your Wireless Audio -
Soundbar via a Bluetooth connection.
To produce TV sound on your Soundbar via a Bluetooth connection, you need to pair your Soundbar to a Bluetooth compliant TV. Once
the pairing is established, the pairing information is recorded and kept. No further Bluetooth connection messages will appear.
Bring the Soundbar and the TV close together before pairing.
The unit will play the TV's audio when it is set to SoundConnect mode and paired with the TV.
If you change to another mode, other than TV mode, or turn off the Soundbar, you will hear audio from the TV’s speakers again.
To connect the Soundbar to a Bluetooth compatible Samsung TV
1.
Turn on the Samsung TV and Soundbar.
2.
Set Add New Device in the TV’s SoundConnect Setting menu to On.
Depending on your TV, the TV’s Setting menu may have a SoundShare menu item instead of a SoundConnect menu item.
3.
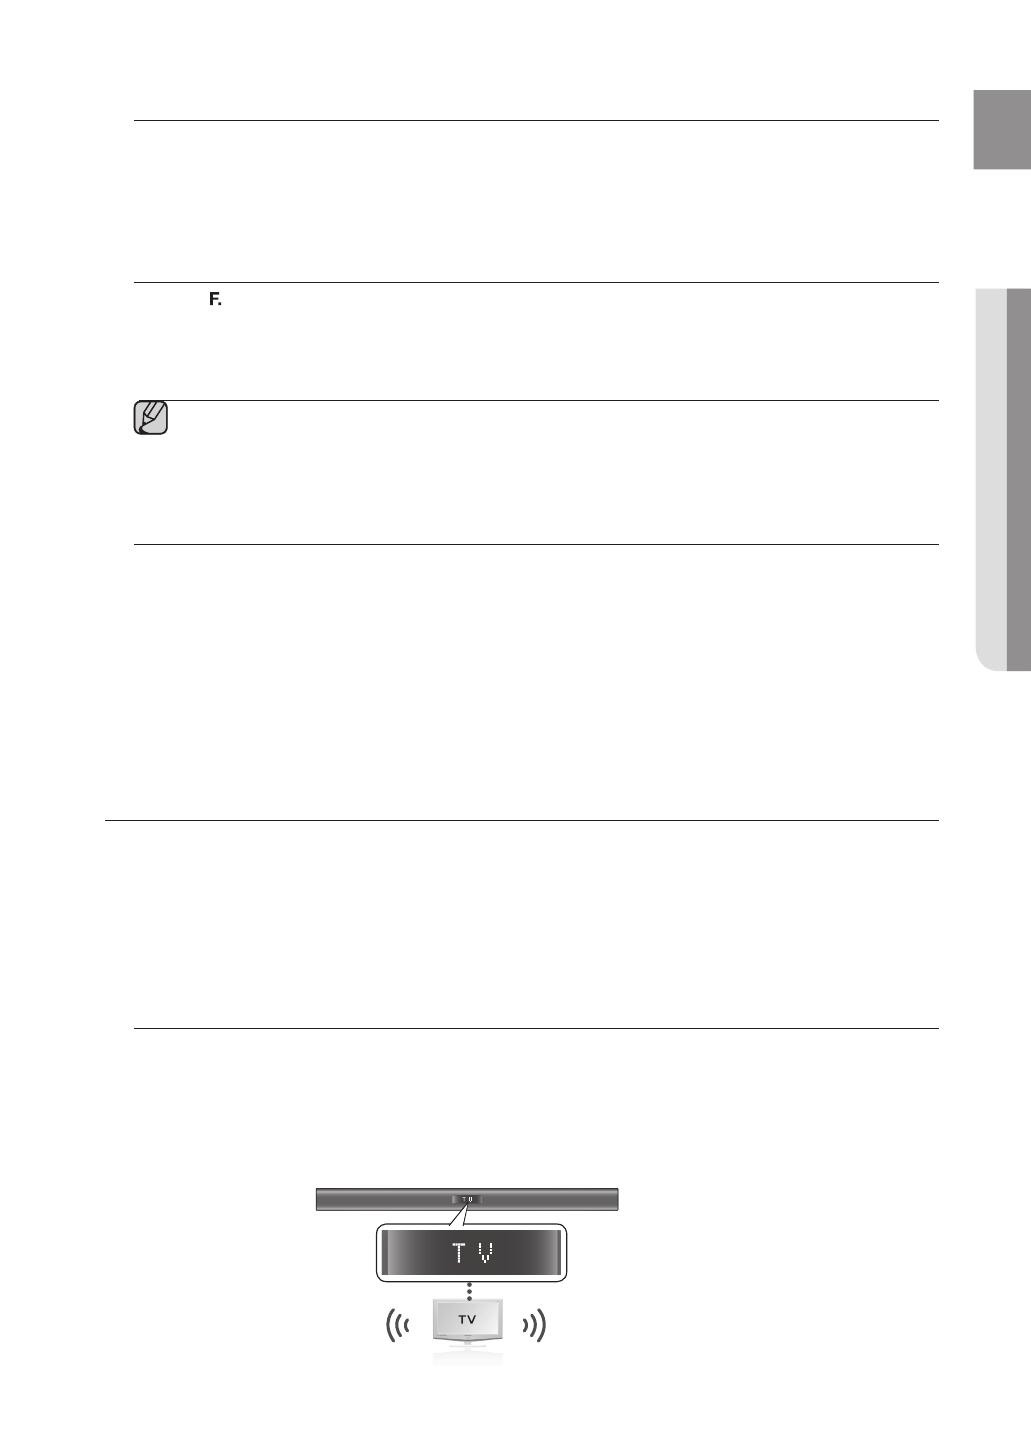
Press the (F.) button to change the mode of the Soundbar to TV. A message asking whether to proceed with Bluetooth
pairing and “[Samsung] Soundbar” appears on the TV screen.
4.
Select <Yes> on the TV screen. The TV pairs with the Soundbar.
Connect
16
functions
•Once the pairing is established, when you change the Soundbar to the TV mode from other input modes, it will
automatically connect to the TV.
•The Soundbar will play the TV's audio when it is connected to the TV.
•Changing the Soundbar from TV mode to any other mode will cancel the SoundConnect connection.
•If you want to cancel the existing pairing of the Soundbar to a TV and pair your Soundbar to a different TV:
- Press the PLAY/PAUSE button on the Soundbar for 5 seconds in the TV input mode to cancel the existing
pairing. You can now pair it to a different TV.
- In the SoundConnect mode, you can control the volume and mute using either the TV remote or the
Soundbar remote.
TV SoundConnect operation range
- recommended pairing range: within 20 inches (within 50cm)
- recommended operation range: within 16.25 ft. (5m)
If the distance between the Soundbar and Samsung TV is over 16.25 ft. (5m), the connection or the
sound can be cut off. If this occurs, connect to the Samsung TV again within the operational range.
Make sure the Samsung TV's SoundConnect mode is on before you use this function.
The PLAY, NEXT, PREV, STOP buttons will not work in the SoundConnect mode.
Bluetooth Power On function
- The Soundbar will be powered on automatically when you turn the TV on if you connected the TV and
Soundbar with the SoundConnect function.
- You can toggle this function On/Off by pressing (
) button of front panel over 5 seconds when Soundbar
is powered off. If set to Off, the product turns off automatically when the TV turns off, but it does not turn
on automatically.
- This feature is supported by TVs released beginning in 2013.
The SoundConnect feature is supported by select models released from 2012. Check whether your TV
supports SoundConnect(SoundShare) before you begin. (For more information, refer to the user's
guide of your TV.)
USB
1.
Connect the USB device to the USB port on the side of the unit.
2.
Press the (
) button on the front panel of the Soundbar repeatedly until USB appears.
3.
USB appears on the display screen and then disappears.
•The Wireless Audio - Soundbar connection is complete.
Before you connect a USB device
Be aware of the following:
If the file name of a folder on a USB device exceeds 10
characters, it is not shown on the Soundbar's display.
This product may not be compatible with certain types of USB
storage media.
The Soundbar supports the FAT16 and FAT32 file systems.
- The NTFS file system is not supported.
17
ENG
FUNCTIONS
Connect USB devices directly to the USB port of the product. Otherwise, you may encounter a USB
compatibility problem.
Do not connect multiple storage devices to the product via a multi-card reader. It may not operate
properly.
Digital camera PTP protocols are not supported.
Do not remove the USB device while it is being read.
DRM-protected music files (MP3, WMA) from a commercial web site will not be played.
External HDDs are not supported.
Mobile phone devices are not supported.
File Format Type Compatibility list:
Format Codec
*.mp3
MPEG 1 Layer2
MPEG 1 Layer3
MPEG 2 Layer3
*.wma
Wave_Format_MSAudio1
Wave_Format_MSAudio2
*.aac
AAC
AAC-LC
HE-AAC
*.wav
-
*.Ogg
OGG 1.1.0
*.Flac
FLAC 1.1.0, FLAC 1.2.1
Supporting Sampling Rate above 16KHz
USING THE REMOTE CONTROL
Play/Pause/Stop
During playback, press the
+
#,@ button.
Press the +
#
button to pause playing the file .
Press the +
#
button again to play the file.
To stop playback, press the Stop (
@
) button during playback.
Skip Forward/Back
During playback, press the [,] button.
When there is more than one file and you press the ] button, the next file
is selected.
When there is more than one file and you press the [ button, the
previous file is selected.
Using the REPEAT function
Repeat playback allows you to repeatedly play a file, repeat all, randomly play
files, or turn Repeat off.
Press the REPEAT button.
• REPEAT OFF : Cancels Repeat Playback.
• REPEAT FILE : Repeat playing a track.
• REPEAT ALL : Repeat playing all tracks.
• REPEAT RANDOM : Plays tracks in random order. (A track that has
already been played may be played again.)
You can set the REPEAT function while playing back music from a
USB drive.
POWER
TV POWER
AH59-02548A
TV VOL TV CH AUDIO SYNC
AUX USB TV SOURCE
TV PRE-CH
TV EXIT
SMART VOLUMESOUND EFFECT
S/W
LEVEL
S/W
LEVEL
VOL
VOL
3D SOUND
PLUS
DRC
TV INFOTV MUTE
AUTO POWER
DIMMERREPEAT
OPTICAL
MUTE
PO
WER
T
V P
O
WER
AH5
9
-
02
54
8A
T
V V
OL
TV
C
H AUDI
O
S
YN
C
AU
X
US
B TV
SO
UR
CE
TV PRE-
CH
TV
EXIT
S
MART V
O
LUM
E
SO
UND EFFE
C
T
S
/W
L
EVEL
S
/W
L
EVEL
VOL
V
O
L
3
3D SOUND
3
P
LU
S
D
R
C
TV INF
O
TV
MUTE
AUT
O
P
O
WER
DIMMER
REPEAT
O
PTI
C
A
L
M
UT
E
POWER
TV POWER
AH59-02548A
TV VOL TV CH AUDIO SYNC
AUX USB TV SOURCE
TV PRE-CH
TV EXIT
SMART VOLUMESOUND EFFECT
S/W
LEVEL
S/W
LEVEL
VOL
VOL
3D SOUND
PLUS
DRC
TV INFOTV MUTE
AUTO POWER
DIMMERREPEAT
OPTICAL
MUTE
PO
WER
TV P
O
WER
AH59-02548
A
T
V V
O
L
T
V
CH
AUDI
O
S
YN
C
A
U
X
USB
T
V SOURC
E
TV PRE-
CH
TV EXI
T
S
MART V
O
LUM
E
SO
UND EFFE
C
T
S
/W
L
EVEL
S/W
L
EVE
L
VOL
VOL
3
3D SOUND
3
P
LU
S
D
R
C
TV INF
O
TV MUT
E
A
U
T
O
P
O
WER
DIMMER
REPEAT
O
PTICA
L
M
UTE
POWER
TV POWER
AH59-02548A
TV VOL TV CH AUDIO SYNC
AUX TV SOURCE
TV PRE-CH
DIMMER
SMART VOLUMESOUND EFFECT
VOL
VOL
DRC
TV INFOTV MUTE
OPTICAL
MUTE
S/W
LEVEL
S/W
LEVEL
3D SOUND
PLUS
AUTO POWER
SoundConnect
USB/
REPEAT
PO
WER
TV P
O
WER
AH5
9
-
02
54
8A
T
V V
O
L TV
C
H AUDI
O
S
YN
C
AU
X
TV
SO
UR
CE
TV PRE-
CH
DIMME
R
S
MART V
O
LUM
E
SO
UND EFFE
C
T
VO
L
VO
L
DR
C
TV INFOTV MUTE
O
PTI
C
A
L
MUTE
S
/W
L
EVEL
S
/W
L
EVEL
3
3D SOUND
3
P
LU
S
AUTO POWER
SoundConnect
R
U
S
B
/
18
functions
Muting the sound
This is useful when answering a doorbell or telephone call.
1.
To mute the sound of this unit, press the MUTE button on the remote
control.
2.
To mute the TV, press the
TV MUTE
(
)
button on the remote
control.
3.
Press MUTE/ TV MUTE
(
)
on the remote control again (or press
VOLUME +/–) to restore the sound.
Using the 3D SOUND PLUS function
The 3D SOUND PLUS feature adds depth and spaciousness to the sound.
Press 3D SOUND PLUS on the remote control.
Each time the button is pressed, the selection changes as follows :
3D SOUND PLUS OFF 3D SOUND PLUS MUSIC 3D SOUND
PLUS MOVIE
When you turn on 3D Sound Plus, the Sound Effect and Smart
Volume functions will automatically change to OFF.
Using the SMART VOLUME function
This will regulate and stabilize the volume level against a drastic volume
change caused by a channel change or scene transition.
Press SMART VOLUME on the remote control.
Each time the button is pressed, the selection changes as follows :
SMART VOLUME ON SMART VOLUME OFF
When you turn on Smart Volume, the Sound Effect and 3D SOUND
PLUS function will automatically change to OFF.
Using the SOUND EFFECT function
• You can select from 5 different sound modes - MUSIC, VOICE, SPORTS,
CINEMA, and STANDARD- depending on the type of sources you want to
enjoy.
Press SOUND EFFECT on the remote control.
Select the STANDARD mode if you want to enjoy the original sound.
We recommend that you select a Sound Effect based on the
source material and your personal taste.
When you choose a Sound Effect mode (except STANDARD), 3D
SOUND PLUS and Smart Volume functions are automatically set to
OFF.
Using the S/W LEVEL function
You can control the base volume with the S/W Level button on the remote
control.
1.
Press the S/W LEVEL button on the remote control.
2.
“SW 0” appears on the display.
3.
Press or button on the LEVEL key if you want to increase or decrease
the subwoofer volume. You can set it from SW -6 to SW +6.
POWER
TV POWER
AH59-02548A
TV VOL TV CH AUDIO SYNC
AUX USB TV SOURCE
TV PRE-CH
DIMMER
SMART VOLUMESOUND EFFECT
S/W
LEVEL
S/W
LEVEL
VOL
VOL
3D SOUND
PLUS
DRC
TV INFOTV MUTE
AUTO POWER
DIMMERREPEAT
OPTICAL
MUTE
PO
WER
TV P
O
WER
AH5
9
-
02
54
8
A
T
V V
O
L TV
C
H AUDI
O
S
YN
C
AU
X
US
B TV
SO
UR
CE
TV PRE-
CH
DIMMER
S
MART V
O
LUM
E
SO
UND EFFE
C
T
S
/W
L
EVEL
S
/W
L
EVEL
VOL
V
O
L
3
3D SOUND
3
P
LU
S
D
R
C
TV INF
O
TV
MUTE
AUT
O
P
O
WER
DIMMER
REPEAT
O
PTI
C
A
L
TV MUTE
POWER
TV POWER
AH59-02548A
TV VOL TV CH AUDIO SYNC
AUX USB TV SOURCE
TV PRE-CH
TV EXIT
SMART VOLUMESOUND EFFECT
S/W
LEVEL
S/W
LEVEL
VOL
VOL
3D SOUND
PLUS
DRC
TV INFOTV MUTE
AUTO POWER
DIMMERREPEAT
OPTICAL
MUTE
PO
WE
R
TV P
O
WER
AH5
9
-
02
54
8A
T
V V
O
L TV
C
H AUDI
O
S
YN
C
AU
X
US
B
T
V
SO
UR
CE
TV PRE-
CH
TV
EXIT
S
MART V
O
LUM
E
SO
UND EFFE
C
T
S
/W
L
EVEL
S
/W
L
EVE
L
VOL
V
O
L
3
3D SOUND
3
P
LU
S
D
R
C
TV INF
O
TV
MUTE
A
U
T
O
P
O
WER
DIMMER
REPEAT
O
PTI
C
A
L
M
UT
E
SMART VOLUME
POWER
TV POWER
AH59-02548A
TV VOL TV CH AUDIO SYNC
AUX USB TV SOURCE
TV PRE-CH
TV EXIT
SMART VOLUMESOUND EFFECT
S/W
LEVEL
S/W
LEVEL
VOL
VOL
3D SOUND
PLUS
DRC
TV INFOTV MUTE
AUTO POWER
DIMMERREPEAT
OPTICAL
MUTE
PO
WER
T
V P
O
WER
AH5
9
-
02
54
8A
T
V VO
L
TV
C
H AUDIO SYN
C
AU
X
U
SB TV SOURC
E
TV PRE-
CH
T
V EXI
T
S
MART V
O
LUM
E
SO
UND EFFE
C
T
S
/W
LEVE
L
S
/W
LEVE
L
V
O
L
V
O
L
3
3D SOUND
3
P
LU
S
D
R
C
TV INF
O
TV MUT
E
AUTO POWER
DIMMER
REPEAT
O
PTICA
L
M
UT
E
SOUND EFFECT
POWER TV POWER
AH59-02548A
TV VOL TV CH AUDIO SYNC
AUX USB TV SOURCE
TV PRE-CH
TV EXIT
SMART VOLUMESOUND EFFECT
S/W
LEVEL
S/W
LEVEL
VOL
VOL
3D SOUND
PLUS
DRC
TV INFOTV MUTE
AUTO POWER
DIMMERREPEAT
OPTICAL
MUTE
PO
WE
R
T
V P
O
WER
AH5
9
-
02
54
8A
T
V V
O
L TV
C
H AUDI
O
S
YN
C
AU
X
US
B
T
V
SO
UR
CE
TV PRE-
CH
T
V EXI
T
S
MART V
O
LUM
E
SO
UND EFFE
C
T
S
/W
LEVEL
S
/W
L
EVE
L
VO
L
VO
L
3
3D SOUND
3
PLU
S
D
R
C
TV INFOTV MUTE
AUT
O
P
O
WER
DIMMER
REPEAT
O
PTI
C
A
L
MUTE
S/W
LEVEL
S/W
LEVEL
POWER
TV POWER
AH59-02548A
TV VOL TV CH AUDIO SYNC
AUX USB TV SOURCE
TV PRE-CH
TV EXIT
SMART VOLUMESOUND EFFECT
S/W
LEVEL
S/W
LEVEL
VOL
VOL
3D SOUND
PLUS
TONE
TV INFOTV MUTE
AUTO POWER
DIMMERREPEAT
OPTICAL
MUTE
PO
WER
T
V P
O
WER
AH
59
-
0
2
5
4
8A
T
V V
OL
TV
CH
AUDI
O
S
YN
C
AU
X
USB
T
V SOURC
E
T
V PRE-
CH
T
V EXI
T
S
MART V
O
LUM
E
SO
UND EFFE
C
T
S
/W
L
EVEL
S
/W
L
EVEL
V
OL
V
OL
3
3D SOUND
3
P
LU
S
TO
N
E
TV INF
O
TV MUT
E
AUTO POWE
R
DIMMER
REPEAT
O
PTICA
L
M
UTE
3D SOUND
PLUS
19
ENG
FUNCTIONS
Using the AUTO POWER LINK function
The Wireless Audio - Soundbar is automatically turns on when you turn on the TV
or any other device connected to the Soundbar with the optical cable.
Press AUTO POWER on the remote control of this unit.
The Auto power link function turns on and off each time you press AUTO POWER.
AUTO POWER LINK Display
ON
POWER LINK ON
OFF
POWER LINK OFF
Using the DIMMER function
This feature control the brightness of the Display.
Press DIMMER on the remote control of this unit.
Each time the button is pressed, the selection changes as follows :
DIMMER ON
DIMMER OFF
Using the AUDIO SYNC function
Video may appear out of synch with the audio if the Soundbar is connected
to a digital TV. If this occurs, adjust the audio delay time to match the video.
Press AUDIO SYNC +/. on the remote control of this unit.
You can use the + , - buttons to set the audio delay time between 0 ms
and 300 ms.
In USB mode TV mode or BT mode, the Audio Sync function may
not work.
Using the TONE function
Press TONE on the remote control of this unit.
Each time the button is pressed, the selection changes as follows :
TREBLE BASS.
Press VOL + or VOL - button to increase or decrease
the Treble or Bass volume. You can set the Tone setting for each from -3 to
+3.
POWER
TV POWER
AH59-02548A
TV VOL TV CH AUDIO SYNC
AUX TV SOURCE
TV PRE-CH
DIMMER
SMART VOLUMESOUND EFFECT
VOL
VOL
DRC
TV INFOTV MUTE
OPTICAL
MUTE
S/W
LEVEL
S/W
LEVEL
3D SOUND
PLUS
AUTO POWER
SoundConnect
USB/
REPEAT
PO
WER
TV P
O
WER
AH5
9
-
02
54
8A
T
V V
O
L TV
C
H AUDI
O
S
YN
C
AU
X
TV
SO
UR
CE
TV PRE-
CH
DIMMER
S
MART V
O
LUM
E
SO
UND EFFE
C
T
V
O
L
VOL
D
R
C
TV INF
O
TV
MUTE
O
PTI
C
A
L
M
UT
E
S
/W
L
EVEL
S
/W
L
EVEL
3D SOUND
3
P
LUS
AUTO POWER
SoundConnect
E
R
U
S
B
/
REPEAT
AUTO POWER
POWER
TV POWER
AH59-02548A
TV VOL TV CH AUDIO SYNC
AUX USB TV SOURCE
TV PRE-CH
TV EXIT
SMART VOLUMESOUND EFFECT
S/W
LEVEL
S/W
LEVEL
VOL
VOL
3D SOUND
PLUS
DRC
TV INFOTV MUTE
AUTO POWER
DIMMERREPEAT
OPTICAL
MUTE
PO
WER
T
V P
O
WER
AH5
9
-
02
54
8A
T
V VO
L
TV
C
H AUDIO SYN
C
AU
X
U
SB TV SOURC
E
TV PRE-
CH
T
V EXI
T
S
MART V
O
LUM
E
SO
UND EFFE
C
T
S
/W
LEVE
L
S
/W
LEVE
L
V
O
L
V
O
L
3
3D SOUND
3
P
LU
S
D
R
C
TV INF
O
TV MUT
E
A
U
T
O
P
O
WER
DIMMER
REPEAT
O
PTICA
L
M
UT
E
AUDIO SYNC
POWER
TV POWER
AH59-02548A
TV VOL TV CH AUDIO SYNC
AUX USB TV SOURCE
TV PRE-CH
TV EXIT
SMART VOLUMESOUND EFFECT
S/W
LEVEL
S/W
LEVEL
VOL
VOL
3D SOUND
PLUS
TV INFOTV MUTE
AUTO POWER
DIMMERREPEAT
OPTICAL
MUTE
PO
WE
R
TV P
O
WER
AH59-02548
A
T
V V
OL
TV
C
H AUDI
O
S
YN
C
AU
X
U
SB
T
V SOURC
E
TV PRE-
CH
T
V EXI
T
S
MART V
O
LUM
E
SO
UND EFFE
C
T
S
/W
L
EVEL
S
/W
L
EVEL
V
O
L
V
O
L
3
3D SOUND
3
P
LU
S
TV INF
O
TV MUT
E
AUT
O
P
O
WER
DIMMER
REPEAT
O
PTICA
L
M
UT
E
TONE
POWER
TV POWER
AH59-02548A
TV VOL TV CH AUDIO SYNC
AUX TV SOURCE
TV PRE-CH
DIMMER
SMART VOLUMESOUND EFFECT
VOL
VOL
DRC
TV INFOTV MUTE
OPTICAL
MUTE
S/W
LEVEL
S/W
LEVEL
3D SOUND
PLUS
AUTO POWER
SoundShare
USB/
REPEAT
PO
WER
TV P
O
WER
AH5
9
-
02
54
8A
T
V V
O
L TV
C
H AUDI
O
S
YN
C
AU
X
TV
SO
UR
CE
TV PRE-
C
H
DIMME
R
S
MART V
O
LUM
E
SO
UND EFFE
C
T
VO
L
VO
L
DR
C
TV INFOTV MUTE
O
PTI
C
A
L
MUTE
S
/W
L
EVEL
S
/W
L
EVEL
3
3D SOUND
3
P
LUS
AUT
O
P
O
WER
S
ound
S
har
e
U
S
B
/
REPEAT
DIMMER
20
functions
Using the TV functions (with Samsung TVs only)
Press TV SOURCE on the remote control to change the TV's input
source.
Press TV INFO on the remote control to display the TV channel
information.
Press TV CH on the remote control to select the TV channel.
Press TV VOL on the remote control to increase or decrease the volume
level.
Use TV PRE-CH button to move to the previous TV channel in TV mode.
When you press the SoundConnect button, the TV's sound is
transmitted through the Soundbar system via a Bluetooth
connection. The Soundbar also controls the sound volume,
sound quality, etc.
The remote control can operate TVs made by SAMSUNG only.
SOFTWARE UPGRADE
Samsung may offer upgrades for the Wireless Audio - Soundbar's system
firmware in the future.
If an upgrade is offered, you can upgrade the firmware by connecting a USB
drive with the firmware upgrade stored on it to the USB port on your
Soundbar.
Note that if there are multiple upgrade files, you must load them onto the
USB drive singly and use them to upgrade the firmware one at a time.
Please visit Samsung.com or contact the Samsung call center to receive
more information about downloading upgrade files.
Insert a USB drive containing the firmware upgrade into the USB port on the main unit.
Do not disconnect the power or remove the USB drive while upgrades are being applied. The main unit will turn
off automatically after completing the firmware upgrade.
When software is upgraded, settings you have made will return to their default (factory) settings.
We recommend you write down your settings so that you can easily reset them after the upgrade.
Once upgrading the product software is completed, turn off the product and then press and hold
(
@
)
button for
a while to reset the product.
If the firmware fails to upgrade, we recommend formatting the USB device in FAT16 and trying again.
For upgrading purposes, do not format the USB drive in NTFS format because it is not a supported file system.
Depending on the manufacturer, some USB devices may not be supported.
POWER
TV POWER
AH59-02548A
TV VOL TV CH AUDIO SYNC
AUX TV SOURCE
DIMMERTV PRE-CH
SMART VOLUMESOUND EFFECT
VOL
VOL
DRC
TV INFOTV MUTE
OPTICAL
MUTE
S/W
LEVEL
S/W
LEVEL
3D SOUND
PLUS
AUTO POWER
SoundConnect
USB/
REPEAT
PO
WER
TV P
O
WER
AH
59
-
0
2
5
4
8A
T
V V
O
L
T
V
C
H AUDI
O
S
YN
C
AU
X
TV SOURC
E
DIMME
R
TV PRE-
CH
S
MART V
O
LUM
E
SO
UND EFFE
C
T
VO
L
VO
L
DR
C
TV INF
O
TV MUTE
O
PTICA
L
M
UT
E
S
/W
L
EVE
L
S
/W
L
EVEL
3
3D SOUND
3
P
LU
S
AUTO POWER
SoundConnect
R
U
S
B
/
REPEAT
TV SOURCE
TV INFO
TV CHTV VOL
TV PRE-CH
1 / 1

Ask a question and I''ll find the answer in the document

Finding information in a document is now easier with AI

Ask the document