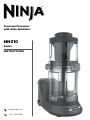
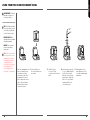
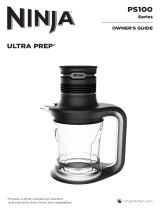
Ninja NN310 is a versatile kitchen appliance that combines a precision processor with an auto-spiralizer, offering a wide range of food preparation possibilities.
With its powerful 400-watt motor and sharp blade assemblies, the precision processor can effortlessly chop, puree, mix, and blend a variety of ingredients. The included chopping blade is ideal for tasks like mincing garlic, chopping onions, or making salsa.
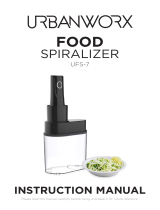
The auto-spiralizer attachment allows you to create vegetable noodles, ribbons, and slices with ease. Simply insert your desired vegetable into the feed chute, select the appropriate blade disc, and watch as the NN310 transforms it into delicious, healthy spirals.
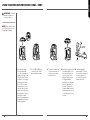
Ninja NN310 is a versatile kitchen appliance that combines a precision processor with an auto-spiralizer, offering a wide range of food preparation possibilities.
With its powerful 400-watt motor and sharp blade assemblies, the precision processor can effortlessly chop, puree, mix, and blend a variety of ingredients. The included chopping blade is ideal for tasks like mincing garlic, chopping onions, or making salsa.
The auto-spiralizer attachment allows you to create vegetable noodles, ribbons, and slices with ease. Simply insert your desired vegetable into the feed chute, select the appropriate blade disc, and watch as the NN310 transforms it into delicious, healthy spirals.


-
 1
1
-
 2
2
-
 3
3
-
 4
4
-
 5
5
-
 6
6
-
 7
7
-
 8
8
-
 9
9
-
 10
10
-
 11
11
-
 12
12
-
 13
13


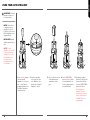
Ninja NN310 is a versatile kitchen appliance that combines a precision processor with an auto-spiralizer, offering a wide range of food preparation possibilities.
With its powerful 400-watt motor and sharp blade assemblies, the precision processor can effortlessly chop, puree, mix, and blend a variety of ingredients. The included chopping blade is ideal for tasks like mincing garlic, chopping onions, or making salsa.
The auto-spiralizer attachment allows you to create vegetable noodles, ribbons, and slices with ease. Simply insert your desired vegetable into the feed chute, select the appropriate blade disc, and watch as the NN310 transforms it into delicious, healthy spirals.
Ask a question and I''ll find the answer in the document
Finding information in a document is now easier with AI
Related papers
Other documents
-
Elkay LKFOBG2816SS User manual
-
NutriBullet 7 Cup Food Processor User guide
-
OXO Good Grips User manual
-
Hamilton Beach 70935 Quick start guide
-
 Ninja Foodi PS100 Owner's manual
-
Lenoxx Healthy Choice SP810 User manual
-
 Spiralizer 5-Blade Spiral Slicer User manual
-
 Urbanworx UFS-7 User manual
-
NutriBullet NBP50100 User guide
-
 Black and Decker Appliances SFP1000B Quick start guide


