Page is loading ...

Wall Boards
INSTALLATION GUIDE

Step 1: Measure
Measure the height and width (inches) of the desired surface area you will be covering with reborn
™
snow fence. To calculate the total square footage of the surface area, multiply the height and width
(inches), then divide the total by 144. Each box of reborn
™
snow fence comes with enough material
to cover 20 square feet. Be sure to add an additional 8% for cutting and waste.
Step 2: Prepare Surface
Ensure the surface is clean, dry and at. The surface must also be structurally sound and capable of
holding the wall boards once they are mounted. Remove any nails, pictures, etc. that would obstruct
hanging the wall boards. Although this is optional, the surface can be painted using a lighter
tint of the wall board color to hide gaps, knot holes and any other beautiful imperfections.
Step 3: Find Studs (for wall installation)
Identify where the studs are located in your wall and lightly mark them with a pencil.
2
◦ safety glasses ◦ nails
◦ dust mask ◦ construction adhesive
◦ tape measure ◦ caulking gun
◦ saw ◦ hammer / nail gun
◦ pencil ◦ stud nder
◦ level ◦ paint* (optional – see step 2)
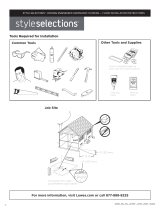
TOOLS REQUIRED

Step 4: Determine the Pattern / Design
Select what design you would like to achieve with your reborn
™
snow fence. Follow popular patterns
such as herringbone, diagonal and staggered, or design your own.
Step 5: Starting Point
Select a starting point on the surface. Using a pencil, draw a straight line across the area where you will be
installing the wall boards. This line will help guide your installation. If creating a staggered/brick design use
a level to ensure a consistent pattern.
Step 6: Install Wall Boards
Note: only use construction adhesive for a permanent installation.
Using a caulking gun, apply a liberal amount of construction adhesive to the back of the wall board.
Position the rst wall board directly above or below your starting point (note the stud marks for wall
installation). Press board rmly onto wall. Using your hammer and nail, or nail gun fasten the board to an
available wall stud. Following your starting point line, continue installing boards to complete your design.
Trim the nal end pieces as needed for a ush t.
Step 7: Finish
Measure and cut around any outlets and light switches if needed. Finish edges as desired. For wall
application, it is recommended to utilize stud-secured boards for hanging pictures, artwork, etc.
Congratulations, you can now enjoy your new accented wall surface.
Herringbone Diagonal Staggered
3
Note: due to the natural characteristics of wood, gaps may appear over time.
California’s Proposition 65
WARNING: Drilling, sawing, sanding or machining wood products generates wood dust, a substance known to the
State of California to cause cancer. Avoid inhaling wood dust or use a dust mask or other safeguards for personal protection.
©2016 OrePac Building Products. All rights reserved.
/