Page is loading ...

Owner’s Manual
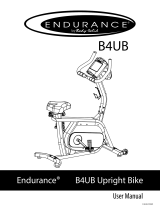
Alliance A7 Upright
Customer Service
(888) 340-0482
Keys Fitness Products
4009 Distribution Drive
Suite 250
Garland, TX 75041
www.keysfitness.com
315-00011
01/05 Rev C
Model Name : A7u
Serial Number :
Write down for future reference.
Serial number is located under unit.

Table of Contents
2
Important Safety Information 3
Before You Start 4
Assembly 5-9
Console Profiles 10
Console Buttons 11
Program Operation 12-13
Program Profiles 14
Monitoring Your Heart Rate 15-16
Change to MPH or KPH 17
Bike Operation 18
Parts List 19
Exploded View 20
Warranty Information 21

Important Safety Information
3
WARNING! Before using this unit or starting any exercise program, consult your physician. This is especially
important for persons over the age of 35 and/or persons with pre-existing health problems. The manufacturer
or distributor assumes no responsibility for personal injury or property damage sustained by or through the use
of this product.
WARNING! To reduce the risk of electrical shock, burns, fire, or other possible injuries to the user, it is
important to review this manual and the following precautions before operation.
SAFETY PRECAUTIONS AND TIPS
1. It is the owner's responsibility to ensure that all users of this unit have read the Owner's Manual and are
familiar with warnings and safety precautions.
2. This unit has a user maximum capacity of 350 pounds.
3. The unit should only be used on a level surface and is intended for indoor use only. The unit should not be
placed in a garage, patio, or near water and should never be used while you are wet. Keys recommends a mat
be placed under the unit to protect floor or carpet and for easier cleaning.
4. Follow safety information in regards to plugging in your unit. Do not run the power cord underneath your
unit. Do not operate the unit with a damaged or frayed power cord.
5. Wear comfortable, good-quality walking or running shoes and appropriate clothing. Do not use the unit with
bare feet, sandals, socks or stockings.
6. Always examine your unit before using to ensure all parts are in working order.
7. Allow the unit to fully stop before dismounting.
8. Pets should never be allowed near the unit.
9. Do not leave children unsupervised near or on the unit.
10. Never operate the unit where oxygen is being administered, or where aerosol products are being used.
11. Never insert any object or body parts into any opening.
12. For safety and to prevent damage to your unit, no more than one person should use the unit at a time.
13. Always unplug the unit before cleaning and/or servicing. Service to your unit should only be performed by
an authorized service representative, unless authorized and/or instructed by the manufacturer.
14. Failure to follow these instructions will void the unit warranty.

Before You Start
4
Thank you for purchasing the Alliance A7 Upright! This quality product you have chosen was designed to
meet your needs for cardiovascular exercise. Before you start, please read the Owner's Manual and become
familiar with the operation of your new unit.
Remember to take the time to perform the stretching exercises provided to avoid injury.
If you are taking medication, consult your physician to see if the medication will affect your exercise heart rate.
If you have heart problems, you are not active, and/or are over the age of 35 years, do not use the pre-set pro-
grams or start an exercise program without first contacting and receiving approval from your physician.
To avoid the risk of electrical shock, always keep the console dry. Do not spill liquids on the console. Keys
Fitness recommends a sealed water bottle for beverages consumed while using the unit.
Please review the following drawing below to familiarize yourself with the listed parts.
LEVELER
LEVELER
LEVELER
RIGHT PEDAL
CONSOLE
SEAT ADJUST KNOB
WATER BOTTLE HOLDER
TRANSPORT WHEELS
PULSE GRIPS

Assembly
5
INSTRUCTIONS FOR ASSEMBLY
Unpack the box in a clear area. Check to make sure all components are present and in good condition. Do
not dispose of the packing material until the assembly is completed. Tools have been provided for you to use
when assembling this product.
Main Components:
1. Main Frame A1
2. Pedals Left and Right A14
3. Front Stabilizer C1
4. Rear Stabilizer D1
5. Seat Pad E1
6. Pulse Handlebar H1
7. Console H6
8. Water Bottle Holder A2
9. Seat Post E2

Assembly
6
Step 1 (Figure 1)
Attach Rear Stabilizer (D1) to Main
Frame (A1) using two Flat Washers
(C9), two Spring Washers (C10), and
two Hex Nuts (C11).
Step 2 (Figure 2)
Attach Front Stabilizer (C1) to Main Frame
(A1) using two Flat Washers (C9), two Spring
Washers (C10), and two Hex Nuts (C11).
Figure 1
Figure 2

Assembly
7
Step 3 (Figure 3)
A) Connect Upper Wire Harness (H8) to Lower
Wire Harness (A39).
Note: Upper Wire Harness will be located
inside the Console Tube (H1).
B) Slide Console Tube (H1) into Main Frame
(A1) and secure using four Flat Allen Head
Bolts (H7). Insert Decoration Cap (B4) into
each bolt hole.
Step 4 (Figure 4)
A) Connect Upper Wire Harness (H8) to Console
(H6).
B) Secure Console (H6) to Console Tube (H1)
using six Round Head Screws (A36) and six Flat
Washers (A24).
Figure 3
Figure 4

Assembly
8
Step 5 (Figure 5)
Attach Seat Pad (E1) to Seat Post (E2).
Step 6 (Figure 6)
Slide Seat Post (E2) into Main Frame (A1) and
secure using Locking Pop Pin Knob (E4).
Figure 5
Figure 6

Assembly
9
Step 7 (Figure 7)
A) Thread Right Pedal (A14) into the right
crank on Main Frame (A1) by turning the
threads Clock-Wise.
Note: The Right Pedal is Marked with an R..
B) Thread Left Pedal (A14) into the left
crank on Main Frame (A1) by turning the
threads Counter Clock-Wise.
Note: The Left Pedal is marked with an L.
Figure 7
Congratulations!
You have completed the assembly of your new Alliance A7 Upright Bike.

Console Profiles
10
The Alliance A7r has an internal generator that provides electrical power to console display. You never need
batteries or have to plug it in. Just simply pedal over 25 RPM to activate the console.
There are 3 options for accessing programs:
1. AT TEST: AT Measurement
2. HRC Mode: Cardio, Fitness Training, Target
Heart Rate and Fat Burn
3. Constant torque mode: Manual, Hiking, Speed Interval,
Vigorous, Endurance and Peak
Start Pedaling
Input User Data
Start
Select
Accessing
Programs
Input User Data
Start
Input User Data
Start

Console Buttons
11
QUICK START:
Press this button to enter MANUAL program.
AT TEST:
Press this button to enter AT TEST mode.
RESET:
Clears current setup variables and goes back to the beginning of setup mode.
PAUSE / RESUME:
Save and readout the data of current workout situation.
ENTER:
Confirm the input data for age, weight, program mode, resistance level, and workout time.
PLUS (+):
Increases the value for age, weight, resistance levels, and workout time. It is also the select button for programs and
user’s sex. To increase the numbers more quickly, hold key down for more than 1 second.
MINUS (-):
Decreases the value for age, weight, resistance levels, and workout time. It is also the select button for programs and
sex. To decrease the numbers more quickly, hold key down for more than 1 second.
KEY PAD:
0~9: Allows you to type the value of age, weight, resistance levels, workout time, and program.
SCAN:
Will automatically change the data being displayed in the data windows. Hold the button down until a “beep” sound is
heard. Once SCAN mode is activated the display data will changes every 4 seconds.
Readout Definitions
TIME: Indication of the workout time
LEVEL: Indicates the current workout resistance level
DISTANCE: Indicates the traveled distance in a workout
WATTS: Power required to pedal the bike
RPM: Pedaling speed in revolutions per minute
METS: Measurement of oxygen consumption
HEART RATE: Indicates the heart beats per minute.
CALORIES: Indicates estimated consumed calories burned in K cal.
Key Pad Program Selection
Workout Program Number
AT Test
Cardio 0
Fitness Test 1
Target Heart Rate 2
Fat Burn 3
Manual 4
Vigorous 5
Hiking 6
Endurance 7
Speed Interval 8
Peak 9

Program Operation
12
Monitoring Heart Rate:
Heart Rate Handgrips: Place you palms onto the metal sensor plates, after few second your heart rate
should be displayed in the window.
Heart Rate Transmitter Strap: Adjust the strap to proper length. Wear directly against your skin around
chest. Some moisture is need between the Transmitter and your skin prior to your workout. Once you start the
workout, your heart rate will be displaced in heart rate window.
Note: It is suggested to use Heart Rate Transmitter Strap for AT TEST and HRC mode (Heart Rate Control
mode)! The HRC mode is designed to keep you exercising at exactly target heart rate. If you use the Handgrip
to monitor your heart rate, please keep your palm on the metal heart rate sensor plates to ensure the correct
heart rate.
AT
T
est: (Anaerobic Threshold)
AT Test is the best approach to find the body's maximum point of aerobic exercise by monitoring the body's
physical condition while exercising. When the body is exercising, and the flow of oxygen to the muscles is
sufficient, the exercise is called aerobic exercise. Exercise over that limit, called anaerobic exercise, results in
muscles working harder than the body can support and the oxygen flow to the muscles is not sufficient.
Rather than improving the muscles' condition, anaerobic exercise can be dangerous. AT TEST can measure
this point, in order to maximize the workout, without crossing the AT point.
To increase accurate measurement, begin AT TEST with normal breathing and relaxation, keep the speed
between 50-70 rpm, place your palm on the Heart Rate Handgrips or wear the Heart Rate Transmitter strap.
Normally, the AT HR (heart rate) can be tested in 10-20 minutes of workout. However, during the AT TEST,
if the workout intensity is too high to withstand, push PAUSE / RESUME button to stop the AT TEST. The
window will also display the AT HR, but it is a estimated value and less accurate.
AT Test Mode:
1. Push + or - to move the light to AT TEST mode or push the AT TEST button directly.
2. Press Enter
3. Push + or - to increase or decrease the user age, or push the correct age on the KEY PAD.
4. Press Enter
5. Push + or - to change the user’s sex to Male or Female, or Push the number 0 key for female or the number
1 key for male.
6. Press Enter to begin the AT Test.
Note: You can hit the RESET button at any time to restart the set up program.
Operation:
1. The Heart Rate input is required under AT TEST mode. The user must either place his palms on the Heart
Rate Handgrip or wear the Heart Rate Transmitter strap.
2. Push the SCAN button to switch the display data between upper row and lower row. Hold the button down
until you hear a "beep", the display data will automatically change every 4 seconds.

Program Operation
13
HRC Mode: (Heart Rate Control)
1. Use + or - to move the LED Indicator to select one of the following programs: CARDIO, FITNESS TEST,
TARGET HEART RATE, OR FAT BURN. You can also use the KEY PAD to choose one directly.
2. Press ENTER
3. Use + or - to increase or decrease the user weight, or use the KEY PAD to type it in.
4. Press ENTER
5. Use + or - to input the user’s AT HR (heart rate), or use the KEY PAD to type it in.
6. Press ENTER
7. Use + or - to input the workout time, or use the KEY PAD to type it in.
8. Press ENTER to begin the workout.
Note: You can hit the RESET button at any time to restart the set up program.
Operation:
1. The Heart Rate input is required under AT TEST mode. The user must either place his palms on the Heart
Rate Handgrip or wear the Heart Rate Transmitter strap.
2. Push the SCAN button to switch the display data between upper row and lower row. Hold the button down
until you hear a "beep", the display data will automatically change every 4 seconds.
3. Use the + or - buttons to increase or decrease the workout resistance levels.
Constant Mode:
1. Use + or - to move the LED Indicator to select one of the following programs: MANUAL, VIGOROUS,
HIKING, ENDURANCE, SPEED INTERVAL, OR PEAK. You can also use the KEY PAD to choose one
directly.
2. Press ENTER
3. Use + or - to increase or decrease the user weight, or use the KEY PAD to type it in.
4. Press ENTER
5. Use + or - to increase or decrease the workout level, or use the KEY PAD to type it in.
6. Press ENTER
7. Use + or - to input the workout time, or use the KEY PAD to type it in.
6. Press ENTER to begin the workout.
Note: You can hit the RESET button at any time to restart the set up program.
Operation:
1. Push PAUSE / RESUME button to save the current workout data. At next workout you can push it again
to resume where you left off.
2. Push the SCAN button to switch the display data between upper row and lower row.. Hold the button
down until you hear a "beep", the display data will automatically change every 4 seconds.
3. Use the + or - buttons to increase or decrease the workout resistance levels.

Program Profiles
14
Constant Mode Programs
HRC Programs
Cardiovascular:
A program designed to keep your workout heart rate value at AT HR x 110%.
Fitness Test:
A program designed to keep your workout heart rate value at AT HR x 100%.
Target Heart Rate:
A program designed to keep your workout heart rate value at AT HR x 95%.
Fat Burn:
A program designed to keep your workout heart rate value at AT HR x 90%.
Manual Mode:
A program designed to be controlled by the user.
Vigorous:
A program designed with a long warm up and steady constant resistance.
Hiking:
A program designed to train you up and down the road with lots of challenging terrain
changes.
Endurance:
An advanced program that is designed to increase muscular strength and endurance.
Peak:
A program designed to maintain a smooth, constant speed in order to conserve
energy.
Speed Interval:
An program designed with 4 more difficult speed intervals.

Monitoring Your Heart Rate
15
Monitoring Your Heart Rate
To obtain the greatest cardiovascular benefits from your exercise workout, it is important to work within your
target heart rate zone. The American Heart Association (AHA) defines this target as 60%-75% percent of your
maximum heart rate.
Your maximum heart rate may be roughly calculated by subtracting your age from 220. Your maximum heart
rate and aerobic capacity naturally decreases as you age. This may vary from one person to another, but use
this number to find your approximate effective target zone. For example, the maximum heart rate for an aver-
age 40 year-old is 180 bpm. The target heart rate zone is 60%-75% of 180 or 108-135 bpm. See Fitness Safety
below.
Before beginning your workout, check your normal resting heart rate. Place your fingers lightly against your
neck, or against your wrist over the main artery. After finding your pulse, count the number of beats in 10 sec-
onds. Multiply the number of beats by six to determine your pulse rate per minute. We recommend taking your
heart rate at these times; at rest, after warming up, during your workout and two minutes into your cool down,
to accurately track your progress as it relates to better fitness.
During your first several months of exercising, the AHA recommends aiming for the lower part of the target
heart rate zone-60%, then gradually progressing up to 75%.
According to the AHA, exercising above 75% of your maximum heart rate may be too strenuous unless you
are in top physical condition. Exercising below 60% of your maximum will result in minimal cardiovascular
conditioning.
Check your pulse recovery rate – If your pulse is over 100 bpm five minutes after you stop exercising, or if
it’s higher than normal the morning after exercising, your exertion may have been too strenuous for your cur-
rent fitness level. Rest and reduce the intensity next time.
Fitness Safety The target heart rate chart indicates average rate zones for different ages. A variety of different
factors (including medication, emotional state, temperature and other conditions) can affect the target heart
rate zone that is best for you. Your physician or health care professional can help you determine the exercise
intensity that is appropriate for your age and condition.
(MHR) = Maximum Heart Rate
(THR) = Target Heart Rate
220 - age = maximum heart rate (MHR)
MHR x .60 = 60% of your maximum heart rate.
MHR x .75 = 75% of your maximum heart rate.
For example, if you are 30 years old, your calculations will be as follows:
220 - 30 = 190
190 x .60 = 114 (low end or 60% of MHR)
190 x .75 = 142 (high end or 75% of MHR)
30 year-old (THR) Target Heart Rate would be 114-142
See Heart Rate Table (on page 15) for additional calculations.

Monitoring Your Heart Rate
16
100%
85%
75%
60%
Serious
athletic
training range
Cardiovascular
conditioning
range
Fat burning
range
20 25 30 35 40 45 50 55 60 65
AGE
200
195
190
185
180
175
170
165
160
155
170
166
162
157
153
149
145
140
136
132
150
146
143
139
135
131
128
124
120
116
120
117
114
111
108
105
102
99
96
93
TARGET HEART RATE ZONE

Change to MPH or KPH
17
Change to MPH (Miles Per Hour) or KPH (Kilometers Per Hour):
1. With the unit off press and hold “0” on the key pad.
2. Start pedaling the bike. “UNIT=KG” OR “UNIT=LB” will be displayed in the upper LED window.
3. Use the key pad to indicate which unit of measure you would like to use.
Press “1” for KG and to change distance to KPH.
Press “2” for LB and to change distance to MPH.
4. Stop pedaling the unit until the screen shuts off to accept the changes.
STEP 1
KG
LB

Bike Operation
18
Seat Adjustment
To raise or lower the seat height, start by pulling out the pop pin knob. Next, raise or lower the seat post to
the proper position. Then, release the pop pin knob to the pre-set position hole. It is important to ensure that
the pop pin knob is locked in one of the pre-set position holes on the seat post. Refer to Figure 1.
On the upright bike, the seat height should be adjusted so that the bottom of the pedal stroke, it is possible to
extend your leg with the heel on the pedal. First, sit on the bike, place your feet in the pedals. Next, rotate
one pedal to the furthest most position. In this position you should have a slight bend in your knee. If your
leg is too straight or your foot cannot touch the pedal, you will need to lower the seat. If your leg is at too
much of an angle, you will need to raise the seat.
Foot Pedal Strap Adjustment
First, place your foot on the pedal. Rotate the pedals until one foot is within arm's reach. Then, carefully
reach down and fasten the rubber strap over your shoe and secure it to the pedal by slipping the nub at the end
of pedal through the slot of the pedal strap. Last, pull down the strap until it snaps into place. Repeat process
for the other foot. Refer to Figure 2.
Figure 1
Figure 2

Parts List
19
REF# KEYS PART# DESCRIPTION QTY. REF# KEYS PART# DESCRIPTION QTY.
A1 323-00165
A7u Frame Assembly
1 C10 302-00277 A7r & A7u Spring Washer SW8 9
A2 310-00123 A7r & A7u Water bottle Holder 1 C11 302-00245 A7u Hex Screw M6*1.25*50 4
A3 302-00311 A7u Seat post bolt 2 C12 302-00252 A7r & A7u Insert Nut M10*1.5 4
A5 331-00038
A7r & A7u Bearing
2D1
323-00161 A7r & A7u Rear Stabilizer Assembly
1
X1 324-00001
A7r & A7u Bottom Bracket Set
1 E1 328-00023 A7u Seat 3
A11 311-00043 A7r & A7u Crank and Pulley set 1 E2 323-00167 A7u Seat post Assembly 3
A12 304-00017 A7u Poly-v Belt 1 E3 306-00321 A7u Sleeve 3
A13 330-00045 A7r & A7u Crank 1 E4 310-00125 A7u Locking Pop Pin Knob 1
A14 306-00311 A7r & A7u Pedal L & R 1 F1 302-00258 A7r & A7u Round Head Allen Bolt M5*0.8*12 1
A15 331-00039 A7r & A7u Bearing 3 F2 302-00278 A7r & A7u Spring Washer SW5 2
A16 330-00046 A7r & A7u Crank and Pulley Axle 1 F3 302-00231 A7r & A7u Flat Washer M5 (5.3*10*1) 1
A17 302-00218 A7r & A7u C Ring 25 1 F4 319-00005 A7r & A7u Axle Assembly Idler 3
X2 324-00002 A7r & A7u Poly of Second Axle Assembly 1 F5 302-00309 A7u C Ring 8 1
A22 302-00219 A7r & A7u C Ring 17 1 X3
324-00003 A7r & A7u Aluminum Idler Wheel Assembly
1
A23 307-00061 A7r & A7u Load Resister 2 F8 331-00045 A7r & A7u DU Bearing 1
A24 302-00228 A7r & A7u Flat Washer M5 (5.5*13*1) 14 F9 330-00044 A7u Idler Arm Assembly 2
A25 302-00263 A7r & A7u Round Head Screw M5*0.8*10 4 F10 302-00223 A7r & A7u C Ring 14 1
A26 302-00266 A7r & A7u Round Head Screw M5*0.8*15 19 F11 302-00275 A7r & A7u Spring 1
A27 302-00264 A7r & A7u Round Head Screw M4*0.7*10 4 G1 311-00044 A7r & A7u Generator 1
A28 302-00242 A7r & A7u Hex Nut M4*0.7 4 G2 302-00220 A7r & A7u C Ring 15 4
A29 313-00086 A7u Wire of Load Resister (B) 2 G3 331-00040 A7r & A7u Bearing (6002LLU) 4
A30 313-00085 A7u Wire of Load Resister (A) 1 G4 319-00007 A7r & A7u Generator Base 5
A31 307-00060 A7r & A7u Control Board Ver3.1 1 G5 306-00314 A7r & A7u Shielding Pad 5
A32 302-00243 A7r & A7u Hex Nut M6*1.0 2 G6 313-00081 A7u Output Generator Wire 4
A33 302-00308 A7r & A7u Sensor Cable Bracket 1 G7 302-00259 A7r & A7u Round Head Allen Bolt M5*0.8*30 4
A34 313-00089 A7u Sensor Cable 1 G8 302-00217 A7r & A7u Bushing 25*22 1
A35 302-00265 A7r & A7u Round Head Screw M3*0.5*8 2 G9 302-00233 A7r & A7u Flat Washer M8 (8.5*26*2.5) 1
A36 302-00268 A7r & A7u Round Head Screw M5*0.8*15 8 G10 302-00319 A7u Round Head Allen Bolt M8*1.25*55 1
A37 304-00013 A7u Poly-v Belt J6 762 1 G11 302-00260 A7r & A7u Round Head Allen Bolt M8*1.25*45 2
A38 302-00273 A7r & A7u Sensor Magnetic 1 H1 323-00166 A7u Pulse Handlebar Assy 1
A39 313-00088 A7u Lower Wire Hardness 1 H2 313-00078 A7r & A7u Heart Rate Sensor plate 2
B1 305-00054 A7u Right Shroud 1 H3 302-00271 A7r & A7u Round Head Screw M3*0.5*35 1
B2 305-00053 A7u Left Shroud 1 H4 306-00308 A7r & A7u Heart Rate Sensor Grip 6
B3 306-00319 A7u Decoration Cover 1 H5 302-00246 A7r & A7u Hex Nut M3*0.5 4
B4 306-00304 A7r & A7u Decoration Cap 8 H6 307-00059 A7r & A7u Console 1
C1 323-00159
A7r & A7u Front Stabilizer Assembly
1 H7 302-00225 A7r & A7u Flat Head Allen Bolt M8*1.25*16 1
C2 310-00122 A7r & A7u Adjusting Knob 4 H8 313-00090 A7u Upper Wire Hardness 1
C3 306-00306 A7r & A7u Foot Cap 4 H9 313-00087 A7u Heart Rate Sensor wire 1
C4 306-00310 A7r & A7u Leveling Base 4 H10 306-00322 A7u Console Tube Cover 1
C5 302-00244 A7r & A7u Hex Nut M6*1*40 2 H11 302-00310 A7u O Ring 8
C6 302-00229 A7r & A7u Flat Washer M6 (6.5*13*1) 4 H12 306-00320 A7u Grip for Front Handlebar 2
C7 302-00254 A7r & A7u Nylon Nut M6*1 2 H13 306-00307 A7r & A7u Handlebar End Cap 4
C8 306-00318 A7r & A7u Transportation Wheel 3*23 2 H14 323-00168 A7u Reading Rack 4
C9 302-00230 A7r & A7u Flat Washer 8.4*17*2 9
A7u Parts List Rev C

Exploded View
20
/