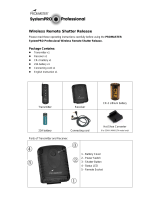
Infrared Remote Control – for Sony
Replaces Sony RMT-DSLR1 Infrared Remote Control
OPERATING INSTRUCTIONS
IMPORTANT NOTICE
Your PROMASTER Remote Control features a POWER SAVE mode. Please
observe the following to ensure proper operation:
1. After initially installing the battery or changing the battery, press and hold the shutter release button for at
least 2 seconds to activate the remote.
2. The remote will enter the POWER SAVE mode after 8 minutes of inactivity. To wake the remote from the
POWER SAVE mode and activate it for use, press and hold the shutter release button for at least 2 seconds.
Using the PROMASTER Infrared Remote Control for Sony
1. Before using the remote for the first time, install the CR2025 battery (included).
2. Mount the camera on a tripod (recommended) or place the camera on a stable, level surface.
3. Set your camera for delayed remote or quick response remote per the instructions provided with your
camera.
4. Aim the remote control at the infrared receiver on the camera (usually within +/- 20 degree of the lens axis,
from the left to the right and from the top to the bottom) and press the shutter-release button on the remote
control (when using the remote outdoors, make sure that the subject is not backlit and that the line of site
between the transmitter and the infrared receiver is not blocked by the lens or other obstacles).
5. How the camera focuses and shoots depends upon the options selected for your camera. For further
information, check your camera's instruction manual.
6. Infrared cannot be seen by human eyes so you will see no visible light from the LED on the front of the
remote control during operation.
Replacing the Battery
1

2
1. The remote control is powered by a three-volt CR2025 lithium battery which is included.
2. After sliding the latch in the direction shown, remove the battery holder.
3. Remove the battery from the battery holder.
4. Insert a fresh battery with the face marked "+" on top.
5. Slide the battery holder into the remote until the latch clicks into place.
Specifications
100% compatible with Sony RMT-DSLR1 infrared remote controls.
Easy-to-replace CR2025 lithium battery.
Operating temperature: 5°C to 40°C (40°F to 105°F).
Typical Battery Life: up to 3 years; 20,000 exposures.
Care and Storage
1. When the remote control is not in use for an extend period of time, please remove the battery from the remote
control.
2. Do not expose the remote control to excessive heat or humidity.
3. Do not leave the remote control on or near a television, refrigerator, or other appliance with a magnetic field.
4. If the remote control gets wet, wipe it with a dry towel as soon as possible.
5. Do not use organic solvents, such as alcohol or paint thinner, when cleaning the remote control.
Compatible with Sony Cameras
A230 A290 A330 A380
A390 A450 A500 A550
A560 A580 A700 A850
A900 A33 A55 NEX5
Digital SLR
Other cameras working with Sony RMT-DSLR1 infrared remote control
LIMITED WARRANTY
This product carries a one-year limited warranty from the date of purchase against defects in materials and
workmanship. This warranty does not cover damage resulting from accidents, misuse, unauthorized
repair/alterations to the product or failure to follow operating instructions. If the product should become defective
within the warranty period and under the above mentioned conditions, please return it to the store you originally
purchased it from with proof of purchase, for repair or replacement free of charge.
www.promaster.com
Fairfield, CT 06825
/


