Page is loading ...

1
TX-186, 5000, 09/22
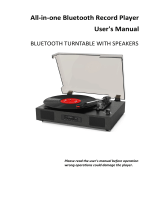
Technaxx® * User Manual
BT Retro LP-Player TX-186
Features
Bluetooth V5.0
Stereo loudspeakers 2 x 3 W
RCA output for connection to HiFi systems
Vinyl player with 3 speeds: 33, 45, 78rpm
LP digitalization directly to USB drive
3.5mm AUX–IN & 3.5mm headphone jack
High quality design with functional handling

2
TX-186, 5000, 09/22
Contents
Features .................................................................................................. 1
Technical specifications ........................................................................... 3
Product overview ..................................................................................... 4
First start ................................................................................................. 5
Phono mode (Vinyl) ................................................................................. 5
Replacing the Stylus ............................................................................. 6
Bluetooth mode ....................................................................................... 7
Bluetooth playing .................................................................................. 7
AUX mode ............................................................................................... 8
Playing Music from an AUX input .......................................................... 8
Headphone ........................................................................................... 8
Connecting to an external amplifier ....................................................... 8
Recording audio to USB drive ............................................................... 8
Belt drive installation / repair .................................................................... 9
FAQ’s ...................................................................................................... 9
Hints ...................................................................................................... 10
Warnings ............................................................................................... 11
Declaration of Conformity ...................................................................... 11
Disposal ................................................................................................ 11
Keep this user manual for future reference or product sharing carefully. Do
the same with the original accessories for this product. In case of warranty,
please contact the dealer or the store where you bought this product.
Enjoy your product * Share your experience and opinion on one of
the well-known internet portals.

3
TX-186, 5000, 09/22
Before usage
Choose the installation location of your unit carefully. Avoid placing it in direct
sunlight or close to a source of heat. Also avoid locations subject to vibrations and
excessive dust, heat, cold or moisture. Do not install the unit in a inclined position,
It is designed to be operated in a horizontal position only. If the unit is brought
directly from a cold to a warm location, moisture may condense inside the player, and
cause damage. When you first install the unit, or when you move it from a cold to a
warm location, wait for 30 minutes before operating the unit. The ventilation holes
should not be covered. Make sure there is enough space above and beside the
amplifier/receiver. Do not place a CD player or other equipment on top of the device.
Do not open the cabinet. This might cause a damage to circuitry or electrical shock.
If you are not going to use the player for long time, be sure to disconnect the player
from the AC power source. When removing the power plug, never yank the cord.
To prevent fire or shock hazard, disconnect your unit from the AC-power source when
cleaning. Use caution when cleaning and wiping the plastic parts. Do not attempt to
clean the unit with the chemical solvents as this might damage the finish.
Technical specifications
Bluetooth
V5.0; range ~10m open areas
Bluetooth transmitting frequency 2.4GHz
Radiated output power max. 2.5mW
Mode
Phono, Bluetooth, AUX-IN, USB
Speakers
2x 3W stereo loudspeakers,
impedance 4Ω, frequency range 75Hz–20kHz
Phono
EP/LP/SP; DC motor; speeds: 33/45/78rpm;
S/N≧45dB; needle cartridge (Model-ID:4768); belt-drive
AUX-IN & Headphone
3.5mm jack
RCA output
Cinch (Left & Right)
Power adapter voltage
100-240V 50/60Hz
Power input
DC 5V 1A
Power consumption
Max. 5W
Weight / Dimensions
2.2 kg / (L) 33.0 x (W) 28.5 x (H) 12.4cm
Package contents
Bluetooth Retro LP-Player TX-186, 45rpm
single puck adapter,
power adapter, user
manual

4
TX-186, 5000, 09/22
Product overview
1
Turntable
2
45 Single adaptor
3
Auto stop on / off switch
4
Tone arm lifter
5
Speed selector
6
Tone arm
7
Cartridge / Stylus
8
Security latch
9
Speaker
10
Indicator Power / Bluetooth (Power red / Bluetooth blue)
11
Headphone output
12
Mode switch / Volume control
13
USB port (record only)
14
AUX-IN
15
RCA (R&L) output
16
Power input (DC 5V)

5
TX-186, 5000, 09/22
First start
Carefully read the manual. Plug the power adapter into a 100-240V AC
outlet and the other end into the TX-186 (16). Power on the device by
turning the volume control knob (12). Bluetooth is in on state by default.
Phono mode (Vinyl)
Vinyl records hints
Do not touch the records grooves. Only handle records by their edges or
the label. Ensure that your hands are clean. Skin oil will gradually
deteriorate the record. Keep your records away from dust and store in a
dry, cool place. Keep your records in sleeves when not in use to avoid
dust and scratches. Store records upright. Records stored horizontally
will bend and warp. Do not store records in the trunk of a car. Store
records in an area with a stable temperature and low humidity. To clean,
gently wipe the surface in a circular motion using a soft anti-static cloth.
Playing a vinyl record
When using the turntable, make sure to remove the stylus protector (2)
according the picture below. It should easily slide off the cartridge stylus
assembly (1). Furthermore, make sure to unclip the tone arm lock before
use and to secure it again after use.
Turn on the unit and adjust the volume to an appropriate level.
Turn the function knob to the PHONO position.

6
TX-186, 5000, 09/22
Place a record on the turntable platter and select the correct player
speed: 33/45/78rpm according to the vinyl being played. When playing a
45rpm record, use the included 45rpm adaptor.
Remove the stylus guard and unlock the tone arm lock.
Push the lift lever up to raise the tone arm and then gently move the tone
arm to the desired position over the record.
The platter will begin to spin when the tone arm is moved toward the record.
Push the cue-lever (2) forward to lower the tone arm slowly onto the desired
position on the record. The record will begin playing.
When the record is finished, push the tone arm lifter (2) backwards to
raise the tone arm and gently move it back to its rest position.
When you have finished playing records, engage the tone arm lock to
protect it from accidental movement. Unplug the TX-186 from the power
supply if it is not going to be used for a while.
1. Tone Arm / 2. Tone Arm Lifter
Replacing the Stylus
It is recommended that the stylus is replaced as soon as you notice a
change in the sound quality. Prolonged use of a worn-out stylus may
damage the record. Wear and tear on the stylus will be accelerated when
playing 78 RPM records.
A: Removing the stylus from the cartridge
Place a screwdriver at the tip of the stylus head shell and
push downwards in the direction shown in sketch “A”.
Remove the stylus head shell by pulling it forwards and
pushing downwards.

7
TX-186, 5000, 09/22
B: Installing the new stylus
Hold the tip of the stylus head shell and insert it by
pressing in the direction illustrated by “B”. Push the
stylus head shell upwards in the direction illustrated by
“C” until the stylus locks into the tip position.
(1) Guide pins inside
Caution
Do not bend the stylus. Do not touch the needle to avoid injury. Turn
off the unit’s power before you replace the stylus. Keep out of reach of
children. Handle with care as the stylus is delicate. Use of a bent or
broken stylus may damage the record and cause malfunction. Do not
expose the stylus to extreme heat.
Bluetooth mode
Bluetooth playing
Turn on the device by turn the volume knob (12) until the indicator flashes
blue. Then you should turn on your phone or other media device and start
the Bluetooth searching function, receive carrier will receive the Bluetooth
identification number for: “Technaxx TX-186”, when your Bluetooth device
is connected, the speaker will beep.
NOTE: Unplug an AUX-IN or Headphone before use the Bluetooth
function. Put the Tone Arm on tone arm rest and security latch. Control the
music from your playback device which is connected to the LP Player.
ATTENTION: If you reboot the machine, you should repeat those steps to
get the Bluetooth function restarted. The last connected device connects
automatically.

8
TX-186, 5000, 09/22
AUX mode
Playing Music from an AUX input
Turn the unit ON by turn the volume knob (12). Connect one end of
the 3.5mm AUX-IN cable (included) into the 3.5mm AUX-IN Jack on the
back panel of the unit and the other end to your audio device’s (CD player,
Tablet, MP3 player, Smartphone etc.) AUX jack.
Press PLAY on the external audio source.
NOTE: The volume output is affected by the volume level on the source.
Ensure that the source volume is set to about 70-80% to avoid sound
distortion. Playback must be controlled from your connected audio device.
Headphone
Connect a headphone to the AUX-out 3.5mm jack (11). Set the mode you
want to listen to. Every mode is possible. Set the volume to a pleasant
setting and enjoy listen to your music.
Connecting to an external amplifier
This feature enables you to play turntable music through amplifier or
external speakers. You will need an RCA cable to make this connection
(not included).
Plug one end of the Red and White RCA jacks into the RCA output (15)
at the back of the TX-186 and the other end into R (red) and L (white)
sockets at the back of the amplifier or external speakers.
Recording audio to USB drive
This equipment has the capacity to encode your vinyl music into digital
format for record options directly to USB drive
Insert the USB-drive into the USB slot (13).
Get your music media ready for playback: place a record on the turntable
and start playing.
The LP player will recognize the USB device
It creates a new MP3-file to the USB device according play and pause.
The file names have to be renamed according recorded files afterwards.

9
TX-186, 5000, 09/22
Note: 32GB USB devices have to formatted in FAT32. Above 32GB storage
it have to be formatted into exFAT format. Maximum storage size is 128GB.
Belt drive installation / repair
1. Use a screwdriver to remove the c-shape locking clip from the rotation
axis.
2. Lift the turntable plate up and remove from the axis of rotation (you will
find the driving belt detach from the track of the turntable.)
3. There are two small cylindrical pins on the back of the turntable plate for
the help of belt replacement. Place the belt on the track and hook the belt
to one pin.
4. Place the turntable plate back on the axis and make sure that the space
formed by pin and belts is aligned with the metal pin on the turntable
bracket, so that the metal pin on the turntable bracket, so that the mental
pin will stand in a triangular space when the turntable plate is fully back
on.
5. Manually rotate the turntable for about half-turn and the belt will be
positioned. Finally put the clip back on the shaft.
FAQ’s
Device will not power on
Make sure that the unit’s power cord is connected to an appropriate
electrical outlet and the wall socket is switched on.
There is no sound
Rotate the power/volume knob clockwise to increase the volume.
The vinyl record will not play
Make sure the function knob is set to you desired function. Make sure
you have selected the right speed (33, 45 or 78 RPM).
Nothing will play via the AUX IN connection
Make sure the cable is firmly connected and check if external device is
clean and undamaged. Check the function knob is set to your desired
function. Check that volume of external device is at 70-80%.

10
TX-186, 5000, 09/22
Nothing will play via the BT device
Make sure the BT is connected and the external device plays a sound.
Reconnect the BT and check the set volume of LP Player and external
device.
NOTE: If normal operation cannot be obtained, unplug the power cord from
the power outlet and plug it in again.
Hints
Unpacking and handling: Open the carton carefully and remove the packing.
Remove the poly-bag and retain all packaging for future use. Keep all packaging away
from small children and animals.
Positioning the music centre: Place the equipment on a stable surface, away
from any heat sources, and ensuring adequate ventilation around the music centre.
Ventilation and heat sources: Do not place material over any ventilation slots
during use, this will cause the device to overheat and fail. Do not place the device in
direct sunlight or near heat sources such as radiators or fires.
Candles and open flames: Do not place lighted candles or tea lights on top of, or
at the sides of the music centre. Do not allow any naked flames near the cabinet.
Connections: When connecting the music centre to the mains supply, do not place
wires that can be tripped over. Do not trap or place heavy objects on the mains lead.
Moisture: Do not place the equipment in wet or damp conditions, such as steamy
kitchens, bathrooms or basements. Do not allow water or other fluids to enter the
equipment. Do not touch the mains plug or adaptor with wet hands. Should moisture
enter the music centre, disconnect from the power supply.
Cleaning and care: Disconnect the music centre from the mains power supply.
Use a soft dry cloth, or for stubborn stains use a soft cloth with a dilute mild detergent.
Do not use alcohol-based fluids or abrasive materials.

11
TX-186, 5000, 09/22
Warnings
Do not use this unit for anything other than its intended to use. Do not drop /
bump / shake the device Do not use the unit if it has been damaged in any way.
Do not open / repair / disassamble the device Do not store the device in high
temperature environment / close to open fire / in humid, damp or erosive environments
/ into water. Stop using when unusual smell / heating distortion / color change of
the shell material or other abnormal situation happens. Keep away from children /
persons without enough mental ability / persons without enough knowledge to use
this product.
Service phone No. for technical support: 01805 012643* (14 cent/minute from
German fixed-line and 42 cent/minute from mobile networks).
Free Email: support@technaxx.de
*The support hotline is available Mon-Fri from 9 am to 1 pm & 2 pm to 5 pm.
Declaration of Conformity
The EU Declaration of Conformity can be requested at the
following address: www.technaxx.de/ (in the lower bar
"Declaration of Conformity").
Disposal
Disposal of the packaging. Sort packaging materials by type
upon disposal.Dispose of cardboard and paperboard in the
waste paper. Foils should be submitted for recyclables
collection.
Disposing of old equipment (Applies in the European Union and
other European countries with separate collection (collection of
recyclable materials) Old equipment must not be disposed of
with household waste! Every consumer is required by law to
dispose of old devices that can no longer be used separately
from household waste, e.g. at a collection point in his or her
municipality or district. This ensures that the old devices are
properly recycled and that negative effects on the environment
are avoided. For this reason, electrical devices are marked with
the symbol shown here.

12
TX-186, 5000, 09/22
Batteries and rechargeable batteries must not be disposed of in
household waste! As a consumer, you are required by law to
dispose of all batteries and rechargeable batteries, whether they
contain harmful substances* or not, at a collection point in your
community/city or with a retailer, to ensure that the batteries can
be disposed of in an environmentally friendly manner. * marked
with: Cd = cadmium, Hg = mercury, Pb = lead. Return your
product to your collection point with the fully discharged battery
installed inside!
Made in China
Distributed by:
Technaxx Germany GmbH & Co. KG
Konrad-Zuse-Ring 16-18,
61137 Schöneck, Germany
/