Apps
2 Tap or to increase or decrease the background blur.
3 Tap Studio, Side, Sunshine, Stage, Noir, or Color pop to change
the light settings.
4 Tap to take the photo and hold your camera steady.
Tip: For best results, subjects should be 2-6 feet away and not side-by-side. When
photographing people, aim for the waist up.
Take close ups and change the background
Use cutout mode to get a close portrait, cut it out from the background, and replace the
background with something else.
Note: Available when using the back camera only.
Find it:
Camera > Menu > Cutout
1 Line up your subject at close range.
2 Tap to take the photo and hold your camera steady.
Tip: When photographing people, aim for the face. After taking the photo, use
the photo editor to change the background. See Change or add your portrait’s
background.
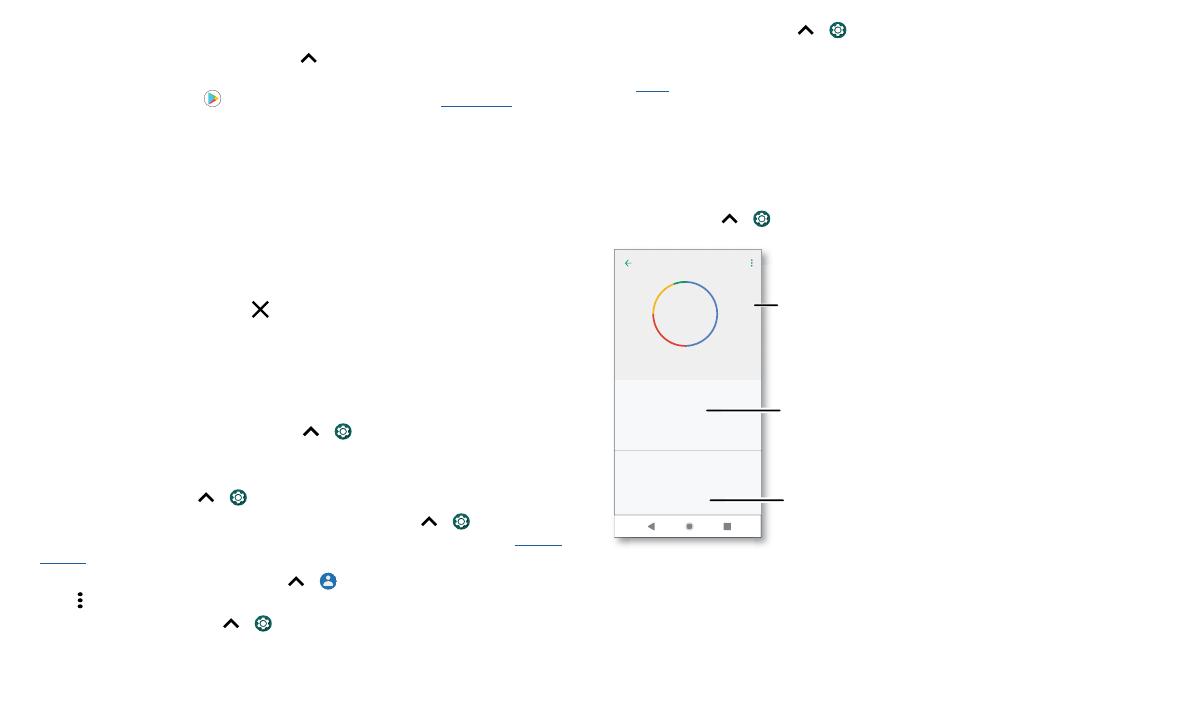
Identify & scan items using Google Lens™
Search landmarks, products, explore books, identify plants and animals, copy text, scan
barcodes, QR codes, business cards, and more.
Find it:
Camera >
1 Focus your camera on an object, landmark, or code until a circle appears on the
object in your viewfinder.
2 Tap the circle.
Depending on the object, you can see the details, take an action, or find more
products.
Tip: Focus your camera on a book cover, tap the screen to see the book title and author.
Note: Google Lens may not work in all languages. You need to be logged into your
Google account to use this feature.
Capture your screen
To capture your phone’s screen, press and hold both the Power and the Volume Down
buttons at the same time. Or press and hold the Power button and tap Screenshot.
To see the screen capture, tap
Photos > Albums > Screenshots.
Tip: See also Moto Actions to capture screenshots by touching the screen with three
fingertips.
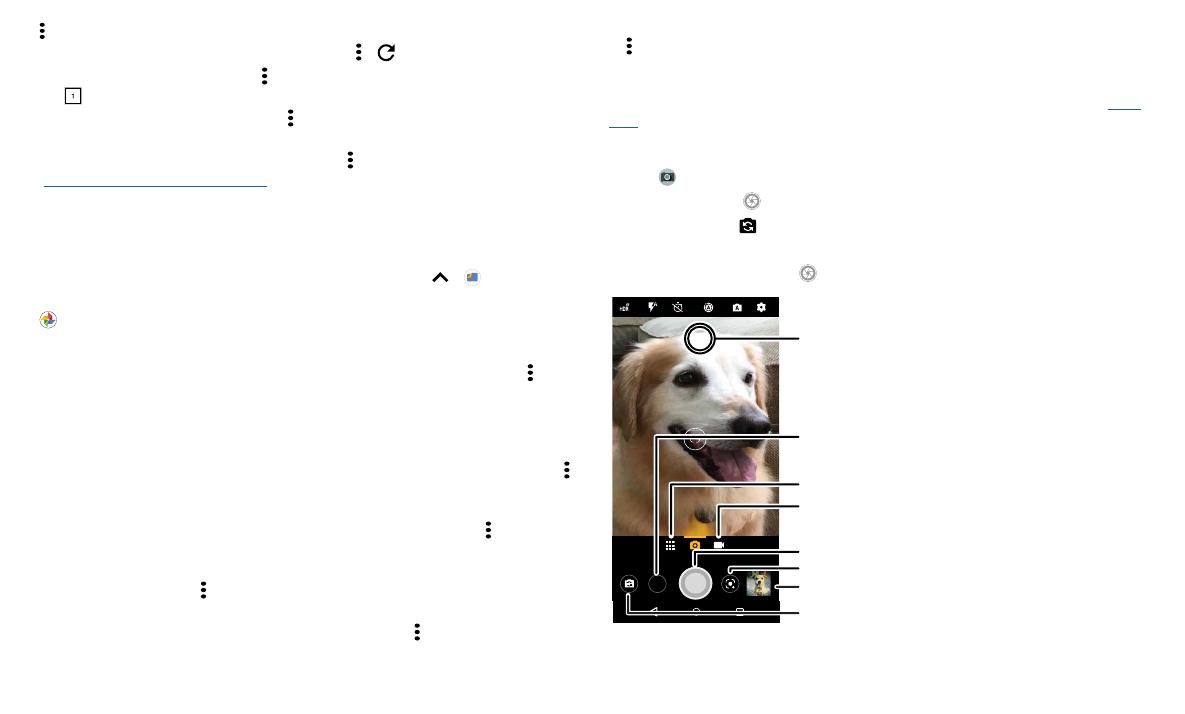
Photos
View, edit & share
Find it: Photos
» View, share, or delete: Tap a thumbnail to open it, then tap to share, to delete,
or Menu for more options.
Tip: To select multiple files, open a folder, touch and hold a photo, then tap others. Or
group photos in an album and share the whole album.
» Zoom: Open a photo in your gallery, then double-tap or drag two fingers apart or
together on the screen.
Tip: Turn your phone sideways for a landscape view. To turn Auto-rotate screen on or
o, swipe up
> Settings > Display > Advanced > Auto-rotate screen.
» Wallpaper or contact photo: Open a picture, then tap Menu > Use as > Wallpaper
or Contact photo.
» Edit: Open a picture, then tap .
» Slideshow: Tap a picture, then tap Menu > Slideshow. To stop the slideshow, tap
the screen. To show the slideshow on a television or other device, see Connect, share
& sync.
Tip: For more about Google Photos™, like how to use the depth editor to blur the
background or Color Pop to make the background black and white, visit https://support.
google.com/photos.
Change or add your portrait’s background
Note: To take a Cutout mode photo, tap Camera > Menu > Cutout.
Cutout photos show
at the top of the thumbnail.