BALDR B0340WST2H2R-V7 User manual

Category
Weather stations
Type
User manual

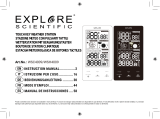
BALDR B0340WST2H2R-V7 wireless weather station provides accurate weather conditions with a user-friendly interface and versatile features. Monitor indoor and outdoor temperatures and humidity levels, with a maximum of three outdoor sensors supported (additional sensors sold separately). It features atomic timekeeping for precise timekeeping and automatic updates for daylight saving time. Stay informed with weather forecast icons and comfort level indicators. The backlit display allows for easy viewing in low-light conditions, and the snooze function adds convenience to your mornings.

BALDR B0340WST2H2R-V7 wireless weather station provides accurate weather conditions with a user-friendly interface and versatile features. Monitor indoor and outdoor temperatures and humidity levels, with a maximum of three outdoor sensors supported (additional sensors sold separately). It features atomic timekeeping for precise timekeeping and automatic updates for daylight saving time. Stay informed with weather forecast icons and comfort level indicators. The backlit display allows for easy viewing in low-light conditions, and the snooze function adds convenience to your mornings.

MODEL: B0340WST2H2R‐V7
TOUCH SCREEN WIRELESS WEATHER STATION
Thank you for your purchasing of BALDR Wireless Weather Station. To ensure
proper use, please read the user manual carefully before use. If you have any
problems during use, please feel free to contact us for support.
Email: baldrservice@baldr.com USA Tel.: 1‐833‐381‐5659
USER MANUAL
TABLE OF CONTENTS
1PRODUCTOVERVIEW
.................................................................................. 1
1.1 WEATHER STATIONMAIN UNIT................................................ 1
1.2 REMOTE SENSOR..............................................................................2
1.3 BUTTONS INTRODUCTION............................................................... 3
2 PACKAGING INCLUDES................................................................................ 4
3 QUICK SET‐UP GUIDE.................................................................................. 4
3.1 POWER UP........................................................................................4
3.2 WWVB RADIO CONTROLLED CLOCK (RCC)...................................... 5
3.3 MANUAL SETTINGS.......................................................................... 6
3.4 REMOTE SENSOR INSTALLATION..................................................... 9
3.5 ALARM TIME SETTING................................................................... 12
3.6 SNOOZE FUNCTION........................................................................13
3.7 MAX/MIN TEMPERATURE & HUMIDITY RECORDS........................ 13
4 TEMPERATURE & HUMIDITY TREND ARROWS......................................... 14
5COMFORTLEVELINDICATOR
.................................................................... 14
6 WEATHER FORECAST ICONS......................................................................15
7 BACKLIGHT FUNCTION.............................................................................. 15
8 LOW BATTERY INDICATOR......................................................................... 15
9 SPECIFICATIONS.........................................................................................16
9.1 TECHNICAL SPECIFICATION............................................................ 16
9.2 MEASUREMENT SPECIFICATIONS.................................................. 16
10 TROUBLESHOOTING GUIDE.................................................................... 17
11 CARE AND MAINTENANCE......................................................................20
12 WARRANTY..............................................................................................20
1
1 PRODUCT OVERVIEW
1.1 WEATHER STATIONMAIN UNIT
1. Outdoor Sensor Channel Indicator
2. Current Outdoor Temperature&Humidity
3. “CH/”Button
Switch channel, clear channel data, or value
increase
4. “RCC/SET” Button
Search atomic time signal or enter into time
setting
5. “MEM/”Button
Check or clear max/min records, or value
decrease
6. “ ”Button
Check or enter into alarm setting
7. Low Battery Indicator
Remind to replace the new batteries
8. Current Indoor Temperature and
Humidity
9. Temperature Trend Arrow UP/DOWN
10. Weekday in 7 Languages
11. Calendar Display
Month/date or date/month optional
12. Comfort Level Indicator
13. Humidity Trend Arrow UP/DOWN
14. Weather Forecast Icon
15. Atomic Reception
16. Backlight/Snooze Button
17. Time (12/24 hours format optional)
18. AM/PM
19. Max/Min Records of Indoor and
Outdoor Temperature and Humidity
2
20. Hanging Hole 21. Battery Compartment Cover 22. Removable Stand
1.2 REMOTE SENSOR
1. Signal Indicator Light 3. Battery Compartment
2. Hanging Hole 4. Channel 1‐2‐3 Switch
3
1.3 BUTTONS INTRODUCTION
BUTTONS FUNCTIONS
1. PRESS to switch channel from CH1, CH2, CH3, or cycle
mode”.
2. PRESS AND HOLD 3 seconds to clear channel data.
3. Value increase button.
1. PRESS to search WWVB atomic time signal
automatically.
2. PRESS AND HOLD to set atomic time ON/OFF, time
zone, time and calendar, language, /.
3. SET button and set exit button.
1. PRESS to check 24 hours MAX/MIN indoor and outdoor
temperature and humidity.
2. PRESS AND HOLD to clear the MAX/MIN records.
3. Value decrease button.
1. PRESS to view alarm time, activate/deactivate alarm
(the alarm icon will display when activated).
2. PRESS AND HOLD to enter into alarm setting.
TOP BUTTON
1. BACKLIGHT: press to turn on the backlight (auto off
after 20s).
2. SNOOZE when alarm rings, silence alarm for 5 minutes.
4
2PACKAGINGINCLUDES
Following contents are included in the packaging:
1 x Weather Station Main Unit (not included AAA batteries)
1 x Remote Sensor (not included AA batteries)
1 x User Manual
3 QUICK SET‐UP GUIDE
NOTE: Prepare new and high quality alkaline batteries. Do not mix old and
new batteries. Heavy duty or rechargeable batteries are not recommended.
3.1 POWER UP
1. Remove the battery door on the back of the display, insert 3 new AAA
batteries in the back of the display console (please take note of the battery
polarity before inserting the batteries).
2. Take out the metal stand inside the battery compartment and screw it into
the hole at the main unit backside. Replace the battery door.
3. Remove the battery door of remote sensor, and set the channel of sensor
to CH1, then insert 2 new AA batteries in the back of the sensor within 3
MINUTES.
Note: The display will beep once and all of the LCD segments will light
up for few seconds to verify all segments are operating properly, then
display indoor temperature and humidity immediately.
5
3.2 WWVB RADIO CONTROLLED CLOCK (RCC)
After the remote sensor is powered up, it will start receiving the outdoor
sensor's signal for 3 minutes, and then the sensor will begin radio controlled
clock (RCC) reception for 7 minutes.
1. The antenna symbol " "will flash while receiving signal, and will be solid
once signal is received, and received time/month/date/weekday will
display on the screen.
2. The weather station will receive RCC signal at UTC 7:00, 8:00, 9:00, 10:00,
and 11:00 each day. It starts receiving RCC signal at UTC 7:00 everyday, once
signal is received at any above time, it will stop receiving signal that day.
Note:
Make sure outside sensor and weather station main unit are at the
same channel.
Do not touch any buttons until the remote sensor reports in,
otherwise the remote sensor searching will be terminated. When the
remote sensor data has been received, all further settings can be
performed.
The display main unit will automatically receive remote sensor signal
when sensor is powered up. The receiving status will last for max 3
minutes ( signal sensor will flash), if no signal received within 3
minutes, it will stop receiving, now you can press and hold the
“CH/” Button 3 seconds to start receiving outside signal again.
6
3. Manual receiving: press "RCC/SET to enter or exit RCC signal receiving.
4. Please be sure you have selected your time zone from the list in the SET
menu. When the RCC signal is received, the weather station will set to the
time zone selected. Default time zone is EST (Eastern Standard Time).
5. During the RCC time reception period, no weather data will be
transmitted to avoid interference.
3.3 MANUAL SETTINGS
NOTE: After RCC signal received, if there is no need for other settings, you can
skip the manual settings part. If no RCC signal received or you need to set
other settings, please follow the bellow steps to finish setting.
TIPS:
1. Press and hold “RCC/SET” button to enter time set mode.
2. Press “CH/”and“MEM/
” buttons to adjust the values. Hold to adjust
quickly.
3. Press “RCC/SET” button to confirm and move to the next setting.
4. Press the “Backlight/Snooze” button anytime to exit settings.
*RCC Symbol Display:
a. When receiving signal , RCC symbol " " will be flashing.
b. When signal successfully received, LCD will display the complete
RCC symbol “ ” and exit RCC receiving.
c. If no signal is received, the RCC symbol will disappear.
7
Setting Order:
 Atomic ON/OFF
 Time Zone (Atomic ON)
 DST ON/OFF
 12H/24H
 Hour
 Minutes
 Year
 Month & Date Display
 Month
 Date
 Language
 (Celsius)/ °F(Fahrenheit)
Detailed Manual Setting Steps:
1. Press and hold “RCC/SET” button for 5 seconds to enter settings.
2. Press “RCC/SET to select ATOMIC ON/OFF. Press “CH/” or “MEM/
buttons to select ON or OFF. (Note: If ATOMIC OFF is selected, it will skip Time
Zone setting and move to 12/24 Hour setting.)
3. Press “RCC/SET to select Time Zone. Press “CH/”or“MEM/
” to select
a time zone: AST, EST, CST, MST, PST, AKST, HS T. (Default setting: ‐5 EST).
8
4. Press “RCC/SET” to select DST ON/OFF. Default setting: ON. Press “CH/
or “MEM/ to select DST ON if you do observe Daylight Saving Time.
5. Press “RCC/SET to select 12/24‐hour format. Press “CH/”or“MEM/
to select 12‐hour format or 24‐hour format.
6. Press “RCC/SET to select the Hours. Press “CH/”or“MEM/
” to adjust
the hour.
7. Press “RCC/SET to select the Minutes. Press “CH/”or“MEM/
”to
adjust the minutes.
8. Press “RCC/SET” to select the Year (year range: 2000‐2099). Press “CH/
or “MEM/” to adjust the year.
Hours from GMT Time Zone Description
‐4 AST Atlantic Standard Time
‐5 EST Eastern Standard Time
‐6 CST Central Standard Time
‐7 MST Mountain Standard Time
‐8 PST Pacific Standard Time
‐9 AKST Alaska Standard Time
‐10 HST Hawaii Standard Time
DST symbol display:
a. Select “DST ALWAYS” , means DST function is always on all the
year round.
b. Select “DST ”, means DST function will be on during daylight
saving time.
c. Select “DST OFF”, means DST function is off.
9
9. Press “RCC/SET to select Month & Date display format. Press “CH/”or
“MEM/” to select Month/Date or Date/Month format.
10. Press “RCC/SET to select the Month. Press “CH/”or“MEM/
”to
adjust the month.
11. Press “RCC/SET” to select the Date. Press “CH/” or “MEM/ to adjust
the date.
12. Press “RCC/SET” to select Weekday Language. Press “CH/”orMEM/
to adjust the language. Optional language: ENG(English), DUT(Dutch),
DAN(Danish), SPA(Spanish), ITA(Italian), GER(German), FRE(French).
13. Press “RCC/SET” to select (Celsius)/ °F(Fahrenheit). Press “CH/”or
“MEM/” to select Celsius or Fahrenheit.
14. Press “RCC/SET” to confirm and exit.
3.4 REMOTE SENSOR INSTALLATION
When the remote sensor is first used, please put the weather station main
unit and the remote sensor together at the same position for 30 minutes to
establish a strong connection.
NOTE:
When Atomic OFF is selected, will move directly to 12/24 hour time
setting.
Weekday will set automatically as Year, Month and Date are set.
When relevant language is selected, the rest of the instructions will be in
that language.
During setting, if no operation for 20 seconds, it will automatically save
and exit settin
g
.
10
1. To insure optimum reception, mount the remote sensor vertically, do not
lay down on a flat surface. Please mount the remote sensor at a height of
2‐2.5m/6.56ft off the ground.
Correct Placement Position Proper Height
2. Direct sunlight and radiant heat sources will result in inaccurate
temperature readings, so a north‐side, shaded location is best.
3. Avoid direct rain, it is best to mount in a well‐protected area, such as under
the eaves.
4. It is recommended to mount the remote sensor at least 50 feet away from
plant life and large bodies of water, because these factors may result in the
inaccurate humidity readings.
11
5. Provide good airflow around the remote sensor to reflect the changes of
environment.
6. Wireless signals are impacted by distance, interference (wireless phones,
wireless routers, TVs, microwaves, computer monitors, etc.), and transmission
barriers such as thick wall, solid metal. Make sure there’s no thick wall or
other strong interference between the weather station main unit and sensor,
place them at least 3ft/0.9m away from interference.
12
7. You can mount the sensor in multiple ways: place on a stable surface,
mount to the wall using a nail, or lift with a rope. In whatever way, make sure
at least one side of the sensor air vent (back or bottom) is not blocked.
3.5 ALARM TIME SETTING
1. Press and hold “ ” button to enter into alarm time setting.
2. Press “CH/”or“MEM/
” button to set alarm hour, and press “
button to confirm and enter minutes setting.
3. Press “CH/”or“MEM/
” button to adjust the alarm minutes, and press
”buttontoconfirmandexitalarmsetting.
4. When in time display mode, press ” button once to check alarm time.
5. Press “ ” button twice to turn ON/OFF alarm. Alarm symbol “ ”will
appear or disappear on the screen.
6. To return to normal mode, press the TOP BUTTON.Ifnooperationfor20
seconds, it will automatically save and exit.
13
3.6 SNOOZE FUNCTION
1. When alarm rings, the ascending “Bibi” alarm sound will last for 2 minutes
if no operation.
2. When alarm rings, press the TOP BUTTON to activate snooze function
(symbol will flash on screen). After 5 minutes, the alarm will ring again.
3. When alarm rings, press any other button except TOP BUTTON to stop the
alarm rings. And the alarm will restart next day.
3.7 MAX/MIN TEMPERATURE & HUMIDITY RECORDS
Note: All Max and Min records will update every 24 hours at 12:00 (midnight).
1. While in normal mode, press “MEM/” button to enter the maximum
mode, and the MAX icon and maximum records will be displayed. Press
“MEM/” button again to enter the minimum mode, the MIN icon and
minimum records will be displayed. Press “MEM/” button again to return
the normal mode.
2. The max and min records will display for 3 seconds, then automatically
exit.
3. Clear max/min records: press “MEM/” once (Maximum Mode), then
press and hold “MEM/” to clear Max record. Press “MEM/”again
(Minimum Mode), then press and hold “MEM/”toclearMinrecord.
14
4 TEMPERATURE & HUMIDITY TREND ARROWS
The temperature and humidity trend arrows update every 15 minutes,
indicating whether the temperature or humidity is rising, falling or remaining
the same.
5 COMFORT LEVEL INDICATOR
Indoor comfort level indicator keeps you informed the comfort level in your
home, and when to dehumidify or humidify.
Arrows
Indicator Humidity Temperature
Up Arrow Humidity has risen 3%
RH in the past hour.
Temperature has risen
1.8°F in the past hour.
Down Arrow Humidity has fallen 3%
RH in the past hour.
Temperature has fallen
1.8°F in the past hour.
No Arrows
Humidity has no
change in the past
hour.
Temperature has no
change in the past
hour.
DRY: Humidity < 30%
COMFORT: 30% < Humidity < 60%, 68°F <
Temperature < 79°F
WET: Humidity > 60%
15
6 WEATHER FORECAST ICONS
There are 5 kinds of weather icons. The weather icon display is based on the
hourly calculation of indoor and outdoor temperature, humidity and
barometric data. It predicts weather condition of the next 12 hours, and is
about 70‐75% correct.
Note: When powered on or restored, the weather icon will be default “Sunny
To Cloudy.
7BACKLIGHTFUNCTION
When powered on, press the top button to turn on the backlight, and the
backlight will last 20 seconds to save batteries.
8 LOW BATTERY INDICATOR
1. When Battery Indicator shows next to the Outdoor Temperature,
replace batteries in your Outdoor Sensor.
2. When Battery Indicator shows next to the Indoor Temperature, replace
batteries in your Weather Station.
16
9 SPECIFICATIONS
9.1 TECHNICAL SPECIFICATION
Indoor Temperature Range: 14 °F~ 122 °F(‐10~50.0
)
Outdoor Temperature Range: ‐40 °F~140 °F(‐40~60)
Humidity Range: 1% to 99% RH
Transmission Range: 328 ft (100 meters), 433MHZ (open air)
Power Requirements: Weather Station: 3 x AAA Alkaline batteries (not
included), Remote Sensor: 2 x AA Alkaline batteries (not included)
9.2 MEASUREMENT SPECIFICATIONS
The following table provides the specifications of the measurement
parameters.
Measurement Range Accuracy Resolution
Indoor
Temperature 14 °F~ 122 °F ±2 °F (between 32~122°F, if out of
this range: ±3.6 °F) 0.1 °F
Outdoor
Temperature ‐40 °F~140 °F ±2 °F (between 32~122°F, if out of
this range: ±3.6 °F) 0.1 °F
Indoor Humidity 1% to 99% ± 5% (humidity between 30‐80%, if
out of this range: ±7%) 1%
Outdoor
Humidity 1% to 99% ± 5% (humidity between 30‐80%, if
out of this range: ±7%) 1%
17
10 TROUBLESHOOTING GUIDE
Problem Possible Solution
Outdoor sensor signal is
lost or showing dashes
(‐ ‐) on the display
1. Resync the unit.Pressandholdthe"CH/
button for 5‐6 seconds to resynchronize. The
sensor search icon will flash while searching and
be solid when sensor signal is received. Please
wait several minutes for the sensor to report in
orthesearchicontoturnoff.
2. If you regain connection while the sensor is
mounted, great. If the the synchronization fails,
bring the sensor within 10 feet of the weather
station and try the bellow methods:
1) Remove the batteries of Sensor, wait 10
seconds. Then press and hold the "CH/
button for 5‐6 seconds, then reinsert the
batteries of sensor. (Please make sure the
sensor and display console have the same
channel.)
2) Factory Restart: Firstly remove all the
batteries of sensor and display console. Then
set the channel of Sensor to "CH1". Reinsert the
batteries of display console and press "CH/
button to choose "CH1". Then reinsert the
batteries of sensor, allow the whole set device
to sit together for 30 minutes to establish a
strong connection.
3. Checked the remote sensor is powered up.
4. The maximum transmission range is
18
328ft/100m, move the sensor closer to the display
console.
5. Make sure both display console and sensor are
placed at least 3ft/0.9m away from electronics
that may interfere with the wireless
communication, such as computers, TVs,
microwaves, other wireless transmitters or
receivers, etc.
6. Make sure the sensor is not transmitting
through solid metal or thick walls. Radio
Frequency (RF) Sensors cannot transmit through
metal barriers or thick walls. (Please refer
REMOTE SENSOR INSTALLATION)
Outdoor temperature
and humidity always
keep cycling/how to exit
the CYCLE mode
. cycle symbol means that weather station
enter channels cycle mode, it will display the
values of 3 channels in order every 10 seconds.
Press the "CH/” button to cancel cycle symbol.
Temperature reads too
high in the daytime
Make sure both the display console and sensor are
placed out of direct sunlight and away from any
heat sources or vents.
Indoor and outdoor
temperature and
humidity do not agree
Allow up to two hours for the sensor to stabilize
due to signal filtering. The indoor and outdoor
temperature sensor should agree within 4.And
indoor and outdoor humidity sensor should agree
within 10%.
  • Page 1 1
  • Page 2 2
  • Page 3 3
  • Page 4 4
  • Page 5 5
  • Page 6 6
  • Page 7 7
  • Page 8 8
  • Page 9 9
  • Page 10 10
  • Page 11 11
  • Page 12 12
  • Page 13 13
  • Page 14 14
  • Page 15 15
  • Page 16 16
  • Page 17 17
  • Page 18 18
  • Page 19 19
  • Page 20 20
  • Page 21 21
  • Page 22 22
  • Page 23 23

BALDR B0340WST2H2R-V7 User manual

Category
Weather stations
Type
User manual

BALDR B0340WST2H2R-V7 wireless weather station provides accurate weather conditions with a user-friendly interface and versatile features. Monitor indoor and outdoor temperatures and humidity levels, with a maximum of three outdoor sensors supported (additional sensors sold separately). It features atomic timekeeping for precise timekeeping and automatic updates for daylight saving time. Stay informed with weather forecast icons and comfort level indicators. The backlit display allows for easy viewing in low-light conditions, and the snooze function adds convenience to your mornings.

Ask a question and I''ll find the answer in the document

Finding information in a document is now easier with AI