Page is loading ...

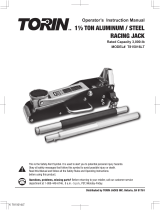
1500-LB. HIGH POSITION HOIST
STAND
OWNER’S MANUAL
WARNING:
Read carefully and understand all ASSEMBLY AND OPERATION INSTRUCTIONS before
operating. Failure to follow the safety rules and other basic safety precautions may result in
serious personal injury.
Item# TRF40753A

2

3
Thank you very much for choosing a BIGRED product! For future reference, please complete the
owner’s record below:
Model: _______________ Purchase Date: _______________
Save the receipt, warranty and these instructions. It is important that you read the entire manual to
become familiar with this product before you begin using it.
This machine is designed for certain applications only. The distributor cannot be responsible for issues
arising from modification. We strongly recommend this machine not be modified and/or used for any
application other than that for which it was designed. If you have any questions relative to a particular
application, DO NOT use the machine until you have first contacted the distributor to determine if it can
or should be performed on the product.
For technical questions please call 1-888-448-6742.
INTENDED USE
This product is designed as a means of partial support for, and the positioning of, vehicle components
during their installation/removal, but not for use in stabilizing or supporting vehicles. For use ONLY
under a properly secured automotive lift.
TECHNICAL SPECIFICATIONS
Description
Item
46207
Maximum Capacity
1,500 lbs.
Minimum Lift Height
53-1/8 in
Maximum Lift Height
80-3/4 in
Product Base Size
12in. x 12 in.
Weight
39 lbs.
Safe Operating Temperature is between 40°F – 105°F (4°C - 41°C)
GENERAL SAFETY RULES
WARNING: Read and understand all instructions. Failure to follow all instructions listed
below may result in serious injury.
CAUTION: Do not allow persons to operate or assemble this jack stand until they have
read this manual and have developed a thorough understanding of how the jack stand works.
WARNING: The warnings, cautions, and instructions discussed in this instruction
manual cannot cover all possible conditions or situations that could occur. It must be understood
by the operator that common sense and caution are factors which cannot be built into this product, but
must be supplied by the operator.
SAVE THESE INSTRUCTIONS

4
IMPORTANT SAFETY CONSIDERATIONS
JACK STAND USE AND CARE
• Do not modify the jack stand in any way. Unauthorized modification may impair the function
and/or safety and could affect the life of the equipment. There are specific applications for which the
jack stand was designed.
• Always check of damaged or worn out parts before using the jack stand Broken parts will
affect the jack stand operation. Replace or repair damaged or worn parts immediately.
• Store idle jack stand when jack stand is not in use, store it in a secure place out of the reach of
children. Inspect it for good working condition prior to storage and before re-use.
• WARNING! NEVER use automotive jack stands to support both ends, or one side of a
vehicle! Use only 1 pair per vehicle. Rated capacity is per pair only!
WARNING!
1. Study, understand, and follow all instructions before operating this device.
2. Do not exceed rated capacity.
3. Use only on hard, level surfaces.
4. Adequately support the vehicle before starting repairs.
5. Do not use to support or stabilize vehicle.
6. Center load on saddle.
7. This stand is intended to provide partial support of vehicle components during removal and
installation.
8. No alterations shall be made to this product.
9. Support only on areas of the vehicle as specified by the vehicle manufacturer.
10. Only attachments and/or adapters supplied by the manufacturer shall be used.
11. Do not use jack stands for any use other than the manufacturer specified usage.
12. Do not use if damaged in any way.
13. Failure to heed these markings may result in personal injury and/or property damage.

5
GENERAL SAFETY INSTRUCTIONS
* Position the Auxiliary Stand
Position the jack stand to only support on the areas of the vehicle as specified by the vehicle manufacturer.
* Always Support Load
After lifting the vehicle always support the load with appropriately before working on the vehicle.
* Do Not Overload
Do not overload this equipment beyond its rated capacity. Overloading this equipment beyond its rated capacity can
cause damage to or failure.
* Always Use on Hard Level Surfaces
This product is designed only for use on hard level surfaces capable of sustaining the load. Use on unstable or other
possible loss of load.
* Center Load on Jack Saddle
Center load on saddle before lifting vehicle working on vehicle.
Off-center loads and loads lifted when the Auxiliary Stand is not level can cause loss of load or damage to the jack stand.
*Do not raise or lower the vehicle unless tools, materials and people are clear.
When the lift is being lowered, make sure everyone is standing at least six feet away. Be sure there are no tools or
equipment left under or around before lowering.
* Always lower slowly.
* Wear ANSI-approved safety glasses and heavy duty work gloves during use.
* Do not move or dolly vehicle while jack stand is in use.
* Stay alert. Use caution and common sense when operating auxiliary stand. Do not use jack stand when tired,
incoherent, dizzy, under the use or drugs or alcohol.
Training
-Read this manual before use. Do not allow anyone who has not read this manual, and/or does not understand the
requirements, use the equipment.
Spectators
-Do not allow bystanders around an Auxiliary Stand or under the load supported only by the Auxiliary Stand. Do not allow
anyone in the vehicle while the Auxiliary Stand is in use. Keep all bystanders away from vehicle when in use.
Inspection
-Inspect the Auxiliary Stand carefully before each use. Ensure the j Auxiliary Stand is not damaged, excessively worn, or
missing parts.
-Do not use the Auxiliary Stand unless it is properly functioning.
-Using an Auxiliary Stand that is not in good clean working condition or properly lubricated may cause serious injury.
Do not modify the in any way. Unauthorized modification may impair the function and/or safety and could affect the life
of the equipment. There are specific applications for which the equipment was designed.
Always check for damaged or worn out parts before using. Broken parts will affect the equipment operation. Replace
or repair damaged or worn parts immediately.
When jack is not in use, store it in a secure place out of the reach of children. Inspect it for good working condition prior to
storage and before re-use.
DO NOT USE wood blocks or any other non-approved load sustaining devices.
DO NOT USE wood blocks or any other non-approved means of lifting with the Auxiliary Stand and or load
being raised.

6
ASSEMBLY
Use the exploded drawing as your guide to assemble, Lay all parts and assemblies out in front of you
before beginning. The following procedure is recommended:
All numbers in parenthesis () refer to the index number from the parts breakdown.
1. Familiarize yourself with the Jack Stand.
2. Attach (11) pillar base to (10) stand base. Check that both parts are secure to each other.

7
3. Attach (9) upright to (11) pillar base.
4. Use hardware include to attach upright to pillar base. Place (13) washer M16, then insert (12) pillar roll
pin M16x60 through holes on the pillar base. Secure roll pin with (14) washer M16 and (15) spring clip.

8
5. Attach (2) handle to (3) threaded rod. Then attach (20) roll pin M4x25 to (3) threaded rod.
6. With the upright in the standing position insert (6) lower bearing base, (7) ball bearing assembly and
(8) upper bearing base onto (5) upright bearing seat.
7. Attach (1,3, 4) threaded rod column assembly on (6,7,8) bearings and slide shaft inside (9) upright.
Use caution when installing and lowering threaded rod column assembly.

9
8. Insert (19) foot pedal into slot between (11) pillar base weldment. Use hardware include to attach
upright to pillar base. Place (21) washer M12 on (16) pin M12, then Insert (16) foot pedal pin M12x35
through (11) pillar base weldment hole slot. Secure (16) foot pedal pin with (17) washer M12 and (18)
spring clip.
9. Check that all hardware is secure and tight.
10. Auxiliary Stand is now ready for use.

10
OPERATING INSTRUCTIONS
RAISING'THE'JACK'STAND' '
1. Adjust height by rotating the handle CLOCKWISE.
2. Check to ensure ratchet is secure before loading/un/loading.
3. Carefully position stand so that load is centered on stand’s saddle.
4. Raise saddle to vehicle support point vehicle, continue to rotate handle clockwise until load support
point is secure. DO NOT RAISE ANY HIGHER THAN LOAD STABILITY WILL ALLOW.
5. Check to ensure vehicle is secure before working on, around or under.
LOWERING'THE'JACK'STAND' '
1. Ensure that all tools, equipment and personnel are clear before lowering load.
2. DO NOT EVER LOWER STAND UNLESS VEHICLE AND COMPNENTS ARE 100% SUPPORTED
SECURELY. DO NOT EVER ASSUME LOAD IS SECURE; CHECK BEFORE LOWERING.
3. Rotate the handle COUNTER-CLOCKWISE to lower the stand clear of support point.
4. Carefully release stopper and allow ratchet to glide down to lowest position.
5. Carefully remove stand, then carefully lower vehicle on car lift.

11
MAINTENANCE INSTRUCTIONS
If you use and maintain your equipment properly, it will give you many years of service. Follow the
maintenance instructions carefully to keep your equipment in good working condition. Never perform any
maintenance on the equipment while it is under a load.
Inspection
You should inspect the product for damage, wear, broken or missing parts (e.g.: pins) and that all
components function before each use. Follow lubrication and storage instructions for optimum product
performance.
Binding
If the product binds while under a load, use equipment with equal or a larger load capacity to lower the
load safely to the ground. After un-binding; clean, lubricate and test that equipment is working properly.
Rusty components, dirt, or worn parts can be causes of binding Clean and lubricate the equipment as
indicated in the lubrication section. Test the equipment by lifting without a load. If the binding continues
contact Customer Service.
Cleaning
If the moving parts of the equipment are obstructed, use cleaning solvent or another good degreaser to
clean the equipment. Remove any existing rust, with a penetrating lubricant.
Lubrication
This equipment will not operate safely without proper lubrication. Using the equipment without proper
lubrication will result in poor performance and damage to the equipment. Some parts in this equipment
are not self-lubricating inspect the equipment before use and lubricate when necessary. After cleaning,
lubricate the equipment using light penetrating oil, lubricating spray.
-Use a good lubricant on all moving parts.
-For light duty use lubrication once a month.
-For heavy and constant use lubrication recommended every week.
Rust Prevention:
-Check unit assemblies daily for any signs of rust or corrosion.
Without a load raise the equipment as high as it goes and inspect support and working joints. If signs of
rust are visible clean as needed.
Storing the Product
1. Lower saddle to the lowest resting position.
2. Place in the upright position.
3. Store in a dry location, recommended indoors.
Note: If the product is stored outdoors, be sure to lubricate all parts before and after use to ensure the
product stays in good working condition.

12
ASSEMBLY DIAGRAM

13
PARTS LIST
Item Index #
Description
Item #
Qty
1
Saddle Pad
M7501.0-1
1
2
Saddle
M7501.0-2
1
3
Threaded Rod
M7501.0-3
1
4
Adjusting Handle
M7501.1
1
5
UPRIGHT Bearing Seat
Upright Weldment
1
6
UPRIGHT LOWER Bearings Base
M7501.0-4
1
7
Upright Ball Bearing Assembly
M7501.2
1
8
UPRIGHT Upper Bearings Base
M7501.0-5
1
9
Upright
M7501.0-6
1
10
Base
M7501.0-7
1
11
Pillar Base
M7501.0-8
1
12
Pillar PIN M16x60
GB 662
1
13
PILLAR Plain Washer M16
GB/T 97.1
1
14
PILLAR Plain Washer M16
GB/T 97.1
1
15
Pillar Spring Clip
M7501.0-9
1
16
FOOT PEDAL PIN M12 X 35
GB 882
1
17
FOOT PEDAL Plain Washer M12
GB/T 97.1
1
18
FOOT PEDAL Spring Clip
M7501.0-10
1
19
Foot Pedal
M7501.0-11
1
20
FOOT PEDAL Roll Pin M4 X 25
GB 879
1
21
FOOT PEDAL Plain Washer M12
GB/T 97.1
1
Safe Operating Temperature is between 40°F – 105°F (4°C - 41°C)

14
One Year Limited Warranty
BIGRED has been producing quality automotive repair and maintenance products since 1968. All products
are sold are felt to be of the highest quality and are covered by the following warranty:
With proof of purchase for a period of one year from the date of that purchase, the manufacturer will repair or
replace, at its discretion, without charge, any of its products or parts thereof which fail due to a defect in
material or workmanship.
This warranty does not cover damage or defects caused by improper use, careless use or abuse of the
equipment. This warranty does not cover parts normally considered to wear out or be consumed in the normal
operation of the equipment.
Except where such limitations and exclusions are specifically prohibited by applicable law, (1) the
CONSUMER’S SOLE AND EXCLUSIVE REMEDY SHALL BE THE REPAIR OR REPLACEMENT OF
DEFECTIVE PRODUCTS AS DESCRIBEDABOVE, and (2) THE MANUFACTURER SHALL NOT BE LIABLE
FOR ANY CONSEQUENTIAL OR INCIDENTAL
DAMAGE OR LOSS WHATSOEVER, and (3) THE DURATION OF ANY AND ALL EXPRESSED AND
IMPLIED WARRANTIES, INCLUDING, WITHOUT LIMITATION, ANY WARRANTIES OF
MERCHANTABILITY AND FITNESS FOR A PARTICULAR PURPOSE, IS LIMITED TO A PERIOD OF ONE
YEAR FROM DATE OF PURCHASE.
For any technical questions or warranty support please contact:
BIGRED Customer Service directly by telephone at 1-888-44-TORIN (1-888-448-6746)
8:00am - 4:30 pm Pacific Time, Monday - Friday.
Alternately Customer Service can be reached through www.torinjacks.com or via email at
info@torinjacks.com.
/