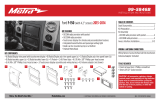
INSTALLATION INSTRUCTIONS
99-5864CH
The World’s best kits.® MetraOnline.com © COPYRIGHT 2023 METRA ELECTRONICS CORPORATION REV. 10/5/23 INST99-5864CH
Attention! With the key out of the ignition,
disconnect the negative battery terminal
before installing this product. Ensure that all
installation connections are secure before
cycling the ignition to test this product.
KIT FEATURES
• ISO DIN radio provision with pocket
• ISO DDIN radio provision
• Included interface for climate and
steering wheel functions
• Integrated passenger airbag indicator
• Painted charcoal
Note: Factory B&O amplified sound
systems require an additional
interface sold separately.
KIT COMPONENTS
• A) Radio trim panel • B) Radio brackets • C) Pocket • D) Blank panels (3), Heated steering wheel, Cooled seat buttons (L & R) • E) 2 and 3-button trim panels
• F) #8 x 3/8” Phillips screws (4) • G) Panel clips (6) • H) SYNC module brackets (not used) • I) HVAC interface and wiring harness (not shown) • J) Antenna adapter (not shown)
TOOLS REQUIRED
• Panel removal tool • Phillips screwdriver
• 9/32” socket wrench • Cutting tool
TABLE OF CONTENTS
Dash Disassembly .............................................. 2-3
Kit Preparation ....................................................... 4
Kit Assembly
– ISO DIN radio provision with pocket .................5
– ISO DDIN radio provision ...................................5
Axxess Interface Installation ...........................6-15
Final Assembly ...................................................... 11
WIRING & ANTENNA CONNECTIONS
Wiring Harness: Axxess interface built into kit
Antenna Adapter: Included with kit
S
old Separately: USB replacement HUB AXFD-USB
or AXFD-USB2.
Visit MetraOnline.com for more detailed information about the product and up-to-date vehicle
specific applications
*With factory dual zone climate controls
A B C D E
G HF
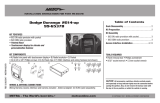
Ford F-150 2015-2020* and
F-250/350/450/550 XL 2020-2022*

2386.257.1187
|
MetraOnline.com
DASH DISASSEMBLY
1. For vehicles with a center channel
speaker: Unclip and remove the speaker
grille in the center of the dash above the
radio/climate control panel, and then
remove the (2) 9/32” screws exposed.
(Figure A)
2. For vehicles without a center channel
speaker: Remove the rubber pad in the
shallow pocket above the radio/climate
control panel, and then remove the (2)
9/32” screws exposed. (Figure B)
3. Unclip and remove the panel above the
radio/climate control panel, and then
remove the (2) 9/32” screws from the
top of the radio/climate control panel.
(Figure C)
Ensure that the vehicle is completely off before
proceeding onto the following (5) steps
4. Using the panel removal tool, carefully
unclip, unplug, and remove the radio/
climate control panel.
5. Remove the 9/32” Phillips screws securing
the display screen:
(4) for the 4.2-inch display screen models,
(6) for 8-inch display screen models, then
unplug and remove the screen. (Figure D)
Continued on the next page
(Figure D)
(Figure C)
(Figure A)
(Figure B)

3
REV. 10/5/23 INST99-5864CH
DASH DISASSEMBLY (CONT.)
(Figure G)
(Figure H)
(Figure F)
6. For models with a 4.2-inch display
screen and SYNC®: Remove (2) 9/32”
screws securing the SYNC® module, then
unplug and remove. (Figure F)
7. Remove (4) 9/32” screws securing the
radio chassis, disconnect the wiring, and
then remove the factory radio. (Figure G)
8. For models equipped with a factory
backup camera: Remove the (2) 10mm
nuts located at the top of the camera
module. Loosen the bottom nut and
reposition the module down onto the
lower stud, then re-secure using just (1)
10mm nut. (Figure H)
Continue to Kit Preparation

4386.257.1187
|
MetraOnline.com
KIT PREPARATION
From the factory radio/climate control panel:
1. Unclip the two or three buttons from the
top of the panel.
To the 99-5864CH radio trim panel:
1. Select two or three-button trim panel
and attach to the radio trim panel with
(4) #4 x 3/8” screws. (Figure A)
2. Snap in the two or three buttons
removed earlier. (Figure B)
(Figure B) (Figure D)
(Figure A) (Figure C)
3. Attach the (6) panel clips provided with
this kit. (Figure C)
4. For models with vented seats and
heated steering wheel:
Clip in the vented seat and heated
steering wheel buttons.
(Figure D)
For models without vented seats and
heated steering wheel:
Clip in the blank panels. (Figure D)
Continue to Kit Assembly

5
REV. 10/5/23 INST99-5864CH
KIT A SSE M B LY
(Figure B)
(Figure A)
ISO DIN radio provision with pocket
1. Attach the pocket to the radio brackets
using (4) Phillips screws provided with
this kit. (Figure A)
2. Remove the metal DIN sleeve and trim
ring from the aftermarket radio.
3. Slide the aftermarket radio into the
radio bracket/pocket assembly, and then
secure it using screws supplied with the
radio. (Figure B)
4. Reconnect the negative battery terminal
and prepare for the Axxess interface
installation.
(Figure A)
ISO DDIN radio provision
1. Attach the radio brackets to the
aftermarket radio using screws supplied
with the radio. (Figure A)
2. Reconnect the negative battery terminal
and prepare for the Axxess interface
installation.
Continue to Axxess Interface Installation

386.257.1187
|
MetraOnline.com
6
AXXESS INTERFACE INSTALLATION
INTERFACE FEATURES
INTERFACE COMPONENTS
• Axxess interface (built into kit)
• Car side harness (LD-TSCREEN-FD3)
• HVAC interface
• HVAC interface harness (LD-FDHVAC)
• 4-pin flat to 4-pin stacked harness (packaged with the HVAC harness)
• 16-pin harness with stripped leads (LD-2NAVAMPL)
• 14-pin harness with stripped leads and a two-pin plug (LD-FD-AUX)
• 54-pin backup camera harness with a two pin plug (LD-FD54CAM)
• Female 3.5 with stripped leads (LD-SWC-F3.5)
TOOLS REQUIRED
• Crimping tool and connectors, or solder gun, solder, and heat shrink
• Tape • Wire cutter • Zip ties
• Provides accessory power (12-volt 10-amp)
• Retains R.A.P. (retained accessory power)
• Provides NAV outputs (parking brake, reverse, speed sense)
• Retains audio controls on the steering wheel
• Allows the override of the STOP/START engine feature
• The factory STOP/START button can resume the STOP/START feature
• Retains the factory backup camera
• Factory B&O amplified sound systems require and additional interface sold separately.
Part # AX-A2B-FD1.
• Retains balance and fade (excluding Sony)
• Micro-B USB updatable
TABLE OF CONTENTS
Connections
For models
without
a Sony or B&O amplifier .......................................................................... 7
For models
with
a Sony amplifier ............................................................................................ 8
3.5mm jack - steering wheel control retention ......................................................................9
Backup camera harness ............................................................................................................ 9
Installation ...................................................................................................................................10
Programming ................................................................................................................................ 11
Configuration Menu ................................................................................................................12-14
Attention! This interface will work with models that are either Sony amplified, or non-
amplified. Please follow the instructions carefully for your model vehicle. Failure to do
so will result in either no sound, or low sound. If you are unsure if your vehicle is factory
amplified or not, please contact your local dealership.

REV. 10/5/23 INST99-5864CH 7
CONNECTIONS
From the Car Side Harness to the aftermarket radio, connect as indicated:
• Black wire to the ground wire.
• Yellow wire to the battery wire.
• Green wire to the left rear (+) speaker output.
• Green/Black wire to the left rear (-) speaker output.
• Purple wire to the right rear (+) speaker output.
• Purple/Black wire to the right rear (-) output. •
Tape off and disregard the following (1) wire, it will not be used in this application:
Blue
AUX-in connections:
• Connect the Red and White RCA jacks labeled “FROM 3.5” to the audio AUX-IN jacks from
the aftermarket radio.
• Disregard the Red and White RCA jacks labeled “RSE/SYNC®/SAT”, they will not be used
in this application.
Continue to 3.5mm Jack - Steering Wheel Control Retention
For models
without
a Sony or a B&O amplifier:
From the 16-pin harness with stripped leads to the aftermarket radio, connect as indicated:
• Red wire to the accessory wire.
• Blue/White wire to the amp turn on wire’ (if equipped with a factory subwoofer)
• Orange/White wire to the illumination wire. (if applicable)
• Gray wire to the right front (+) speaker output.
• Gray/Black wire to the right front (-) speaker output.
• White wire to the left front (+) speaker output.
• White/Black wire to the left front (-) speaker output.
The following (3) wires are only for multimedia/navigation radios that require these wires.
• Blue/Pink wire to the VSS/speed sense wire.
• Green/Purple wire to the reverse wire.
• Light Green wire to the parking brake wire.
Tape off and disregard the following (5) wires, they will not be used in this application:
Brown, Green, Green/Black, Purple, Purple/Black

386.257.1187
|
MetraOnline.com
8
CONNECTIONS (CONT.)
From the Car Side Harness to the aftermarket radio:
• Connect the Black wire to the ground wire.
• Connect the Yellow wire to the battery wire.
• Tape off and disregard the following (5) wires, they will not be used in this application:
Blue, Green, Green/Black, Purple, Purple/Black
• Disregard the Red and White RCA jacks labeled “RSE/SYNC®/SAT”, they will not be used
in this application.
• Disregard the Red and White RCA jacks labeled “FROM 3.5”, they will not be used
in this application.
Continue to 3.5mm jack - steering wheel control retention
For models
with
a Sony amplifier:
From the 16-pin harness with stripped leads to the aftermarket radio, connect as indicated:
• Red wire to the accessory wire.
• Blue/White wire to the amp turn on wire.
Note: This wire must be connected to hear sound from the factory amplifier.
• Orange/White wire to the illumination wire. (if applicable)
• Gray wire to the right front (+) speaker output.
• Gray/Black wire to the right front (-) speaker output.
• White wire to the left front (+) speaker output.
• White/Black wire to the left front (-) speaker output.
• Green wire to the left rear (+) speaker output.
• Green/Black wire to the left rear (-) speaker output.
• Purple wire to the right rear (+) speaker output.
• Purple/Black wire to the right rear (-) output.
Tape off and disregard the following (1) wire, it will not be used in this application: Brown
The following (3) wires are only for multimedia/navigation radios that require these wires.
• Blue/Pink wire to the VSS/speed sense wire.
• Green/Purple wire to the reverse wire.
• Light Green wire to the parking brake wire

REV. 10/5/23 INST99-5864CH 9
CONNECTIONS (CONT.)
OE Backup camera retention:
• Connect one side of the supplied camera retention harness to the 54 pin connector in the
vehicle. This connector was removed from the factory 8” screen.
• Connect the two pin plug to the 14-pin AUX plug (LD-FD-AUX)
• Connect the Yellow RCA jack to the backup camera input from the aftermarket radio.
From the 14-pin harness with stripped leads to the aftermarket radio:
•
Connect the two pin plug to the mating two pin plug on the camera harness (LD-FD54CAM)
The following wire is for triggering a relay from the buttons on the face of the radio trim panel. The
outputs are latching, which means they will stay active until the button is pressed again (or until the
ignition key has been turned off). These buttons can be used to turn on items such as: accent lighting or
fans to cool aftermarket amplifiers.
• Connect the Blue/Red wire labeled “AUX 1” to the negative input from an automotive
SPDT relay (sold separately).
3.5mm Jack - Steering Wheel Control Retention:
• The 3.5mm jack is to be used to retain audio controls on the steering wheel control.
For the radios listed below:
Connect the female 3.5mm connector with stripped leads, to the male 3.5mm SWC jack from the
5864 harness. Tape off and disregard remaining wires.
• Eclipse: Connect the SWC wire, Brown to the Brown/White wire of the connector. Then
connect the remaining SWC wire, Brown/White to the Brown wire of the connector.
• Metra OE: Connect the Gray steering wheel control wire (Key 1) to the Brown wire.
• Kenwood or select JVC with an SWC wire: Connect the Blue/Yellow wire to the Brown
wire.
Note: If the Kenwood radio auto detects as a JVC, manually set the radio type to
Kenwood. See the instructions under Changing Radio Type.
• XITE: Connect the SWC
(
SWC-2
)
wire from the radio to the Brown wire.
• Parrot Asteroid Smart or Tablet: Connect the 3.5mm jack into the AXSWCH-PAR (sold separately),
and then connect the 4-pin connector from the AXSWCH-PAR into the radio.
Note: The radio must be updated to rev. 2.1.4 or higher software.
• Universal “2 or 3 wire” radio: Connect the SWC wire,
(
Key-A or SWC-1
)
to the Brown wire of the
connector. Then connect the remaining SWC wire,
(Key-B or SWC-2)
to the Brown/White wire of
the connector. If the radio comes with a third wire for ground, disregard this wire.
Note: After the interface has been programmed to the vehicle, refer to the manual provided with
the radio for assigning the SWC buttons. Contact the radio manufacturer for more information.
• For all other radios: Connect the 3.5mm jack from the AXSWC harness into the port on the
aftermarket radio designated for an external SWC interface. Refer to the manual provided with
the radio, if in doubt as to where the 3.5mm jack should connect.

386.257.1187
|
MetraOnline.com
10
Climate control panel
1. Connect the 16-pin harness with stripped leads into port A.
2. Connect the 14-pin harness with stripped leads into port B.
3. Connect the FD3 harness into port C, and then to the wiring harnesses in the vehicle.
These harnesses are the ones removed in Dash Disassembly, step 7.
4. Port D is a Micro-B USB input for updating the Axxess interface.
A
BC
D
HVAC interface
5. Connect the HVAC interface harness into the HVAC interface, and then to the
wiring harnesses in the vehicle. These harnesses are the ones removed in
Dash Disassembly, step 4.
Attention! Disregard the 10-pin connector from the HVAC interface harness,
it will not be used in this application.
6. Connect the 4-pin flat to 4-pin stacked harness into the HVAC interface, and then to the
passenger airbag light assembly.
7. Connect the 6-pin harness from the car side harness to the HVAC interface.
8. Locate the factory antenna connector in the dash and complete all necessary
connections to the radio. Use the antenna adapter provided to adapt the factory
antenna connector to the aftermarket radio.
INSTALLATION

REV. 10/5/23 INST99-5864CH 11
PROGRAMMING FINAL ASSEMBLY
1. Secure the completed assembly into the upper dash using the factory hardware removed in
Dash Disassembly, step 5.
2. Snap the radio trim panel over the completed assembly, then reassemble the dash in reverse
order of disassembly to complete the installation.
1. Connect the car side harness into Port C, and then to the wiring harnesses in the vehicle.
Note: This is a timed process.
Cycle ignition on.
Note: The right knob should show DZ (or a 2). If not, select that option using the steps below.
2. Turning the left knob will guide you through the options on “kit”
3. Turn right knob to change setting for that option.
4. Turn right knob to cycle through your options until you find the “done” option.
5. Press the “Dual” button exit (“Dual button will act as an Enter button”)

386.257.1187
|
MetraOnline.com
12
Download and install the AX-CUSTOM-BT app from the Android/Apple mobile devices app store.
QR Codes for downloading of APP
(Figure A)
Vehicle Settings Screen
1. Start the vehicle.
2. Open the app wait for the Customization Settings menu to appear.
(If Not Connected) appears instead, press the right button in the top right corner of
the screen, then press the left button in the top right corner of the screen to go back
to Customization Settings. The pairing process will begin at this point.
3. Once paired, Settings will be displayed on the screen. From this point on you can
make changes to the vehicle as desired, as long as the vehicle is on. (Figure A)
Note: Screenshot shown for illustration only.
Actual options available vary per vehicle and trim level.
Continued on the next page
APP INSTRUCTIONS

REV. 10/5/23 INST99-5864CH 13
1. Select Manage Vehicles by pressing the button in the top right of the screen. (Figure B)
2. Pressing either the Add Vehicle or Edit (pencil icon) button will open the
Configure Vehicle menu. (Figure C)
Manage Vehicles Screen Configure Vehicle Screen
(Figure B)
(Figure C)
• The name of the vehicle can be changed by pressing the text field.
• The app can automatically detect the interface installed in the vehicle by pressing the
Search button (magnifying glass).
• The Make and Model fields will open a drop down list for the user to select the make and
model of the vehicle that the interface is installed in.
• Press the Save button to store the changes.
APP INSTRUCTIONS (CONT.)

14 386.257.1187
|
MetraOnline.com
Available Options
Unit Settings
(Backlight Color)
• Off
• Red
• Orange
• Yellow
• Lime Green
• Green
• Cyan
• Blue
• Purple
• Magenta
Number of Zones
• Single Zone
• Dual Zone
Customization
(Ambient Lighting)
• Off
• Ice Blue
• Orange
• Light Blue
• Red
• Green
• Blue
• Purple
Radio (type)
1 Eclipse (Type 1)
2 Kenwood 2
3 Clarion (Type 1)
4 Boss (type 1)/Dual/Sony 1 (Boss)
5 JVC
6 Pioneer/Jensen
7 Alpine 3
8 Boss (type 4)/Visteon 1 (Boss)
9 Valor
10 Clarion (Type 2)
11 Boss (Type 2)
12 Eclipse (Type 2)
13 LG
14 Parrot 4
15 XITE
16 Philips
17 Kicker
18 JBL
19 Insane Audio
20 Magnadyne
21 Boss (type 3)
22 Axxera
BLUETOOTH CONFIGURATION OPTIONS

15
REV. 10/5/23 INST99-5864CH
SWC button remap
Note: Not all options are available, please
refer to aftermarket’s radio owner’s manual
for available commands from radio
• SEEK UP button remap
• SEEK DOWN button remap
• MODE/SOURCE button remap
• MUTE button remap
• PRESET UP button remap
• PRESET DOWN button remap
• POWER button remap
• BAND button remap
• PLAY/ENTER button remap
• PTT button remap
• ON HOOK button remap
• OFF HOOK button remap
SWC button dual press
Note: Not all options are available, please
refer to vehicle’s owners’ manual for buttons
that came equipped from vehicle
• SEEK UP button dual press
• SEEK DOWN button dual press
• MODE/SOURCE button dual press
• MUTE button dual press
• PRESET UP button dual press
• PRESET DOWN button dual press
• POWER button dual press
• BAND button dual press
• PLAY/ENTER button dual press
• PTT button dual press
• ON HOOK button dual press
• OFF HOOK button dual press
BLUETOOTH CONFIGURATION OPTIONS (CONT.)

16 386.257.1187
|
MetraOnline.com
The buttons on the steering wheel will be used to enter, navigate, and make changes to the
Configuration Menu in the kit. The display on the climate knobs will be used to view the menu.
1. With the driver’s door open, press and hold the OK button (right side), then cycle
the key on.
2. Press the Seek Up and Seek Down buttons to toggle through the menu options
available.
Refer to the Menu Options table for a list of options, and description of each option.
3. Navigate to “d o”, then press the OK button to exit the Configuration Menu.
4. If no activity after 10-seconds the Configuration Menu will close.
Menu Options
Left Knob Display Right Knob Display Description
A.L Ambient Lighting
A.G OEM Amplifier Gain
A.S. Will display current state Auto Stop/Start Override
r.d Radio Detection
b.L. Backlight
U O Version Number of Kit
d o n E Done/Quit
Left Knob Display Right Knob Display Ambient lighting Color
A.L Ib Ice Blue
A.L Or Orange
A.L Sb Soft Blue
A.L rd Red
A.L Gr Green
A.L bL Blue
A.L PU Purple
Left Knob Display Right Knob Display
A.S 0.0 Disabled (no over-ride)
A.S 0.1 Enabled
Sub-Menu Options
Ambient Lighting
Auto Stop/Start Override
OEM Amplifier Gain
Left Knob Display Right Knob Display
A.G 0 to 30
CONFIGURATION MENU

17
REV. 10/5/23 INST99-5864CH
Steering Wheel Controls
Left Knob Display Right Knob Display Radio Manufacturer Keynotes
r.d 1 Eclipse (Type 1) 1
r.d 2 Kenwood 2
r.d 3 Clarion (Type 1) 1
r.d 4 Boss (type 1)/Dual/Sony 1 (Boss)
r.d 5 JVC
r.d 6 Pioneer/Jensen
r.d 7 Alpine 3
r.d 8 Boss (type 4)/Visteon 1 (Boss)
r.d 9 Valor
r.d 10 Clarion (Type 2) 1
r.d 11 Boss (Type 2)
r.d 12 Eclipse (Type 2) 1
r.d 13 LG
r.d 14 Parrot 4
r.d 15 XITE
r.d 16 Philips
r.d 17 Kicker
r.d 18 JBL
r.d 19 Insane Audio
r.d 20 Magnadyne
r.d 21 Boss (type 3)
r.d 22 Axxera
Radio Detection
• Press the OK button on the steering wheel to start the auto detection process.
1. If the steering wheel controls don’t work properly it is possible to change the radio type.
2. Get to the radio type sub menu. Rotate the right climate knob until the correct radio type is
displayed on the knob display. Press the MAX AC button to set the new radio type.
3. If the AXSWC interface flashes Red (7) times, and an Alpine radio is not installed, that means
there is an open connection not accounted for. Verify that the 3.5mm jack is connected to the
correct steering wheel jack/wire in the radio.
4. The AXSWCH-PAR (sold separately) is required. Also, the software in the radio must be rev.
2.1.4 or higher.
5. If a Clarion or Eclipse radio is installed and the steering wheel controls do not function, change
the radio to Clarion (type 2) or Eclipse (type 2) respectively. If the steering wheel controls
still do function, refer to the Changing Radio Type document available at axxessinterfaces.
com.
6. If a Kenwood radio is installed and the L.E.D. feedback flashes (5) times instead of (2),
manually change the radio type to Kenwood. To do this, refer to the Changing Radio Type
document available at axxessinterfaces.com.
CONFIGURATION MENU (CONT.)

18 386.257.1187
|
MetraOnline.com
Left Knob Display Right Knob Display Backlight Color
b.L -- No backlight
b.L rD Red
b.L Or Orange
b.L YE Yellow
b.L LG Lime Green
b.L Gr Green
b.L CY Cyan
b.L BL Blue
b.L Pu Purple
b.L HP Hot Pink
Sub-Menu Options (cont.)
Backlight
Done/Quit
Version Number of Kit
Left Knob Display Right Knob Display
UO Will display current version of kit
Left Knob Display Right Knob Display
d o n E
• Press the Mode/OK button on the steering wheel to exit the Configuration Menu.
CONFIGURATION MENU (CONT.)

19
REV. 10/5/23 INST99-5864CH
Reseting the interface
• Hold the “AUTO” & “DUAL” inner button on the left and right “LCD” knobs for 15 seconds.
• The LCDs will go blank and reset causing the interface to redetect the vehicle
Changing the temp from Fahrenheit to Celsius
(factory controls not effected by the Metra AXXESS product)
• The temperature can be changed from the instrument cluster of the vehicle by following the
steps listed below. From the vehicle’s Message Center (if equipped, will be displaying on the left
hand side of the instrument cluster) Using the left steering wheel controls to navigate through
the message center, scroll down to the “Settings”, press “Ok”. There you will see “Units”,
press “Ok”, then you will have the option to select Fahrenheit (°F) or Celsius (°C).
Pressing the “Ok” button will select the temperature that is being displayed from vehicle on kit.
Scroll Up/Down to highlight one of the categories, then press the right arrow key
or OK to enter into that category.
Main menu
From the main menu screen you can choose from the following categories:
• Display Mode
• Trip 1 & 2
• Fuel Economy
• *Settings
• Information
Under vehicle Settings
Units: Temperature
• Fahrenheit (°F)
• Celsius (°C)
TECH NOTES

INSTALLATION INSTRUCTIONS
99-5864CH
KNOWLEDGE IS POWER
Enhance your installation and fabrication skills by
enrolling in the most recognized and respected
mobile electronics school in our industry.
Log onto www.installerinstitute.edu or call
386-672-5771 for more information and take steps
toward a better tomorrow.
®
The World’s best kits.® MetraOnline.com © COPYRIGHT 2023 METRA ELECTRONICS CORPORATION REV. 10/5/23 INST99-5864CH
Metra recommends MECP
certified technicians
Having difficulties? We’re here to help.
Contact our Tech Support line at:
386-257-1187
Or via email at:
Tech Support Hours (Eastern Standard Time)
Monday - Friday: 9:00 AM - 7:00 PM
Saturday: 10:00 AM - 5:00 PM
Sunday: 10:00 AM - 4:00 PM
Page is loading ...
Page is loading ...
Page is loading ...
Page is loading ...
Page is loading ...
Page is loading ...
Page is loading ...
Page is loading ...
Page is loading ...
Page is loading ...
Page is loading ...
Page is loading ...
Page is loading ...
Page is loading ...
Page is loading ...
Page is loading ...
Page is loading ...
Page is loading ...
Page is loading ...
Page is loading ...
/