Page is loading ...

PLEASE READ
This manual is provided as a free service
by Projector.com.
We are in no way responsible for the
contents of the manual. We do not guarantee
its accuracy and we do not make any claim
of copyright. The copyright remains the
property of their respective owners.
ABOUT PROJECTOR.COM
Projector.com (http://www.projector.com) is
your review and buying guide resource for
DLP and LCD video projectors.
Visit the site to read the latest projector
news and reviews, read and comment on
projector specifications, download user
manuals and much more.

Downloaded from Projector.com
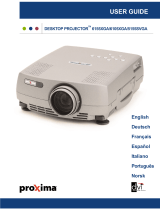
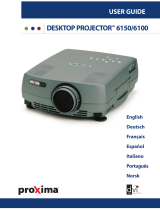
USER GUIDE
ULTRALIGHT
TM
X350
English
Deutsch
Français
Español
Italiano
Português
Norsk

Downloaded from Projector.com
WARRANTY (US, Latin America and Canada only)
Proxima Corporation warrants that the projector product manufactured by Proxima is free from defects in materials and
workmanship under normal use during the Warranty Period. The Warranty Period commences on the day of purchase by
the end user. The Warranty Period of the projector is two years. The lamp Warranty Period is 90 days or 500 hours which
ever comes first. Each Proxima product is manufactured from new parts, or new and some used parts. In some cases,
the product may have been delivered to another end-user and then returned. In all cases, the product has undergone testing
and quality inspection, and Proxima’s full warranty terms apply. The end-user’s sales receipt or invoice showing the date of
purchase of the product and the name of the Reseller is proof of date of purchase. The Warranty extends only to the original
purchaser and is not transferable. During the Warranty Period, Proxima will, at no additional charge, repair or replace defective
parts or at the option of Proxima, replace the entire unit.
This limited Warranty does not extend to any Proxima product thas has been damaged or been rendered defective (a) as a
result of accident, misuse or other abuse; (b) by the use of parts not manufactured or sold by Proxima; (c) by modification of
the product; or (d) as a result of servicing by non-authorized personnel.
ProXchange Coverage (US and Canada only)
ProXchange
TM
is offered as part of the standard warranty for this projector product within the United States and Canada.
ProXchange offers the original purchaser the option of having a replacement unit shipped (in mos cases) the next business
day to the location within the covered regions of their choice.
By choosing ProXchange, the original purchaser will receive either a new or “like new” unit which they will keep. The
replacement projector will be covered by the remaining balance of the original Warranty Period or any Extended Warranties
if applicable. Proxima will not return the non-working projector originally purchased. If the original purchaser requires their
original projector to be returned, they must return (at their cost) the non-working unit to Proxima for repair.
To execute the ProXchange process, proof of date of purchase and a valid credit card number for security are required. If the
non-working unit returned to Proxima is damaged or the warranty has been voided, the original purchaser will be responsible
for the cost to repair the out of warranty conditions. All other in-warranty repairs will be covered by Proxima. ProXchange is
part of the standard warranty and as such expires at the end of two year Warranty Period.
Limitation of Warranties
The foregoing Warranty is expressly in lieu of any other expressed or implied warranties including, without limitations, warranties
of merchantability or fitness for a particular purpose. To the extent not prohibited by law, all statutory warranties are hereby
waived and excluded from this Warranty. Proxima expressly disclaims all warranties not stated in this Limited Warranty.
Trademarks
Proxima is a registered trademark of Proxima Corporation. Desktop Projector, Desktop Projection, ProXchange and Laser F/X
are trademarks of Proxima Corporation. Other trademarks are the property of their respective owners.
©
2000 Proxima Corporation. All rights reserved. Specifications are subject to change without notice.
For Americas:
Proxima Corporation
9440 Carroll Park Drive
San Diego, CA 92121-2298
USA
Phone (800) 447-7692, option 2.
Fax (858) 457-9647
http://www.proxima.com
For Europe/Middle
East/Africa:
Proxima Netherlands
Horsterweg 24
6191 RX Beek
The Netherlands
Tel: +31 (0)43 358 52 00
Fax: +31 (0)43 358 52 01
http://www.proxima.com
For Asia:
Proxima Singapore
29, Int Business Park
# 04-02 Acer Bldg, Tower B
609923 Singapore
Singapore
Tel: +65 566 8102
Fax: +65 565 1080
http://www.proxima.com

Downloaded from Projector.com
A.SUPPLIED MATERIAL................................................4
LIEFERUMFANG
EQUIPEMENTFOURNI
MATERIALSUMINISTRADO
MATERIALE FORNITO
MATERIALFORNECIDO
VEDLAGTMATERIELL
B.SETTING UPPROCEDURE..............................................6
ANSCHLUSS
INSTALLATION
PROCEDIMIENTO DE CONEXI
Ó
N
PROCEDIMENTO DI IMPOSTAZIONE
INSTALAÇÃO
OPPSETT
C.OVERVIEW........................................................................8
ÜBERSICHT
PRESENTATION
VISTAGENERAL
PROSPETTO
VISTAGERAL
OVERSIKT
D.START - STOP.................................................................10
START- STOP
MISE EN/HORS SERVICE
ENCENDIDO - APAGADO
AVVIO - ARRESTO
LIGAR - DESLIGAR
START- STOPP
E.IMAGEADJUSTMENTS..................................................11
BILDEINSTELLUNGEN
MISE AU POINTDE L’IMAGE
AJUSTE DE LAIMAGEN
REGOLAZIONE DELL’IMMAGINE
AJUSTES DAIMAGEM
JUSTERE BILDET
F.2 REMOTECONTROL& KEYPAD....................................12
FERNBEDIENUNG UND BEDIENFELD
TELECOMMANDE ETCLAVIER
CONTROLREMOTO YTECLADO
TELECOMANDO E TASTIERA
CONTROLE REMOTO E TECLADO
FJERNKONTROLLOG TASTATUR
G.MENU ADJUSTMENTS...................................................15
MENÜ EINSTELLUNGEN
OPTIONS DE MENU
MEN
Ú
DE AJUSTES
IMPOSTAZIONI DALMENU
AJUSTES DO MENU
MENYINNSTILLINGER
TABLE OF CONTENTS
INHALTSVERZEICHNIS TABLE DES METIERES INDICE INDICE
Í
NDICE INNHOLDSFORTEGNELSE
H.USER'S LOGO................................................................22
LOGO DES BENUTZERS
LOGO DE L’UTILISATEUR
LOGOTIPO DELUSUARIO
LOGO DELL’UTENTE
LOGOTIPO DO USU
ÁRIO
BRUKERDEFINERTLOGO
I.2 LIGHTMESSAGES........................................................23
LEUCHTANZEIGEN
INDICATEURS LUMINEUX
INDICADORES LUMINOSOS
MESSAGGI LUMINOSI
INDICADORES LUMINOSOS
LYSIGNALER
J.2 POWER MANAGEMENT (DPMS).................................25
POWER MANAGEMENT(DPMS)
GESTION DE L’ALIMENTATION (DPMS)
FUENTES DE ENERG
Í
A(DPMS)
CONTROLLO DELL’OPERATIVITÀ (DPMS) I
CONTROLE DAPOTÊNCIA
STRØMSPARING (DPMS) TEKNISKE DATA
K.TROUBLESHOOTING....................................................26
FEHLERBEHEBUNG
SOLUTION AUX PROBLÈMES LES PLUS
FR
É
QUENTS
SOLUCI
Ó
N DE PROBLEMAS
SOLUZIONE DEI PROBLEMI
LOCALIZAÇÃO DE DEFEITOS
FEILSØKING
L.TECHNICALDATA.........................................................28
TECHNISCHE DATEN
CARACTERISTIQUES TECHNIQUES
DATOS T
É
CNICOS
DATI TECNICI
DADOS T
É
CNICOS
TEKNISKE DATA
M.SERVICE INFORMATION..............................................31
SERVICEHINWEIS
R
ÉPARATIONS
INFORMACI
Ó
N SOBRE ASISTENCIATECNICA
ASSISTENZATECNICA
INFORMAÇÃO DE SERVIÇOS
SERVICEINFORMASJON
N.MAINTENANCE......................................................................32
WARTUNG
ENTRIEN
MANTENIMIENTO
MANUTENZIONE
MANUTENÇÃO
VEDLIKEHOLD
O.FCC STATEMENT..........................................................33
3

Downloaded from Projector.com
SUPPLIED MATERIAL
LIEFERUMFANG EQUIPEMENT FOURNI MATERIAL SUMINISTRADO MATERIALE FORNITO MATERIAL FORNECIDO VEDLAGT MATERIELL
A
DLP Projector with lenscap
DLP Projektor mit Schutzkappe
Projecteur DLP avec protection lentille
Proyector DLP con tapa del lente
Proiettore DLP con coperchietto
Projetor DLP com protetor de lente
DLP-projektor med linsedeksel
Audio/Video Cable
Audio/Videokabel
Câble audio/vid
éo
Conexi
ón de audio/v
ídeo
Cavo audio/video
Cabo de
Áudio/
V
ídeo
Audio/Videokabel
Audio Cable
Audiokabel
Câble audio
Cable de audio
Cavo audio
Cabo de
Áudio
Audiokabel
USB Mouse Cable
USB Mauskabel
Câble souris USB
Cable raton USB
Cavo mouse USB
Cabo de Mouse USB
USB-musekabel
Power cord
Netzkabel
Cordon d’alimentation
Cable de alimentaci
òn
Cavo alimentazione
Cabo de alimentação
Strømledning
Digital Computer Cable DVI to VGA
Digitales Computerkabel (DVI) für VGA
Câble ordinateur digital (DVI) à VGA
Cable Digital (DVI) para VGA
Cavo da computer digitale (DVI) a VGA
Cabo (DVI) de Computador Digital para VGA
Digital Datamaskinkabel (DVI) til VGA
Remote control with batteries
Fernbeienung mit Batterien
T
él
écommande avec batteries
Control remoto con pilas
Telecomando con batterie
Controle remoto com pilhas
Fjernkontroll med batterier
Digital Computer Cable (DVI)
Digitalkabel (DVI)
Câble ordinateur digital (DVI)
Cable para ordenador digital (DVI)
Cavo digitale per il computer (DVI)
Cabo de Computador Digital (DVI)
Digital Datamaskinkabel (DVI)
Video module
Videomodul
Module vid
éo
M
ódulo de v
ídeo
Modulo video
M
ódulo de v
ídeo
Videomodul
Audio Cable Jack/RCA
Audiokabelstecker / RCA
Câble audio Jack/RCA
Cable de audio Jack/RCA
Cavo audio Jack/RCA
Cabo de Áudio Jack/RCA
Audiokabel-Jack/RCA
1
7
53 6
*) Country dependent Länder abhängig D
épendant du pays Depende del pa
ís
Dipendentemente al paese di destinazione Dependendo do pa
ís Områdeavhengig
*)
4
*)
2
S-Video Cable
S-Videokabel
Câble S-Video
Cable de V
ídeo S
Cavo S-Video
Cabo de S-Video
S-Videokabel
*)
4

Downloaded from Projector.com
*) Country dependent Länder abhängig D
épendant du pays Depende del pa
ís
Dipendentemente al paese di destinazione Dependendo do pa
ís Områdeavhengig
SCART adapter
SCART-Anschluß
Adaptateur audio
Adaptador de Scanner
Presa scart
Adaptador SCART
SCART-adapter
SUPPLIED MATERIAL
LIEFERUMFANG EQUIPEMENT FOURNI MATERIAL SUMINISTRADO MATERIALE FORNITO MATERIAL FORNECIDO VEDLAGT MATERIELL
*)
5
Soft Case
Tragetasche
Etui souple
Funda
Valigetta
Maleta
Myk veske
User guide
Benutzer Handbuch
Guide d’utilisateur
Gu
ía del usario
Manuale d’uso
Guia do usu
ário
Bruker veiledning
Projector CD
CD-Projektor
Projecteur CD
CD del proyector
CD del proiettore
CD Projetor
Projektor-CD

Downloaded from Projector.com
SETTING UP PROCEDURE
ANSCHLUSS INSTALLATION PROCEDIMIENTO DE CONEXIÔN PROCEDIMENTO DI IMPOSTAZIONE INSTALAÇÃO OPPSETT
1. Koble projektoren til: - datakilden med den “Digitale datamaskinkabelen (DVI) til VGA (1)” til COMPUTER eller
- datakilden med den “Digitale datamaskinkabelen (DVI) (2)” til COMPUTER
- videokilden med “Audio/Videokabelen (3)” til VIDEO/AUDIO L/AUDIO R
- videokilden med “S-VIDEO-kabelen* (4)” til S-VIDEO
2. Musekontroll kobles til med “USB-musekabelen (5)” til USB MOUSE
3. Lyd fra datamaskinen kobles til med “Audiokabelen (6)” til LINE IN
4. Koble “Strømledningen” til projektoren (7)
5. Slå på projektoren, og deretter kilden(e)
1. Conecte o projetar à: - fonte de dados com o “Cabo (DVI) de Computador Digital para VGA (1)” em COMPUTER ou
- fonte de dados com o “Cabo de Computador Digital (DVI) (2)” em COMPUTER
- fonte de video com o “Cabo de
Áudio/V
ideo (3)” em VIDEO/AUDIO L/AUDIO R
- fonte de video com o “Cabo de S-Video* (4)” em S-VIDEO
2. Para o controle do mouse, use o “Cabo de mouse USB (5)” em USB MOUSE
3. Para a conexäo do computador, use o “Cabo de Áudio (6)” em LINE IN
4. Conecte o “Cabo de alimentaçâo” no projetor (7)
5. Ligue o projetor, depois a(s) fonte(s)
1. Collegare il proiettore: - alla sorgente dei dati con il “Cavo da computer digitale (DVI) a VGA (1)” al COMPUTER o
- alla sorgente dei dati con il “Cavo digitale per computer (DVI) (2)” al COMPUTER
- Alla sorgente video con il “Cavo audio/video (3)” sulla presa VIDEO/AUDIO L/AUDIO R
- Alla sorgente video con il “Cavo S-Video* (4)” sulla presa S-VIDEO
2. Per il controllo del mouse, usare il “Cavo mouse USB (5)” collegato a USB MOUSE
3. Per il collegamento audio con il computer, usare il “Cavo audio (6)” collegato a LINE IN
4. Collegare il “Cavo di alimentazione” al proiettare (7)
5. Accendere prima il proiettore e poi la/e sorgente/i
1. Conectar el proyector a: - la fuente de datos conectando el “Cable Digital (DVI) para VGA (1)” al COMPUTER o
- la fuente de datos conectando el “Cable para ordenador digital (DVI) (2)” al COMPUTER
- la fuente de video conectando el “Cable de audio/video (3)” a la entrada VIDEO/AUDIO L/AUDIO R
- la fuente de video conectando el “Cable de VÍDEO S* (4)” al S-VIDEO
2. Para controlar el ratón conecte el “cable de ratón USB (5)” al USB MOUSE
3. Para conectar el sonido del ordenador, conecte el “cable de audio (6)” a la entrada LINE IN
4. Conectar el “cable de alimentación” al proyector (7)
5. Poner en marcha el proyector, luego la(s) fuente(s)
B
1. Connect the projector to: -the data source with the “Digital Computer Cable (DVI) to VGA (1)” to COMPUTER or
-the data source with the “Digital Computer Cable (DVI) (2)” to COMPUTER
-the video source with the “Audio/Video Cable (3)” to VIDEO/AUDIO L/AUDIO R
-the video source with the “S-Video Cable* (4)” to S-VIDEO
2. For the mouse control use the “USB mouse cable (5)” to USB MOUSE
3. For computer sound connection, use the “Audio Cable (6)” to LINE IN
4. Connect “Power cord” to projector (7)
5. Turn on the projector, then the source(s)
1. Projektor anschließen: - mit dem “Digitales Computerkabel (DVI) für VGA (1)” an COMPUTER (Datenquelle) oder
- mit dem “Digitalkabel (DVI) (2)” an COMPUTER (Datenquelle)
- mit “Audio/Videokabel (3)” an VIDEO/AUDIO L/AUDIO R (Videoquelle)
- mit “S-Videokabel* (4)” an S-VIDEO (Videoquelle)
2. Für Steuerung per Maus das “USB-Mauskabel (5)” in den Anschluss USB MOUSE stecken
3. Für Klang aus dem Computer das “Audiokabel (6)” in den Anschluss LINE IN stecken
4. Netzstecker des Projektors einstecken (7)
5. Zuerst Projektor und dann Quellgerät(e) einschalten
1. Connectez le projecteur à: - la source de donnée avec le “Câble ordinateur digital (DVI) à VGA (1)” à la COMPUTER
- la source de donnée avec le “Câble ordinateur digital (DVI) (2)” à la COMPUTER
- la source vidéo avec le “Câble audio/video (3)” à la prise VIDEO/AUDIO L/AUDIO R
- la source vidèo avec le “Câble S-Video* (4)” à la prise S-VIDEO
2. Pour le contrôle de la souris, reliez le “câble souris USB (5)” à USB MOUSE
3. Pour la connexion au son de l’ordinateur, reliez le “Câble audio (6)” à LINE IN
4. Branchez le “cordon d’alimentation” sur le projecteur (7)
5. Allumez d’abord le projecteur, puis la (les) source(s).
6
*) Country dependent Länder abhängig D
épendant du pays Depende del pa
ís
Dipendentemente al paese di destinazione Dependendo do pa
ís Områdeavhengig

Downloaded from Projector.com
SETTING UP PROCEDURE
ANSCHLUSS INSTALLATION PROCEDIMIENTO DE CONEXIÒN PROCEDIMENTO DI IMPOSTAZIONE INSTALAÇÂO OPPSETT
7
AUDIO
S-VIDEO
VIDEO
L
R
Line in
S-Video
Video
Audio R
Audio L
Line out
USB Mouse
Computer
USB Mouse
Computer
Switch to external monitor
Schalter für externen Monitor
Commutateur pour
écran autonome
Enchufe para monitor externo
Interruttore per monitor esterno
Interruptor para monitor externo
Bytt til ekstern skjerm
*) Country dependent Länder abhängig D
épendant du pays Depende del pa
ís
Dipendentemente al paese di destinazione Dependendo do pa
ís Områdeavhengig
1
or
2
5
4
*)
3
6
7

Downloaded from Projector.com
C
Focus
Fokus
Poignée
Foco
Messa a fuoco
Foco
Fokus
Ventilation in
Lufteintritt
Entrée ventilation
Entrada de ventilación
Griglia di ventilazione di
entrata
Entrada de ventilação
Ventilasjon inn
Keypad
Bedienfeld
Clavier
Teclado
Tastiera
Teclado
Tastatur
Zoom
Ceiling mount (use 1/4" screw). Min. distance from ceiling/rear wall: 30/50 cm, 12/20 inch for proper ventilation
Deckenmontage (1/4"-Schrauben verwenden). Mindestabstand von der Decke/rückwand 30/50 cm, damit eine korrekte Belüftung gewährleistet ist
Montage au plafond (utilisez un tournevis 1/4"). Distance minimum au plafond/mur arrière: 30/50 cm, pour garantir une ventilation ad
équate
Soporte de techo (utilice un tornillo de 1/4”). Distancia mínima desde el techo/pared posterior: 30/50 cm, para que exista una ventilaci
ón correcta
Montaggio a soffitto (utilizzare viti da 1/4”). Distanza minima dal soffitto/muro posteriore 30/50 cm, per una ventilazione adeguata
Montagem de teto (use parafuso de 1/4"). Distância mín. teto/parede traseira: 30/50 cm, para uma ventilação adequada
Takbeslag (bruk 1/4" skrue). Min. distanse fra tak/bakvegg: 30/50 cm, 12/20 tommer, for å få tilstrekkelig ventilasjon
Adjustable foot
Höhenverstellbarer Fuß
Pieds réglables
Pata ajustable
Piede regolabile
Pé ajustável
Justerbar fot
Ventilation in
Lufteintritt
Entrée ventilation
Entrada de ventilación
Griglia di ventilazione di entrata
Entrada de ventilação
Ventilasjon inn
Power
Netzanschluß
Alimentation
Alimentación
Alimentazione elettrica
Alimentação elétrica
Strøm
Connectors
Anschlüsse
Connecteurs
Conectores
Connettori
Conectores
Kontakter
Ventilation out
Luftaustritt
Sortie ventilation
Salida de ventilación
Griglia di ventilazione di uscita
Saída de ventilação
Ventilasjon ut
Lamp housing
Lampenfach
Support de lampe
Lugar para la lámpara
Scomparto lampadina
Compartimento da lâmpada
Lampehus
OVERVIEW
BESTANDTEILE PRESENTATION VISTA GENERAL PROSPETTO VISTA GERAL OVERSIKT
Ventilation in
Lufteintritt
Entrée ventilation
Entrada de ventilación
Griglia di ventilazione di entrata
Entrada de ventilação
Ventilasjon inn
IR Sensor
IR-Sensor
Senseur IR
Sensor de IR
Sensore IR
Sensor IR
IR-Sensor
Ventilation out
Luftaustritt
Sortie ventilation
Salida de ventilación
Griglia di ventilazione di uscita
Saída de ventilação
Ventilasjon ut
Foot release
Fußauslöser
Releaser de pied
Liberaci
ón del pie
Sblocco il piede
Soltura dos p
és
Fotutløser
8

Downloaded from Projector.com
OVERVIEW
BESTANDTEILE PRESENTATION VISTA GENERAL PROSPETTO VISTA GERAL OVERSIKT
Connectors
Luftaustritt
Sortie ventilation
Salida de ventilación
Griglia di ventilazione di uscita
Saída de ventilação
Ventilasjon ut
Release Button
Auslöser
Touche de d
éclenchement
Bot
ón de Liberaci
ón
Pulsante di sblocco
Botão de soltura
Utløserknapp
Video Module
Videomodul
Module vid
éo
M
ódulo de v
í
deo
Modulo video
M
ódulo de v
ídeo
Video modul
Speaker
Lautsprecher
Haut-parleur
Altavoz
Altoparlante
Alto-falante
Høyttaler
9
In order to attach the video module, insert the two hooks on the module (1) into the two slots on the projector (2). Press the button on the side of the
module (3) and at the same time insert the DVI plug into the DVI connector on the back of the projector
Fü den Anschluss des Videomoduls stecken Sie die beiden Haken des Moduls (1) in die beiden Schlitze am Projektor (2). Drücken Sie auf den Knopf an der
Seite des Moduls (3) und schließen Sie gleichzeitig den DVI-Stecker in die DVI-Buchse an der Rückseite des Projektors an
Pour relier le module vid
éo, ins
érer les deux crochets sur le module (1) dans les deux fentes du projecteur (2). Appuyer sur le bouton situ
é sur le côt
é du
module (3)
et au même moment ins
érer la prise DVI dans la prise DVI à l’arrière du projecteur
Para poder incorporar el m
ódulo de v
ídeo, deber
á insertar los dos ganchos del m
ódulo (1) en las dos ranuras del proyector (2). Pulse el bot
ón situado en el
lateral del m
ódulo (3) y, al mismo tiempo, introduzca el enchufe DVI en su conexi
ón, situada en la parte trasera del proyector
Per collegare il modulo video, inserire i due ganci sul modulo (1) nelle due fessure sul proiettore (2). Premere il pulsante sul lato del modulo (3) e,
contemporaneamente, inserire la spina DVI nel connettore DVI sul retro del proiettore
De modo a anexar o m
ódulo de v
ídeo, insira as duas presilhas do m
ódulo (1) nas duas aberturas do projetor (2). Pressione o botão lateral do m
ódulo (3) e,
ao mesmo tempo, insira o plugue DVI no conector na parte traseira do projetor
Du fester videomodulen ved å sette de to krokene på modulen (1) inn i de to åpningene på projektoren (2). Trykk inn knappen på siden av modulen (3),
og sett samtidig DVI-pluggen inn i DVI-kontakten bak på projektoren
3
2
1
&

Downloaded from Projector.com
START - STOP
START - STOP MISE EN/HORS SERVICE ENCENDIDO - APAGADO AVVIO - ARRESTO LIGAR - DESLIGAR START - STOP
Install batteries
Batterien einlegen
Mettre des piles en place
Colocar las bater
ías
Inserimento pile
Colocar as pilhas
Sett inn batteriene
Switch ON to operate remote control
Auf ON stellen, um die Ferbedienung einzuschalten
Mettez sur position ON pour utiliser la t
él
écommande
Poner el conmutador en ON para activar el control remoto
Posizionare su ON per attivare il telecomando
Coloque em on para ligar o controle remoto
Trykk på ON for å slå på fjernkontrollen
D
10

Downloaded from Projector.com
IMAGE ADJUSTMENT
BILDEINSTELLUNG MISE AU POINT DE L
‘IMAGE ADJUSTE DE LA IMAGEN REGOLAZIONE ELL`IMMAGINE ADJUSTES DA IMAGEM JUSTERE BILDET
E
Zoom: adjusts picture size
Zoom: Einstellen der Bildgröße
Zoom: règle les dimensions de l‘image
Zoom: adjusta el tamaño de la imagen
Zoom: regola le dimensioni dell‘immagine
Zoom: adjusta o tamanho da imagem
Zoom: justerer bildets størrelse
Focus: adjusts picture clearness
Focus: Einstellen der Bildschärfe
Focus: règle la nettet
é de l‘image
Foco: adjusta la claridad de la imagen
Focus: regola la messa a fuoco dell‘immagine
Foco: adjusta a nitidez da imagem
Fokus: justerer bildets skarphet
Release the projectors foot to adjust display angle
Lösen Sie den Projektorfuß, um den Anzeigewinkel einzustellen
R
égler la hauteur de l’image projet
ée au moyen des pieds ajustables
Suelte el pie del proyector para ajustar el
á
ngulo de visi
ó
n
Sblocca il piede del proettore per regolare l‘angolazione dello schermo
Solte os pés do projetor para ajustar o ângulo de exibição
Frigjør projektorens fot slik at du kan tilpasse visningsvinkelen
11

Downloaded from Projector.com
REMOTE CONTROL & KEYPAD FERNBEDIENUNG UND BEDIENFELD TELECOMANDE ET CLAVIER
CONTROL REMOTO Y TECLADO TELECOMANDO E TASTIERA CONTROLE REMOTO E TECLADO FJERNKONTROLL OG TASTATUR
F
RED light indicates lamp replacement required. Ref. M (SERVICE INFORMATION)
Das ROTE Licht zeigt an, daß die Lampe ausgewechselt werden muß. Ref. M (SERVICE-INFO)
La lumière ROUGE indique que la lampe doit être remplacée. Voir. M (REPARATIONS)
La luz ROJA indica que se debe de reemplazar la bombilla. Ref. M (INFORMACI
ÓN SOBRE ASISTENCIA T
ÉCNICA
)
La luce ROSA indica che bisogna sostituire la lampadina. Rif. M (ASSISTENZA TECNICA)
A luz VERMELHA indica que a lâmpada deve ser substituída. Ref. M (INFORMAÇÃO DE SERVIÇO)
RØDT lys angir at lampen må byttes ut. Se M (SERVICE INFORMATION)
RED FLASHING when the projector is overheated. Power off and let cool down
ROTES BLINKLICHT zeigt Überhitzung des Projektors an. Ausschalten und abkühlen lassen
Un CLIGNOTEMENT ROUGE signale la surchauffe du projecteur. Débrancher l‘alimentation et laisser refroidir
LUZ ROJA PARPADEANTE cuando el proyector está sobrecalentado. Desconectar la alimentación y dejar enfriar
La luce ROSSA INTERMITTENTE indica che il proiettore si è surriscaldato. Scollegare l‘alimentazione e lasciare raffreddare
A luz VERMELHA INTERMITENTE indica superaquecimento do projector. Desligar e deixar esfriar
RØDT BLINKENDE når projektoren er overopphetet. Slå av og la projektoren avkjøle seg
Active when RED light blinks
Laser aktiv, wenn rotes Licht blinkt
Actif lorsque la lumière ROUGE clignote
Activo cuando la luz ROJA parpadea
È attivo quando la luce ROSSA lampeggia
Ativo quando a luz VERMELHA pisca
Aktiv når det RØDE lyset blinker
12
Alarm
Alarm

Downloaded from Projector.com
Turns the projector ON/OFF
Projektor ein-/ausschalten
Allume (ON)/Eteint (OFF) le projecteur
Encender (ON)/Apagar (OFF) el proyector
Accensione del proiettore ON/OFF
Liga e Desliga o projetor
Slår projektoren PÅ/AV
Adjust volume
Lautstärke einstellen
Réglage du volumen
Ajustar el volumen
Regolazione del volume
Ajusta o volume
Juster lydstyrken
Switch between connected sources
Zwischen angeschlossenen Geräten hin- und
herschalten.
Passage d‘une source connectée à une autre
source connectée.
Conmutar entre las fuentes conectadas
Commutazione fra le sorgenti collegate
Alterna entre as fontes conectadas
Bytt mellom de tilkoblede kildene
Adjust keystone angle
Winkel Trapezentzerrung einstellen
Réglage de l‘angle de la clef de voûte
Ajustar el ángulo de distorsión de imagen
Regolazione dell‘angolo di distorsione
Ajusta o ângulo trapezóide
Juster keystone-vinkelen
Activates/deactivates on screen menu (OSD)
Bildschirmmenü aktivieren/deaktivieren (OSD)
Active/Désactive le menu sur l‘écran (OSD)
Activa/desactiva el menú en pantalla
Attivazione/disattivazione del menù sullo schermo
Ativa/desativa o menu da tela
Aktiverer/deaktiverer menyvisning på skjermen (OSD)
-Activate by pressing actual key(s).
-Zum Aktivieren jeweilige Taste(n) drüken.
-Aktiver en pressant la (les) touches correspondante(s).
-Activar pulsando la(s) tecla(s) indicativa(s).
-Attivare premendo il / i tasto / i attivi.
-Ativar pressionando a(s) tecla(s) correspondante(s).
-Aktiver ved å trykke på aktuell(e) tast(er).
REMOTE CONTROL & KEYPAD FERNBEDIENUNG UND BEDIENFELD TELECOMMANDE ET CLAVIER
CONTROL REMOTO Y TECLADO TELECOMANDO E TASTIERA CONTROLE REMOTO E TECLADO FJERNKONTROLL OG TASTATUR
Remote
Control
Keypad
13
Laser pointer
Laserzeiger
Indicateur laser
Puntero láser
Puntatore laser
Apontador laser
Laserpeker

Downloaded from Projector.com
Scroll menu
Menüpunkte ansteuern
Menu déroulant
Desplegar menú
Scorrimento del menú
Desloque-se no menu
Gå gjennom menyen
Press to zoom into picture (default setting)
Drücken, um Bild zu vergößern (standardeinstellung)
Cliquez dans l’image pour faire un zoom (Paramètres
par d
éfaut
)
Pulse para acercar la imagen (Configuraci
ón por defecto
)
Premere per ingrandire l’immagine (impostazione di default)
Pressione para efetuar o “zoom” da imagem
(Configuração predefinida )
Press for å forstørre bildet (standardinnstilling)
Press to pan
Drücken, um zu panoramisieren
Cliquez pour faire un panoramique
Pulse para panor
ámica
Premere per una panoramica
Pressione para “pan”
Press for å bevege bildet
Reset picture to full size
Zurük zur Orginalgröße
Retour de l‘image à ses dimensions
Restablecer la imagen a tamaño completo
Ripristino dell‘immagine all dimensioni massime.
Reajuste a imagem a seu tamanho màximo.
Tilbakestill bildet til full størrelse
Select on-screen menu function
Funktion des Bildschirmmenüs aktivieren
Sélectionnez une fonction du menu sur l‘écran
Seleccionar función de menú en pantalla
Selezione della funzione sul menù dello schermo
Selecione uma funçäo no menu da tela
Velg aktuell funksjon i menyen på skjermen
(1) (2)
(1) (2) (3)
REMOTE CONTROL & KEYPAD FERNBEDIENUNG UND BEDIENFELD TELECOMMANDE ET CLAVIER
CONTROL REMOTO Y TECLADO TELECOMANDO E TASTIERA CONTROLE REMOTO E TECLADO FJERNKONTROLL OG TASTATUR
14
Press to instantly invoke the presentation effect assigned through the “Effects” menu
Drücken Sie, um unmittelbar den Präsentationseffekt aufzurufen, der über das Menü “Effects” eingestellt wurde
Appuyer pour faire apparaître les effets sp
éciaux disponibles assign
és dans le menu “Effets”
Pulse para obtener, de forma inmediata, el efecto de presentaci
ón asignado mediante el men
ú “Efectos”
Premere per richiamare immediatamente l’effetto presentazione assegnato tramite il menu “Effetti”
Aperte para obter instantaneamente o efeito da apresentação determinado atrav
és do menu “Efeitos”
Trykkes når du vil ta i bruk presentasjonseffekten som er tilordnet ved hjelp av “Effekt” menyen
Mouse control
Steuerung per Maus
Contrôle souris
Control del ratón
Controllo del mouse
Controle do mouse
Musekontroll

Downloaded from Projector.com
G
Activate/deactivate by:
Aktivieren/Deaktivieren mit:
Activer et désactiver à l‘aide:
Activar/desactivar pulsando:
Attivare/disattivare premendo:
Ativa/Desativa com:
Aktiver/deaktiver med:
Navigate by:
Steuern mit:
Pour naviguer:
Navegar pulsando:
Spostasi premendo:
Navegar com:
Naviger med:
Choose function with:
Funktion wählen mit:
Choisissez la fonction avec:
Seleccionar función con:
Scegliere lafunzione:
Escolha a funçcom:
Velg funksjon med:
Adjusts contrast range from 0-100
Kontrast von 0-100 einstelle
Règle le contraste entre 0 et 100
Ajusta el contraste entre 0-100
Regolazione del contrasto da 0 a 100
Ajusta o contraste de 0 a 100
Justerer kontrasten innenfor området 0-100
Adjust keystoning from -63 to +64
Trapezentzerrung von -63 bis + 64 einstellen
Règle la clé de voûte -63 et +64
Ajusta la distorsió de imagen desde -63 a +64
Regolazione della distorsione da -63 + 64
Ajusta o ângulo trapezóide de -63 a +64
Justerer keystone-funksjonen fra -63 til +64
Adjusts colour intensity in video images from 0-100
Farbintensität von Videobildern von 0-100 einstellen
Règle l‘intensité de la couleur des images vid
éo
entre 0 et 100
Ajusta la intensidad del color de la imagen v
ídeo
entre o-100
Regolazione dell‘intensità del colore da 0 a 100 nelle immagini video
Ajusta a intensidade da cor em imagens de v
ídeo
de 0 a 100
Justerer fargeintensiteten til videobilder fra 0-100
Adjusts brightness range from 0-100
Helligkeit von 0-100 einstellen
Règle la luminosité entre 0 et 100
Ajusta el brillo entre 0-100
Regolazione della luminosità da 0 a 100
Ajusta o brilho de 0 a 100
Justerer lysstyrken innenfor området 0-100
3.0
1.0
4.0
2.0
5.0
MENU ADJUSTMENTS
MENÜEINSTELLUNGEN OPTIONS DE MENU MEN
Ú DE AJUSTES IMPOSTAZIONI DAL MENU AJUSTES DO MENU MENYINNSTILLINGER
15
5.1

Downloaded from Projector.com
MENU ADJUSTMENTS
MENÜEINSTELLUNGEN OPTIONS DE MENU MEN
Ú DE AJUSTES IMPOSTAZIONI DAL MENU AJUSTES DO MENU MENYINNSTILLINGER
Adjusts horizontal phase/fine tunes computer analog image
Einstellung der Horizontalfrequenz/Feinabgleich für analoge Computerbilder
Règle la phase horizontale/met au point l'image analogique de l'ordinateur
Ajusta la fase horizontal/sintoniza la imagen del ordenador analógico
Regolazione della fasatura orizzontale/sintonizzazione fine dell'immagine
analogica del computer
Ajusta as sintonias fase/fina horizontais da imagem analógica de computador
Justerer den horisontale fasen/finstiller datamaskinens analoge bilde
Modifies color temperature balance
Veränderung des Farbtemperaturwertes
Modifie l'équilibre de la température couleur
Modifica el equilibrio de temperatura del color
Modifica dell'equilibrio della temperatura di colore
Modifica o equilíbrio da temperatura da cor
Endrer balansen for fargetemperatur
Select application setting to optimize image quality for the selected application
Wählen Sie die Anwendung-Einstellung, um die Bildqualität für die gewählte Andwendung zu optimieren
S
électionner les paramètres application pour optimiser la qualit
é de l’image dans l’application s
électionn
é
Seleccione la configuraci
ón aplicaci
ón
para optimizar la calidad de imagen de la aplicaci
ón seleccionada
Selezionare l’impostazione della applicazione per ottimizzare la qualità dell’immagine per
l’applicazione selezionata
Selecione a configuração aplicação para otimizar a qualidade da imagem da aplicação selecionada
Velg en applikasjonstilling for å optimalisere bildekvaliteten for det valgte bruksområdet
Automatically adjusts image quality to match the level of ambient light
Die Bildqualität wird automatisch eingestellt, um sie an die Lichtstärke der Umgebung
anzupassen
Ajuste automatiquement la qualit
é de l’image en fonction de l’
éclairage ambiant
La calidad de imagen se ajusta autom
áticamente para adaptarse a la luz ambiental
Regola automaticamente la qualità dell’immagine in base al livello della luce ambiente
Ajusta automaticamente a qualidade da imagem para adequar-se ao n
ível de luz do ambiente
Justerer automatisk bildekvaliteten slik at den passer til belysningen i rommet
5.1.4
5.1.3
5.1.5
5.1.1
5.1.2
5.1.6
16
Select 16:9 widescreen image fomat
Auswahl Breitbildformat 16:9
Sélectionner pour remettre toutes les options sur paramètres usine
Seleccionar el formato de imagen de pantalla ancha 16:9
Selezione del formato panoramico 16:9
Seleciona o formata de imagem com largura de tela 16:9
Velg vidvinkelformatet 16:9 for bildet
Adjusts sharpness in video images
Einstellung der Schärfe von Videobildern
Règle la netteté des images vidéo
Ajusta la nitidez de la imagen de vídeo
Regolazione della nitidezza dell'immagine video
Ajusta a nitidez nas imagens de vídeo
Justerer skarpheten i videobilder.

Downloaded from Projector.com
MENU ADJUSTMENTS
MENÜEINSTELLUNGEN OPTIONS DE MENU MEN
Ú DE AJUSTES IMPOSTAZIONI DAL MENU AJUSTES DO MENU MENYINNSTILLINGER
Adjusts width to computer analog image size
Anpassung der Breite auf Größe des analogen Computerbildes
Règle la largeur à la dimension de l'image analogique de l'ordinateur
Ajusta el ancho al tamaño de la imagen del ordenador analógico
Regolazione della larghezza alla dimensione dell'immagine analogica del computer
Ajusta a largua ao tamanho da imagem analógica de computador
Justerer bredden på datamaskinens analoge bilde
Adjusts position to computer analog and video image size
Anpassung der Position auf Größe Analog- und Videobildes
Règle la position à la dimension de l'image analogique de l'ordinateur et de la vidéo.
Ajusta la posición al tamaño de la imagen del ordenador analógico y del vídeo
Regolazione della posizione alle dimensioni dell'immagine analogica e video
del computer
Ajusta a posição ao tamanho de imagem de computador analógica e de vídeo
Justerer plasseringen på datamaskinens analoge bilde og videobildet
5.1.7
5.1.9
5.1.8
5.2
5.2.1
17
Varies the hue in video NTSC images from 0-100
Veränderung der Farbe von NTSC Videobildern von 0-100
Modifie le ton des images NTSC vidéo de 0 à 100
Varía la tonalidad de la imagen de vídeo NTSC entre 0-100
Variazione della tonalità cromaticada 0 a 100 nelle immagini video NTSC
Varia a tonalidade em imagens de vídeo NTSC de 0 a 100
Endrer fargenyansen til NTSC-videobilder innenfor området 0-100
Select for ceiling mounted projection
Markieren für Projektion bei Deckenmontage
Sélectionner pour la projection appareil au plafond
Seleccionar para proyección montada en el techo
Selezione per la proiezione con montaggio al soffitto
Selecione para projeção com montagem no teto
Velges hvis du vil bruke takmontert projeksjon
Select for rear projection
Markieren für Projektion von hinten
Sélectionner pour afficher l'information réparations
Seleccionar para proyección de transparencias
Selezione per la retroproiezione
Selecione para projeção de serviço autorizado
Velges hvis du vil bruke bakprojeksjon
5.2.2

Downloaded from Projector.com
MENU ADJUSTMENTS
MENÜEINSTELLUNGEN OPTIONS DE MENU MEN
Ú DE AJUSTES IMPOSTAZIONI DAL MENU AJUSTES DO MENU MENYINNSTILLINGER
Select language
Sprache auswählen
Sélectionne la langue
Seleccionar lenguaje
Selezione della lingua
Seleciona o idioma
Velg språk
5.2.4
5.3.1
5.2.5 5.4
5.35.2.3
18
Select to activate / deactivate automatic source search
Entsprechend wählen, um automatische Quellensuche zu aktivieren
S
électionnez “activer/d
ésactiver” la recherche automatique de source
Seleccione para activar/desactivar la b
úsqueda autom
ática del origen
Selezionare per attivare/disattivare la ricerca della sorgente automatica
Selecione para ativar/desativar a busca autm
ática
Velges om automatisk kildesøking skal være aktiv/inaktiv
Select to hide On Screen Display (OSD)
Markieren, um Bildschirmmenü zu verbergen
Sélectionner pour effacer l'affichage sur l'écran
Seleccionar para ocultar la presentación en pantalla
Selezione per nascondere OSD
Selecione para ocultar a exibição na tela (OSD)
Velges hvis du vil slå av menyvisningen (OSD)
Select DPMS active/inactive. Ref. chapter J
DPMS aktivieren/deaktivieren. Siehe Kapitel J
Sélection DPMS actif/inactif. Voir chapitre J
Selecciona activar/desactivar DPMS. Consultar capítulo J
Selezione del DPMS attivo/inattivo. Vedere il capitolo J
Selecione DPMS ativo/inativo. Ref. capítulo J
Velg om DPMS-funksjonen skal være aktiv/inaktiv. Se kapittel J
Tagged effect is assigned to the remote control’s “Effect” key
Der eingestellte Effekt wird der “Effekt”-Taste an der Fernbedienung zugewiesen
L’effet annot
é est assign
é à la cl
é “Effet” contrôle à distance
El efecto de r
ótulos se asigna a la tecla “Efecto” del control remoto
L’effetto a tendina viene assegnato al tasto “Effetto” sul telecomando
O efeito Tagged
é designado à tecla “Efeito” do controle remoto
Den avmerkede effekten tilordnes “Effect”-tasten på fjernkontrollen

Downloaded from Projector.com
MENU ADJUSTMENTS
MENÜEINSTELLUNGEN OPTIONS DE MENU MEN
Ú DE AJUSTES IMPOSTAZIONI DAL MENU AJUSTES DO MENU MENYINNSTILLINGER
5.4.1
5.4.3
5.4.4
5.4.2
5.5
19
5.5.1
Select to reset all options to factory settings
Aktivieren, um alle Optionen auf Werkseinstellung zu setzen
Sélectionner pour remettre toutes les options sur paramètres usine
Seleccionar para restablecer todas las opciones a la configuración original
Selezione per il ripristino di tutte le opzioni sulle impostazioni di fabbrica
Selecione para que as opções retornem à programação inicial de fábrica
Velges hvis du vil tilbakestille alle innstillinger til fabrikkinnstillingene
Assigns the “Effect” key’s function to “magnify” (default setting)
Der “Effekt”-Taste wird als Funktion “Vergrößern” zugewiesen (Standardeinstellung)
Assigne la fonction de la cl
é “Effet” à “agrandir” (paramètres par d
éfaut)
Configure la funci
ón “amplificar” en la tecla “Efecto” (configuraci
ón por defecto)
Assegna la funzione del tasto “Effetto” a “ingrandire” (impostazione di default)
Designa a função da tecla “Efeito” para “ampliar” (configuração predefinida)
Setter “Effect”-tastens virkemåte til “zoom” (standardinnstilling)
Assigns the “Effect” key’s function to “freeze the projected image”
Der “Effekt”-Taste wird als Funktion “Projiziertes Bild einfrieren” zugewiesen
Assigne la fonction de la cl
é “Effet” à “arrêt sur image projet
ée”
Configure la funci
ón “congelar la imagen proyectada” en la tecla “Efecto”
Assegna la funzione del tasto “Effetto” a “fermo immagine”
Designa a função da tecla “Efeito” para “congelar a imagem projetada”
Setter “Effect”-tastens virkemåte til “frys det projiserte bildet”
Assigns the “Effect” key’s function to “mask the projected image”
Der “Effekt”-Taste wird als Funktion “Projiziertes Bild verbergen” zugewiesen
Assigne la fonction de la cl
é
”Effet” à “masquer l’image projet
ée”
Configure la funci
ón “ocultar la imagen proyectada” en la tecla “Efecto”
Assegna la funzione del tasto “Effetto” a “maschera dell’immagine proiettata”
Designa a função da tecla “Efeito” para “mascarar a imagem projetada”
Setter “Effect”-tastens virkemåte til “legg maske på det projiserte bildet”
Assigns the “Effect” key’s function to “mute the sound”
Der “Effekt”-Taste wird als Funktion”Ton abstellen” zugewiesen
Assigne la fonction de la cl
é “Effet” à “mettre la sourdine”
Configure la funci
ón “silenciar el sonido” en la tecla “Efecto”
Assegna la funzione del tasto “Effetto” a “disattivazione audio”
Designa a função da tecla “Efeito” para “colocar o som em mudo”
Setter “Effect”-tastens virkemåte til “mute” (dvs. at lyden slås av)
/