Page is loading ...

MODEL H7507
ROUTER TABLE EXTENSION
OWNER'S MANUAL
WARNING: NO PORTION OF THIS MANUAL MAY BE REPRODUCED IN ANY SHAPE
OR FORM WITHOUT THE WRITTEN APPROVAL OF GRIZZLY INDUSTRIAL, INC.
Model H7507 Shown Installed on Model G1023RLW

4HISMANUALPROVIDESCRITICALSAFETYINSTRUCTIONSONTHEPROPERSETUP
OPERATIONMAINTENANCEANDSERVICEOFTHISMACHINEEQUIPMENT
&AILURETOREADUNDERSTANDANDFOLLOWTHEINSTRUCTIONSGIVENINTHIS
MANUALMAYRESULTINSERIOUSPERSONALINJURYINCLUDINGAMPUTATION
ELECTROCUTIONORDEATH
4HEOWNEROFTHISMACHINEEQUIPMENTISSOLELYRESPONSIBLEFORITS
SAFEUSE4HISRESPONSIBILITYINCLUDESBUTISNOTLIMITEDTOPROPER
INSTALLATIONINASAFEENVIRONMENTPERSONNELTRAININGANDUSAGE
AUTHORIZATIONPROPERINSPECTIONANDMAINTENANCEMANUALAVAILABILITY
ANDCOMPREHENSIONAPPLICATIONOFSAFETYDEVICESBLADECUTTERINTEG
RITYANDTHEUSAGEOFPERSONALPROTECTIVEEQUIPMENT
4HEMANUFACTURERWILLNOTBEHELDLIABLEFORINJURYORPROPERTYDAMAGE
FROMNEGLIGENCEIMPROPERTRAININGMACHINEMODIFICATIONSORMISUSE
3OMEDUSTCREATEDBYPOWERSANDINGSAWINGGRINDINGDRILLINGAND
OTHERCONSTRUCTIONACTIVITIESCONTAINSCHEMICALSKNOWNTOTHE3TATE
OF#ALIFORNIATOCAUSECANCERBIRTHDEFECTSOROTHERREPRODUCTIVE
HARM3OMEEXAMPLESOFTHESECHEMICALSARE
s ,EADFROMLEADBASEDPAINTS
s #RYSTALLINESILICAFROMBRICKSCEMENTANDOTHERMASONRYPRODUCTS
s !RSENICANDCHROMIUMFROMCHEMICALLYTREATEDLUMBER
9OURRISKFROMTHESEEXPOSURESVARIESDEPENDINGONHOWOFTENYOU
DOTHISTYPEOFWORK4OREDUCEYOUREXPOSURETOTHESECHEMICALS
7ORKINAWELLVENTILATEDAREAANDWORKWITHAPPROVEDSAFETYEQUIP
MENTSUCHASTHOSEDUSTMASKSTHATARESPECIALLYDESIGNEDTOFILTER
OUTMICROSCOPICPARTICLES

Table of Contents
INTRODUCTION ............................................................................................................................... 2
SECTION 1: SAFETY ....................................................................................................................... 4
SECTION 2: SETUP ......................................................................................................................... 7
SECTION 3: OPERATIONS ........................................................................................................... 19
SECTION 4: MAINTENANCE......................................................................................................... 25
SECTION 5: PARTS ....................................................................................................................... 26
WARRANTY AND RETURNS ........................................................................................................ 29

INTRODUCTION
Machine Description
LZhiVcYWZ]^cYdjgbVX]^cZh#>[ndj]VkZVcn
hZgk^XZfjZhi^dch!eVgihgZfjZhihdg\ZcZgVafjZh"
i^dchVWdjii]ZbVX]^cZ!eaZVhZXVaadglg^iZjhVi
i]ZadXVi^dca^hiZYWZadl#
<g^ooan>cYjhig^Va!>cX#
&'%(AnXdb^c\BVaa8^gXaZ
BjcXn!E6&,,*+
E]dcZ/*,%*)+".++(
:"BV^a/iZX]hjeedgi5\g^ooan#Xdb
LZlVcindjg[ZZYWVX`dci]^hbVcjVa#>[ndjXVc
iV`Z i]Zi^bZ! eaZVhZ ZbV^a dg lg^iZ id jh Vi i]Z
VYYgZhhWZadlVcYiZaajh]dllZY^Y/
<g^ooan>cYjhig^Va!>cX#
8
$DIZX]c^XVa9dXjbZciVi^dcBVcV\Zg
E#D#7dm'%+.
7Zaa^c\]Vb!L6.-'',"'%+.
:bV^a/bVcjVah5\g^ooan#Xdb
Contact Info
LZ VgZ egdjY id d[[Zg i]^h YdXjbZci l^i] ndjg
cZl bVX]^cZ LZkZ bVYZ ZkZgn Z[[dgi id WZ
ZmVXi l^i] i]Z ^chigjXi^dch! heZX^[^XVi^dch! YgVl"
^c\h! VcY e]did\gVe]h d[ i]Z bVX]^cZ lZ jhZY
l]Zc lg^i^c\ i]^h bVcjVa# =dlZkZg! hdbZi^bZh
lZhi^aabV`ZVcdXXVh^dcVab^hiV`Z#
6ahd!dl^c\iddjgeda^Xn d[Xdci^cjdjh^begdkZ"
bZci! your machine may not exactly match
the manual# >[ndj [^cY i]^hid WZi]Z XVhZ!VcY
i]ZY^[[ZgZcXZWZilZZci]ZbVcjVaVcYbVX]^cZ
aZVkZhndj^cYdjWi!^bbZY^ViZanXVaadjgiZX]c^"
XVahjeedgi[dgjeYViZhdgXaVg^[^XVi^dc#
;dgndjgXdckZc^ZcXZ!lZedhiVaaVkV^aVWaZYdXj"
bZciVi^dc dc djg lZWh^iZ Vi www.grizzly.com#
6cnjeYViZhidi]^hYdXjbZcil^aaWZgZ[aZXiZYdc
djglZWh^iZVhhddcVhXdbeaZiZ#
Manual Accuracy
NOTICE
Installation may require permanent modifi-
cation to your table saw or its parts. This
modification can include cutting, grinding,
drilling, and tapping threads into metal sur-
faces. Before beginning any modification to
your table saw or its parts, read the entire
assembly section in this manual to make
sure the person making the modification is
capable of performing the required tasks,
and to make sure the Model H7507 will fit
your saw.

Identification
To reduce the risk of
serious injury when using
this machine, read and
understand this entire
manual before beginning
any operations.

For Your Own Safety, Read Instruction
Manual Before Operating this Machine
The purpose of safety symbols is to attract your attention to possible hazardous conditions.
This manual uses a series of symbols and signal words intended to convey the level of impor-
tance of the safety messages. The progression of symbols is described below. Remember that
safety messages by themselves do not eliminate danger and are not a substitute for proper
accident prevention measures.
WEARING PROPER APPAREL. 9d cdi lZVg
Xadi]^c\! VeeVgZa! dg _ZlZagn i]Vi XVc WZXdbZ
ZciVc\aZY ^c bdk^c\ eVgih# 6alVnh i^Z WVX` dg
XdkZgadc\]V^g#LZVgcdc"ha^e [ddilZVgidVkd^Y
VXX^YZciVaha^ehl]^X]XdjaYXVjhZVadhhd[ldg`"
e^ZXZXdcigda#
HEARING PROTECTION. 6alVnh lZVg ]ZVg"
^c\egdiZXi^dcl]ZcdeZgVi^c\dgdWhZgk^^c\ adjY
bVX]^cZgn# :miZcYZY ZmedhjgZ id i]^h cd^hZ
l^i]dji]ZVg^c\ egdiZXi^dcXVc XVjhZ eZgbVcZci
]ZVg^c\adhh#
MENTAL ALERTNESS. 7Z bZciVaan VaZgi l]Zc
gjcc^c\ bVX]^cZgn# CZkZg deZgViZ jcYZg i]Z
^c[ajZcXZd[Ygj\hdgVaXd]da!l]Zci^gZY!dgl]Zc
Y^higVXiZY#
OWNER’S MANUAL. GZVY VcY jcYZghiVcY
i]^h dlcZg»h bVcjVa 7:;DG: jh^c\ bVX]^cZ#
JcigV^cZYjhZghXVcWZhZg^djhan]jgi#
EYE PROTECTION.6alVnhlZVg6CH>"VeegdkZY
hV[Zin\aVhhZhdgV[VXZh]^ZaYl]ZcdeZgVi^c\dg
dWhZgk^c\ bVX]^cZgn id gZYjXZ i]Z g^h` d[ ZnZ
^c_jgndgWa^cYcZhh[gdb[an^c\eVgi^XaZh#:kZgnYVn
ZnZ\aVhhZhVgZcdiVeegdkZYhV[Zin\aVhhZh#
HAZARDOUS DUST. 9jhi XgZViZY l]^aZ jh^c\
bVX]^cZgn bVn XVjhZ XVcXZg! W^gi] YZ[ZXih! dg
adc\"iZgb gZhe^gVidgnYVbV\Z# 7Z VlVgZ d[ Yjhi
]VoVgYhVhhdX^ViZYl^i]ZVX]ldg`e^ZXZbViZg^Va!
VcYValVnhlZVgVC>DH="VeegdkZYgZhe^gVidgid
gZYjXZndjgg^h`#
Indicates a potentially hazardous situation which, if not avoided,
MAY result in minor or moderate injury. It may also be used to alert
against unsafe practices.
Indicates a potentially hazardous situation which, if not avoided,
COULD result in death or serious injury.
Indicates an imminently hazardous situation which, if not avoided,
WILL result in death or serious injury.
This symbol is used to alert the user to useful information about
proper operation of the machine.
NOTICE
Safety Instructions for Machinery
SECTION 1: SAFETY

DISCONNECTING POWER SUPPLY.6alVnhY^h"
XdccZXi bVX]^cZ [gdb edlZg hjeean WZ[dgZ hZg"
k^X^c\! VY_jhi^c\! dg X]Vc\^c\ Xjii^c\ iddah W^ih!
WaVYZh!XjiiZgh! ZiX## BV`Z hjgZ hl^iX] ^h ^cD;;
edh^i^dcWZ[dgZgZXdccZXi^c\idVkd^YVcjcZmeZXi"
ZYdgjc^ciZci^dcVahiVgi#
APPROVED OPERATION. JcigV^cZY deZgVidgh
XVc WZ hZg^djhan ]jgi Wn bVX]^cZgn# Dcan Vaadl
igV^cZY dg egdeZgan hjeZgk^hZY eZdeaZ id jhZ
bVX]^cZ# L]Zc bVX]^cZ ^h cdi WZ^c\ jhZY! Y^h"
XdccZXi edlZg! gZbdkZ hl^iX] `Znh! dg adX`"dji
bVX]^cZidegZkZcijcVji]dg^oZYjhZ·ZheZX^Vaan
VgdjcYX]^aYgZc#BV`Zldg`h]de`^Yegdd[
DANGEROUS ENVIRONMENTS. 9d cdi jhZ
bVX]^cZgn ^c lZi dg gV^cn adXVi^dch! XajiiZgZY
VgZVh! VgdjcY [aVbbVWaZh! dg ^c eddgan"a^i VgZVh#
@ZZe ldg` VgZV XaZVc! Ygn! VcY lZaa"a^\]iZY id
b^c^b^oZg^h`d[^c_jgn#
ONLY USE AS INTENDED. Dcan jhZ bVX]^cZ
[dg ^ih ^ciZcYZY ejgedhZ# CZkZg bdY^[n dg VaiZg
bVX]^cZ[dgVejgedhZcdi^ciZcYZYWni]ZbVcj"
[VXijgZgdghZg^djh^c_jgnbVngZhjai
USE RECOMMENDED ACCESSORIES.8dchjai
i]^hdlcZg»hbVcjVadgi]ZbVcj[VXijgZg[dggZX"
dbbZcYZY VXXZhhdg^Zh# Jh^c\ ^begdeZg VXXZh"
hdg^Zhl^aa^cXgZVhZi]Zg^h`d[hZg^djh^c_jgn#
CHILDREN & BYSTANDERS. @ZZe X]^aYgZc
VcYWnhiVcYZghVhV[ZY^hiVcXZVlVn[gdbldg`
VgZV#Hidejh^c\bVX]^cZ^[X]^aYgZcdgWnhiVcY"
ZghWZXdbZVY^higVXi^dc#
REMOVE ADJUSTING TOOLS. CZkZg aZVkZ
VY_jhibZciiddah!X]jX``Znh!lgZcX]Zh!ZiX#^cdg
dcbVX]^cZ·ZheZX^VaancZVgbdk^c\eVgih#KZg^[n
gZbdkVaWZ[dgZhiVgi^c\
SECURING WORKPIECE. L]Zc gZfj^gZY! jhZ
XaVbehdg k^hZhid hZXjgZldg`e^ZXZ# 6 hZXjgZY
ldg`e^ZXZegdiZXih]VcYhVcY[gZZhWdi]d[i]Zb
iddeZgViZi]ZbVX]^cZ#
FEED DIRECTION.JcaZhhdi]Zgl^hZcdiZY![ZZY
ldg` V\V^chi i]Z gdiVi^dc d[ WaVYZh dg XjiiZgh#
;ZZY^c\^ci]ZhVbZY^gZXi^dcd[gdiVi^dcbVnejaa
ndjg]VcY^cidi]ZXji#
FORCING MACHINERY.9dcdi[dgXZbVX]^cZ#
>il^aa Yd i]Z _dWhV[Zg VcY WZiiZg Vii]Z gViZ [dg
l]^X]^ilVhYZh^\cZY#
GUARDS & COVERS. <jVgYh VcY XdkZgh XVc
egdiZXi ndj [gdb VXX^YZciVa XdciVXi l^i] bdk^c\
eVgih dg [an^c\ YZWg^h# BV`Z hjgZ i]Zn VgZ egde"
Zgan^chiVaaZY!jcYVbV\ZY!VcYldg`^c\XdggZXian
WZ[dgZjh^c\bVX]^cZ#
NEVER STAND ON MACHINE.HZg^djh^c_jgndg
VXX^YZciVa XdciVXi l^i] Xjii^c\ idda bVn dXXjg ^[
bVX]^cZ^hi^eeZY#BVX]^cZbVnWZYVbV\ZY#
STABLE MACHINE. JcZmeZXiZYbdkZbZciYjg"
^c\deZgVi^dch\gZVian^cXgZVhZhi]Zg^h`d[^c_jgn
VcY adhh d[ Xdcigda# KZg^[n bVX]^cZh VgZ hiVWaZ$
hZXjgZ VcY bdW^aZ WVhZh ^[ jhZY VgZ adX`ZY
WZ[dgZhiVgi^c\#
AWKWARD POSITIONS. @ZZe egdeZg [ddi^c\
VcYWVaVcXZViVaai^bZhl]ZcdeZgVi^c\bVX]^cZ#
9dcdidkZggZVX]6kd^YVl`lVgY]VcYedh^i^dch
i]Vi bV`Z ldg`e^ZXZ Xdcigda Y^[[^Xjai dg ^cXgZVhZ
i]Zg^h`d[VXX^YZciVa^c_jgn#
UNATTENDED OPERATION. CZkZg aZVkZ
bVX]^cZgjcc^c\l]^aZjcViiZcYZY#IjgcbVX]^cZ
OFFVcYZchjgZVaabdk^c\eVgihXdbeaZiZanhide
WZ[dgZlVa`^c\VlVn#
MAINTAIN WITH CARE.;daadlVaabV^ciZcVcXZ
^chigjXi^dch VcY ajWg^XVi^dc hX]ZYjaZh id `ZZe
bVX]^cZ^c\ddYldg`^c\XdcY^i^dc#6c^begdeZgan
bV^ciV^cZYbVX]^cZbVn^cXgZVhZi]Zg^h`d[hZg^"
djh^c_jgn#
CHECK DAMAGED PARTS. GZ\jaVgan ^cheZXi
bVX]^cZ [dg YVbV\ZY eVgih! addhZ Wdaih! b^h"
VY_jhiZY dg b^h"Va^\cZY eVgih! W^cY^c\! dg Vcn
di]Zg XdcY^i^dch i]Vi bVn V[[ZXi hV[Z deZgVi^dc#
6alVnhgZeV^gdggZeaVXZYVbV\ZYdgb^h"VY_jhi"
ZYeVgihWZ[dgZdeZgVi^c\bVX]^cZ#
EXPERIENCING DIFFICULTIES. >[ Vi Vcn i^bZ
ndj VgZ ZmeZg^ZcX^c\ Y^[[^Xjai^Zh eZg[dgb^c\ i]Z
^ciZcYZY deZgVi^dc! hide jh^c\ i]Z bVX]^cZ
8dciVXi djg IZX]c^XVa Hjeedgi 9ZeVgibZci Vi
*,%*)+".++(#

Additional Safety for Router Tables
No list of safety guidelines can be complete.
Every shop environment is different. Always
consider safety first, as it applies to your
individual working conditions. Use this and
other machinery with caution and respect.
Failure to do so could result in serious per-
sonal injury, damage to equipment, or poor
work results.
Like all machinery there is potential danger
when operating this machine. Accidents are
frequently caused by lack of familiarity or
failure to pay attention. Use this machine
with respect and caution to decrease the
risk of operator injury. If normal safety pre-
cautions are overlooked or ignored, serious
personal injury may occur.
AVOIDING AMPUTATION.
SECURING LEVERS AND KNOBS.
PREVENTING WORKPIECE DRAW-IN OR
KICKBACK.
APPROPRIATE WORKPIECES
BLIND CUTTING
TESTING CLEARANCE
CUTTING SUPPORT.
WORKPIECE SIZING.
CUTTER HEIGHT.
USING SAFETY GUARDS
TRIPPING HAZARD.

Wear safety glasses dur-
ing the entire setup pro-
cess!
This machine presents
serious injury hazards
to untrained users. Read
through this entire manu-
al to become familiar with
the controls and opera-
tions before starting the
machine!
SECTION 2: SETUP
Needed for Setup
please imme-
diately call Customer Service at (570) 546-9663
for advice.
Otherwise, filing a freight claim can be difficult.
Unpacking
This machine and its com-
ponents are very heavy.
Get lifting help or use
power lifting equipment
such as a forklift to move
heavy items.
Description Qty
Page 10

SUFFOCATION HAZARD!
Keep children and pets away
from plastic bags or packing
materials unpacked with this
machine. Discard immediately.
Inventory
I]Z[daadl^c\^hVYZhXg^ei^dcd[i]ZbV^cXdbed"
cZcihh]^eeZYl^i]ndjgbVX]^cZ#AVni]ZXdbed"
cZcihdjiid^ckZcidgni]Zb#
>[ Vcn cdc"egdeg^ZiVgn eVgih VgZ b^hh^c\ Z#\# V
cjidgVlVh]Zg!lZl^aa\aVYangZeaVXZi]Zb0dg
[dgi]ZhV`Zd[ZmeZY^ZcXn!gZeaVXZbZcihXVcWZ
dWiV^cZYVindjgadXVa]VgYlVgZhidgZ#
NOTICE
If you cannot find an item on this list, check
the mounting location on the machine or the
packaging materials. Sometimes parts are
pre-installed for shipping, or they become
hidden by packaging materials.
Hardware and Tools (Not Shown):
Router Table
Guard
Box Contents: (Figures 1 –2) Qty
A.
B.
C.
D.
E.
F.
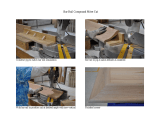
Figure 1.
Figure 2.
G.
H.
I.

Hardware Recognition Chart

I]Z jceV^ciZY hjg[VXZh d[ ndjg bVX]^cZ VgZ
XdViZY l^i] V ]ZVkn"Yjin gjhi egZkZciVi^kZ i]Vi
egZkZcihXdggdh^dcYjg^c\h]^ebZciVcYhidgV\Z#
I]^h gjhi egZkZciVi^kZ ]Vh WZZc ndjg bVX]^cZh
XadhZ Vaan VcY \jVgY^Vc h^cXZ ^i aZ[i i]Z [VXidgn#
>[ ndjg bVX]^cZ Vgg^kZY id ndj [gZZ d[ gjhi! i]Zc
WZ i]Vc`[ja i]Vi i]Z gjhi egZkZciVi^kZ egdiZXiZY
^i Yjg^c\ ^ih _djgcZn###VcY ign id hiVn i]Vc`[ja Vh
ndjXaZVc^id[[!WZXVjhZ^iXVcWZX]VaaZc\^c\id
gZbdkZ^[ndjVgZjcegZeVgZYVcY^beVi^Zci#
EaVc dc heZcY^c\ hdbZ i^bZ XaZVc^c\ ndjg
bVX]^cZ# I]Z i^bZ ndj heZcY Yd^c\ i]^h l^aa
gZlVgYndjl^i]hbddi]ha^Y^c\eVgihVcYVWZiiZg
VeegZX^Vi^dc[dgi]ZegdeZgXVgZd[ndjgbVX]^cZh
jceV^ciZYhjg[VXZh#
6ai]dj\] i]ZgZ VgZ bVcn lVnh id hjXXZhh[jaan
gZbdkZ i]Z gjhi egZkZciVi^kZ! i]ZhZ ^chigjXi^dch
lVa`ndji]gdj\]l]Vildg`hlZaa[dgjh#
Before cleaning, gather the following:
9^hedhVWaZGV\h
8aZVcZg$YZ\gZVhZghZZWZadl
HV[Zin\aVhhZhY^hedhVWaZ\adkZh
Basic steps for removing rust preventative:
1. Eji dc hV[Zin \aVhhZh VcY Y^hedhVWaZ
\adkZh#
2. 8dViVaahjg[VXZhi]Vi]VkZgjhiegZkZciVi^kZ
l^i]Va^WZgVaVbdjcid[ndjgXaZVcZg$YZ\gZVh"
ZgVcYaZii]ZbhdV`[dg[Zlb^cjiZh#
3. L^eZd[[i]Zhjg[VXZh#>[ndjgXaZVcZg$YZ\gZVh"
Zg^hZ[[ZXi^kZ!i]ZgjhiegZkZciVi^kZl^aal^eZ
d[[ZVh^an#
Note:To clean off thick coats of rust preven-
tative on flat surfaces, such as tables, use
a PLASTIC paint scraper to scrape off the
majority of the coating before wiping it off with
your rag. (Do not use a metal scraper or you
may scratch your machine.)
4. GZeZViSteps 2–3VhcZXZhhVgnjci^aXaZVc!
i]ZcXdViVaajceV^ciZYhjg[VXZhl^i]VfjVa^in
bZiVaegdiZXiVciidegZkZcigjhi#
Gasoline and petroleum
products have low flash
points and can explode
or cause fire if used to
clean machinery. Avoid
using these products
to clean machinery.
Many cleaning solvents
are toxic if inhaled.
Minimize your risk by only
using these products in a
well ventilated area.
NOTICE
Avoid chlorine-based solvents, such as
acetone or brake parts cleaner that may
damage painted surfaces. Always follow
the manufacturer’s instructions when using
any type of cleaning product.
Note:In a pinch, automotive degreasers, mineral
SPIRITSOR7$sCANBEUSEDTOREMOVERUSTPRE-
ventative. Before using these products, though,
test them on an inconspicuous area of your paint
to make sure they will not damage it.
Cleanup
H9692—Orange Power Cleaner & Degreaser
Figure 3.

Assembly
To assemble and install your router table
extension wing:
1.
2.
Figure 4
(
¿
-
;aViLVh]Zg
(
¿
-
AdX`
LVh]Zg
(
¿
-
"&+m&
&
¿
)
=Zm7dai
GdjiZgIVWaZ
BV^cIVWaZ
Figure 5.
3.
Figure 5
4.
Step 5
bottom
Figure 6
IVeZ
Figure 6.
GdjiZgIVWaZ
BV^cIVWaZ
Bdjci^c\
=daZh
Figure 4.
Note: There are other ways to attach the
router table to a table saw, but these may
require modifications to the saw.

7.
8.
9.
Figure
9
Note:
If your rails do not have mounting holes
to accomodate the router table legs, you may
need to drill holes in the end of the rails to
allow the legs to be fastened, as shown in
Figure 9.
10.
11. Figure
10
&
¿
)
"'%
=ZmCji
&
¿
)
"'%
;aViLVh]Zg
&
¿
)
"'%m
(
¿
)
;aVi=ZVYHXgZl
AZ\
6Y_jhiVWaZ;ddi
GZVgGV^a
8djciZghjc`
&
¿
)
=daZh[dg
Bdjci^c\AZ\h
Figure 9.
IVeZ
Figure 7.
top
Figure 7
Note: After reinstalling the router table, remove all
excess masking tape with a razor blade.
(
¿
-
;aVi
LVh]Zg
(
¿
-
AdX`
LVh]Zg
(
¿
-
"&+
=ZmCji
(
¿
-
=daZ
(
¿
-
=daZ
(
¿
-
"&+m&
&
¿
)
=Zm7dai
;gdciGV^a
GZVgGV^a
Figure 8.
Note: If your rails do not have mounting
holes to accommodate the router table, you
may need to drill holes in your fence rails
to allow the router table to be fastened, as
shown in Figure 8.
5.
6.
Figure 8
Figure 10.

Figure 11.
To mount a router to the router table:
1.
2.
Figure 11
Mounting Router
NOTICE
Do not tighten the
clamp adjustment
bolts against the
thin edge of the
T-slots, or they may
break.
Figure 13.
3.
Figure 13
If the router unexpectedly moves or the
router bit contacts the table insert or fence
during operation, serious personal injury
could result from flying debris. ALWAYS
make sure that at least three router clamps
are used and are applied to a flat surface
of the router base before connecting the
router to power.
4.
Note: To properly position the hold-down
clamp, balance the tightness of the hold-
down knob and the adjustment bolt so that
the clamp will allow room for the router base
in the next step. It may be necessary to move
the jam nut on the adjustment bolt to the
other side of the hold down clamp, as shown
in Figure 12 to properly fit your router.
Figure 12.

Router Guard
Figure 14
2.
Figure 16
IVWaZ=daZ
8ZciZgEd^ci
BVg`ZY
Figure 16.
To make a shop made fence and install the
router guard:
1.
Figure 15
'
&
¿
'
'-
&
&
¿
'
Figure 15.
8ZciZgEd^ci
BVg`ZY
Figure 17.
3.
Figure 17
4.
Note:Be careful not to disturb any shim tape
on the metal body of the fence. This has been
carefully installed at the factory to ensure
that the fence face remains straight when
installed.
5.
Figure 14.

IgVch[Zg
I]ZhZ=daZh
8ZciZgEd^cih
6a^\cZY
Hjeedgi
7dVgY
Figure 18.
6.
Figure 18
7.
8.
Figure 19
STEP 7
9g^aa
(
¿&+]daZh
i]gdj\]i]Z
hjeedgiWdVgY#
STEP 8
8djciZgh^c`i]Z]daZh
Veegdm^bViZan
&
¿)YZZe
l^i]V
(
¿-Yg^aaW^i#
(
¿
-
(
¿
&+
&
¿)
;VXZ
IdeK^Zl
Figure 19.
9.
Figure 20
Figure 20.
10.
Figure 21
Note: If you are using a non-Shop Fox
Classic Fence, you may have to provide your
own screws if the ones provided with the kit
are not the correct size and will not secure
the support board to the fence face.
Figure 21.

9^VbZiZg
8jii^c\9Zei]
;ZcXZ
I]^X`cZhh
&
¿)
Figure 22.
11.
Figure 22
13.
Removing more than
1
⁄16" from the infeed
fence may greatly increase the risk of kick-
back injury when routing.
Figure 24 Step
13
12.
Figure 23
Step 14
9^gZXi^dcd[;ZZY
:cYK^Zl
Figure 23.
:cYK^Zl
9^gZXi^dcd[;ZZY
HjeedgiZY
Figure 24.
14.
Mounting Router
Page 13
15.
Attaching the fence faces incorrectly during
the next step may increase the risk of kick-
back or other serious personal injury during
routing operations.

&
¿-
&
¿-
BVm^bjb9^hiVcXZ
[gdbGdjiZg7^i
BVm^bjb9^hiVcXZ
[gdbGdjiZg7^i
Dji[ZZY;ZcXZ >c[ZZY;ZcXZ
Figure 25.
16.
Figure 25
Dji[ZZY;ZcXZ >c[ZZY;ZcXZ
Figure 26.
Figure 26
18.
Figure 28
Note: If you followed Step 13, be sure to
install the modified board on the infeed side.
>c[ZZYH^YZ
Dji[ZZYH^YZ
Figure 27.
E]ae=YHXg
-"('m
*
¿
-
8Vgg^V\Z7dai
&
¿
)
"'%m
&
¿
'
L^c\Cji
&
¿
)
"'%
;aViLVh]Zg-
;aViLVh]Zg
-
;aViLVh]Zg-
<jVgY
AdX`LVh]Zg-
=ZmCji-"('
KZgi^XVa
7gVX`Zi
=dg^odciVa
7gVX`Zi
;aViLVh]Zg
&
¿
)
LddY
HXgZl
-m
(
¿
)
Figure 28.
Overtightening the fasteners that secure the
plastic guard to the bracket may crack or
break the plastic guard, rendering it unsafe
for use.
17.
Figure
27

Figure 29.
20.
21.
22.
If you change router bits, the fence pieces
must be adjusted in/out so there is not more
than
1
⁄8" clearance between the router bit
and the fences.
Dust Collection
DO NOT use the Model H7507 without an ade-
quate dust collection system. An attached
router will create substantial amounts of
wood dust while operating. Failure to use a
dust collection system can result in short
and long-term respiratory illness.
Recommended CFM at Dust Port: 225 CFM
Do not confuse this CFM recommendation with
the rating of the dust collector. To determine the
CFM at the dust port, you must consider these
variables: (1) CFM rating of the dust collector,
(2) hose type and length between the dust col-
lector and the machine, (3) number of branches
or wyes, and (4) amount of other open lines
throughout the system. Explaining how to cal-
culate these variables is beyond the scope of
this manual. Consult an expert or purchase a
good dust collection "how-to" book.
19.
Figure 29.
/