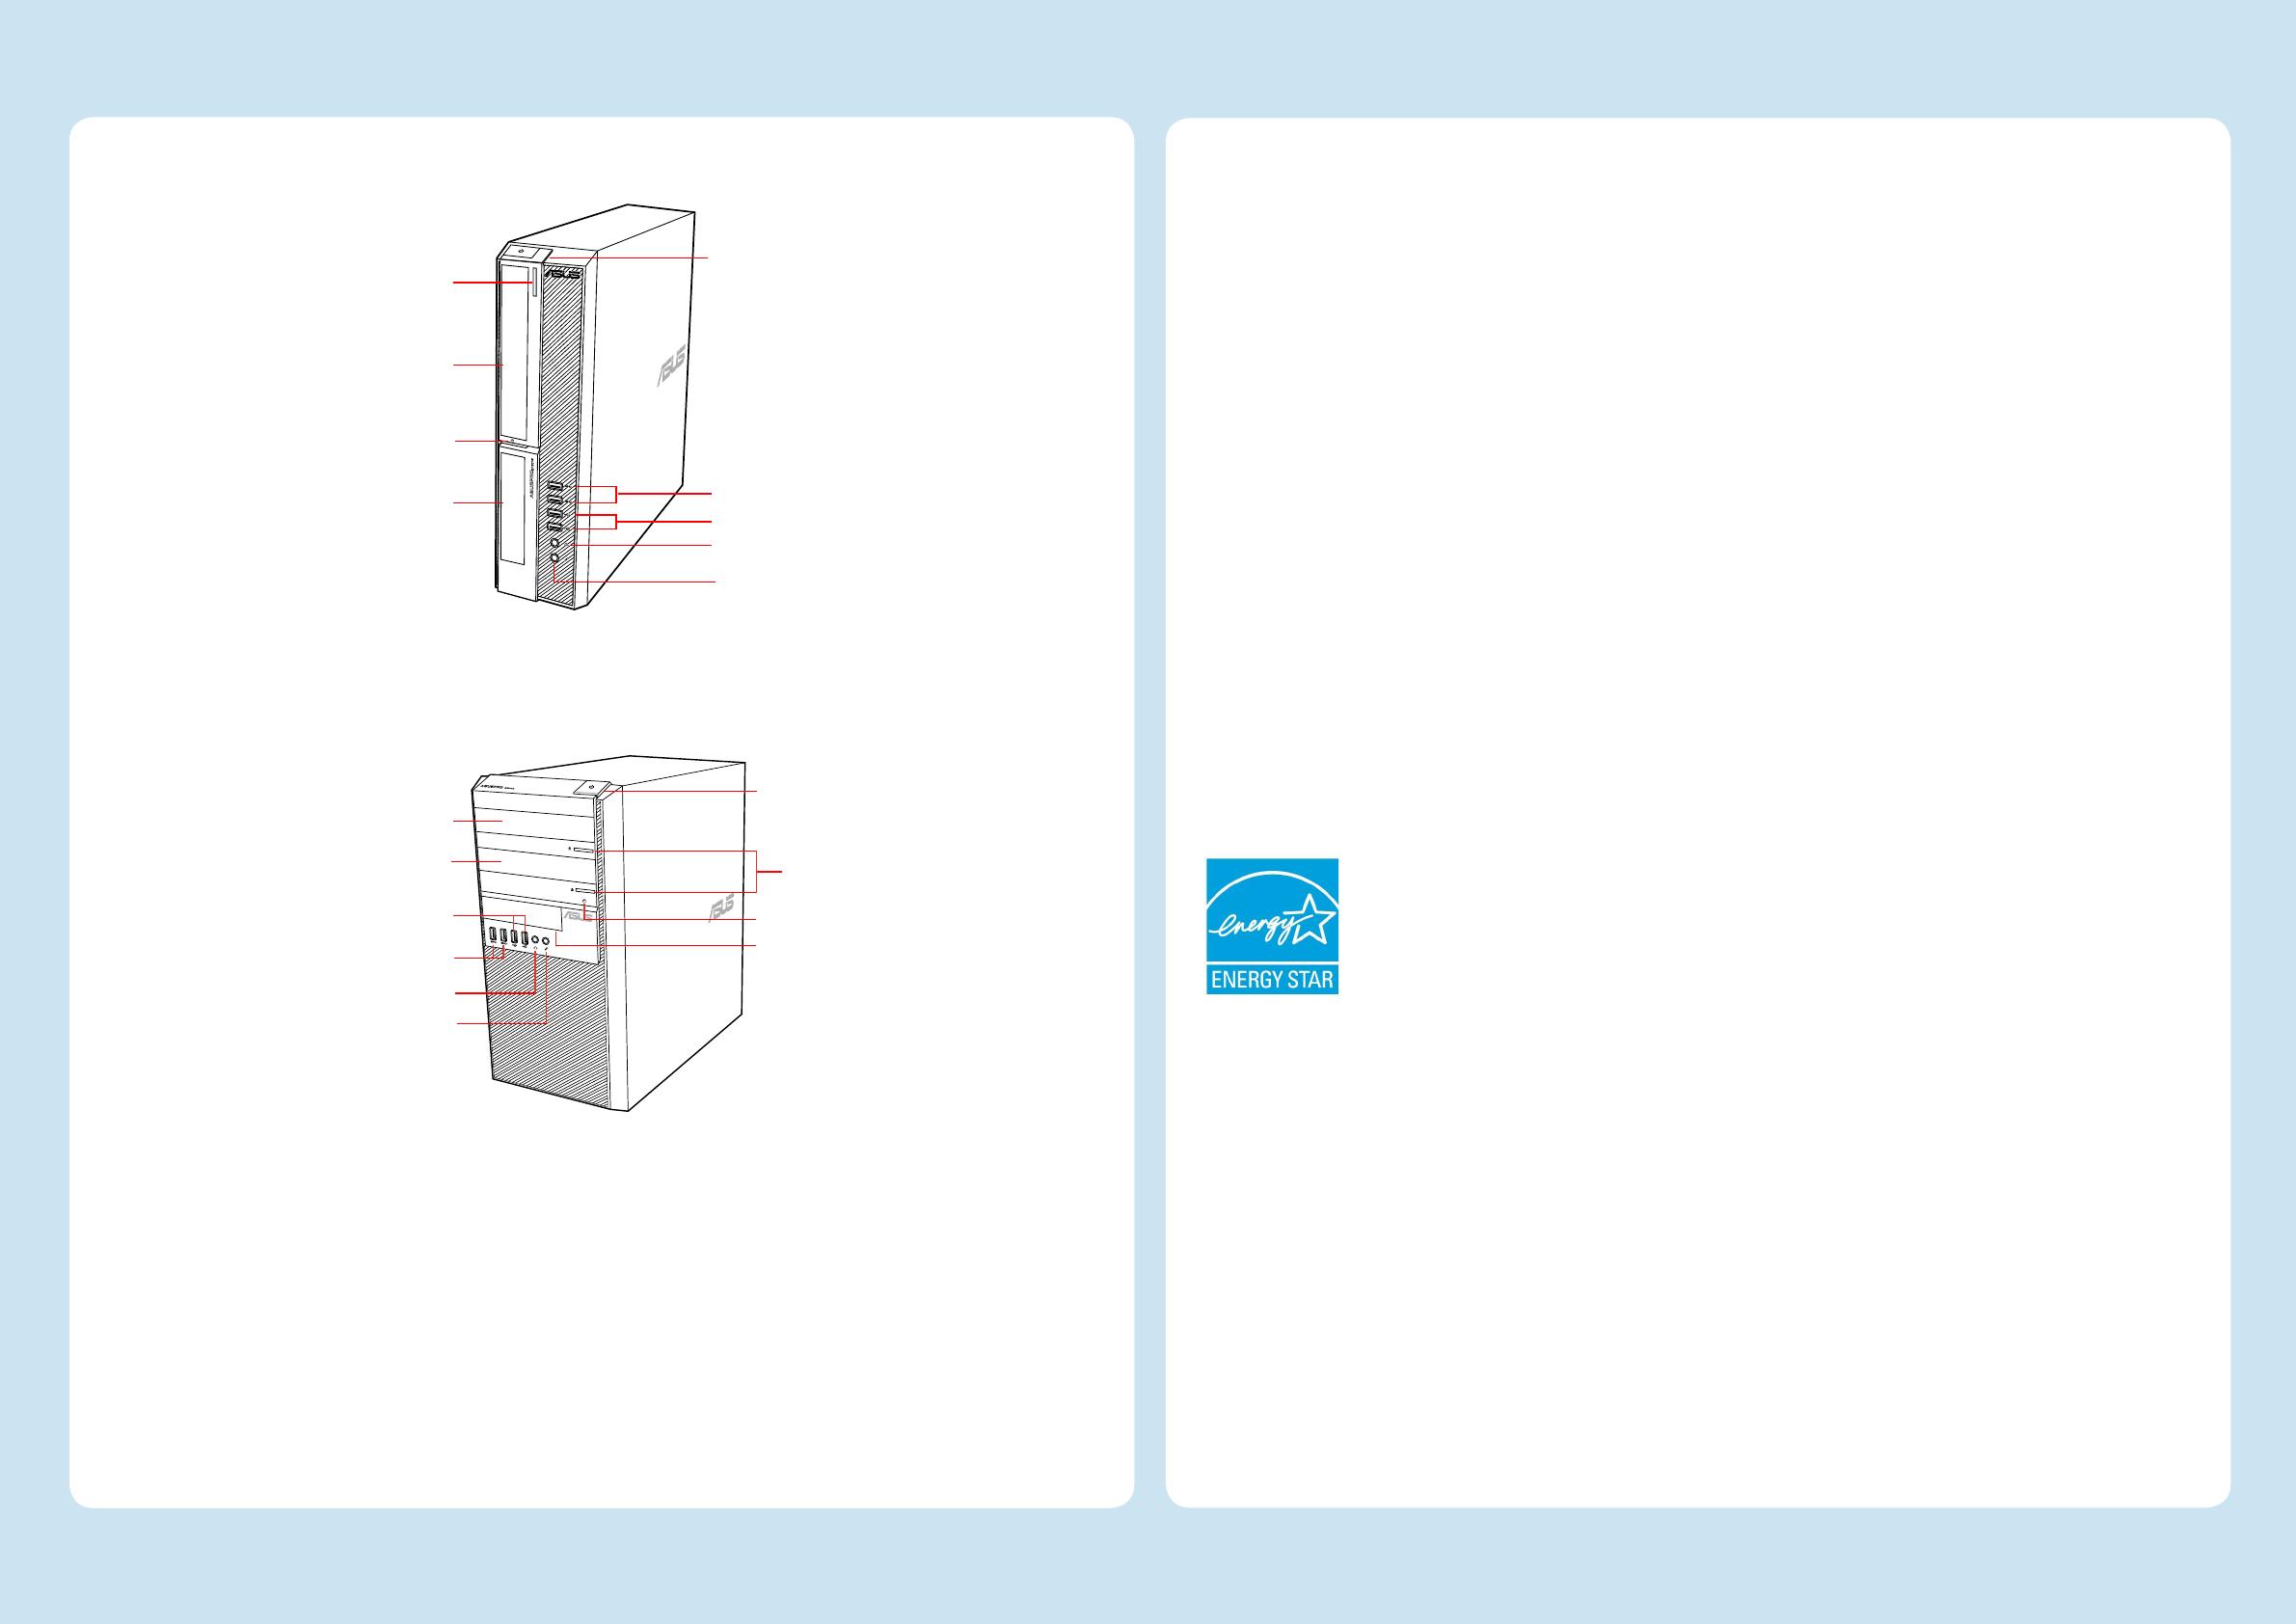
BM1AD
5.25 inch optical disk drive bay /
5.25 吋光碟機插槽 / 5.25 英寸光驅插槽
Microphone port / 麥克風插孔 / 麥克風插孔
Power button / 電源按鈕 / 電源按鈕
HDD LED / 硬碟存取指示燈 / 硬盤讀寫指示燈
USB 2.0 port / USB 2.0 連接埠 / USB 2.0 接口
BP1AD (SD310)
USB 3.0 port / USB 3.0
連接埠 / USB 3.0 接口
Microphone port / 麥克風插孔 / 麥克風插孔
HDD LED / 硬碟存取指示燈 / 硬盤讀寫指示燈
5.25 inch optical disk drive bay /
5.25 吋光碟機插槽 / 5.25 英寸光驅插槽
Power button / 電源按鈕 / 電源按鈕
Headphone port / 耳機插孔 / 耳機插孔
Safety information
• Before using this product, ensure that all cables are correctly connected. If you detect any cable damage, contact your retailer
immediately.
• Use this product only with the correct voltage as instructed by the manufacturer.
• To avoid short circuits and faulty contacts, keep scraps of paper, screws, and threads away from connectors, slots, sockets, and
circuits.
• Before adding or removing devices to or from the system, ensure to unplug it from the power source.
• The system covers are elaborately designed to protect users from scratches, but still be careful with those sharp tips and edges. Put
on a pair of gloves before removing or replacing the system covers.
• If you encounter technical problems with this product, e.g. the power supply is broken, contact a qualied service technician or
your retailer. DO NOT service this product yourself.
安全性須知
• 在使用產品之前,請確定所有的排線、電源線都已正確地連接好。若您發現有任何重大瑕疵,請儘速聯絡您的經銷商。
•
請依據廠商指示在正確的電壓下使用本產品。
• 請避免讓紙張碎片、螺絲及線頭等小東西靠近電腦之連接器、插槽、孔位等處,避免短路及接觸不良等情況發生。
• 在安裝或是移除週邊產品時請先關閉電源。
• 電腦的機殼、鐵片大部份都經過防割傷處理,拆裝機殼時最好能夠戴上手套。
• 如果電源供應器或系統已損壞,請不要嘗試自行修復。請將之交給專業技術服務人員或經銷商來處理。
安全性須知
• 在使用產品之前,請確定所有的排線、電源線都已正確地連接好。若您發現有任何重大瑕疵,請儘快聯絡您的經銷商。
•
請依據廠商指示在正確的電壓下使用本產品。
• 請避免讓紙張碎片、螺絲及線頭等小東西靠近電腦的接口、插槽、孔位等處,避免短路及接觸不良等情況發生。
• 在安裝或是移除外圍產品時請先關閉電源。
• 電腦的機箱、鐵片大部分都經過防割傷處理,拆裝機箱時最好能夠戴上手套。
• 如果電源供應器或系統已損壞,請不要嘗試自行修復。請將之交給專業技術服務人員或經銷商來處理。
First Edition / August 2013
15060-266000DP
標示有 ENERGY STAR 標誌的 ASUS 產品,均符合美國環保署所制訂的 ENERGY STAR 規範,而且產品
電源管理功能都已經啟用。在靜置 15 分鐘後,螢幕會自動進入睡眠模式;30 分鐘後,電腦會進入睡眠模
式。使用者可藉由任何鍵將電腦由睡眠模式中喚醒。有關電源管理功能及其潛在效益的詳細資訊,可參考
http://www.energy.gov/powermanagement 。
美國環保署所制訂的 ENERGY STAR 規範,旨在推廣能源效益產品以減少空氣污染。藉由 ENERGY STAR,
使用者每年可節省高達 30% 的電力以及電費,同時減少溫室氣體排放。能源之星的相關資訊,可參考 http://
www.energystar.gov 。
*註:無作業系統或使用 Linux 系統的產品,不支援 ENERGY STAR。
標示有 ENERGY STAR 標誌的 ASUS 產品,均符合美國環保署所制訂的 ENERGY STAR 規範,而且產
品電源管理功能都已經啟用。在靜置 15 分鐘後,屏幕會自動進入睡眠模式;30 分鐘後,電腦會進入睡眠
模式。用戶可通過任何鍵將電腦由睡眠模式中喚醒。有關電源管理功能及其潛在效益的詳細資訊,可參考
http://www.energy.gov/powermanagement 。
美國環保署所制訂的 ENERGY STAR 規範,旨在推廣能源效益產品以減少空氣污染。通過 ENERGY STAR,
用戶每年可節省高達 30% 的電力以及電費,同時減少溫室氣體排放。能源之星的相關資訊,可參考 http://
www.energystar.gov 。
*註:無操作系統或使用 Linux 系統的產品,不支持 ENERGY STAR。
ENERGY STAR is a joint program of the U.S. Environmental Protection Agency and the U.S. Department of Energy helping
us all save money and protect the environment through energy ecient products and practices.
All ASUS products with the ENERGY STAR logo comply with the ENERGY STAR standard, and the power management
feature is enabled by default. The monitor and computer are automatically set to sleep after 15 and 30 minutes of user
inactivity. To wake your computer, click the mouse or press any key on the keyboard.
Please visit http://www.energy.gov/powermanagement for detail information on power management and its benets
to the environment. In addition, please visit http://www.energystar.gov for detail information on the ENERGY STAR joint
program.
*Note: Energy Star is NOT supported on Freedos and Linux-based products.
USB 2.0 port / USB 2.0 連接埠 / USB 2.0 接口
Headphone port / 耳機插孔 / 耳機插孔
optical disk drive eject button /
光碟機彈出按鈕 / 光驅彈出按鈕
optical disk drive bay (empty) /
光碟機槽蓋(空)/ 光驅槽蓋(空)
optical disk drive eject button /
光碟機彈出按鈕 / 光驅彈出按鈕
USB 3.0 port / USB 3.0 連接埠 / USB 3.0 接口
3.5 inch drive bay /
3.5 吋裝置插槽 / 3.5 英寸設備插槽
3.5 inch drive bay /
3.5 吋裝置插槽 / 3.5 英寸設備插槽
ASUS Desktop PC Installation Guide

