Page is loading ...

ASSEMBLY INSTRUCTION
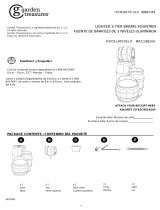
OUTDOOR FOUNTAIN
WITH LED LIGHTS & PUMP
Get social with us and discover more about our products, tips and exclusive discounts!
Please carefully unpack and identify each component before beginning assembly.
Before you begin, please refer to parts list to make sure that you have all parts. Please take
care when assembling the unit and always place the parts on a clean, soft surface. If you
require assistance with assembly or parts, please call 888-357-7263.

Assembly Instruction
1
PRE-INSTALLATION INSTRUCTIONS
SAFETY PRECAUTIONS
WARNING! DO NOT LET CHILDREN PLAY IN OR AROUND THE FOUNTAINS DUE TO THE POSSIBLE RISK OF ACCIDENTAL
DROWNING OR ELECTRICAL SHOCK.
1. As with any large container of water, fountains are to be used carefully with adult supervision.
They are not intended to be used as “kid pools” and present a risk to small children and
infants. Injury or accidental drowning could result. An adult should supervise children when
they are around the pump.
2. As with any electrical appliance, make sure the pump plug is dry before you plug it into an
outlet, and make sure you are not standing in the water - electrical shock could result.
3. Filled fountain weighs a considerable amount. Make sure your set-up area can support at
least 300 lbs.
4. Excessive weight or pressure on any of the fountain sections may cause it to tip or fall over.
Keep pets and children away from any of the fountain sections.
5. For fountains, it is normal for some splashing to occur. Protect surrounding surfaces as
needed.
6. The pump on the fountain has no user serviceable parts. Only an authorized service
representative should service the pump. Do not open the sealed pump housing as this may
result in electrical shock. Refer to enclosed pump maintenance guide for cleaning.
7. Always unplug the pump from the electric outlet before cleaning and handling.
8. Use with clean water only. Do not place it in other liquids. Do not allow the pump to run dry.
9. Use the proper power source as indicated on the pump label.
10. Equip the electrical power for the pump with a ground fault circuit interrupter (GFCI).
1. Please read through this instruction before attempting to assemble, operate or install.
2. Save all packing materials until assembly is complete to avoid accidentally discarding smaller
parts or hardware.
3. Please install the fountain on a flat, level surface close to an electrical outlet.
4. This product is designed for outdoor use, it can be used indoors, however splashing may
occur.
GFCI

Assembly Instruction 2
PARTS LIST
Top Ball (A)
Qty: 1
Fountain Base (B)
Qty: 1
Pump Cord (C)
Qty: 1
Power Plug (D)
Qty: 1
Black Lid (E)
Qty: 1
Pebble (F)
Qty: 1
11. The fountains are not manufactured to withstand extreme temperatures. Improper storage
that allows water to freeze within a product may cause damage.
12. Keep the fountain away from high temperatures or heat sources.
13. Do not use the pump in water above 86°F (30).
14. Disconnect the power cord from the outlet by holding the plug. Do not lift, carry, or pull the
pump by the power cord.
15. If the entire fountain falls into the water accidentally, turn off the circuit breaker immediately.
16. If any leakage occurs around the pump housing, turn off the circuit breaker immediately and
have the pump serviced by a registered technician.
17. Do not operate the fountain if the pump has been dropped or has a damaged power cord or
plug. Do not replace the power cord.
18. Keep the plug dry. Do not expose the plug to water or steam. Do not use the pump in
swimming pool or marine area.
19. If the plug or the wall receptacle gets wet due to water dripping down the power cord or for
any other reason, do not remove the plug from the wall outlet until the circuit breaker is
turned off.
20. Do not expose the pump to direct sunlight or to low temperatures for any period of time.
21. Use only a UL-approved extension cord of the correct rating to avoid overheating.
22. Do not use attachments that are not provided by the manufacturer since they may cause an
unsafe condition.
23. Do not use the pump for anything other than its intended use.

Assembly Instruction
3
PLEASE CAREFULLY UNPACK AND IDENTIFY EACH COMPONENT BEFORE BEGINNING ASSEMBLY. BEFORE YOU BEGIN, PLEASE
REFER TO PARTS LIST TO MAKE SURE THAT YOU HAVE ALL PARTS.
STEP-BY-STEP ASSEMBLY
STEP 1
Place the Fountain Base (B) on a flat, level surface close to an electrical outlet.
Allow enough space to access the pump.
STEP 2
Remove the Pump Cord (C) from the packaging and adjust the water flow control to
the lowest setting to avoid splashing until the fountain is completely assembled.
WATER FLOW RATE CONTROL: The water flow rate can be increased (+) or decreased (-) by
moving the flow rate control on the pump body, adjust the pump flow rate to achieve the desired effect.
B
A C D E F
Flow rate control
MIN MAX
Min. water level

Assembly Instruction
4
STEP 4
Connect the water hose preassembled inside of the Top Ball (A) into the Pump (C).
Please keep the pump still out.
STEP 3
Make the long cable from the Pump (C) out through the bottom of the Fountain
Base (B).
C
C

Assembly Instruction
5
STEP 5
Connect the light cable preassembled inside of the Top Ball (A) to the branch cable
from the Pump (C). Tighten the connector by twisting clockwise, then place the
Pump (C) into the reservoir at the top of the Fountain Base (B).
STEP 6
Put the Black Lid (E) onto the tube inside the Fountain Base (B).
B
B
E
C
A

Assembly Instruction
6
STEP 8
Connect the long cable from the Pump (C) to the Power Plug (D). Tighten the
connector by twisting clockwise and keep the power plug sit outside.
STEP 7
Put the Top Ball (A) onto the Fountain Base (B).
NOTE: Please double check all connecters to make sure they are tightened.
B
A
D
D

Assembly Instruction
7
STEP 9
Gently pour water into the fountain basin, make sure the water completely submerges
the Pump (C).
NOTE:
For the first-time you operate the pump, it normally needs about 1-2 minutes for the air to be
completely expelled to make sure the water begins to flow.
STEP 10
Place Pebble (F) around the ball.
F

Assembly Instruction
8
STEP 12
Once set up, you can adjust the pump water flow rate control to achieve the desired
effect (see step 2 for adjustment) and enjoy your new fountain.
NOTE: Don’t forget to add water regularly as water will evaporate over time.
NOTES: 1. Make sure there is no water on the power plug.
2. Allow the pump power cord to hang at a lower level than the wall outlet to form a “drip
loop.” This will help to prevent water from dripping down the power cord and getting into
the wall outlet.
STEP 11
Connect the Power Plug (D) into your local power supply.
DRIP LOOP
D
D

PUMP SAFETY & TROUBLESHOOTING
CARE AND MAINTANCE
1. Check regularly that the water reservoir has sufficient water to always cover the pump. It will
be necessary to check more frequently in warm or windy weather.
2. Do not allow the pump to freeze. During cold spells, remove the pump from the water feature
and place in a water-filled container in a frost-free position. DO NOT store the pump dry.
3. Periodically it will be necessary to change the water and clean the water feature and reservoir.
The frequency of this will depend on the weather and location of the water feature. The outside
of the water feature can be cleaned using a soft cloth and clean water and the reservoir with
a soft brush. A mild detergent can be used, but please note this will cause the water to foam
and should be avoided unless strictly necessary.
4. The pump rotor will require cleaning at approximately monthly intervals. A good indication
will be if the water flow rate drops. Unplug the water feature, remove the pump from the
water reservoir and disconnect the water pipe. Remove the filtering cover and pressure-casing
from the front of pump body. Clean the rotor and housing in clean water using cotton buds.
Reassemble the pump, reconnect the water pipe and reassemble the water feature.
Flow rate control
MIN MAX
Min. water level
Filtering cover Housing
Rotor
Assembly Instruction
9

Assembly Instruction
10
TROUBLE SHOOTING
POSSIBLE CAUSE CORRECTIVE ACTION
Disconnect fountain from power source, remove any
obstruction, and clean bowl and tubing.
a) Pump is not covered with water.
b) Pump or fountain is blocked.
c) Pump is not secured correctly
d) Pump is not electrically connected
e) Pump may be “air locked.”
Disconnect fountain from power source, pour out any
remaining water, and ensure the tubing in the reservoir is
tightly secured to the pump outlet.
Plug and unplug the pump several times to clear any air
that may have been trapped.
Add more water to the reservoir.
Check to make sure pump is plugged in and the outlet is
working.
1.If the pump fails to run:
POSSIBLE CAUSE CORRECTIVE ACTION
There is not enough water in the basin to
operate your fountain.
Check the water level to make sure the pump is
completely submerged, add enough water to reservoir.
2.If the pump “spews” or “burp”:
CORRECTIVE ACTION
a) Disconnect the power supply and then remove the pump front cover and impeller cover.
b) Use hand to grip the impeller, gently pull the impeller/rotor assembly out of the pump housing.
3.If abnormal loud noise is heard during operation:
c) Rinse the impeller/rotor assembly and the cavity with clean water. If breakage or surface
damage is found in the assembly contact your local retailer or our customer service for a part
replacement.

/