Page is loading ...

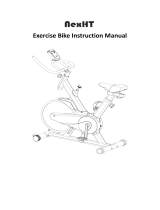
Portable Mini Bike
Item #7102
OWNER’S
MANUAL

SERVICE ------------------------------------------------------------------------- 2
IMPORTANT LABELS -------------------------------------------------------- 3
PRODUCT SAFETY ----------------------------------------------------------- 4
PART DRAWING --------------------------------------------------------------- 5
PART LIST ----------------------------------------------------------------------- 6
INCLUDED HARDWARE & TOOLS -------------------------------------- 7
ASSEMBLY ---------------------------------------------------------------------- 8
COMPUTER --------------------------------------------------------------------- 11
OPERATING THE TENSION CONTRIL KNOB ------------------------ 12
WORKOUT PRINCIPAL ------------------------------------------------------ 13
EXERCISES --------------------------------------------------------------------- 14
WARM UP ----------------------------------------------------------------------- 16
WARRANTY -------------------------------------------------------------------- 17
FAX FORM ---------------------------------------------------------------------- 18
TABLE OF CONTENTS
1

IMPORTANT: FOR NORTH AMERICA ONLY
To request product service and order
replacement parts, please call our
customer service department at:
1-866-924-1688
Monday through Friday, 8:00 AM-5:00 PM Pacific Standard Time,
or email us at: [email protected]
Please visit our website at www.paradigmhw.com.
Please have the following information ready when requesting for service:
Your name
Phone number
Model number
Serial number
Part number
Proof of Purchase
*Before returning this product to the store please contact
customer service at the contact number.
Paradigm Health & Wellness, Inc.
1189 Jellick Ave, City of Industry, CA 91748, USA
SERVICE
2

IMPORTANT LABELS
3

Basic precautions should always be followed, including the following safety
instructions when using this equipment: Read all instructions before using
this equipment.
1. If any part of the cable/wire is stripped or damaged, STOP using the portable
mini bike immediately.
2. Do not operate the portable mini bike in a wet or moist environment.
3. Do not operate under blanket or pillow. Excessive heating can occur and
cause fire or injury to persons.
4. Close supervision is necessary when the portable mini bike is used by, on, or
near children, invalids or disabled persons.
5. Use the portable mini bike only for its intended use as described in this
manual. Do not use attachments not recommended by the manufacturer.
6. Never operate the portable mini bike if it is not working properly, if it has been
dropped or damaged, or dropped into water.
7. Consult your physician before beginning this or any other exercise program.
8. If you experience any irregular physical conditions such as dizziness, severe
muscle or joint pain, pain in the chest, stop exercising and consult with your
physician immediately.
9. Keep children and pets away from the machine while in use.
10. Set up the portable mini bike as directed in Assembly Instructions and place
unit on a level, non-slip surface.
11. Keep hands and feet away from any moving parts. Do not insert any object
into any openings.
12. Perform 3 to 5 minutes of warm-up and stretching before beginning your
exercise.
13. Never exercise to exhaustion.
14. Do not stand on the portable mini bike, only exercise in seated position.
Keep a minimum safety clearance during operation. The portable mini bike
is designed as a home use exercise device. User must have full control of
their muscles to operate this unit. It may not be suitable for people who
are quadriplegic or paraplegic. Please consult your doctor or physician.
15. Exercise equipment is to be regularly inspected for maintenance for loose or
broken parts.
16. Never operate the portable mini bike with the air openings blocked; keep the
air openings free of lint.
17. Do not operate where aerosol (spray) products are being used or where
oxygen is being administered.
18. Exercise equipment is for consumer only.
Wear comfortable and suitable clothing when using the portable mini bike.
19. Each exercise should be performed in a controlled manner and always begin
exercises slowly.
20. Do not use outdoors.
21. For indoors household use only.
22. Have the unit serviced by a qualified service technician. DO NOT
ATTEMPT
TO SERVICE THE UNIT YOURSELF.
PRODUCT SAFETY
4

PART DRAWING
5

No.
Description
Qty
No.
Description
Qty
001
Main Frame
1
018
Plastic Cap
2
002
Stabilizer Ø50x1.5tx380
2
019
Bolt M4x10mm
2
003
Non-slip Mat 500x600
1
020
Bolt M5x10mm
7
004
End Cap for Stabilizer
4
021
Bearing Bracket
2
005R
Right Cover
1
022
Spring 1.0txØ10x50mm
1
005L
Left Cover
1
023
Round Magnet
1
006
Digital Display Computer
1
024
Magnet Bracket
1
007
Belt Pulley
1
025
Nut M10
2
008
Bearing 6003
2
026
Bolt M8x40mm
1
009
Inner C Ring
4
027
Cap Nut M8
1
010
Screw ST4x16mm
11
028
Cap Nut M6
4
011
Tension Control Knob
1
029
Washer M6
2
012
Square Sensor
1
030
Bolt M6x35mm
2
013
Spring Washer M8
6
031
Flywheel
1
014
Bolt M8x16mm
8
032
Bearing 6900
2
015R
Right Foot Pedal
1
033
Flywheel Axle M10x75mm
1
015L
Left Foot Pedal
1
034
Plastic Washer M10
4
016
Belt (220J, 3V)
1
035
Adjustable Bolt M6
2
017R
Right Crank
1
036
U Bracket
2
017L
Left Crank
1
037
Washer M10
2
PART LIST
6

INCLUDED HARDWARE & TOOLS
7
(13) Spring Washer M8
6 PCS
(14) Bolt M8x16mm
6 PCS
Allen Wrench with Phillips Screwdriver
1 PC
Multi Hex
Tool
1 PC

ASSEMBLY
8
Hold the unit in an upright position.
The Tension Control Knob (11) side
facing up. Then insert the Stabilizer
(2) into the Main Frame (1) and align
bolt holes.
1
2
Attach the Stabilizer (2) to the Main
Frame (1) with three M8 Spring
Washers (13) and three M8x16mm
Bolts (14). Tighten bolts with the Allen
Wrench with Phillips Screwdriver
provided.
Tool:
Allen Wrench with Phillips Screwdriver
Hardware:
3 Spring Washer (M8)
3 Bolt (M8x16mm)

ASSEMBLY
9
3
Insert the other Stabilizer (2) into the
Main Frame (1) and align bolt holes.
4
Attach the Stabilizer (2) to the Main
Frame (1) with three M8 Spring
Washers (13) and three M8x16mm
Bolts (14). Tighten bolts with the Allen
Wrench with Phillips Screwdriver
provided.
Tool:
Allen Wrench with Phillips Screwdriver
Hardware:
3 Spring Washer (M8)
3 Bolt (M8x16mm)

ASSEMBLY
10
Multi Hex Tool
Tool:
5
5-1
Insert the pedal shaft of Left Foot
Pedal (15L) into threaded hole in the
Left Crank (17L).
Turn the pedal shaft by hand in the
counterclockwise direction until snug.
Note: DO NOT turn the pedal shaft
in the clockwise direction, doing
so will strip the threads.
Tighten the pedal shaft of Left Foot
Pedal (15L) with the Multi Hex Tool
provided.
Insert pedal shaft of Right Foot Pedal
(15R) into threaded hole in Right
Crank (17R).
Turn the pedal shaft by hand in the
clockwise direction until snug.
Tighten pedal shaft of Right Foot
Pedal (15R) with the Multi Hex Tool
provided.
Note: The Cranks and Pedal Shafts
are marked “R” for Right and “L”
for Left.

COMPUTER
11
COMPUTER BUTTON FUNCTIONS:
Push the button to turn on the display.
Push the button to select each function.
Push the button for 3 seconds to clear all functions
to zero except the ODO function.
COMPUTER DISPLAY FUNCTIONS & MEASURING RANGE:
SCAN: Automatically displays each function every 6 seconds.
SCAN→TMR→KM→DIS→CAL→ODO→RPM
TMR (TIMER): Displays the exercise time.
KM (KILOMETER): Displays the current training speed in kilometers per hour.
DIS (DISTANCE): Displays the accumulative distance traveled during
exercise.
CAL (CALORIES): Displays the calories burned during exercise.
ODO (ODOMETER): Displays the total accumulative distance traveled.
RPM (REVOLUTIONS PER MINUTE): Displays the current RPM.
STOP: The unit is stopped.
AUTO START: Start motion or push button.
AUTO DISPLAY SHUT OFF: After approximately 4 minutes without operation.
SPECIFICATIONS:
TMR (TIMER): 0:00~99:59 (Minute:Second)
KM (KILOMETER): 0.0~199.9 km/h
DIS (DISTANCE): 0.0-999.9 km
CAL (CALORIES): 0.0-999.9 calories
ODO (ODOMETER): 0.0-9999 km
RPM (REVOLUTIONS PER MINUTE): 0~9999 r/min
BATTERY REPLACEMENT:
Remove the
battery with a
slotted
screwdriver.
Replace with a
new 3V Lithium
Button Cell
Battery.
Remove the
Computer by
using a slotted
screwdriver.

OPERATING THE TENSION CONTROL KNOB
12
8-LEVEL TENSION CONTROL KNOB
The resistance can be adjusted by
turning the tension control knob. To
increase the resistance, turn the tension
control knob in a clockwise direction. To
decrease the resistance, turn the tension
control knob in a counterclockwise
direction.
STORAGE PRECAUTIONS
Do not store the portable mini bike in any place where it will be subjected to high
or low temperature.
Do not expose to direct sunlight or outdoor for extended periods of time.
Do not store the portable mini bike in a humid or dusty area.

WORKOUT PRINCIPAL
13
1. Personal goals includes shaping, strengthening, available time, present
fitness level, previous injuries, and cardiovascular. By using this product
correctly and on a regular basis, you can achieve your goals.
2. Available time is one of a major element in determining what we do in our
daily lives. If you can only exercise for 15 minutes, develop a 15 minute
program with the portable mini bike.
3. Exercising and working out on the portable mini bike should be an
enjoyable part of your daily life.
4. Focus on the exercises for your muscles work. No matter what your level
of fitness, you can complete each exercise in a short range of time and
sense the increase level of strength and endurance.
5. Always start your exercise slowly to warm up muscles.
6. The design of the portable mini bike allows you to exercise your muscles
with movements that are natural and efficient.
The Overload Principal
In order for you to strengthen your body, you must develop a series of exercise
workouts each day. When you work out on a regular basis, your body
specifically your muscles, adjust to the new level of workout. It’s called
increasing local metabolic efficiency. As a result, your muscles work better
and you get stronger. If you keep working at the same level of metabolic
efficiency, you can’t improve muscle efficiency. So from time to time you
need to increase the frequency and/or duration of the exercise. Thus, in order
to improve your fitness level, you must progressively increase your work load to
reach your personal goal.

EXERCISES
14
How to use your Portable Mini Bike.
When using the portable mini bike, the proper way to exercise is to set the
desired resistance by turning the Tension Control Knob, and then pedaling to
get the best results. Pedaling at excessive speeds or applying excessive
force will damage the product or injury to persons. Please begin exercise at a
slow pedaling speed.
Range of motion and flexibility
This portable mini bike can be used both upper and lower body. As a lower
body device, it works with passive motion to increase tone of the quadriceps
muscles (muscles in the thigh) and circulate blood flow to the entire lower leg
and foot. For upper body use, it perform as a resistance device allowing the
user to use the pedals as hand grips to exercise the muscles of the arm
(biceps, triceps, deltoids and the smaller muscles of the forearms).
Routine
People vary in how they adapt to repetitive exercise. In developing an
exercise routine pay attention to how you feel especially after an exercise is
completed. You may feel tired but you should not feel exhausted. When you
first start exercising, the principal muscles you use will ache slightly, especially
the next day. However, they should not hurt to cramp. No matter what the
recommended exercise routine, never exercise beyond the point of discomfort.
For the first two weeks, you should begin with 5-10 minutes once a day at a
slow pedaling speed. After the first two weeks, you can increase the exercise
time to 15-20 minutes as you become more accustomed to the exercise. The
pedaling speed can also be increased once you have adapted to the device.
Longer periods of exercise will result in greater gains for you.

EXERCISES
15
Leg Exercise
For use as a lower body device-place the portable mini bike on a level and
non-slip surface prior to use, and sit comfortable in a chair with the portable
mini bike directly in front of you such that the knee joint is not flexed less than
90 degrees. It is important that the user wears rubber soled shoes when on
the foot pedals so they do not slip off the foot pedals during the exercise.
WARNING
Do not stand on the unit to exercise, only exercise at seated position.
Make sure the seat does not move or pivot. Do not sit in a chair with
casters.
Arm Exercise
When using the portable mini bike for upper body exercise-it should be placed
directly in front of the user on a table top, and the user should be seated in a
comfortable chair such that they can easily reach the pedals without hyper
extending (over straightening) the elbow joint. This can be accomplished by
either placing a seat cushion on top of the seat or by moving the device closer
to the user.

WARM UP
16
Quadriceps Stretch
With one hand against a wall for balance, reach behind
you and pull your right foot up. Bring your heel as close
to your buttocks as possible. Hold for 15 counts and
repeat with left foot up.
Inner Thigh Stretch
Sit with the soles of your feet together with your knees
pointing outward. Pull your feet as close into your groin as
possible.
Gently push your knees towards the floor. Hold for 10
counts.
Toe Touches
Slowly bend forward from your waist, letting you back and
shoulders relax as you stretch toward your toes. Reach
down as far as you can and hold for 15 counts.
Hamstring Stretches
Sit with your right leg extended. Rest the sole of your left
foot against your right inner thigh. Stretch toward your toe
as far as possible. Hold for 15 counts Relax and then
repeat with left leg extended.

Paradigm Health & Wellness, Inc. warrants to the original purchaser that this product
is free from defects in material and workmanship when used for the purpose intended,
under the conditions that it has been installed and operated in according to
Paradigm’s Owner’s Manual. Paradigm’s obligation under this warranty is limited to
replacing free of charge, any parts which may prove to be defective under normal
home use. This warranty does not include any damage caused by improper
operation, misuse or commercial application. From the date of purchase, the
product is warranted to be free from defects for 1 (one) year. All parts and
workmanship, including upholstery, foam, ball bearings, pulleys, cables, shocks, all
tension mechanisms, wheels, pedals and hardware are to be free from defects for 90
days. This warranty is offered only to the original owner and is not transferable.
Proof of purchase is required. This warranty is offered only to the original owner and
is not transferable.
Ordering Replacement Parts
Replacement parts can be ordered by calling or emailing our customer service
department
1-866-924-1688
Monday through Friday, 8:00 AM - 5:00 PM (PST).
When ordering replacement parts please have the following information ready:
1. Owner’s Manual
2. Model Number
3. Description of Parts
4. Part Number
5. Date of Purchase
WARRANTY
17

PARADIGM
PARTS REQUEST FAX FORM
Please fax this form to (1-626-810-2166)
OR YOU CAN EMAIL CUSTOMER SERVICE REQUESTS TO
NAME: _______________________________________________________
ADDRESS: ____________________________________________________
CITY ______________ STATE ______________ ZIP ___________________
TELEPHONE: (Day) _____________________________________________
(Night) ____________________________________________
(Email Address) ____________________________________
SERIAL#: __________________________________________
MODEL#: __________________________________________
PURCHASE DATE: ______________________________________________
PURCHASE FROM: ______________________________________________
“YOUR ORDER WILL BE PROCESSED WITHIN 3 BUSINESS DAYS”
PART #
DESCRIPTION
QTY
OFFICIAL USE ONLY
SHIP DATE: ___________________________________________
TRK #: _______________________________________________
BACK ORDER: ________________________________________
FAX FORM
18
/