Sony DVDirect VRD-MC5 User manual

Category
Camcorders
Type
User manual

This manual is also suitable for

Operating Instructions
© 2007 Sony Corporation
IT
JP
FR
DE
ES
IT
CS
Multi-Function
DVD Recorder
W-273-384-11(2)
VRD-MC5
2
Safety
Regulations
WARNING
To reduce the risk of fire or electric shock, do
not expose this apparatus to rain or moisture.
To prevent fire or shock hazard, do not place
objects filled with liquids, such as vases, on the
apparatus.
Do not install this equipment in a confined
space such as a bookshelf or similar unit.
CAUTION:
The use of optical instruments with this
product will increase eye hazard. As the laser
beam used in this multi function DVD recorder
is harmful to eyes, do not attempt to
disassemble the cabinet. Refer servicing to
qualified personnel only.
This appliance is classified as a CLASS 1
LASER product. The CLASS 1 LASER
PRODUCT MARKING is located on the
bottom exterior.
This label is located on the laser protective
housing inside the enclosure.
This symbol is intended to alert
the user to the presence of
uninsulated “dangerous
voltage” within the product’s
enclosure that may be of
sufficient magnitude to
constitute a risk of electric
shock to persons.
This symbol is intended to alert
the user to the presence of
important operating and
maintenance (servicing)
instructions in the literature
accompanying the appliance.
This graphical symbol is located on the bottom
of the unit.
Important Safety Instructions
1) Read these instructions.
2) Keep these instructions.
3) Heed all warnings.
4) Follow all instructions.
5) Do not use this apparatus near water.
6) Clean only with dry cloth.
7) Do not block any ventilation openings.
Install in accordance with the manufacturer’s
instructions.
8) Do not install near any heat sources such as
radiators, heat registers, stoves, or other
apparatus (including amplifiers) that produce
heat.
9) Do not defeat the safety purpose of the
polarized or grounding-type plug. A polarized
plug has two blades with one wider than the
other. A grounding type plug has two blades
CLASS 1
LASER PRODUCT
LASER KLASSE 1
PRODUKT
LUOKAN 1 LASERLAITE
KLASS 1 LASER APPARAT
3
and a third grounding prong. The wide blade or
the third prong are provided for your safety. If
the provided plug does not fit into your outlet,
consult an electrician for replacement of the
obsolete outlet.
10) Protect the power cord from being walked
on or pinched particularly at plugs,
convenience receptacles, and the point where
they exit from the apparatus.
11) Only use attachments/accessories specified
by the manufacturer.
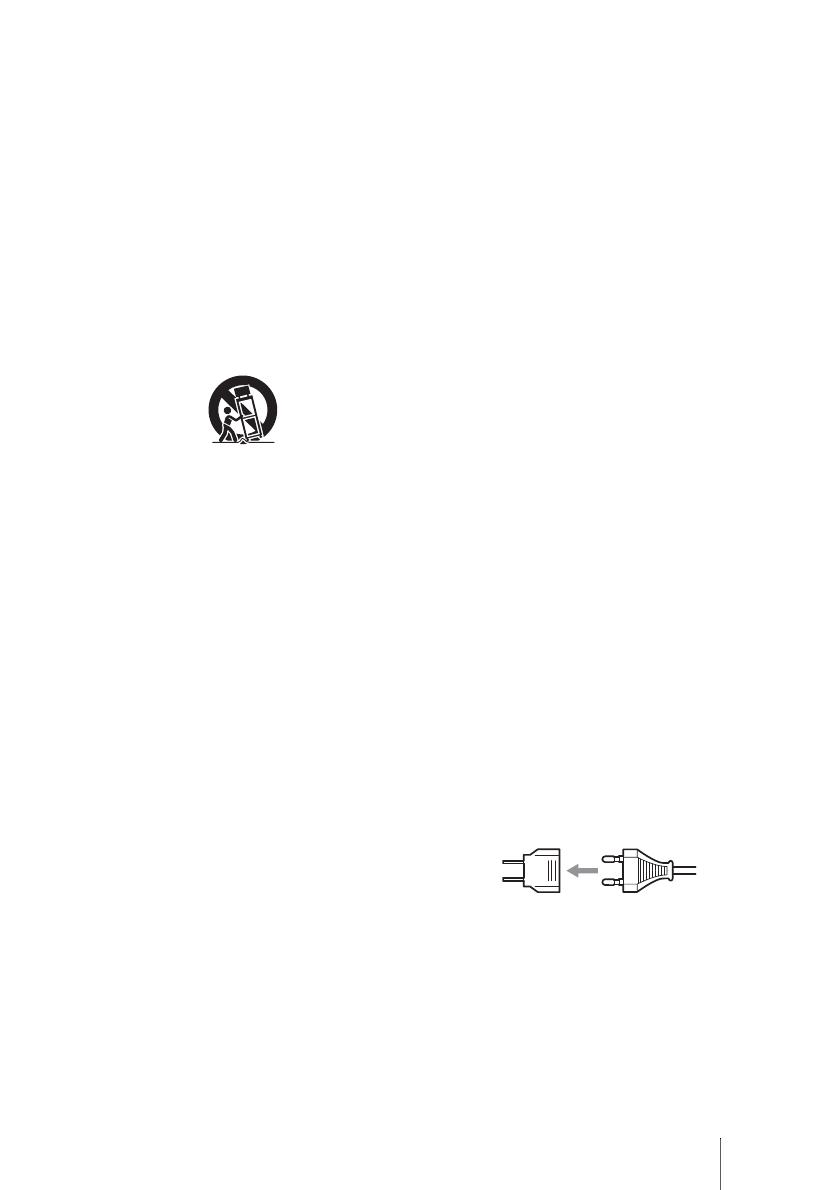
12) Use only with the cart, stand, tripod,
bracket, or table specified by the manufacturer,
or sold with the apparatus. When a cart is used,
use caution when moving the cart/apparatus
combination to avoid injury from tip-over.
13) Unplug this apparatus during lightning
storms or when unused for long periods of
time.
14) Refer all servicing to qualified service
personnel. Servicing is required when the
apparatus has been damaged in any way, such
as power-supply cord or plug is damaged,
liquid has been spilled or objects have fallen
into the apparatus, the apparatus has been
exposed to rain or moisture, does not operate
normally, or has been dropped.
FCC Compliance Statements
This equipment has been tested and found to
comply with the limits for a Class B digital
device, pursuant to Part 15 of the FCC Rules.
These limits are designed to provide
reasonable protection against harmful
interference in a residential installation.
This equipment generates, uses, and can
radiate radio frequency energy and, if not
installed and used in accordance with the
instructions, may cause harmful interference to
radio communications.
However, there is no guarantee that
interference will not occur in a particular
installation.
If this equipment does cause harmful
interference to radio or television reception,
which can be determined by turning the
equipment off and on, the user is encouraged to
try to correct the interference by one or more of
the following measures:
- Reorient or relocate the receiving antenna.
- Increase the separation between the
equipment and receiver.
- Connect the equipment into an outlet on a
circuit different from that to which the
receiver is connected.
- Consult the dealer or an experienced radio/
TV technician for help.
You are cautioned that any changes or
modifications not expressly approved in this
manual could void your authority to operate
this equipment.
The manufacturer of this product is Sony
Corporation, 1-7-1 Konan Minato-ku Tokyo,
108-0075 Japan. The Authorized
Representative for EMC and product safety is
Sony Deutschland GmbH, Hedelfinger Strasse
61, 70327 Stuttgart, Germany. For any service
or guarantee matters please refer to the
addresses given in separate service or
guarantee documents.
Notes on AC power adapter
Please ensure that the socket outlet is
installed near the equipment and shall be
easily accessible.
Be sure to use the supplied AC adapter and
power cord.
Do not use any other AC adapter. It may
cause a malfunction.
Connect the AC adapter to an easily
accessible socket outlet.
Do not touch the AC adapter with wet hands.
Should you notice an abnormality in the AC
adapter, disconnect it from the socket outlet
immediately.
Use a commercially available AC plug
adapter, if necessary, depending on the
design of the wall outlet.
The set is not disconnected from the AC
power source (mains) as long as it is
connected to the wall outlet, even if the set
itself has been turned off.
The nameplate is located on the bottom of the
unit.
4
For Customers in U.S.A
Owner’s Record
The product label is located on the bottom of
the unit. Record the serial number in the space
provided below. Refer to them whenever you
call upon your Sony dealer regarding this
product.
Model: VRD-MC5
Serial Number: ________
For customers in the United Kingdom and
Republic of Ireland
A molded plug complying with BS1363 is
fitted to this equipment for your safety and
convenience. Should the fuse in the plug
supplied need to be replaced, a fuse of the same
rating as the supplied one and approved by
ASTA or BSI to BS1362, (i.e., marked with
or mark) must be used. If the plug supplied
with this equipment has a detachable fuse
cover, be sure to attach the fuse cover after you
change the fuse. Never use the plug without the
fuse cover. If you should lose the fuse cover,
please contact your nearest Sony service
station.
Disposal of Old Electrical &
Electronic Equipment (Applicable in
the European Union and other
European countries with separate
collection systems)
This symbol on the product or on
its packaging indicates that this
product shall not be treated as
household waste. Instead it shall
be handed over to the applicable
collection point for the recycling
of electrical and electronic
equipment. By ensuring this product is
disposed of correctly, you will help prevent
potential negative consequences for the
environment and human health, which could
otherwise be caused by inappropriate waste
handling of this product. The recycling of
materials will help to conserve natural
resources. For more detailed information about
recycling of this product, please contact your
local Civic Office, your household waste
disposal service or the shop where you
purchased the product.
5
Table of Contents
Safety Regulations .......................... 2
Introducing DVDirect
Features ........................................... 8
About this manual ........................... 9
Package Contents .......................... 11
Parts and Controls ......................... 12
Turning the Power On/Off ............ 16
Navigation Display ..................... 17
Accessing functions from
the menu ..................................... 18
Inserting a Disc ............................. 19
Inserting a Memory Card .............. 21
Creating a Video DVD
Creating a Video DVD and AVCHD
disc ................................................ 22
Types of Dubbing ....................... 22
About Video DVDs and AVCHD
discs ............................................ 25
Camcorders/video devices,
recording quality, and the
interface ...................................... 27
Usable disc ................................. 29
About Created Video DVDs and
AVCHD discs ............................. 30
Dubbing From a Handycam
®
(HDD/
Memory Stick) –One Touch
Dubbing– ...................................... 32
Dubbing From a Handycam
®
(HDD/
Memory Stick) –Using the Dubbing
Mode– ........................................... 35
Before selecting a dubbing
mode… ....................................... 35
Full (All) Dubbing ...................... 37
Incremental Dubbing ..................38
Playlist Dubbing .........................40
Scenes Selection Dubbing ..........41
Dubbing From a Handycam
®
(DVD) ...........................................43
Before selecting a dubbing
mode… .......................................43
Full (All) Dubbing ......................45
Consolidation Dubbing ...............46
Dubbing From a Handycam
®
(DV/
D8) or DV digital video camera ....48
Before selecting a dubbing
mode… .......................................48
Full (All) Dubbing ......................49
Manual Dubbing .........................50
Dubbing From Video Devices ......52
Creating a Photo DVD
Creating a Photo DVD ..................55
Types of Dubbing .......................55
About Created Photo DVDs –Types
of Photo DVD– ...........................56
Camcorders/photo devices,
recorded media, and the
interface ......................................57
Usable Discs for Creating Photo
DVDs ..........................................58
About Created Photo DVDs .......58
Dubbing Photos Stored on a Memory
Card/Handycam
®
..........................60
Finalizing/Viewing the
Created DVD
Removing/Finalizing the Created
Disc ...............................................65
6
Previewing a Video DVD and a Photo
DVD ..............................................68
Setup
Using the Setup Menu ..................71
Rec Quality .................................72
Auto Stop Timer .........................72
Auto Chapter ..............................72
DVD Menu .................................73
Slideshow Music ........................73
Slideshow Creation .....................74
Finalize disc ................................74
Erase disc ....................................76
System Info .................................77
Demo ..........................................77
Color System ..............................77
Language ....................................77
Additional Information
About Discs ..................................78
Compatible Writable Discs ........78
About Memory Cards ...................79
About “Memory Stick” ..............79
About the CompactFlash/SD/
xD-Picture Cards ........................80
Precautions ....................................81
Specifications ................................82
7
DVDirect, Handycam, CyberShot, Memory Stick and each logos are trademarks, or registered
trademarks of Sony Corporation.
“PLAYSTATION” is a registered trademark of Sony Computer Entertainment Inc.
Other system and product names used herein are registered trademarks or trademarks of their
respective manufacturers, although the ™ and ® marks are not used in the text.
Manufactured under license from Dolby Laboratories.
Dolby and the double-D symbol are trademarks of Dolby Laboratories.
The authorized software on this product is used under license from eSOL Co. Ltd.
Copyright
Television programs, films, video tapes, discs, and other materials may be copyrighted.
Unauthorized recording of such material may be contrary to the provisions of the
copyright laws. Also, use of this product with cable television transmission may require
authorization from the cable television transmitter and/or program owner.
Our product warranty is valid only when the supplied accessories are used in the
specified or recommended system environment, in accordance with the documentation,
and applies only to this DVDirect. Our customer service and user support apply only
under these product warranty conditions.
Please note that we cannot accept responsibility for failure of the computer or other
devices, incompatibility with special hardware, operating problems caused by improper
installation of software, loss of data, discs or other accidental or incidental damage that
might occur when using this product.
The guarantee and user support for this product are valid only within the countries or
sales regions specified on the warranty card.
Specifications may be changed without notice in the interest of product improvement.
8
B
Introducing DVDirect
Features
You can easily record videos or photos using the DVDirect. You do not need a computer.
Create video DVDs
You can record videos from connected camcorders and AV devices directly onto DVDs
without using a computer.
You can dub the entire contents of your HDD, Memory Stick, DVD, or DV camcorder
onto a DVD with one touch of the record button.
Create photo DVDs
You can archive photos from a memory card and connected camcorders directly onto a
DVD without using a computer.
You can also create slideshows of the photos that will be playable on DVD players.
AVCHD dubbing
You can record HD (High Definition) videos taken with Sony High Definition
Handycam
®
(HDD/Memory Stick) as they are. For detail about compatibility of AVCHD
disc, see “Notes on compatibility of AVCHD disc” on page 26.
Navigation Display
The DVDirect automatically detects inserted memory cards and discs and input signals
from connected devices. It then displays a message prompting the next necessary
operation. Preparations for recording are made without any complicated button
operations.
RETURN
9
Introducing DVDirect
About this manual
Depending on the type of device that is connected, or the image quality (High Definition
video or Standard Definition video), you can perform the following operations with the
DVDirect.
In this manual, different icons for each operation or image quality appear in section
headings. The functions of these icons are as follows.
* In this manual, Handycam
®
refers to a Sony camcorder. In particular, High Definition Handycam
®
and
AVCHD Handycam
®
refers to an HD (High Definition) AVCHD compatible camcorder. For details, see
page 27 and 57.
Dubbing videos from Handycam
®
(HDD/Memory Stick) 1 page 32
Create a DVD using video taken with a Handycam
®
(HDD/Memory Stick). Connect the
Handycam
®
to the DVDirect via a USB cable.
Available functions:
One Touch Dubbing Through Handycam
®
Control
Full Dubbing
Incremental Dubbing
Playlist Dubbing
Scenes Selection Dubbing
Icon Meaning
Functions available for Sony Handycam
®
(HDD) recording to hard disc
Functions available for Sony Handycam
®
(Memory Stick) recording to
Memory Stick
Functions available for Sony Handycam
®
(DVD) recording to 8cm DVD
Functions available for Sony Handycam
®
(DV/D8) or DV digital video
camera recording to digital video tape
Functions available for various camcorders or video devices
Functions available for Memory Stick, Memory Stick Duo, SD Card, xD-
Picture Card, Compact Flash
Dubbing videos being recorded on Standard Definition image quality
Dubbing videos being recorded on High Definition image quality (AVCHD
format)
Dubbing still images shot by a digital still camera or Sony Handycam
®
10
Dubbing videos from Handycam
®
(DVD) 1 page 43
Create a DVD using video taken with a Handycam
®
(DVD). Connect the Handycam
®
to
the DVDirect via a USB cable.
Available functions:
Full Dubbing
Consolidation Dubbing
Dubbing videos from DV digital video camera 1 page 48
Create a DVD using video taken with a Handycam
®
(DV/D8) or DV digital video camera.
Connect a Handycam
®
or DV digital video camera to the DVDirect via a DV (i.LINK)
cable.
Available functions:
Full Dubbing
Manual Dubbing
Dubbing videos from miscellaneous video devices 1 page 52
Create a DVD using video taken with a camcorder, or using video from any other device
equipped with a video output connector. To connect a device, use the AV cable supplied
with your camcorder or standard video or S-video cables.
Available functions:
Manual Dubbing
Dubbing photos from memory cards
1 page 60
Create a DVD using photos taken with a digital still camera and stored on a memory card.
Available functions:
Full Dubbing, Photo Selection Dubbing
Dubbing photos from Handycam
®
(HDD/DVD/Memory Stick) 1 page 60
Create a DVD using photos taken with Handycam
®
(HDD/DVD/Memory Stick).
Available functions:
Full Dubbing, Photo Selection Dubbing
11
Introducing DVDirect
Package Contents
Please confirm that the package contains the following items. If any of these
items are missing or damaged, please contact your dealer.
AC power cord
Quick Start Guide
Operating Instructions (this document)
Warranty card
DVDirect •AC adapter
Note
Use an AC power cord appropriate to the region or country of use.
12
Parts and Controls
Front and rear
A 1 (power) button
Turns the DVDirect on or off.
B Top panel
The buttons and display for operating the DVDirect are located here (page 13).
C Disc tray
Insert a disc here with the label side up (page 19).
D Z (eject) button
Opens and closes the disc tray.
E DC IN connector
Connect the supplied AC adapter here (page 16).
Bottom
A Emergency eject lever
If you cannot open the disc tray with the Z (eject) button, turn off and reverse the
DVDirect. Slide the lever with a thin implement.
4321
5
1
13
Introducing DVDirect
Top panel
A Display window
Displays a menu screen, images from a playback device or memory card.
B Mm<,cursor / (select) button
Selects a function.
C (stop) button
Stops recording.
D RETURN button
This returns the display to the menu screen or to the previous screen when operating the
DVDirect.
E (record) button
Starts recording.
Lights red during recording.
RETURN
1
2
3
5
4
14
Left side panel
A USB connector (Type A)
Connect the USB cable (not supplied)
here when connecting a Handycam
®
.
B AUDIO IN L/R connectors
Connect the audio plugs of an AV cable
(not supplied) here when connecting the
DVDirect to a video device, such as a
camcorder or VCR.
C VIDEO IN connector
Connect the video plug of an AV cable
(not supplied) here when connecting the
DVDirect to a video device, such as a
camcorder or VCR.
D S VIDEO IN connector
Connect an S-video cable (not supplied)
here when connecting the DVDirect to a
video device with an S-video connector,
such as a camcorder or VCR.
E DV IN connector (4-pin)
Connect a DV (i.LINK) cable (not
supplied) here when connecting the
DVDirect to a DV camcorder with DV
connector.
HANDCAM
R-AUDIO IN-L VIDEO IN S VIDEO IN DV IN
45321
15
Introducing DVDirect
Right side panel
A Memory card LED
Lights amber when accessing the memory card.
B Memory Stick Duo slot
Insert a “Memory Stick Duo” here.
C Multi memory card slot
Insert a “Memory Stick,” SD Card, or xD-Picture Card here.
D CompactFlash card slot
Insert a CompactFlash here.
4321
16
B
Introducing DVDirect
Turning the Power On/Off
1 Connect the supplied AC power cord to the AC adapter.
2 Insert the power plug of the AC adapter into the DVDirect’s DC
IN connector.
3 Insert the power plug of the AC power cord into a power outlet.
Notes
Be sure to use the supplied AC power cord and the AC adapter.
Do not use damaged cables, such as cables with deformed connectors.
4 Press the 1 (power) button.
After the display window lights and the DVDirect logo appears, a different
screen appears depending on the DVDirect’s current status. For details, see
“Navigation Display” on page 17. When you press the RETURN button, the
menu is displayed. For details, see “Accessing functions from the menu” on
page 18.
To turn power off
Press the 1 (power) button again.
17
Introducing DVDirect
After the power is turned on, the DVDirect automatically detects inserted
memory cards and DVD discs and input signals from connected devices. A
message indicating how to prepare for recording then appears in the display
window. By following this message, you can automatically move on to the
recording procedure you intended without complicated button operations.
When recording videos from a High Definition Handycam
®
When connecting a High Definition Handycam
®
(HDD/Memory Stick) to the
DVDirect, videos are recorded by the Navigation Display procedure as
follows.
When storing only HD (High Definition) video, or both HD (High
Definition) video and SD (Standard Definition) video, the DVDirect
automatically detects HD (High Definition) video and records it on the disc.
When storing only SD (Standard Definition) video, the DVDirect
automatically records it on the disc.
Note
When storing HD (High Definition) video and SD (Standard Definition) video on your High
Definition Handycam
®
and you want to record SD (Standard Definition) video, use the menu
display (page 18).
Navigation Display
Messages and illustrations indicate the
operations to perform next.
18
You can perform recording procedures manually by selecting options from the
menu. You can also go to the setup screen (Setup menu) from the menu for
various settings.
Press the RETURN button to return to the menu display (You cannot go back
to the menu display while recording or from some of operating status).
Press M or m to select the desired operation, and press the (select) button.
Accessing functions from the menu
Menu Function
Video , DVD Create a video DVD (
page 35, 52).
Photo , DVD Create a photo DVD (page 60).
DVD Preview Playback a created video DVD or photo DVD. (page 68).
AVCHD Dubbing
Record HD (High Definition) video to a disc with a High
Definition Handycam
®
connected to the DVDirect.
Setup Configure various settings (page 71).
,
19
Introducing DVDirect
Inserting a Disc
To insert a disc, perform the following while the DVDirect is turned on.
1 Press the Z (eject) button.
The disc tray ejects.
2 Place the disc in the disc tray with its label facing up, and press
the Z (eject) button again.
Note
Do not touch the recording side of the disc.
When the Z (eject) button is pressed again, the disc tray closes and the DVDirect starts
reading the inserted disc.
20
When a new disc is inserted
When connecting a video device to the VIDEO IN, S VIDEO IN, or DV IN
connector, and dubbing manually with a new disc (page 50), the following
display appears.
When recording, press M or m to select “OK,” and press the (select)
button. Format is started. This may take several seconds to complete.
For other types of dubbing, the disc may be automatically formatted depending
on the dubbing mode.
Formatting is a necessary process before recording to a disc.
Note
For a disc formatted according to the message on this display, you can only record video with
the VIDEO IN, S VIDEO IN, or DV IN connector. When formatting a DVD+RW or DVD-
RW disc according to the message on this display, you can use the disc to record in other
dubbing modes, for example AVCHD Dubbing, if you erase the contents of the disc.
  • Page 1 1
  • Page 2 2
  • Page 3 3
  • Page 4 4
  • Page 5 5
  • Page 6 6
  • Page 7 7
  • Page 8 8
  • Page 9 9
  • Page 10 10
  • Page 11 11
  • Page 12 12
  • Page 13 13
  • Page 14 14
  • Page 15 15
  • Page 16 16
  • Page 17 17
  • Page 18 18
  • Page 19 19
  • Page 20 20
  • Page 21 21
  • Page 22 22
  • Page 23 23
  • Page 24 24
  • Page 25 25
  • Page 26 26
  • Page 27 27
  • Page 28 28
  • Page 29 29
  • Page 30 30
  • Page 31 31
  • Page 32 32
  • Page 33 33
  • Page 34 34
  • Page 35 35
  • Page 36 36
  • Page 37 37
  • Page 38 38
  • Page 39 39
  • Page 40 40
  • Page 41 41
  • Page 42 42
  • Page 43 43
  • Page 44 44
  • Page 45 45
  • Page 46 46
  • Page 47 47
  • Page 48 48
  • Page 49 49
  • Page 50 50
  • Page 51 51
  • Page 52 52
  • Page 53 53
  • Page 54 54
  • Page 55 55
  • Page 56 56
  • Page 57 57
  • Page 58 58
  • Page 59 59
  • Page 60 60
  • Page 61 61
  • Page 62 62
  • Page 63 63
  • Page 64 64
  • Page 65 65
  • Page 66 66
  • Page 67 67
  • Page 68 68
  • Page 69 69
  • Page 70 70
  • Page 71 71
  • Page 72 72
  • Page 73 73
  • Page 74 74
  • Page 75 75
  • Page 76 76
  • Page 77 77
  • Page 78 78
  • Page 79 79
  • Page 80 80
  • Page 81 81
  • Page 82 82
  • Page 83 83
  • Page 84 84

Sony DVDirect VRD-MC5 User manual

Category
Camcorders
Type
User manual
This manual is also suitable for

Ask a question and I''ll find the answer in the document

Finding information in a document is now easier with AI